Windows 10 what are the problems. Restoring the current version of the system
Read also
Updating the operating system is an important procedure, so it should be done regularly. Nevertheless, sometimes during the download or the installation of the update itself, errors occur that prevent the installation new version package. They may be with different codes and messages. It is also possible that the download of an upgrade or its search takes too long and eventually does not end. What exactly can be done for each type of error?
Possible causes of problems installing updates on Windows 10
Problems in the work of the Center windows updates” may occur for the following reasons:
Table: main errors when installing an update in Windows
| Error | Description |
| Failed to update Windows. Cancel changes. Don't turn off your computer. | It usually occurs due to the presence of duplicate user profiles on the PC or due to an overflowing update cache. |
| Error that starts with code 0xC1900101 | There are driver problems on the PC. Check the "Device Manager" for errors and, if necessary, fix corrupted files in the console " Command line". If it doesn't help, use other methods. |
| Errors 0xC1900208 - 0x4000C | This error may indicate that an incompatible application is installed on the computer that is preventing the update process from completing. Remove any incompatible applications, and then try updating again. |
| The update is not applicable to this PC | This error may indicate that the required updates are not installed on the computer. Install all important updates on your computer. |
| Updates installed but not configured. The update was successful but was cancelled. | In this case, it is recommended to find out the exact error code in the update log, which can be opened through Windows Update. The code will let you know what action to take next. |
| Error starting with code 0x80070070 | The code says that there is not enough space on the disk. |
| 0xC1900107 | The cleanup operation of the previous installation attempt is still pending, a system restart is required to continue the update. Reboot your device and run the installer again. If restarting the device does not resolve the issue, use Disk Cleanup to remove temporary and system files. |
| 0x80073712 | A file required by Windows Update is corrupted or missing. Try restoring system files. |
| 0xC1900200 - 0x20008 0xC1900202 - 0x20008 | This error may mean that your computer does not meet minimum requirements to download or install an upgrade to Windows 10. |
| 0x800F0923 | The driver or other software on your computer is not compatible with the Windows 10 upgrade. Please contact Microsoft support for instructions on how to resolve this issue. |
| 0x80200056 | The update process was interrupted because you accidentally restarted your computer or logged out. Try updating again and make sure the computer is plugged in and stays on. |
| 0x800F0922 | Your computer was unable to connect to the Windows Update servers. If you are using a VPN to connect to a work network, disconnect from the network and turn off the VPN software (if applicable), and then try updating again. This error can also mean that there is not enough free space on the system reserved partition. |
| 0x80240016, WindowsUpdate_8024401C, 0x8024401C, 0x80070490 | Important system files have been damaged - use the "Command Prompt" and remove viruses from your PC. |
The main ways to solve problems with installing updates on Windows 10
In the "OS" there are many tools and modules that can solve the problem with updating it. Determine the error code and proceed from it using our instructions.
Dozens developers give the following tips for troubleshooting errors during a system update:
- To start searching for an update, click on the "Check for Updates" button. If the search does not start or an error occurs, close the center, wait 15 minutes, log in again and start the scan.
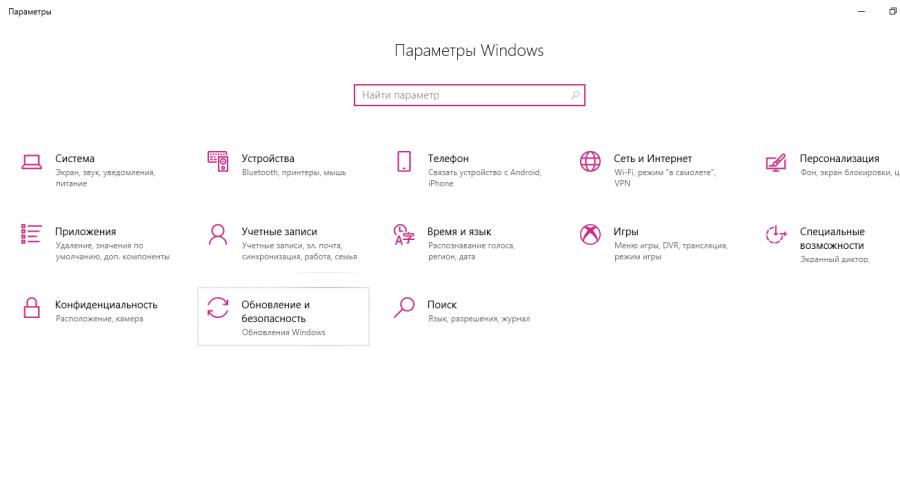
 In the "Options" window, select the section called "Update and Security"
 - Call up the window " Windows Settings': click on two Win buttons and I on the keyboard. If nothing appears, use the Start menu. Click on the gear above the button to turn off the device.
 Click the gear to open the Windows Settings window
 - On the panel, go to the "Update and security" block.
 Click on the "Check for Updates" button
 - Also follow the link " Extra options» below the button. Set the automatic installation for the update.
 In the drop-down menu, select the first item "Automatic"
This solution can only help in a number of cases, for example, when the download of updates was interrupted due to some single failure in the system or due to a temporary lack of Internet.
Solving Problems with Computer Troubleshooter
The developers have built a special tool into Windows that allows you to find various problems in the system and fix them right there. How to use this tool, we will tell in the instructions:
- We will launch the tool through the "Control Panel". You can open it through the Run module: hold down Win and R, type the control request in the empty field and click OK.
 In the "Open" line, enter the command control
 - You can also launch the panel through the "Search". We enter the appropriate query and open the desktop application in the results.
 Type "Control Panel" into the search bar and open the desktop app
 - On the panel, click on the "Troubleshooting" section.
 In the "Control Panel" window, find and run the "Troubleshooting" block
 - In the left column, click on the second link "View all categories".
 Go to the list of all categories for troubleshooting
 - We are waiting for the system to detect available packages for diagnostics.
 Searching for diagnostic packages will take some time - please wait a bit
 - At the end of the list will be the Windows Update module. Right-click and select the "Run as administrator" option.
 Run the Windows Update troubleshooter as an administrator
 - In the troubleshooting tool window, click on "Next" to start the search.
 Click "Next" to start troubleshooting your computer
 - Again, we wait until the tool finishes the problem detection procedure.
 Wait for the troubleshooting to complete on your device
 - If problems are found, the tool will notify you and immediately provide an opportunity to fix them. For example, a module might offer to run a pending update. Click on "Apply this fix".
 Click on "Apply Fix" to let Windows fix the problem with the update
 - The system can also find any additional problems. You will learn about the success of the operations in the report, where there will be a list of errors and marks next to each - “Fixed”, “Not fixed” or “Detected”. If any problems remain unresolved, run the diagnostic tool again. You can also view additional information about the problems.
 Click "Close" to exit the module
 - If the module does not find any problems in the operation of the update center, move on to other methods of solving.
 The tool may not detect any problems on the PC related to "Windows Update"
Service check
The Windows service corresponding to the Update Center may simply be turned off in this moment on the device. In order for the update to happen, you need to activate it and install automatic switch on with each system start:
- We call the "Run" window using a simple combination of Win + R. In the free field, write services.msc or copy and then paste. Press OK or Enter to execute.
 Paste the short command services.msc into the empty field
 - In the services we find at the very end of the list "Windows Update". We double-click on it so that the second window appears on the display. If the click does not work, right-click - select the last item "Properties".
 IN context menu services, click on the penultimate item "Properties"
 - For the startup type in the menu, set the value to "Automatic" - the selected service will start its work immediately after loading "Windows". After that, click on "Run" and apply the changes. Close all windows and retry the update in the center.
 Set automatic activation in the "Startup type" menu
Clearing the update cache manually
Removing all data from the update cache is quite simple - even a beginner can do it. Follow the little instructions:
- Before getting rid of information about the previous system update, you must deactivate the service responsible for the operation of the "Update Center" in the "Services" window. Open it using the instructions from the previous section.
- In the list of components, we are looking for "Update Center". In the middle part of the window, click on the "Stop" link. We do not close the window with services yet.
 Temporarily disable the Windows Update service using the Stop link
 - Launching " Windows Explorer» and immediately go to the directories on system drive. Here we need to open the following folders: Windows - SoftwareDistribution - Download.
 On the system drive, open the SoftwareDistribution folder, and in it - the Download directory
 - In the last section, select everything with the mouse, right-click and select delete from the options menu.
 Delete all contents of the Download folder using the context menu
 - We return to the "Services" window. We click on the "Start" link so that the update service starts working again. We look to see if the problem with the system update has been resolved. To do this, follow the steps from the "Recommendations from Microsoft Corporation" section.
 Click on "Start" to activate the center service again
Video: what to do if Windows 10 updates do not download
Checking your computer for viruses
Even the presence of an antivirus on a PC cannot guarantee absolute security - a virus can also penetrate through protection. In addition, antivirus software may not be up to date, which means it is vulnerable. Consider how to identify and neutralize a threat on a PC, using an example standard antivirus"Windows Defender", which is built into the Windows system:
- Open the Windows tray - down arrow icon in the lower right corner of the display. Click on the small white shield.
- On the screen, you will immediately see a window with the "Security Center". Click immediately on the first tile "Protection from viruses and threats."
 In the "Security Center" window, click on the first tile "Virus and Threat Protection"
 - Click on "Run Check Now". Defender will immediately launch a quick scan. If the program does not reveal anything, follow the link at the bottom of the "Run a new advanced scan" button.
 To get started, you can run a quick scan and, if the defender does not find anything, enable advanced scanning
 - Select the first or third item. Please note that full check will take a lot of time, but at the same time you can work in parallel on a PC. To perform the third option - standalone - you will need to restart the PC. Within 15 minutes, the defender will search for and remove threats. Click after selecting "Scan Now".
 Select the scan type depending on whether you want to wait a long time for the scan to finish
 - Wait for the end of the check. In the results, you will see a list of actions that can be performed with the detected threat. Select removal for all found viruses, if any.
 Wait for the extended scan to complete and remove viruses if the defender finds them
You can also be helped by a small Dr.Web CureIt! utility that can work with other antiviruses on the device without any conflicts and has a simple and user-friendly interface understandable to a beginner. It is better to download it from the official site. For home use it's free.
Fixing corrupted system files
After checking with an antivirus, it is necessary to “treat” system files - restore them. Of course, they could be damaged and not because of viruses - in any case, checking for damage and fixing it will not hurt. Do the following:
- Expand the "Search" panel through the "Taskbar" (magnifying glass icon). Type cmd in the empty field.
 Write simple cmd code in panel search bar
 - Right-click on the classic Command Prompt application - in the small menu, click on the option to launch the console with administrator rights.
 Click on the "Run as administrator" option
 - Allow the module to make changes in the "OS" by clicking on "Yes".
- Now type or paste the command DISM.exe /Online /Cleanup-image /Restorehealth. After that, immediately press Enter to execute it. The console will start the process of searching for and repairing corrupted system files. Wait for it to finish - the module will provide you with a report on the work done. Then restart your PC and try to update.
 Paste the copied command DISM.exe /Online /Cleanup-image /Restorehealth using the Ctrl + V combination
Video: how to check the integrity of system files and "cure" damaged ones
Cleaning the system disk from "garbage"
Remove temporary files and clear various types of system cache, for example, DNS cache, you can use the built-in Disk Cleanup tool or third-party utilities. Let us describe the procedure on the example of the well-known free application CCleaner by Piriform developer:
- We launch the official page of the application using any browser. On it we click on the first green button "Download free version».
 Click on the first button "Download free version" if you don't want to buy the Pro version
 - After the file is fully downloaded, run it and install the software, following simple instructions installer.
- Now we open the utility - we immediately get to the desired section "Cleaning". In the columns on the left side of the window, all the necessary checkboxes are already set. You don’t need to change anything in the Windows tab, but in the “Applications” block you can already optionally check the boxes for the browsers that you use most often. If you do not clear their cache, they will collect a lot of unnecessary information on the system disk and work very slowly. Click on "Analysis".
 Select the necessary partitions for cleaning and click on "Analyze"
 - The system will estimate the number of megabytes or even gigabytes that it is recommended to delete, and will also report on the types of data that you can safely get rid of. Click on "Cleanup".
 When the analysis is finished, look at the amount of data that will be freed on the disk and click on "Cleanup"
 - We confirm our desire to get rid of unnecessary information and free the disk. We are waiting for the completion of the procedure, close the utility, restart the device and try to update the system in the center.
 Click on "Continue" to confirm your intention to delete unnecessary system files
Video: smart system cleaning of junk files using CCleaner
Temporarily disable antivirus and Windows Defender Firewall
Deactivating your antivirus and Windows Defender Firewall can help install necessary updates that are blocked by security software from downloading by mistake. First, let's analyze disabling the antivirus using the example of the Avast utility:

You can temporarily deactivate Windows Defender in its settings:
- Open the defender panel through the Windows tray (image of a white shield). In the window, immediately look at the lower left corner - click on the "Parameters" link.
 Click on the "Settings" link at the bottom of the window on the left
 - In the notifications section, click on "Virus and Threat Protection Settings".
 Click on "Virus and Threat Protection Settings"
 - Deactivate the "Real-time protection" option using the switch.
 Click on the first radio button to deactivate standard antivirus protection
 - Click "Yes" to allow the protector to change anything on your device.
 Click on "Yes" so that the "Security Center" can make changes to the system
 - You will see that a cross in a red circle has appeared in the window. Repeat the update in the center. The protection will turn on itself after a while - you do not need to enter the defender again.
 When you disable the antivirus, try again to update the system in the center
Now let's look at how to disable the "Firewall" to bypass the system update blocking download:
- Call the "Control Panel" through the "Run" window and the control command or using the " Windows Search". Find the "Windows Defender Firewall" link and click on it.
 Select among all sections "Windows Defender Firewall"
 - In the left column with links, click on the fourth - "Enable and disable ...".
 Click the "Turn Firewall on or off" link to go to the next page
 - Check the boxes next to the "Disable" values for two types of network at once. Click OK at the bottom of the page to save the parameter change.
 Check the "Disable" checkboxes for the two types of network
 - Red shields with crosses inside will appear on the screen. Please try updating again. After that, be sure to manually enable Windows Defender Firewall protection.
 Make sure that " Windows Firewall» is disabled and try to update the system
Video: how to disable Windows Firewall in several ways
Windows clean restart
Loading the "OS" in clean mode means disabling all third-party services along with the launch of Windows, that is, utility processes that the user independently installed on the device earlier. Thus, all extraneous components that could interfere with the installation of the update will be deactivated:
- In the Search bar, type in msconfig command and run the proposed classic utility with one click. The same code can also be entered in the Run window (Win and R).
 Enter in the "Search" or in the "Run" window the query msconfig
 - In the configuration window, switch immediately to the third section "Services". At the bottom, under the list, click on "Do not display Microsoft services."
- After that, click on the "Disable all" button. Apply the changes and go to the next tab called "Startup".
 Deactivate all extraneous services using a special button
 - To open an additional window, click on the blue link "Open Task Manager".
 In the "Startup" tab, click on the link to launch on the "Task Manager" screen
 - In the manager, one by one, deactivate all the program services in the list using the "Disable" button in the lower right corner or through the corresponding item in the context menu.
 In the "Task Manager" turn off all the services in the list one by one
 - Return to the "System Configuration" window and in the "Startup" section, click on "Apply" and on OK. Restart the device and try updating again in the center. If it doesn't, run the troubleshooter again in clean boot mode using the instructions in the section of the same name in this article.
- On a clean start, the PC will lose some functionality. After a successful update, return everything to its place in the "System Configuration" window - enable all third-party services in the list using the special button.
Checking "Device Manager" for errors
If your PC has corrupted drivers, they can be a barrier to installing updates. You need to check the serviceability in the "Device Manager":
- Going to its window in the "top ten" is quite simple: right-click on the "Start" button in the lower left corner of the display and select the dispatcher from the list that appears.
 In the context menu of the Start button, find the item "Device Manager"
 - If the context menu does not appear for some reason, hold down R and Win and in empty line paste the code devmgmt.msc. After that, click on OK or Enter to execute it.
 In the "Open" line, enter the request devmgmt.msc and click on OK
 - Look carefully at the list of connected devices and their drivers. Modules that are marked with an exclamation point in yellow triangle or a question mark, are problematic.
 See if there is Exclamation point next to any device in the list
 - To fix a problem with a driver, update it using a special item in the context menu.
 Click on "Update Driver" in the context menu
 - In the new window, click on "Automatic search".
 Click on the first link to get started automatic search updates for the problematic driver
 - Wait while the system searches for an available upgrade on official resources. If present, it will be successfully downloaded and installed without any action from the user.
 Wait until the end of the search for an update for the driver with which there are problems
 - If there is no update, you will see a corresponding message in the window. In this case, click on Close. Call the context menu of the driver again, but this time click on "Remove device". After a couple of seconds, it will disappear from the list. Try installing the update without this device.
 A message may appear in the window stating that you currently have the latest driver installed.
 - After that, be sure to return it to the place. In the dispatcher on the top panel there is an "Action" section. Open its panel with one click and select Update Configuration.
 In the "Action" menu, select the first item "Update hardware configuration"
 - If this method does not work, install the driver by downloading it from the official website of the manufacturer of a particular hardware part or the PC itself. It also makes sense to refer to technical support companies to see if your device is compatible with an update that the center cannot install.
Removing duplicate profiles
You can remove an extra account using the "Registry Editor". However, any changes in it must be made as carefully as possible:
- Press the combination on the keyboard Win keys and R - in the empty field, write the regedit code. To execute it, press Enter or OK in the Run window itself.
 In the "Open" line, enter the command regedit and click on OK
 - Click Yes to allow the editor to make changes to the system. double click expand the third branch called HKEY_LOCAL_MACHINE.
 In the ProfileList folder, find directories with long names
 - See if there are directories with long names in the last folder. Open them and note the ProfileImagePath entry. If these files in the folders have the same path, delete one of them. Usually the name of the duplicate has the word bak at the very end.
 If you find a duplicate entry, remove it using the context menu
System rollback
You can return the system to the state that it was before errors occurred with updates, using a restore point, backup system (which is stored in the image file), as well as through a reset to the initial settings. Consider restoring using a dot. Before applying any important changes to the system, for example, installing updates, the “OS” automatically creates a restore point, so in most cases there are several points on the disk. Let's get started with the instructions:
- On the "Desktop" look for the standard "Windows" icon "This PC", with which you usually open the "Explorer". Right-click on this icon and select the last item "Properties".
 Select "Properties" from the context menu of the "This PC" icon
 - Now click on the "System Protection" link in the left pane of the window.
- You will immediately be taken to the desired tab. Click on the "Restore" button to launch the rollback tool.
 Click on "Restore" to open the module to restore the previous system state
 - On the initial screen of this tool, you must either select the last created point (recommended value), or open a list with all available states. Click on "Next" after that.
 You can choose your own restore point in the list or immediately roll back to the previous state
 - If you want to select a point yourself, click on the desired point to select it. You can find out which programs and drivers will be affected when restoring to a specific state using the button at the bottom of the list. Once selected, click Next.
 Select the point with the left mouse button and click on "Next"
 - In the next window, you can see the date and time when the restore point was created and its description. Click on "Finish" - the system will start restoring to the previous state. During the rollback process, the computer will restart. When the procedure is completed, run the system update manually in the "Update Center".
 Click "Finish" to let the module start restoring the system to the previous state
Video: how to roll back to Windows
Installing the update using the Windows Update Minitool utility
Windows Update Minitool is an alternative method to update the Windows system. The utility allows you to choose which updates to install and which not. Also, the user gets the opportunity to completely abandon them or remove the problematic update directly in the program interface. The application developer is a user under the pseudonym stupid user. He posted the program installer on the forum page, from which it needs to be downloaded. How to use the tool, consider the instructions:
- Click on the Download (Google Drive) link. On the next page, click on the "Download" button. Run the downloaded archive through the "Downloads" panel.
- Run one of the two files depending on the bitness of your system.
- Click "Yes" to allow Minitool to make changes to your device.
 Click on "Yes" to allow Windows Update Minitool to change anything on the system
 - Click on the round icon of two arrows called "Check for Updates". The utility will start searching.
 Click directly on the update icon in the Windows Update Minitool window to start the search
 - After a while, a list of Windows components available for updating will appear. Select the entire update with checkmarks and click on the "Install" icon - the program will immediately download and install.
 Click on the third icon to install the updates found
 - Wait for the update to complete and restart your device.
- If necessary, set up an automatic update in the lower left corner of the window in the drop-down menu. You have the right to set the value "On schedule". In this case, set the frequency with which the program will check and install updates.
 In the drop-down menu in the lower left corner of the window, select "Automatic"
Downloading offline updates for Windows 10 using the official method
Microsoft has a catalog of all updates, from which each user of the "OS" has the right to independently download one or another update:
- First you need to determine which OS build you have on your PC. To do this, hold down Win and R on your keyboard, and then enter the winver command in the "Open" field. Click OK.
- In the gray window, look at the version and remember its number.
 Find the update for your package version in the official Windows Update Catalog
 - Look for desired file updates. Pay attention to the bit depth - it should match yours. Click on the "Download" button in the required line.
 Using the appropriate button, download the necessary update for your system, which does not want to be installed in the center
 - Click on the link that appears in the new window.
 Click on the link in a new window to start downloading
 - Open the downloaded archive and run the update installer to update the system manually. Wait for the installation to finish. Then reboot your device for the changes to take effect.
 Click on "Restart now" for all changes after the update to take effect on the PC
If you have problems updating the "dozens", first of all, you need to pay attention to the error code - this is the key to troubleshooting. The user is able to fix the situation with an unfinished update in many ways: from manually starting the search for updates and clearing the update cache to fixing corrupted system files in the "Command Line" and rolling back the system using a restore point.
02/19/2017 | 13:39 Analytics
Where to find and how to use key instruments to fix most problems in a Windows 10 PC?
To Microsoft's credit, Windows 10 is more stable than previous versions. Windows versions. However, every operating system has problems. Luckily, Microsoft offers several tools that can be used to fix the most common problems. Some of them are built right into Windows 10, others can be downloaded from the Microsoft website. We will tell you when you might need each of the tools and how to use them.
Troubleshooting Tool Start Menu
When to use: If Cortana or the Start menu is not working properly.
In rare cases, the Start menu may not open when you click the Start button or when you click on Windows key located on the computer keyboard. Something else might break, like the ability to drag app shortcuts from the app list to the Start menu bar, or the tiles pinned to the Start menu bar disappear.
Personal digital assistant Cortana, which is built into the Start menu, may also not work properly. The Cortana bar may not open when you click its search box (to the right of the Start button), or Cortana may not respond to search box input or voice prompts (and you know your Internet connection is working).
To fix issues like this, Microsoft's troubleshooting suggestions range from simple (restart Windows 10) to more advanced (create a new account administrator user, and then log in). But the company also provides a Start Menu Troubleshooter, which is likely to be a more effective solution.

The Start Menu Troubleshooter can identify and fix problems with files and settings related to the Start Menu and Cortana.
You can download it from the Microsoft website - on the Microsoft Troubleshooting page, click the "Try the troubleshooter" button, and then "Start menu troubleshooter" (Start Menu Troubleshooting Tool), double click to run it (file name "startmenu.diagcab") and follow the instructions. It checks if there are any missing or corrupted files and settings related to the Start menu and Cortana, and then makes adjustments.
If frequent crashes with Start Menu and Cortana persist after you use this tool, the problems may be caused by an incompatible or faulty graphics card driver. The tools described in the next two sections of this article can probably help.
Built-in troubleshooters
When to use: If you're having problems with hardware components (such as network, audio, video, etc.), or if an app from the Windows Store doesn't work properly on Windows 10.
While some of Microsoft's "Troubleshooters" (like the Start Menu Troubleshooter above) need to be downloaded, Windows 10 includes many built-in troubleshooting tools. operating system. These tools were introduced in Windows 7 and Windows 8. To access them in Windows 10, type “trouble” in the Cortana search box, and select “Troubleshooting” from the search results.
The main troubleshooting panel screen sorts troubleshooting tools into four categories: Programs, Hardware and Sound, Network and Internet, and System and Security. Click the “View all” button in the top left corner to see an alphabetical list of all the tools that are available on your computer. To run the troubleshooter, click on its name.
Many of these tools work similarly to the aforementioned Start Menu/Cortana Troubleshooter: The Troubleshooter runs diagnostics on the component you've selected and if it finds any problems, tries to fix them.
The tools show you the most common problems that you are likely to encounter while working with Windows 10:
Blue screen: Run this tool if your computer freezes, restarts or shuts down.
Hardware and Devices: This tool will look for problems with the hardware components of your computer (eg video chip, sound subsystem). You can also run it if the Start menu or Cortana is not working or behaving strangely - a bad graphics card driver could be the cause of the problem.
Incoming connections, Internet connection, network adapter A: Use these three troubleshooting tools to analyze problems while connecting to the Internet.
Audio playback, audio recording: If the Hardware and Devices tool did not find anything strange in the drivers sound card but you're still having problems playing or recording audio, run these two tools. There may be a software problem or a setting that needs to be fixed.
Windows Store Apps: Applies to issues with apps you install through the Windows Store. It is not suitable for cases where the tiles Windows applications The Store will disappear from the Start menu, or if you can't drag the app's shortcut from the app list to the Start menu bar. Problems in the Start menu should be resolved using the Start Menu troubleshooting tool.

The Windows Store Apps troubleshooter tool shows a report of the problems it found.
Windows Update: Run it if Windows 10 can't install official update operating system released by Microsoft. It should be noted that this troubleshooter cannot fix an update that was successfully installed, but as a result, your computer began to malfunction. For example, if an update contains bugs or an incompatible driver hardware. For this type of problem, you need to use the troubleshooter "Hardware and Devices" (Hardware and devices).
And if the Hardware and Devices tool cannot solve this problem, you should consider using the next tool.
Troubleshooting tool "Show or hide updates"
When to use: If a driver update is downloaded and installed via Windows Update and it causes problems with the computer's hardware (for example, if the sound no longer works).
The Windows Update troubleshooter mentioned above may think that the update is OK, but does not resolve the situation when successfully installed update messes up your computer - say, if a new driver doesn't work properly. Worse, even if you uninstall the problematic update, Windows Update will usually install it again.

The "Show or hide updates" troubleshooter helps you prevent the installation of problematic updates.
Microsoft has released a tool that allows you to stop the installation of a particular update (or at least delay it until the company releases best update). Download the "wushowhide.diagcab" file from the Microsoft support site and run it.
It works similarly to the trouble shooters described earlier in this article. This tool scans your computer for computer hardware driver updates and lists them. You can choose which one you want to "hide" and Windows Update will stop trying to install it.
Task Manager
When to use: If the computer takes a long time to start up or runs slowly.
An old app available in the last few generations of Windows, Task Manager, remains good tool for service or deep windows settings 10. If you feel that you have to wait too long for the desktop to appear when you turn on your computer or when you restart it, this may be due too big amount programs automatically loaded during startup. Task Manager allows you to prevent startup similar programs during start. It also allows you to close running programs that hang, eat up system resources, or cause other problems.
To launch Task Manager, right-click on the Start button, and select Task Manager from the pop-up menu. Alternative launch - press Ctrl + Alt + Delete, and select Task Manager from the menu on blue screen.
Task Manager will display a list of applications (processes) that are actively running on your computer. Let's say one of the programs is stuck and you can't close it. You can close it here by right-clicking on its name and selecting End Task from the pop-up menu. Or you can click on the name of the hung program and then click the End Task button in the lower right corner of the Task Manager window.

With the help of the task manager, you can prevent automatic start programs when starting Windows 10.
Click the "Details" button in the lower right corner of the Task Manager. Wherein user interface will show section tabs. Click the Startup tab and you will see a list of programs that are set to download in the background when you turn on your computer or restart it. You can prevent most of the programs on this list from running by right-clicking on the name and choosing "Disable" from the pop-up menu. (Or click to highlight the name of the program, and then click the "Disable" button in the lower right corner of the window).
Windows 10 clean install tool
When to Use: If you want to remove all unnecessary software on a new computer.
With the Windows 10 Anniversary Update, Microsoft has provided another choice that can be summed up as "delete everything and start from scratch." It's in the Settings app, at the bottom of the recovery menu: "Learn how to start over with a clean install of Windows" but it's actually a link that takes you to the Microsoft site where you'll download the tool.
This tool installs Windows 10 on a computer without any additional software from the manufacturer. When you run the tool (file name: "RefreshWindowsTool.exe"), you can choose to keep your personal files on your computer during a clean install or let them be erased. Either way, your settings and apps will be deleted.

The Windows 10 clean install tool allows you to reinstall the operating system without bloatware from the PC manufacturer.
Warning: If your computer requires special driver or a device app that is supplied by the manufacturer, a clean install of Windows 10 may not be able to provide it. For example, your computer may have a keyboard with special buttons that are assigned to perform multimedia tasks, and a clean install of Windows 10 will not be able to support these keys on the keyboard. If this is the case, then you should visit the computer manufacturer's website, find the Windows 10 drivers that you can download there, and install them separately after you have performed a clean Windows installation 10.
On July 29, a new version of Microsoft's most famous product, the operating system, was released. Windows system 10. Computer publications, online resources around the world review the platform, talk about its advantages and disadvantages. And users complain about errors and problems that haunt them after switching to Windows 10.
And although Microsoft tried to eliminate all kinds of bugs for the final assembly and make the system completely ready for use, there are problems in the operation of the operating system.
Activation errors
After a free upgrade from Windows 7 SP1 or Windows 8.1, users are reporting operating system activation failure. In the list of errors that users report: "This product key does not work", "There was a problem with the network", "A security error occurred", "The Software Licensing Service reported that an error occurred while checking the license."
In this case, the first step is to open the Start menu, select Settings > Update & Security > Activation. Here select "Go to the Store" and check if a valid license is available for the PC. If a valid license is not available, you must purchase Windows from the Store. The error can also occur if the device is not connected to the Internet or the firewall settings do not allow Windows to complete the online activation process.
"Glitchy" Chrome
Chrome users on Windows 10 are facing a lot of issues, including slow work, especially when performing resource-intensive tasks like watching videos. Google will probably fix the bugs in one of the next updates. Reinstalling Chrome has helped some users.
Where is the favorite?
The new completely redesigned Edge browser is a cut above Internet Explorer. Although, I must say, it would be difficult to create something worse than IE. Among the useful innovations of Edge are the ability to take notes on a web page, a new reading mode, reading pages offline, integration with voice assistant Cortana.
But how do you find your favorites in the new browser? The answer is very simple: click on the “…” button, go to the program settings, scroll down to the “Import favorites from another browser” item and select your old browser.
Folder problem
According to some users, there is an area where Windows 8 better than windows 10: mail client. In the new OS, the program does not allow you to create subfolders for organizing mail. For some users, this has become a real problem. Unfortunately, there is no way out of the situation yet: you should wait for an update from Microsoft.
Unstable Wi-Fi
After upgrading to Windows 10, Wi-Fi stopped working for many. The easiest thing to do is restart your computer. A more reliable solution: disable the Wi-Fi sharing function. The function is enabled by default in the operating system. public access to the network. Disabling the option in wifi settings does wireless connection more stable.
Driver Issues
This bug was encountered by some users with Nvidia graphics cards and multiple monitors. The video card driver contains a bug that causes flickering when working with multiple monitors, as well as system crashes when using multiple video cards. To fix this issue, you need to roll back to previous version drivers.
If users encounter insurmountable problems, Microsoft has provided a program to return to the previous installed OS, but only within a month after installation. At the end of the month, the license for Windows 7/8/8.1 will finally turn into a license for Windows 10.
As has long been known, with Windows 10, the corporation is trying to grab onto the tablet niche, and at the same time spur sales of personal computers through hybrid devices. The system is designed to work not only in "tablets" with touchscreens, but also in personal computers: You can control the device by touching the interface panel with your fingers.
Microsoft wants users to actively switch to Windows 10 from older versions of the operating system. However, according to Gagadget, the company should not count on it. And that's why.
This is not a finished product
It is known in what haste Windows 10 was presented. There was no particular need to present your not yet ready, raw product in such a hurry. Of course, failures with Windows 8 affected. The company wanted to rehabilitate itself for the failure, but it didn’t work out very well. It seems that even now, no one really knows what Windows 10 will eventually turn out to be. Each new update is alarming. What will they come up with? What problem will still open after the update? How to fix it? As a result, many users have had and are experiencing problems that have forced many to roll back to Windows 7 and Windows 8.1.

Safety
Windows 10 has as many as 30 different privacy-related settings, some with very vague descriptions. Microsoft has not yet given a clear answer on the issue of privacy. Of course, many law-abiding citizens have nothing to fear and nothing to hide. But it’s unpleasant when they look over your shoulder, while not explaining anything for what all this is. Is it really that hard for a company's legal department to sort things out? Really not tired of eternal poking in the direction of the company's products? Do they not care what people think of them, their product, in this case Windows 10? If these security settings were reasonably systematized and clearly explained, Microsoft could at least partially correct the situation.

Aggressive update policy
It's no secret that Windows 10 forces all home computer users to automatically download and install updates. In a sense, this is good - the system is better protected. But there is one nuance that is financially unpleasant for some. Of course, many nowadays have unlimited access to the Internet, but not everyone can afford to download hundreds of megabytes of updates every week. Especially when it comes to tablets and mobile internet. Updating Windows 10 on Surface Pro 3 can easily consume a month's worth of internet data.
Another problem concerns the mechanism for deploying Windows 10 updates on the principles of P2P technology. After downloading updates from Microsoft servers, the computer starts automatically sending them to other devices on the Internet that have not yet downloaded. Since not everyone has an optical fiber connection, this innovation does not benefit everyone. This is especially true for "victims" mobile operators and their network infrastructure. Since the download (upload) also affects the download speed (download), using the function on computers with a slow connection leads to noticeable delays when opening web pages, watching streaming video, etc.
Beautiful but useless start menu
In the Start menu in Windows 10, they decided to combine all the achievements of previous versions. At first it was interesting, but one day it became clear that this is no different from the shortcuts on the Desktop, which many have been trying to get rid of for a long time. The problem is that the more “live” tiles in the Start menu, the slower the gadget becomes, because the tile must be constantly updated. You cannot pin frequently used applications to the left side of the panel. Even worse, it works fundamentally differently than in Windows 7. It only fits 500 shortcuts, and everything beyond this number is simply not displayed in the menu, and is not found in the search either.

Useless Metro Apps
Almost the main question for users who upgraded to Windows 10 from Windows 7 is what to do with these Metro apps, how to use them? To comfortably use Windows 10, you need to continue to give preference to desktop programs. Even Microsoft doesn't seem to have much faith in Universal Apps, as they've taken a long time to arrive. Yes, they appear, yes, many developers have paid attention to them, but why then only now appears universal version Skype, and the Metro version of Office 2016 is labeled "Mobile", which makes it clear that traditional desktop apps are better.
Microsoft Edge
The Microsoft Edge browser is quite fast and austere. However, even some pages of the official site, users are forced to open in Internet Explorer, where they are sent over and over again when working in Edge. It's about not about sites on the Internet, but local web pages through which work is implemented in corporate networks. Microsoft decided to make Edge in a modern, minimalist style. At the same time, even what was unique and really convenient in Internet Explorer disappeared from it. For example, color highlighting of tabs, the ability to quickly translate, and the like. In addition, Microsoft Edge often has problems displaying pages, freezing, and it may not open at all.
Two control panels
Windows 10 has two Control Panels. It would seem, what's wrong with that? Someone is comfortable old version from Windows 7. Users of Windows 8.1 are more familiar with the new one. Everything would be so, but Microsoft developers managed to confuse everything. For example, you can change your desktop background through the settings app, but you need to use the control panel when you need to change theme settings. You can change your mouse settings using the app settings, but you have to go to the control panel to change the mouse pointer. You can set up a Wi-Fi connection in the app's settings, but you still have to go to the control panel to change the network adapter settings.

OneDrive sync issue
With Windows 8, the company began integrating OneDrive into the operating system, which also includes the concept of placeholders. This is a feature that allows users to view OneDrive files locally on their computer, but without downloading the entire file. One of the biggest benefits is the ability to have hundreds of gigabytes of files at your fingertips without using up much of your local storage. However, this raised an issue where many people didn't know what files were available offline. As a result, Microsoft has introduced selective sync, which allows users to choose which files are available on Windows 10. However, the new sync functionality isn't very effective for users with many gigabytes of OneDrive documents and limited local storage.
Force driver update
Almost the main problem that you will encounter after upgrading to Windows 10 is the mandatory driver update. In addition to Windows updates, users are forced to install and latest drivers, which Microsoft believes are appropriate for the computer. There is no way to refuse these drivers if they are incompatible with the existing equipment. Even if set the right drivers manually, Windows Update will replace them with its own.

Endless reboots and shutdowns
If in Windows 8.1 reboot and shutdown took a few seconds, then in Windows 10 they sometimes take up to several minutes. Even on very powerful devices with a lot of random access memory. This is very annoying. Interestingly, the further, the more. Even installing from scratch does not help. For some, this may not be a problem, but it causes at least a misunderstanding. The same situation with reboot after updates. There are cases when the computer began to continuously reboot, and the installation of updates did not reach the end. Microsoft nevertheless released a patch that fixed the problem, but an unpleasant aftertaste remained.

This article contains the most common mistakes when Windows startup 10, as well as ways to eliminate them. We hope this information will make life a little easier for those who switched to the new version of the system and suddenly found themselves between a rock and a hard place.
1. Windows 10: "The computer did not start correctly"
The first common problem when starting Windows 10 is that the system reports some critical error (CRITICAL_PROCESS_DIED, INACCESSIBLE_BOOT_DEVICE) and then displays a blue screen " Automatic recovery» with text .
 Automatic Repair: The computer did not start correctly
 The reason for this error, in most cases, is damage and deletion of system files or registry entries. This may be caused by installing and removing programs, or by the actions of antiviruses or utilities for cleaning the Windows registry.
The solution to the problem is to restore files and registry entries that are damaged:
- Click on the button Extra options on the blue screen, select Troubleshooting> Extra options > Download Options.
- Click Reload.
- In the window Download Options press the F6 key or the number 6 on numeric keypad to start safe mode with command line support.
- The computer will restart in safe mode, and a command prompt will open automatically. In it enter:
The computer will restart and after that Windows will start in normal mode.
2. Windows 10 won't load past the logo
Another known issue is that the system boots up to the Windows logo, after which the computer randomly shuts down. The reason for this error is also the corruption of system files, however, unlike the first case, the damage is so severe that the system cannot start the recovery itself.
In this case, you will have to create a rescue disk Windows recovery on another Windows 10 PC:
- In panel Windows controls 10 find and select an item Recovery > Create a recovery drive.
- In the window that appears, set the parameter Run backup system files to the recovery drive and press Dalley.
- Connect an empty USB drive to your computer. Select it in the Create Recovery Drive window and click Next > Create.Wait for the files to finish copying and press Ready.
- Remove the USB drive from your computer, plug it into one that won't run Windows 10, and enable BIOS to boot from it.
- The Windows Recovery Environment will start. It has to choose Restoring a system image, or item Command line, and then enter the commands from the instructions for solving the first problem in it.
 Windows Recovery Environment
 You can also start the System Restore Environment from the disc that you installed Windows from. To do this, you need to boot from the installation disk, in the bootloader instead of Install press System Restore. In the menu that appears, select Troubleshooting> Extra options. The same options window shown above will open.
After recovery, the computer will restart. Change the BIOS to boot from hard drive, and the system should start correctly.
3. "Boot Failure" and "An operating system wasn't found" errors
In some cases, when starting Windows 10, instead of loading the operating system, a black screen occurs with one of two errors:
- boot failure. Reboot and Select Proper Boot device or insert boot media in selected boot device.
- An operating system wasn't found. Try disconnecting any drives that don't contain an operating system. Press Ctrl+Alt+Del to restart.
There can be two reasons for this error:
- Wrong boot device order in BIOS or UEFI. Make sure you are booting from the drive where Windows 10 is installed.
- Damage to the system loader. In this case, you will also need installation disk or a Windows 10 emergency recovery disk. After booting from it, in the recovery environment, select the item Boot recovery and let the bootloader files be overwritten.
Also, the problem may be hardware damage to the hard drive from which you are booting.
 Error boot failure
4. Windows 10 won't start: black screen
A common error when starting Windows 10 is a black screen with no signs of loading the desktop, with or without a frozen cursor on the screen. This often happens as a result of incorrect installation of any drivers: after a reboot, the computer works, but the OS does not boot.

In most cases, the solution to the problem lies in the rollback of the system. To do this, you will also need an installation disk or a Windows 10 emergency recovery disk. After booting from it, in the recovery environment, you can try to select the item System Restore.
This will allow you to roll back the system to the state before the problem occurred. The system will prompt you to select a restore point to which the rollback will be performed, and after confirmation it will perform it. As a rule, after a reboot, the black screen disappears.

5. Windows 10 takes a long time to boot on startup
There is a situation when Windows 10 does not load, the waiting icon is spinning, and that's it. In fact, most likely, nothing bad is happening - the system simply installs the updates that it downloaded the last time you used the computer.
In this situation, it's best to just wait. This state can last for several hours, depending on the number and volume of downloaded updates. It is recommended not to turn off the computer, but to leave it in the boot state for 1-2 hours.
To prevent this error when starting Windows 10 again, you can set up a scheduled computer update so that the system does not download updates without your knowledge. To learn how to edit update policies, read our.