How to enable mms function on iphone. How to enable MMS function on iPhone? Red exclamation mark display
Read also
Articles and Lifehacks
Although the operating iOS system has the most simple and accessible interface, intuitive even for a child, many users have questions about performing the simplest tasks of the device - for example, how to send mms from an iPhone?
It should be remembered that in order to use the MMS function on the iPhone, the appropriate settings of the cellular operator must be sent, and then installed.
The absence of the traditional item "Send MMS", familiar to most users of ordinary mobile phones, can make it much more difficult to send a multimedia message when buying a new device.
Ways to send messages
- In fact, everything is much simpler than it might seem at first glance. You can send an MMS message from your device in 2 different ways.
- So, first you need to open the "Messages" section and click on the icon in the upper right corner of the display, which shows a sheet of paper and a pencil.
- This will open the menu for creating a new message. You can then send either a regular SMS or a multimedia message. At iPhone help you can send saved pictures and photos via MMS.
- To turn an ordinary SMS into MMS, you need to click the icon to the left of the text input field, which shows a camera.
- If the image is already in the device, you need to find "Select existing". Or "Take a picture", take a picture and click "Submit".
- You will need to specify the addressee by clicking on the “+” icon, and then enter the text of the message and subject, and then select the “Send” button.
- The next way is to go to the gallery and open the "Photos" section, select the appropriate image and click the arrow icon in the lower left corner of the display, and then select the "Send by MMS" item.
- After that, the image is attached to the message, and the menu for creating MMS opens before the user, where he adds the addressee and enters the text and subject of the message. The Submit button will complete the final submission.
Alternative way
There is also a 3rd way, with which you can instantly send an MMS message. To do this, the user goes to the "Camera" section, takes a picture and clicks in the lower left corner on the thumbnail of the resulting photo.
The photo expands to full screen, after which an icon with an arrow appears at the bottom. By clicking on this icon, the finished picture can be immediately sent via MMS in a familiar way.
It is mistakenly considered that MMS for iPhone is an outdated function, because most people use instant messengers to send multimedia files: Viber, WhatsApp, Telegram and others. However, it happens that your subscriber does not use all these programs, and then you have to resort to sending MMS.
What is MMS on iPhone
With multimedia messages, users can send each other photos, as well as video and audio files. When sending such messages from the iPhone, difficulties can arise: often you need to change the settings, and even at the first attempt to send a message, you can get confused, since Apple products do not have a separate button for sending MMS.
How to send MMS from iPhone
iPhone allows you to send a multimedia message in three ways:
Keep in mind that some operators set a file size limit for sending MMS - usually 1 MB.
Problems with sending MMS: setting up settings in iPhone
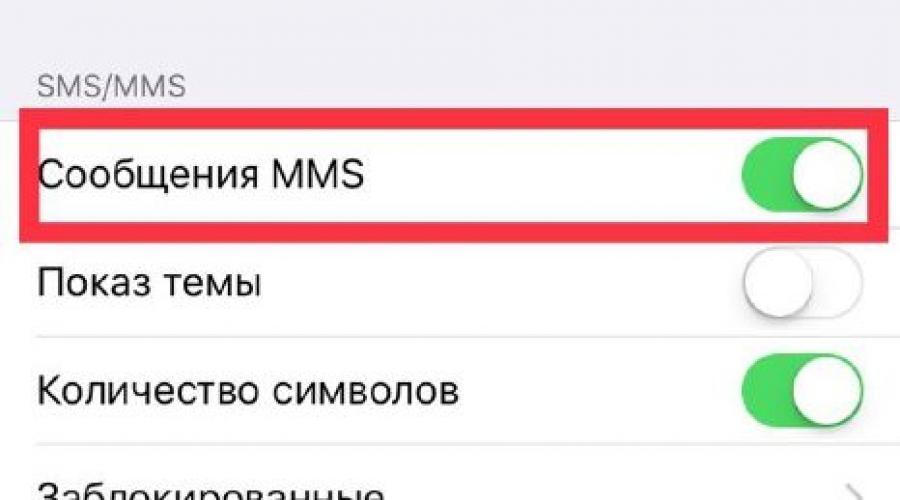
Alas, most often the first time you send MMS from the iPhone and receive it does not work - then it's all about the settings. First, check if you have multimedia messaging enabled. For this:

After changing the settings, restart your iPhone so that they definitely take effect. Sometimes you even need to do a so-called "hard reset" - hold down the shutdown and Home keys for a long time until a branded apple appears on the screen.
MMS settings for iPhone by carrier
If you still need settings for multimedia messages, first contact technical support. You will be sent all the parameters in the form of SMS - you just have to save them. When this option is not possible for some reason, all data is entered manually depending on the operator:
"MTS": username and password - mts, APN - mms.mts.ru, MMSC - http://mmsc, MMS proxy - 192.168.192.192:8080, maximum size - 512000, URL - MMS UAProf.
"Megaphone": username and password - gdata, APN - mms, MMSC - http://mmsc:8002, MMS proxy - 10.10.10.10:8080, maximum size - 512000, URL - leave empty.
Beeline: username and password - beeline, APN - mms.beeline.ru, MMSC - http://mms, MMS proxy - 192.168.94.23:8080, maximum size - 512000, URL - MMS UAProf.
"Tele2": username and password - leave blank, APN - mms.tele2.ru, MMSC - http://mmsc.tele2.ru, MMS proxy - 193.12.40.65:8080, maximum size and URL - leave empty.
Yota: username and password - leave empty, APN - mms.yota, MMSC - http://mmsc:8002, MMS proxy - 10.10.10.10:8080, maximum size and URL - leave empty.
After making the settings manually, be sure to restart your iPhone!
Video: settings for sending MMS from iPhone
For what other reasons can not send MMS from iPhone
So, all the settings have been adjusted, the methods of sending MMS have been tried, but the message does not go away. What else could be wrong?
- In tariff. It turns out that some rates mobile operators do not allow you to send multimedia messages. Most often, such a ban is placed on corporate rates. Check this point with the operator.
- In the way you connect to the Internet. MMS is not sent WiFi connection- you need to turn it off and wait until the smartphone connects to the mobile Internet. It is desirable that the LTE or 3G icon appear - with the “E” symbol, MMS will be sent for a very long time.
- in the SIM card. Usually, the problem occurs with the owners of the so-called "cropped" SIM - if the card was cut off manually, then they could do it inaccurately and remove the part of the microcircuit, which is just "responsible" for sending MMS. In this case, you will have to change your SIM card, especially since now ready-made Micro- and Nano-SIMs are issued in communication stores.
- In the failure of the network settings. Usually this is indicated by the inscription "Carrier" instead of the name of the operator in top line iPhone screen. This happens if the network settings for some reason were not loaded into the smartphone - an old SIM card, synchronization failure, etc. It is advisable to change the SIM card and contact the operator's technical support service to update the settings.
After the first successful attempt to send MMS from the iPhone, it turns out that it is not so difficult. Most often, problems with sending and receiving MMS are fixed after making the right settings. Do not forget about the "magic" reboot: usually the settings take effect after it.
You can send pictures, photos and important documents via multimedia messages. For users Apple systems setting up mms is not difficult. The manufacturer allows you to exchange files between devices of your brand absolutely free. To do this, the user will need a properly configured phone that has iMessage enabled. If you do not know how to enable mms, try the simplest option.
Often, when you first start the device with a SIM card, all the necessary options are configured automatically. You just install the SIM, and within 15 minutes the operator will send you an SMS with all the settings. But if this does not happen, the owner must register all the data manually. When changing a SIM card, users often encounter problems sending pictures via messages. This difficulty can be solved by restoring the factory settings of the device. After successfully saving messages from the operator with configurations, you do not need to configure anything else.
There are several ways to connect the multimedia messaging service:
- Contact the service center of the manufacturer of the mobile device;
- Contact the Call center of your operator, wait for the SMS with the settings and save it;
- Do it yourself by entering all the data yourself.
First, make sure your device is connected to the internet. Go to Settings/General/Network/Cellular Data and drag the floating button to the right. Thus, the inclusion mobile internet. To check if it works, disable Wi-Fi device and go to any page global network. Access to manual settings you will find under Settings/General/Network. By clicking on the line called " Cellular network data transfer", you will be able to enter the necessary data of your operator.
Manual mms settings for Russian operators
Below is a table with the information that you will need to write in the lines:

Some information may vary depending on where you live.
Health testing
After the performed manipulations, reboot the device for the changes to take effect.  After turning on the phone, try sending a test message to any number from phone book. We go to the desktop, click on the "Message" icon. Select a recipient from contacts or enter the number manually. Next, click on the camera icon and go to the “Media Library” item. The device will prompt you to select the desired file from your gallery or take a picture right now. Select the item you want and click the Submit button. Within a minute, your addressee will receive a photo. If the device gives an error about the impossibility of sending a message, then you were unable to enable mms on your iPhone. Try again to check the correctness of the settings made earlier. Even a minor error in the form of a dot or a space affects the performance of data transfer.
Apple provides full support to its users, so in service centers The manufacturer will not only tell you how to set up mms on iPhone 7, but they will also do it for you. If there are no such branches nearby, contact the customer support operator center.
Hello everyone, dear readers and users of iPhones. In today's article, I will tell you about how you can set up MMS transmission on your iPhone (4, 4s, 5, 5s and above). In fact, it is not as simple as it might seem at first glance.. But once set up this function you can use it for as long as you want.
So, let's move from words to practice.
Activation
In order to activate MMS and set up data for your mobile operator (for example, MTS or TELE 2), you need to follow these steps:
After all the above operations, you will see a field for entering the settings of your mobile operator. You can see an example of such settings for MTS and TELE2 below.
Settings example
Below I give an example MMS settings on an iPhone for two popular mobile operators, namely MTS and TELE2.
Complete following settings(for iOS 8 and above):
- APN field (cellular data) - enter the following here - internet.mts.ru;
- Username and password (cellular data) you also need to specify - mts;
- Now the settings in the MMS section;
- APN section, enter here - mms.mts.ru;
- You also need to specify the username and password - mts;
- In the MMSC field, enter the following - http://mmsc;
- In the MMC proxy field, write the following data - 192.168.192.192:8080;
- Specify the maximum message size as - 512000;
- Now it remains to make a few more settings, in the modem mode section;
- APN field - enter the following here - internet.mts.ru;
- You also need to specify the username and password - mts.
Below you can see a screenshot of the MTS settings. The image is taken from the official website of MTS, so the correctness of the data provided is 100%.

Now, to complete the setup for MTS, you need to send any mms message to the MTS server at the following number - 8890. After that, MTS will activate this service on your iPhone.
TELE 2
For TELE2, I will also give an example of current settings for iOS version eight (4, 4s, 5, 5s, etc.) and higher.
Of course, the most up-to-date this moment time information on TELE 2 settings you can see on the TELE 2 website. To set up, do the following:
- The first thing you need to do is set up your cellular data;
- Now you need to make settings in the MMS section;
- APN field - enter the following here - mms.tele2.ru;
- Leave the username and password blank;
- In the MMSC field, enter the following - http://mmsc.tele2.ru;
- In the MMC proxy field, write the following data - 193.12.40.65:8080;
- Do not fill in the maximum message size;
- Leave the URL address blank;
- Now it remains to make the modem mode setting;
- APN field - enter the following here - internet.tele2.ru;
- Leave the username and password blank.
As you can see, in principle, there is nothing complicated here. Now you need to restart your iPhone.
Some useful tips by setting:
- If following the instructions above you needed to set up MMS, then look for the current settings on the websites of your mobile operators. To do this, simply type in the phrase into the search engine: “MMS settings your mobile operator”;
- If it still doesn’t work, then contact any store of your operator, they will help you, most often for free, set up MMS;
- To send messages and media files to another iPhone user, you can use free service iMessage.
That's all for me, I hope you managed to set up MMS on your Apple mobile iPhone device. If you have any questions regarding this topic, you can ask them in the comments to this post, I will try to answer as quickly as possible and in as much detail as possible. See you in the following materials, be sure to add this site to your favorites, because. it will definitely come in handy for you.
MMS for many users mobile communications are an important component of comfortable communication and work. You can send photos, videos, and audio files using multimedia messages. However, to use this feature, you must make the correct settings. So, how to enable and set up MMS on iPhone? We will talk about this further.
MMS setup process
This article will focus on the general. At the same time, settings are made for each individual operator that differ from each other. You can find them on the official websites of mobile operators.
Below is an example of basic MMS settings on iPhone:
- you need to go to "Home" and select the "Settings" menu;
- after that, you need to click "Basic";
- then you need to go to the "Network" section;
- after that, you need to enable the "Cellular data network" option.
At the final stage, your operator's settings for MMS are made. Subscribers can find out the settings for their operator on their official websites of cellular companies.

Additional settings
After the profile for MMS is configured, experts advise that you must restart the gadget. Then you will need to indicate the shipment number or enter the number:
- you need to enable "Settings";
- go to the "Phone" section;
- in the next step, you need to select "My number".
After that, you will need to enter the number of the SIM card that you are using. For numbers registered in Russia, all numbers start with +7.
When the subscriber makes the necessary settings, you will need to restart the smartphone again. Otherwise, the function will not be enabled and the subscriber will not be able to receive or send MMS. Only after the next reboot will you be able to fully use multimedia messages.

It should be noted that when the subscriber sends each message, the camera icon should be displayed to the left of the text input field. If there is none even after the next reboot, then you will need to enter all the settings again from the beginning. The phone will automatically detect the type of message being sent. And if there is no photo in it, then it will be sent as a standard SMS message, and if a file is added, then it will be marked as multimedia.
Send MMS
To add to the message, for example, a photo, the subscriber needs to click on the camera icon. When sending a file, the subscriber is prompted to "Select existing" or the second option - "Take a new picture." The user just needs to select the appropriate option, for example, he can take a new picture. After that, a new window opens, or rather the camera window. After the shooting process has been carried out, and the result suits the user, just click the "Use" button.
