How to recover partitions from raw and ntfs. How to restore the file system of a hard drive without losing data
Unfortunately, sometimes you can encounter a situation where a user turns on a computer or laptop, and instead of some logical partition, a disk is displayed that has an incomprehensible RAW format. What is it, let's try to find out. At the same time, consider some of the simplest ways to convert this format into a normal look.
RAW format: what is it?
If we talk about this type of format, you need to clearly understand that, in fact, this is not even a format in the usual sense. This is a modified type of file system.
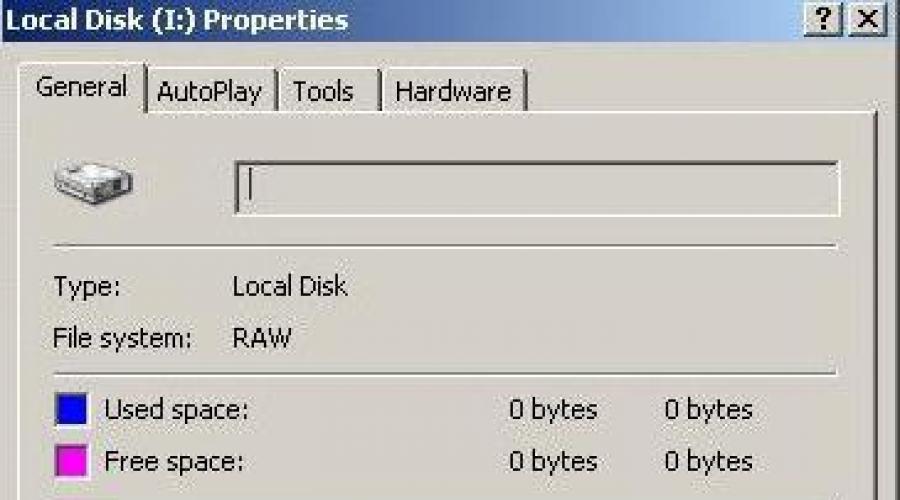
When accessing such a section, two types of problems can be noted. First, in file manager the volume may not be displayed at all. And secondly, even if it is visible, then there are either no files on it, or the system suggests immediate formatting, since the file system is incompatible with the operating system (RAW format of HDDs). How to fix this situation? You need to choose the right approach, because formatting a partition with the destruction of even non-displayed data is not the best option.
Why are HDD formats changing?
Before proceeding directly to solving the problem, it is necessary to clarify the reasons for changing the structure of the section. In general, it is generally accepted among experts that the RAW format of HDDs (how to fix it to a readable one will be discussed later), as a result, can appear, for example, when exposed to some viruses that change the file system purposefully, when the power is suddenly turned off ( electricity) at the time of performing any operations involving direct access to the partition, etc.

Actually, after that, sometimes the disk can be seen even with the folders and files present on it, but it becomes simply impossible to perform operations, say, to change the volume label, format it using standard means, change the size, and much more. This happens because, roughly speaking, there is a change in the file system or fatal errors appear in the partition table. However, there are several solutions on what to do if RAW format HDDs appear on the system. How to fix this situation, consider in more detail.
Correction Method
Now let's look at the main aspects of the remediation processes. As it is probably already clear, HDD recovery as the main task uses a solution that allows you to bring the partition's file system into a form that would be perceived by the operating system itself (FAT32, NTFS, etc.). Note that in most cases, even rolling back the system to a previous state does not give the desired result, so you should not do this. It's just a waste of time.
To begin with, you can try to make the section display files and folders, which in some cases makes it possible to copy them to another location, for example, to the same removable media.
How to make files visible and copy them to another location?
RAW format processing in this case is done using a very interesting utility called MiniTool Power Data Recovery(the program belongs to the class of shareware).

After installation in the application, you need to run the Lost Partition Recovery module, select the required partition and run a Full Scan. Upon completion of the process, a list of all available files will be displayed in the program window. It remains to mark the necessary data and click the save button (Save). The application will prompt you to select a location where the selected files will be copied. Specify it and activate the process. After that, you can start formatting the partition. If the procedure is not available, proceed to the next step.
The easiest way to restore the format using the system
Now let's dwell on how to convert RAW to NTFS using Windows' own tools (especially since such a solution is best suited for this).
First you need to launch the command line (cmd) from the Run menu (Win + R). Note that HDD recovery can only be done in this way, a standard partition check in a Windows environment will not give a result.

Now it all comes down to just typing the command chkdsk "drive letter": / f (for example, in the case of drive D it will look like chkdsk d: / f) - and pressing the enter key. It remains to wait for the process to complete, during which the file system will be restored, and reboot the system.
By the way, this method in file systems that previously had the NTFS structure is also perfect for system disks. Only when using this technique, the computer terminal or laptop will need to be booted from a boot or recovery disk.
Correcting the format using the TestDisk utility
On this stage let's look at another aspect of the topic "RAW HDD format: how to fix it." TestDisk (a utility for quickly restoring the original format) is the best. The main advantage of this application is that it does not require installation. Since it is available as a portable version. Minus - it does not have a Russified interface and works in a mode similar to DOS.

So, let's start HDD recovery. At the first stage after starting the program, you need to select the creation of a new log file (Create item) and press the enter key. Then the arrows select desired disk or partition, after which the application will automatically determine the type of the partition table (you can change it manually, but I think you should not do this).

Next, you need to first use the Analysis string, and then quick search(Quick Search). After each action, Enter is pressed. When the orphaned section is found, the structure save clause (Write) should be used. Otherwise, if the desired section is not displayed in the list of search results, you should use Deep Scan (Deeper Search), and then do the steps just described to save the structure. Now, as in the previous version, you just need to restart your computer or laptop. The problem should be gone.
Using Ontrack EasyRecovery
Before us is another program that allows you to convert the RAW format of HDDs. How to fix it with this utility? As easy as pie.

In principle, the application works almost similarly to the TestDisk program, however, it can attract many users because it has a beautiful and user-friendly interface. By the way, many experts call this software an indispensable tool when you need to restore large disk partitions. The only negative is that the program is paid, but I think this is not a problem for our person. On the Runet, you can easily find activation keys, patches, and key generators for it.
Conclusion
What is the result? On this moment the RAW format of HDDs was considered. How to fix it to be readable by the system, I think, is already clear. As for what exactly to apply, it depends on the specific situation. For example, if formatting by your own means is possible, you can display the files and copy them to another location. This, so to speak, is absolutely certain. You can also use the command to check and restore the partition to its original state, which is provided in the system itself, but this process is sufficient large volume volumes can take a very long time.
On the other hand, to simplify user actions, third-party utilities described just above are also perfect. Another thing is that some users will not accept the DOS interface of the TestDisk application. However, it is easy to get used to it. Moreover, as already mentioned, this portable version, which means that you can always have it at hand and run it from the same flash drive. If you don't like it, please use a similar application Ontrack EasyRecovery with graphics. True, some may object to the issue of cost, but here it is worth deciding for yourself what is more important: money or a hard drive with information stored on it? In addition, among all such utilities, these two are the most powerful, and sometimes you can’t wait for a quality result from free software. However, the choice is up to the users themselves.
Dedicated to recovering data from NTFS volumes, this tool is perfect for solving isolated cases and single incidents with system disks and hard drives. Offered at a discount compared to our top of the line tool, Magic NTFS Recovery is a perfect bargain for complex data loss situations occurring in NTFS-only environments.
Free DownloadMagic NTFS Recovery fixes broken file systems and restores partitions

Magic NTFS Recovery offers a quick, easy way to reliably recover information from badly damaged, corrupted and inaccessible disks and partitions. From simple undelete to bit-precise restoration of affected disk system structures, Magic NTFS Recovery can handle any type of data recovery jobs. Fully automated performance, quick and comprehensive recovery modes with smart content-aware analysis make Magic NTFS Recovery a winner.
Magic NTFS Recovery delivers all features offered by Magic’s top-of-the-line product, Magic Partition Recovery, except the ability to restore FAT and FAT32 media. As Windows XP, Vista and Windows 10 will format new disks with NTFS and will only run on NTFS partitions, Magic NTFS Recovery is a true bargain at only half the price of the company’s flagship tool.
Features and Benefits
Magic NTFS Recovery effectively handles hard disks, flash and SSD drives with major issues. The tool can reliably locate and recovers deleted files and data missing on damaged partitions, optionally rebuilding the damaged disk complete with original files and folder structure.
Recovery Files and Data
- Unerases deleted files from healthy, formatted and damaged NTFS partitions;
- Quick scan mode undeletes files in minutes;
- Comprehensive mode trademark content-aware analysis for in-depth recovery.
Rebuilding Disks and Partitions
- Refurbishes damaged partitions by rebuilding the file system based on information collected with content-aware analysis;
- Restores formatted partitions and repartitioned drives;
- Recovers media to “as new” state perfect for long-term use.

With all the powerful features under the hood, Magic NTFS Recovery is designed to be used safely by non-pros. The tool offers an easy way of fixing common issues and repairing serious problems.
A fully guided, step-by-step wizard will assist you in fixing all types of damage from recovering individual files to refurbishing broken partitions. The tool works strictly in read-only mode, keeping the possibility of accidental damage as close to zero as reasonably possible. In fact, Magic NTFS Recovery will try to reduce the number of disk access operations in order to preserve damaged disks and hard drives with lots of bad sectors.
Undelete Files in Minutes
Featuring two analysis modes, Quick and Comprehensive, Magic NTFS Recovery can recover recently deleted files in just minutes.
Refurbish Broken Partitions
Magic NTFS Recovery can re-create corrupted file systems complete with original files and folders, effectively rebuilding broken partitions from scratch.

Once Magic NTFS Recovery finishes searching for recoverable files, you’l see the file list in a familiar Explorer-like setting. Click on a file to see an instant preview. The preview will display pictures, play back audio, open compressed archives and display office documents complete with formatting and embedded objects.

The Ability to Perform
Content-Aware Analysis
The proprietary content-aware analysis is used in comprehensive scan mode to locate as many recoverable files as possible. Content-aware analysis scans the entire disk surface, looking for traces of known file types on the disk as well as in the file system. The algorithm enables surefooted recovery when all other methods fail.

Magic NTFS Recovery will only recover NTFS volumes, including NTFS streams. Use Magic NTFS Recovery to recover hard disks, SSD drives and some USB flash drives formatted by Windows XP, Vista and Windows 7. Most memory cards used in digital cameras and portable audio players will bear the FAT32 system; to recover memory cards, use Magic Partition Recovery or Magic FAT Recovery instead.
System Requirements
Magic NTFS Recovery supports Windows XP, Vista, Windows 10, 2003 and 2008 Server in 32-bit and 64-bit variations. The administrative privileges are required to run the program under MS Windows 10 / Vista / 2008 Server / XP / 2000 / NT / 2003.
Free Download
A free evaluation version of Magic NTFS Recovery is available free of charge. The free version performs all types of analysis and features instant pre-recovery preview, displaying the content of recoverable files in visual, WYSIWYG mode.
Restores information from any kind of a carrier
Magic NTFS Recovery can recover all types of files from all kinds of storage devices. Deleted files can be undeleted in a matter of moments with a quick file system scan. Files deleted directly or removed from the Recycle Bin can be restored in a matter of minutes regardless of their extension.
Thanks to the company's content-aware analysis technology, hundreds of recognizable file types can be recovered even if the drive is formatted, repartitioned or unreadable. Even if the drive no longer appears as a drive letter, Magic NTFS Recovery can still analyze a physical storage device looking for missing partitions. Magic NTFS Recovery has been tested with a wide range of devices based on different storage technologies such as magnetic hard drives and flash-based solid-state drives. Magic NTFS Recovery can be used to recover files from hard disks and SSD drives, USB flash drives and most types of memory cards including full-size, mini and micro versions of SD/SDHC/SDHC cards, Compact Flash, Memory Stick, as well as the traditionally mentioned but obsolete formats such as MMC and xD.
Restores corrupted and unavailable partitions
Thanks to the use of content-aware analysis, Magic recovery tool s can recover information from corrupted and inaccessible partitions, repartitioned hard drives and formatted volumes. Magic NTFS Recovery will perform a thorough scan of the entire physical drive in order to locate unavailable or deleted partitions, and then analyze the entire volume looking for recoverable files and folders. Magic NTFS Recovery will attempt to re-create the entire file and folder system complete with multiple-level folders and long file names, effectively restoring the content of the entire partition on a different disk or another storage media. After your data is completely recovered, you may attempt to recover the original broken partition by repairing the damaged system structures with scandisk (a Windows tool).
Using Magic NTFS Recovery on damaged disks is completely safe, as all access is performed strictly in read-only mode. Because of that, Magic NTFS Recovery will not mess your disk system structures or the file system.
Restores files from deleted and formatted drives
The data recovery tool supports the recovery from deleted partitions, formatted volumes and repartitioned hard drives. The tool scans the entire surface of the hard disk or reads the full content of a solid-state drive in order to reliably detect, locate and read the content of a deleted partition. If the disk has been formatted, the tool can read raw sectors from the disk in an attempt to detect the beginning of multiple known file types. During this process, the tool will not need the file system to be present, and will successfully restore the files even if the file system is emptied by the format operation.
Deleted partitions can be similarly detected by reading blocks of raw data from the disk surface, matching and analyzing raw data structures in an attempt to detect the beginning and size of deleted partitions. Once all partitions are successfully detected, the tool can perform further analysis by accessing their file systems and reading files off deleted partitions. More often than not, deleted partitions are much less of a problem than formatted hard drives or deleted files.
Offers easy access to advanced features with Windows Explorer-like user interface
The wizard-based user interface is simple, convenient and straightforward. However, advanced users may need more flexibility in fine-tuning the process or configuring the settings. To allow advanced access to the internal data recovery mechanisms, we implemented a convenient Explorer-like user interface to go along with the wizards. This advanced user interface allows easy access to all the advanced features with the convenience of Windows Explorer-like performance. The familiar user interface will make seasoned computer users and computer professionals feel immediately at home, adjusting all the required settings with just a few mouse clicks.
In addition, by using the data recovery tool in Explorer-like mode you can browse through deleted files or navigating information stored on a deleted partition just like you would normally browse your computer. You can click deleted files to preview, mark them for recovery, and enter compressed archives as if they were folders.
Search files based on content (Content-aware analysis)
The entire family of Magic data recovery tools shares a set of sophisticated data recovery algorithms that can perform a search of recoverable information based on its content. The technology is called “content-aware analysis”, and allows not only undeleting files that were simply deleted, but also recovering files stored on formatted, corrupted and inaccessible disks and memory cards.
Unlike legacy data recovery algorithms that analyze the file system alone, content-aware analysis looks beyond the file system in its search for recoverable information. The technology reads all sectors on the disk, analyzing raw data in order to detect characteristic signatures of known file types. If the beginning of a file is detected, content-aware analysis will then analyze what appears to be a file header in order to calculate the length of the file. Based on this information, file’s exact location on the disk can be derived, and the file itself can be successfully recovered even if no record about it appears in the file system. This allows recovering files from formatted partitions, corrupted, repartitioned and inaccessible disks.
What
others are
saying
My biggest thanks and warmest regards to developers! I was able to recover deleted documents from my colleague's hard drive after almost a week. It's a miracle I was not even hoping for! Kudos to developers! Steve Swan
I formatted a hard drive to upgrade the OS. I installed 8, then upgraded to Windows 10, and then discovered the entire photo archive is missing. Downloaded this tool without much hope. The photos were back almost immediately! Daniel Thomas
thank you! You're my saviors! I restored a 3-year worth of work on my office computer without a sweat. Hundreds of documents, emails, databases. Would take years to type them back. You saved my job!
Cheers! Jane Stalnaker
There are situations in which a user may lose access to his hard disk (or its separate partition), while the file system this disk(or its problem partition) will start to be defined as "Raw". On such a hard drive, there may be data that is necessary for the user and needs to be accessed (often at any cost). In this article I will try to help the user who finds himself in such a situation, I will explain how to fix the RAW format HDD drives, and also talk about the tools that will help us with this.
What is RAW format HDD
To understand what “RAW HDD format” means, you need to refer to the translation of the word “RAW” itself. Translated from English, the word "raw" means "raw, unprocessed". Accordingly, this term refers to disks on which either the file system is not installed at all (the disk is not formatted), or their file system is damaged for some reason (the structure of the MFT file table is broken, incorrect MBR partition table data, etc.).
Initially, the term RAW denoted the file system used by default when working with CD-ROM. Blank discs that are being prepared for recording were defined by the system as using the RAW "file system".

Now everyone HDD, which is not formatted with the NT file system format (such as FAT or NTFS) has a hard disk status of "RAW".
Causes of the RAW status on the hard drive
To understand how to fix the RAW format of HDD disks, you need to understand the list of reasons that cause it. I would point out the following determinants:
- Voltage surges in the mains;
- Problems with the hard drive cable (the cable is damaged, the cable has poor contact with the hard drive, and so on);
- Problems with the PC power supply;
- Bad sectors on the hard drive (especially noticeable when accessing the hard drive, when it responds with a slowdown);
- Damage to the structure of the file system or damage to the partition table;
- Incorrect reinstall or ;
- Activities of various virus programs.
So, we have identified a list of reasons that cause the RAW status to appear on the hard drive. Now let's decide how to fix the RAW format of HDD disks.
RAW HDD format - how to fix
So, how to get rid of RAW HDD format? I suggest doing the following:
- Use the capabilities of the CHKDSK system utility. If the RAW status has appeared on one of the hard disk partitions, and you have access to command line(or use a live build on a CD (DVD) or flash drive) - then run the command prompt as administrator, in which type:
chkdsk X: /f (where X is the letter of the problem drive)
After this check, the problem with RAW will usually be resolved, and you will get your working disk back.

If you have a boot disk or flash drive, then boot from it, select the menu option "System Restore", go to "Advanced Options", then "Command Prompt", and there enter the above command. When doing so, make sure you select the correct letter for the desired section. To do this, type in the line one by one the commands:
list volume- (this allows you to find out the letter of the drive we need)
You can also connect your hard drive to another PC and run the CHKDSK command from it;

Use third party apps
On the issue of eliminating the RAW format on HDD drives we can also be helped by various auxiliary programs (for example, MiniTool Power Data Recovery or TestDisk).
- The first of the mentioned programs will allow us to recover the necessary data located on the RAW disk.
- Download MiniTool Power Data Recovery (link just above), click on "Lost Partition Recovery" (recover lost partitions) in the main window.
- Select a RAW disk and scan it by clicking on "Full Scan".
- Then decide on the partition and files that need to be restored, click on "Save", indicating the path where you want to save the recovered files.

To use the TestDisk utility, download it, run it as an administrator.
- Select "Create" and press enter, then use the arrows to select the problem disk and press enter again.
- Then decide on the type of partition table you need (the utility will do this automatically) and press "Enter".
- Search for problematic or lost sections by selecting "Analyse" and then "Quick Search".
- After the utility finds the desired volumes, select "Write" to save the resulting partition structure.

Video instruction
Above, I stated the answer to the question about the RAW format of HDD disks, identified the reasons for the appearance of RAW disks and described tools for solving this problem. In most cases, the appearance of this format of your disk can indicate both hardware and software problems on the PC, which are described by me in the list of causes of this dysfunction (except for the situation when the disk is new and not formatted). To solve the problem, I recommend that you follow the list of tips I suggested above, this will help you effectively fix the problem of RAW HDD format on your computer.
One of the common problems encountered on Windows 7, 8 and 10 is changing the file system of a hard drive, flash drive or solid state drive to RAW. The system automatically informs about this problem with messages like "Format the disk to use it" and "The file system of the disk is not recognized." Let's figure out how to return the file system from RAW back to NTFS or FAT32.
The RAW format file system is, in fact, a complete “no file system” on the media as such. Usually this happens due to system failures, a sudden power outage, or a malfunction of the device itself. Any attempt to check the drive is often accompanied by the notification "CHKDSK is not valid for RAW disks." No need to worry - in most cases, the data on the disk can be recovered.
How we will solve the problem:
- With help standard means drive check.
- Through partition formatting.
- Recuva utility.
- With the help of the DMDE program.
- Through TestDisk.
The first thing to do when a RAW file system is detected and there are problems accessing the media (HDD, SDD, external drive or microSD card) – test the device. The method will not work in all cases, but it is absolutely safe and is great for situations where RAW is formatted system disk, as a result of which the OS refuses to boot.
System starts
So, if you are lucky and the system was “lying” on another volume (continues to work), then you can check it directly from the OS. To do this, perform the following sequence of actions:
- We use administrator rights to open the command line. To do this, press the Win + X combination on the keyboard or right-click on "Start", and then go to the "Command Prompt (Administrator)" section.
- We enter the command chkdsk n: / f in the line, where n is the symbol of the disk, the file system of which has changed to RAW. Click on Enter.
There are two options for the reaction of the command line to the entered command:
- the check will start and the drive will be reformatted to the original NTFS format if the problem was a normal failure;
- the line will give the message "chkdsk is invalid for raw disks" or "Main file table corrupted, chkdsk interrupted" if the problems are more serious than the standard failure (then using chkdsk to restore the file system will not work).
After checking the external hard drive, the ntfsck 00000000 and ntfsck 00000001 folders may appear on the media, which will contain many recovered files with the name "file".
You can also check the device with another command - "sfc / scannow". Use it if the previous one did not help. The system scan will start, which can take quite a long time (the current progress will be displayed).
If the operation did not give the desired result, then we move on to other ways to return the file system on the hard drive, hard drive or microSD.
System won't start
If Windows refuses to boot (this means that the system drive has become the RAW disk), you need to boot from another OS, . We will not analyze the process of its creation - this is a topic for a separate article. Next, to fix the problem with RAW, follow the instructions below:
- We boot the PC using the distribution kit, which is recorded on a USB flash drive or on an external hard drive (the Boot Menu launch combination for our motherboard or laptop can be seen when starting the computer). After selecting the language, click on "System Restore" in the lower right corner, or press the combination Shift + F10.
- In the command line that opens, write the following commands one by one:
- diskpart;
- list volume (the program will show which letter was assigned to the faulty disk partition, since it may differ from the one that was installed in the system);
- exit;
- chkdsk n: /f (again, n is the letter of the failed drive).
According to the possible reaction, everything is exactly the same - these operations will either help change the file system to NTFS, and the system will boot, or a message will be displayed about the inapplicability of this method.
If RAW arose due to minor damage to the MFT file table, then most likely you will be able to perform a recovery using the CHKDSK utility, after which the system will start in standard mode.
If the steps above fail, move on to the next methods to solve the problem.
Partition Formatting
We have already noted that with the RAW format, the system automatically asks you to format the hard drive to start working. This is worth doing if the device does not store important information, or if the media is simply new (for new drives, the RAW file system is a standard phenomenon). When performing the formatting procedure, data loss cannot be avoided.
You can format a partition or an entire disk using the built-in Windows tools. To do this, we either agree with the request of the system, which it displays when trying to open the disk, or we perform the following actions:
- Press the key combination Win + R and in the Run window that opens, write the command. We click on "OK".
- In the list of disks, select the drive that has RAW in the "File system" column. We make a right click and format the device by pressing the desired button.
- If the "Format" item is not active (it is not available for new drives), then you must first click on "Initialize disk". Once the device is initialized, it can be formatted to NTFS and used.
If the formatting procedure is still not carried out, then first right-click on the disk and click on "Delete Volume". Then click on the unallocated area (it will be marked with a hatch) and select "Create a simple volume". A wizard that opens automatically will guide you through the next steps.
The formatting procedure itself will not require additional actions from the user - you will only need to specify the future file system (NTFS or FAT32) and the desired letter for the new volume.
Recuva utility help
Recuva is the simplest application that can quickly return the NTFS format to a disk with the current RAW file system without losing data ( free analogue EaseUS Data Recovery Wizard).
To fix the problem with Recuva, you need to follow the instructions below:
- Download the program from the official site and install it. Exists free version utility, the functionality of which is quite enough for us. The developers have already completed the translation into Russian.
- Click on the icon with the list of disks and select the one with which the problem occurred, and then click on the "Analyze" button.
- Upon completion of the scan, the utility will display a list of files. We restore them in a few clicks: select the ones you need, right-click and click on "Restore selected ...".
The files will be restored, RAW will return to NTFS.
Using DMDE
It is possible that the drive that converted to RAW format contained important information that needs to be returned. In this case, you cannot format the drive in any case. We suggest using the free DMDE utility designed to recover information.
The procedure for returning data from a RAW partition using DMDE can be represented as follows:
- Download the utility from the official website of the developer.
- The program does not need to be installed - just unpack the archive to any convenient place and run the dmde.exe file.
- Check the "Show partitions" box, select the hard drive on which the problematic RAW partition is located, click on "OK".
- After analysis, a partition without a file system and with a strikethrough icon should appear in the list. Right-click on it and click on "Open Volume". If RAW was not found, execute " Full Scan”, after which we open the section.
- We check if there is the necessary information on this section of the disk. If it is there, then click on the second icon in the top toolbar.
- Select the disk and click on "Restore".
When the procedure is completed, the faulty partition will become available again. The NTFS file system will be returned.
When carrying out such a procedure on a system hard drive connected to another computer, you will have to restore the bootloader in order for the drive to start working on your PC.
Recovery via TestDisk
TestDisk is a fairly advanced tool that can solve most of the problems with the RAW file system (and convert it to NTFS in particular). You have to “pay” for such functionality - there is a possibility that something will go wrong and the data on the disk with current system will be lost. Use this program only if none of the previous methods worked.
- We download the utility from the official website and unpack the archive to a suitable place - the program does not need to be installed.
- Run the testdisk_win.exe file from the unzipped folder.
- In the "Select a media" item, select the disk, one of the partitions of which received the RAW status (we select the drive itself, and not a separate faulty partition). Moving is done with arrows, selection by pressing Enter .
We are waiting for the verification procedure to be completed.
- As a result, the utility will find sections, among which there will be RAW. You can determine which one we need by size. You can familiarize yourself with the contents by pressing the English letter P, and go back by pressing Q. Sections marked with "P" next to them will be restored and recorded, those with "D" will be ignored. You can use the "left" and "right" keys on the keyboard to translate the assignment for the section. To avoid accidentally deleting system partition, marked with the symbol "D", change it to "P". To continue, press Enter.
- We make sure that the program has compiled the correct table, and if we are sure that everything is done correctly, then select "Write", click on Enter, and then on Y to confirm the action.
When the program completes, close it and check the result. If this method did not help, and the file system for the flash drive or disk did not return, then the drive may have been mechanically damaged. In such situations, hard drive recovery is best left to a professional.
In conclusion, we suggest that you familiarize yourself with the list of problems that may result in changing the file system to RAW:
- Power outages. You may have had a sudden power outage, causing the file system to be corrupted.
- Violation of the cable connecting the device to the motherboard.
- Operation of malicious software.
- Breakage of the USB connector (if the problem arose with a flash drive).
- Motherboard problems.
- The presence of bad sectors.
We hope that you managed to recover personal information and return the disk to the NTFS file system. The guides provided are applicable to SSD, HDD and flash memory.
Video instruction
We are attaching a video instruction, thanks to which you can visually study the process of returning from RAW to NTFS using advanced software.
Conclusion
Now you know exactly how to fix the file RAW system flash drive or other storage device. We recommend using the methods described in the article in turn - in most cases, one of them helps to solve the problem.
All kinds of USB drives, whether they are ordinary flash drives or removable memory cards, are prone to errors due to many reasons. Let's say the user needs to use a USB device to install or restore operating system, and the file system of the flash drive is RAW. How to install Windows 7 or another modification, because this format is not recognized? First you need to fix the file system. The following are a few basic techniques that will come in handy in any other cases when, for some reason, such a failure has occurred.
Why does the RAW format appear on the USB device?
The RAW format itself is a kind of "raw" structure, which, due to a failure or error, has replaced FAT32 or NTFS.
The most common situations are related to exposure to viruses, power surges, incorrect removal of the device, software failures microcontroller and physical damage to the media. As a result, the file system on the drive changes spontaneously, however, issues related to how to remove the RAW file system on a flash drive and restore the information stored on it can be resolved quite simply. First, let's look at the native tools of Windows systems.
How to fix the RAW file system on a flash drive: preliminary steps
In the event of errors, it is impossible to write or read information from the drive, although the flash drive itself can be seen both in the Explorer, and in the section and in the Device Manager.
Before proceeding with the question of how to fix the RAW file system on a flash drive, it is recommended that you first check it with a standard system tool in the form of a CHKDSK disk checker.

To start diagnostics, the command console is launched (cmd in the Run menu), after which the line chkdsk F: / f is written in it, in which the first letter (“F”) is the letter of the USB drive (it can be seen in Explorer) . This command is good because at the end of the check, if the failures on the device were not critical, you can see your flash drive in standard format NTFS.
Also, the check can be launched when booting from the recovery disk using the same command console, in which, before entering the above command, you need to write the lines volume (to find out the device letter) and exit, and then use the standard tool.
However, in case of serious damage, the system may display a message stating that the use of this tool is not allowed for RAW discs. How to fix the RAW file system on a flash drive in this case? The easiest way out is formatting.
on a flash drive: how to fix the situation using Windows tools?
To begin with, you can try to perform formatting by calling the right-click menu in the "Explorer" and selecting the line for performing this operation.

When you specify additional options you should use a full format, rather than a quick format that only clears the table of contents, and specify the required file system-specific type parameters. Then it remains to press the button to start the process and wait for it to finish.

In the event that formatting in this way is not possible, the problem of how to fix the RAW file system on a flash drive can be solved using the disk management section, which is easiest to call with the diskmgmt.msc command in the Run console. Right-clicking on the disk brings up the context menu, where the format string is selected. If the disk is currently inactive, the initialization command is used first, and then formatting is performed.
Troubleshooting with low-level formatting programs
If this does not give an effect, RAW flash drives can be produced using special utilities.
One of the most powerful is considered a small HDD program Low Level Format, which is shareware, but in test mode will be able to perform the formatting operation without problems. When the application starts, the button for free continuation (Continue for free) is pressed. In this mode, the only limitation will be the speed of the operation, so you have to be patient.
Next, you need to select your drive, click the continue button and confirm formatting, agreeing with the program warning. At the end of the process, a message will be displayed indicating that the operation is 100 percent complete, and after that it remains to perform a quick format using Windows tools.
Data recovery software
As for data recovery, it is best to use software products like R.Saver, RS FAT Recovery and others.

Depending on the size of the drive, a lot of time may be required. But recovery is guaranteed one hundred percent. Sometimes you can even see the data that has been deleted from the device for a very long time.
What else do you need to know?
If for some reason the above methods do not help, it is very likely that the problem is a malfunction of the microcontroller. You can try to reflash it using the VEN and DEV identifiers from the "Hardware ID" section in the "Device Manager" properties menu and download the appropriate firmware from the hardware manufacturer's resource. If errors occur due to physical damage, the problem device can in most cases be discarded.
Finally, it remains to be added that the issues of virus exposure, which can also lead to such failures, were not considered here, since each user must take care of protecting his system on his own and without reminders. And before restoring a USB drive, it is advisable to check for viruses without fail.