Battery calibration through recovery. Battery calibration on Android - how to do it right? Video: how to restore a Li-Ion battery from a camcorder or smartphone
Read also
30.06.2017 Frank 0 comments
We all complain about the battery life of a smartphone or tablet. Often we wonder why 50% of the available charge, after a few minutes, makes it 10% less.
It's not the phone's fault. This is how the devices are designed. The solution is periodic battery calibration.
It can be done using programs (the easiest way is for a non-removable battery), without root rights and with root rights, on a Samsung, Sony and all the others.
Let's find out how to properly calibrate the battery on an android smartphone or tablet.
We blame the manufacturers for the short battery life, but it may not actually be the fault of the hardware manufacturer.
The truth is that the battery needs to be calibrated periodically. Why? In order for battery management to really indicate the actual power value (and time).
So how do you properly calibrate a battery? To this end, we must, at least once a month, completely discharge the battery of a tablet or smartphone.
In principle, nothing complicated. During this process, the phone will inform the operating system of the total load and we will make sure that the system actually has adequate information about the actual state of charge of the battery.
Android battery calibration using programs
With root rights (root) and without root rights (without root), battery calibration in a smartphone or tablet is easiest to do using programs.
You can also perform manual calibration, which we will discuss below (which calibration is best - all methods are good, but easier with programs).
If your choice of program, then go - the programs are free and in Russian.
There you will find the two best programs with descriptions and direct download links. Who wants to do it manually, see the section below and follow the instructions step by step.
How to manually calibrate android battery
The first thing to do is turn off the mobile phone, take out the battery and put it back in. The next step is to figure out how to put the device into recovery mode.
Typically, entry is done by using the volume up and power buttons pressed and held at the same time.

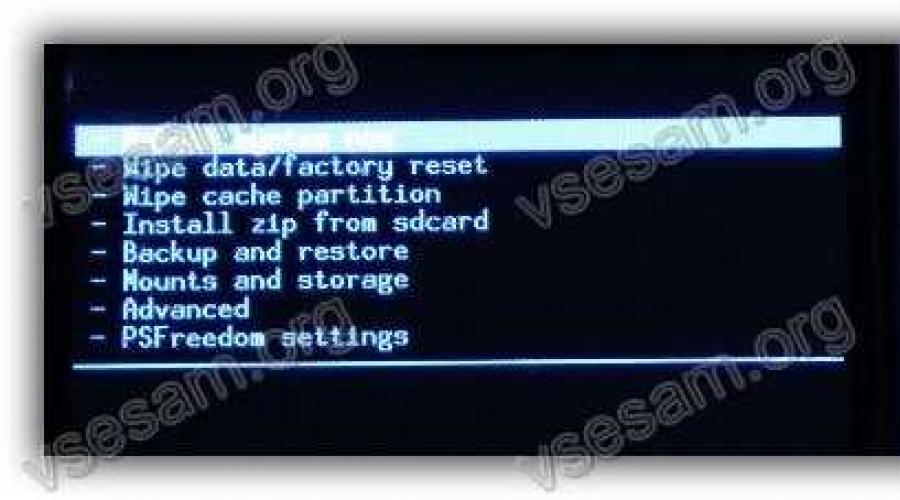
When you enter, select "Battery Statistics" and "Wipe Cache" to erase what was considered to be 100% life.
After clearing the information or, in other words, calibrating, the charge indicators should no longer go crazy.
Another way to do android battery calibration without root rights
To do manual calibration without root in any way possible, load the phone until it turns off (the battery is completely discharged).
Then turn on the phone until the battery is really low. After that, charge your smartphone or tablet to 100% and leave it charging for another two hours (ignore any messages that appear on the screen).
This is an important step, but don't overdo it. After two hours, unplug your phone from the charger.
Now take the battery out for 10-15 minutes and then put it back in but don't turn it on for another 10-15 minutes.
Operation completed. You can turn on your smartphone or tablet - battery calibration should be completed.
If the problem persists, repeat the process. Otherwise, try the alternative method below.
Does calibration increase battery life in an android phone
Calibration does not always lead to radical changes. It all depends on the number of full charge cycles.
In the case of lithium batteries, 200-300 cycles, so further calibration will not be effective.
How often do you need to calibrate? Every time after flashing, and later when the charge suddenly decreases.
Note: The calibration procedure should only be carried out if it is really necessary. If you repeat the procedure several times, but the problem is not solved, replace the battery or phone.
Problems with the battery of your smartphone are probably one of the most frequent occurrences, and therefore we are looking for new ideas and suggestions on how to best deal with this problem. Battery consumption may not be uniform, and you need to understand where the problem is. You can also try calibrating your Android's battery, which can greatly increase performance, if that's possible with your phone of course.
In this article, we will take a detailed look at how you can calibrate your phone's battery.
Our first suggestion for improving power consumption would be our article "Saving Battery Power on Different Smartphones". Even after these tips, the problem still persists and then it is time to calibrate the battery. The biggest battery problem is when it runs out extremely quickly, or the phone just won't turn on.
Before replacing the battery, try to calibrate it. This may be the only way that is used in most cases!
Every Android phone has a battery app that displays all the necessary battery statistics for your phone. The app is very informative as it shows the battery percentage, battery run time and consumption from different apps using your battery life.
In some cases, when your battery is not calibrated, this application may give errors in statistics. Battery calibration can fix this issue and hopefully improve performance.
Calibrate Your Android Battery - On Non-Rooted Phones
First, don't forget to check the battery capacity. If you're unsure, look up your phone's battery specifications online. You can find detailed specifications for your phone model on your phone manufacturer's website.
After that, look for an app called "Battery Monitor ". You can find the app for download on the Google Play store.
The unique feature of this app is that it will show you the charging parameter in milliamps (mA). Of course, this is a great help when you need to charge the battery to a certain level indicated on the battery capacity. When the required level is reached, simply turn off the phone, turn it off and turn it on again. If everything is done as noted, your phone battery will be 100% charged
A selection of powerful PowerBanks in online stores:
An alternative way to calibrate your Android battery:
fully charge the battery and once that is done, just turn off the phone.
After turning it off, plug it back into the charger and charge your phone to 100 percent again. You will know that the phone is 100 percent charged when you see a green light on the phone.
Now turn your phone back on. Go to the display settings tab and select the option - do not turn off the screen backlight. Now plug your phone into a charger and charge it to full 100% again.
Finally after that, turn off the phone and let the battery drain to 0% and the phone will turn off by itself. This is a long process, but it must be done this way for the calibration process to work properly.
What can drain your phone battery
It is worth noting that modern phone firmware is a full-fledged mobile operating system. This means that while the phone is running, "background" processes are required, such as: SMS messaging service, Text input service, Antivirus, etc.
Accordingly, for the operation of background processes, it is also necessary to spend on them both the power of the central processor, RAM and, of course, battery power.
During the "active" use of the phone (for example, launching various programs: Internet Explorer, Games, Programs for accessing bank accounts, Mail programs, etc.), we recommend that you restart your mobile phone. To do this, press and hold the "Power" button of your phone and select "Restart".
If nothing helps
After a long period of operation of your phone - the battery becomes unusable over time. But even from this situation there is a way out, for example:
- Battery for phone charging(PowerBank) solar-powered
Pros: low cost and charging from solar energy and from the car charger. The disadvantages are obvious - it will increase the weight of your bag by about 200 grams. There are quite a few Chinese versions of such devices on the market, but we settled on this one:.
Video review of POWER BANK 20000 mAh
Modern mobile devices only look simple. In fact, each of these compact devices - a tablet, a smartphone or just a mobile phone - is a whole complex of different systems. Some of them have a very high level of energy consumption. For a tablet, such a module is a block, as well as for a smartphone. It is not surprising that even with a large battery capacity, the charge is not enough for a long time. You can often come across such a thing as tablet battery calibration, about which they say that this is necessary and even inevitable. Let's see if that's the case.
There are situations in which the battery may need to be calibrated. The short list looks like this:
- The device began to work much less time;
- After fully charged, the indicator on the screen does not show a 100% level;
- The system displays the drop in battery capacity in strong jumps;
- The tablet shuts down due to lack of power, although the indicator does not signal a complete discharge of the battery, and no warnings are issued.
There may be several explanations for this behavior. Some cases are quite expected - experiments were carried out with a device, for example,. Others are not so obvious, and battery calibration may actually be necessary. A brief list of symptoms and preliminary actions can be summarized as follows:
- the firmware with which the system was registered, which has different battery usage statistics, has changed;
- there was a change in the battery, which has other parameters;
- tablet battery fails;
- junk power and battery charge controller;
- the charger does not provide the necessary parameters;
- the battery controller gives incorrect readings of the sensors that Android uses.

The last four points do not make sense to compensate. Repair required. But the whole catch is that the behavior of the tablet is difficult - in electronics or software. Therefore, before going to a service center, it is better to resort to simpler methods.
Most popular method
In the case of a firmware change, the best answer to the question of how to calibrate the battery on Android will sound very simple. You need to reset the battery usage statistics and force the system to recreate the file.
There is a popular and quite widely used Battery Calibration program. It acts radically and simply, forcing Android to recognize the battery as the first, the only one and set the parameters of the power system in accordance with its characteristics.

The application will need root access to delete statistics. Battery Calibration can be downloaded from PlayMarket, it is easy to install and does not require configuration. You won’t have to figure out how to calibrate the battery on a tablet for a long time either. as follows:
- Install Battery Calibration;
- Fully charge the tablet in the off state;
- Turn on the device and run the program;
- Before us is a single button. We press;
- Battery Calibration will ask for a superuser name.
Video on how to use the Battery Calibration app:
By specifying the required data and confirming the choice, the user initiates the overwriting of the statistics file and the creation of parameters that are responsible for only 100% of the battery charge. Then the system will do everything itself according to the indications of the battery controller.
Meticulous and attentive users began to ask questions to the "author" - Google. They concerned, first of all, the effectiveness of using Battery Calibration and similar programs. As expected, the company recognized the method as the least effective, giving an acceptable result only when the following factors are combined:
- normal condition of the battery;
- correct operation of the power controller;
- reliable readings of battery sensors;
- normal operation of the charger.
The way to calibrate the battery on Android, proposed by Google, is quite complicated. Judge for yourself:
- or smartphone. The process must go on for at least 8 hours, even if the system signals that charging is over. The device must be turned on;
- Disconnect the charger or unplug it from the socket. Turn off your tablet or smartphone;
- Start the charging process again and continue it for an hour;
- Disconnect the charger and turn on the tablet or smartphone. Keep it in this state for a minute or two;
- Turn off the device and charge again. Continue for an hour;
- Physically disconnect the charger cable and turn on your smartphone or tablet.

Looks strange at first glance. But everything is rational and simple. Thus, the statistics are recreated and the hardware parameters are adjusted to the maximum for all conditions. From a physical point of view, everything looks like this:
- after the first point, the battery gains capacity, which corresponds to the maximum controller readings recorded in the system statistics;
- the second point removes the load, all consumers are turned off;
- the third point performs recharging with the optimal current and voltage under the hardware control of the power microcircuit;
- the fourth point forces the system to update the statistics, since the readings of the sensors may not correspond to those previously recorded;
The actions of the fifth and sixth points are control. They are intended mainly for complex devices whose power management systems use data from operating system statistics. The last two actions allow you to really charge the battery completely. And turning on a smartphone or tablet again records a new maximum of indicators in the statistics if they have changed.
As you can see, this is the most It can be produced periodically if the battery loses capacity.
other methods
You can find several more options. One of them is a prototype of the methodology proposed by Google - multiple charging / discharging the tablet. The same method of collecting new statistics, just not as accurate.
There are a number of programs similar in principle to Battery Calibration.. But resetting statistics parameters, as described above, does not always work well.

Which display the indicators of the battery control sensors in numerical form. One of them is Battery Monitor. It displays the current battery charge in milliamp-hours. It is recommended to charge the battery until the program readings match the maximum capacity that is written on the battery.
The program works great, but someone who decides to learn how to calibrate the battery on Android is likely to run into problems. If we are talking about improper operation of the power controller or a drop in battery performance, then in accordance with the recommendations, you can repeat the charging / discharging process forever. And to no avail.
How to proceed?
In order not to wander in three pines, wondering why the tablet began to work less time or behaves incorrectly, use the method proposed by Google. This tablet battery calibration is completely safe.
Perhaps the problems will disappear, in any case, the repetition of similar symptoms after a while will clearly signal hardware problems. And if you have been experimenting: changing the firmware or changing the power management settings, resetting the statistics using Battery Calibration is acceptable and will give good results.
If you notice all sorts of signs of improper battery operation, do not immediately go to a service center. Try to perform such a harmless operation as battery calibration on android. You can do this yourself at home using a certain combination of actions or thanks to specialized software.
How to determine if calibration is needed
Each phone has its own battery with a certain capacity. Users with long-term use of a smartphone already know how long a single battery charge lasts on average, so you can easily determine incorrect operation, respectively, the need for calibration by the following signs:
- Your cell phone runs out of power very quickly;
- When fully charged, the indicator on the device does not show 100 percent;
- The device spontaneously turns off, although the battery charge shows more than 10 percent.
- The phone is not charging.
The reasons for these situations can, of course, be problems with the battery, which require the purchase of a new part. But before drawing such conclusions, try to calibrate the battery. This process will not take long, but it may be able to solve your problem and save you money.
If you look in the dictionary, you will find concepts such as tuning, optimization. In this context, this process means optimizing the battery consumption of the mobile device.
The problem may be that the Android system will not correctly read the battery status. As a result, even with a full charge of energy, the indicator will not show 100 percent. Also, a misperception can lead to the fact that the phone screen shows a charge of another 2-5 percent, but after a second it turns off. The situation when a mobile phone “ate” up to 5 percent of the battery in a couple of seconds is extremely unlikely.
In order for the phone to “remember” the correct parameters and stop discharging very quickly, you should perform a calibration.
Quick way for root users
Many owners of smartphones and tablets have received superuser rights. With their help, you can get full access to the Android operating system, while using various applications that allow you to configure system settings.
One such application is Battery Calibration. You can download it from the official Google Play-Market store. The procedure includes several simple steps:

Now your battery should tune in, as well as perceive the charge correctly. In this way, you show the "starting" point of reference for the accumulator, and it remembers it. It is worth noting that this technique does not extend battery life. You can find information on how to increase the term on the Internet. Extended battery life is achieved through proper charging techniques.
Method using Recovery mode
Another technique for devices with superuser rights. Mobile devices on the Android operating system have a special recovery mode called. With it, you can do many different things, including calibrating.
To calibrate a battery, you need the following:

The third paragraph in this instruction removes batterystats.bin from the file system, which is responsible for battery usage statistics. As soon as the phone turns on, it is re-created, with a new “level” of battery charge being written to it. If you did everything right, the battery will no longer suddenly drain by several percent at once.
Method 1: Manual setup
If you actually can't get superuser rights, or just don't want to, there are several ways for you to calibrate without using Root.
The first involves using only the charger, as well as the auxiliary application CurrentWidget: Battery Monitor, which you can find on the Play Market. It shows the current battery charge in milliamps.
First you need to know the capacity of your battery. You can do this by examining the instructions for the phone, reading its specification on the box, or simply finding this information on the Internet.
The instruction includes the following steps:

With these actions, you will let the device know what the maximum charge level is true.
Due to the huge number of disputes on how to properly charge the phone and how to properly calibrate, some experts decided to contact the official representative of the Internet giant Google. Since it is this company that is responsible for the development of the operating system, they are the best way to answer all questions of interest.
Google engineers gave the following instructions:
- Perform a full discharge and then charge the device for at least 8 hours.
- Disconnect the charger from the device and turn it off. Put your smartphone or tablet on charge for another hour.
- Turn off the charger and turn on the device. Keep it in this state for 1-2 minutes.
- Turn off the gadget, and then charge again. Continue this for one hour.
- Disconnect the charger and turn on the smartphone or tablet.

The Android OS is notorious for its sometimes insatiable appetite for battery life. In some cases, due to its own algorithms, the system cannot accurately estimate the balance of this charge - that's why situations arise when the device, having discharged to the conditional 50%, suddenly turns off. The situation can be corrected by calibrating the battery.
Strictly speaking, calibration is not required for lithium-based batteries - the concept of "memory" is characteristic of older batteries based on nickel compounds. In the case of modern devices, this term should be understood as the calibration of the power controller itself - after installing a new firmware or replacing the battery, the old charge and capacity values \u200b\u200bare stored that need to be overwritten. You can do it like this.
Method 1: Battery Calibration
One of the easiest ways to tidy up the charge readings taken by the power controller is to use the application designed for this.

This solution, unfortunately, is not a panacea - in some cases, the program may turn out to be inoperable and even harmful, which is what the developers themselves warn about.
Method 2: CurrentWidget: Battery Monitor
A slightly more complicated method, for which you must first know the real battery capacity of the device that needs to be calibrated. In the case of original batteries, information about this is either on the battery itself (for devices with a removable battery), or on the box from the phone, or on the Internet. After that, you need to download a small widget program.

Generally, the above steps are sufficient. If it does not help, you should turn to another method. Also, this application is not compatible with devices from some manufacturers (eg Samsung).
Method 3: Manual calibration method
For this option, you do not need to install additional software, but it can take a lot of time. To manually calibrate the power controller, do the following:
- Charge your device to 100% capacity. Then, without removing it from charging, turn it off, and only after completely turning it off, pull out the charging cable.
- In the off state, reconnect to the charger. Wait for the device to report a full charge.
- Disconnect the phone (tablet) from the power supply. Use it until it turns itself off due to battery drain.
- After the battery is completely dead, connect your phone or tablet to the block and charge to the maximum. Done - the correct values should be recorded in the controller.
As a rule, this method is an ultimatum. If after such manipulations problems are still observed, it is possible that the reason is physical problems.
Method 4: Deleting controller readings via Recovery
Perhaps the most difficult way, designed for experienced users. If you are not confident in your abilities - try something else, otherwise do everything at your own peril and risk.

Summing up, let us remind you again - if none of the above helped you, then most likely the cause of the problems is in problems with the battery or the power controller itself.