Instructions on how to flash the official firmware of the Nexus device (Video). Instructions on how to flash the official firmware of the Nexus device (Video) Alternative firmware for lg nexus 5
Read also
Sometimes there comes such a turning point when the firmware gets bored and you want to sit on the "good old stock". This instruction is also suitable for people who have some technical problems and need to return the device under warranty (remove the hack flag).
Instructions for installing stock firmware on Nexus 5
All your data will be deleted. If you want to save important information, then I recommend making a backup. Everything you do, you do at your own peril and risk. The author is not responsible for "bricking" your device.
Preparing to flash the drain on the Nexus 5
- We charge the device at least up to 70%.
- Download drivers, unpack to any folder.
- Install the drivers: “First, you need to put your smartphone into Fastboot mode (Power + Volume down for 10 seconds when turned on). After we go to the device manager -> PCM on our device -> properties -> driver -> update -> search for drivers on this computer -> select a driver from the list of already installed drivers -> show all devices -> install from disk -> we reach to the folder with our drivers, select the file android_winusb.inf -> Ok -> Android ADB Interface -> Yes -> install.»
- Download ADB and Fastboot depending on the bitness of the OS:,. Unpack the archive to any folder. It is necessary that there are no Russian letters and numbers on the way. I unzipped my folder to d:\ADB
- Download the firmware file.
Installing stock firmware on Nexus 5
- We put the Nexus 5 into Fastboot mode:
- We turn off the smartphone.
- Press the Power + “Volume -“ button for 10 seconds, fastboot starts
- We connect the device to the computer
- Unpack the archive with the firmware into the ADB folder. It is necessary that you unpack not a folder into a folder, but the files that are in the archive with the firmware into the folder with ADB. If this point is not entirely clear, you can watch the video.
- We go into the folder with ADB (I have the ADB folder in the following path “D:\ADB”). And run the flash-all.bat file
We are waiting for the end of the firmware
If the Nexus 5 is stuck in an eternal download
- Turn off the smartphone by holding the Power button for 10 seconds
- Press the Power + “Volume -“ button, fastboot starts
- We go into Recovery Mode
- We see an android with an exclamation mark, hold down the Power button and the volume “-“
- Select wipe data / factory reset, confirm the choice.
- And now we reboot the smartphone using the reboot system now item
- Enjoy stock firmware
For returning Nexus 5 under warranty
If you are going to return the smartphone under warranty, then you need to lock the Bootloader and reset the hack flag, otherwise you will be denied warranty. This flag tells the service center if the Bootloader has ever been unlocked.
Resetting the "hack flag" and locking the bootloader on the Nexus 5

If you unlock the bootloader again, then Device tampered will take on the value again true.
Good day. Earlier, I wrote a couple of topics that you will need for firmware. In them and unlock the bootloader of the device necessary for further work. Today we will write detailed instructions on the firmware and at the end of the topic we will post official firmware for Google Nexus 5. When you have checked the readiness of your device for flashing, make sure that the battery charge is at least 50%, install the drivers downloaded from the previous topic and install as described there and unlock the bootloader. Once you have completed these steps, transfer your device to the engineering menu using the smartphone buttons.
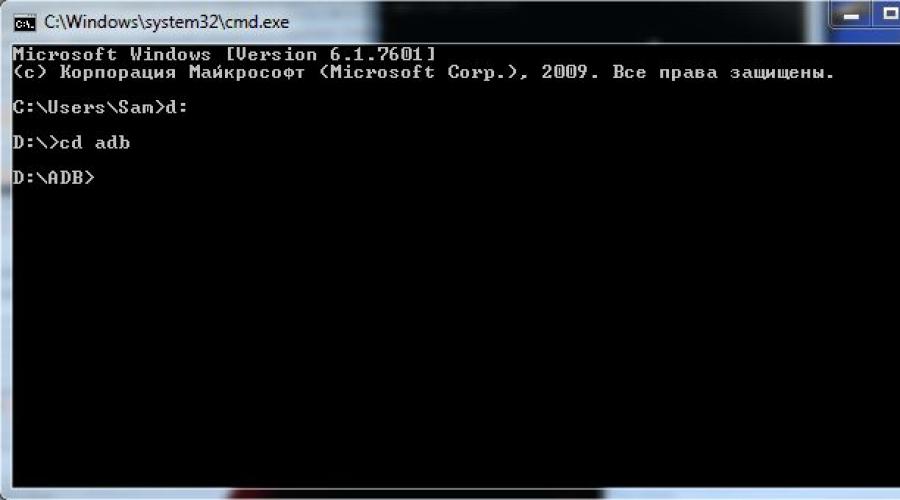
Now let's get started. Open on your computer drive C. On this disk you need create an empty folder titled " Nexus5". Download and unpack the archive with ( adb/fastboot) . The file size in the archive does not take 10 MB. You can download from our website, free of charge and without registration. After unpacking, you should get the same as me. See the picture below.

Once all files have been transferred, go to or open a command prompt. All work that will be performed with the device will be directly registered through the command line. For those who do not know how to open it, here is a small instruction.
- Go to start and in the search column write "Command Prompt".
- Go to start and select "Run" in the window that appears, type cmd.
- Press the key combination Win+R.
- Start - All Programs - Accessories - System Tools - Command Prompt.

Once you have opened the command prompt, enter the following code in it: "cd C:\Nexus5". This will allow your computer to visually open the folder that we recently created and will work with next. The folder can be created on any drive, but note that the folder path command will also be changed. Better do as it is written and shown here. Make sure your smartphone is set to engineering menu or bootloader / fastboot mode.

Now you need to check for the presence of drivers. To do this, you need to enter one more code: fastboot devices. If you see your device number on the command line, and you can look at the bottom of the screen in bootloader / fastboot mode, then you did everything right. You can move on to the next steps.

Download the necessary firmware build for your device and unpack the archive on disk "c" in the "Nexus 5" folder. Now you can move on. Firmware can be done in two ways, but we are preparing everything for beginners, so we will consider only one.
- Open the Nexus 5 folder on your computer.
- Turn off the device and put it into the engineering menu or bootloader mode.
- Connect it to your computer via USB cable.
- Run the flash-all.bat file from the Nexus5 folder.
Wait for the download to complete, it took me about 10-15 minutes. When the firmware is finished, reboot your device. The first launch will take some time, so do not rush to turn it off.
That's all, thank you for your attention.
Detailed step-by-step instructions for flashing LG Nexus 5 (Hammerhead) to the original firmware with an unlocked bootloader in Fastboot mode.
Attention!
For all further manipulations with the device, an unlocked bootloader is required. To unlock it, this instruction can help.
Installation instructions
- At the command line enter " flash-all.bat” and wait for the firmware installation to complete.
- Put your phone in bootloader mode.
- Use the volume buttons to select an item recovery mode and press the power key to confirm the selection.
- When a small recumbent robot appears with a triangle and the text " no command”, hold down the power button and press the volume up key once, then immediately release them simultaneously. The phone will be loaded into stock recovery.
- Now you should select the item " wipe data/factory reset” and on the next screen - “ Yes -- delete all user data».
- After the data deletion is completed, select "reboot system now".
- To clean the system:
- fastboot erase boot
- fastboot erase cache
- fastboot erase recovery
- fastboot erase system
- Now you need to flash the bootloader and reboot:
- fastboot flash bootloader bootloader-hammerhead-*.img
- fastboot reboot-bootloader
- Next, flash the modem and reboot the device again:
- fastboot flash radio radio-hammerhead-*.img
- fastboot reboot-bootloader
- And finally, flash the system in this way (if you remove the -w parameter, then user files will be saved):
- fastboot -w update image-hammerhead-*.zip
- Or unzip the archive image-hammerhead-*.zip and manually flash all system components as follows:
- fastboot flash system system.img
- fastboot flash boot boot.img
- fastboot flash recovery recovery.img
- fastboot flash cache cache.img
- To completely clear user data, enter:
- fastboot erase userdata
- fastboot flash userdata userdata.img
- Wait for the operation to complete and restart the phone manually:
- fastboot reboot
Create a folder in the root of the C:\ drive named " Android».
Download the archive with the original firmware image and unpack it into the "Android" folder. You can find the current version on the official website.
Open a command prompt and go to the created Android folder with the command " cd c:\Android\” (commands are written without quotes).
Connect your phone to the computer using a USB cable.
Make sure the computer finds the device via ADB.
To do this, enter " adb devices' to the command line. On the request that appears on the phone for permission to debug ADB on this computer, you must click " Ok", while selecting the item" Always allow from this computer". If the device is visible, the text " List of devices attached” and a list of all devices (for example, xxxxxxx device). If “offline” is written instead of “device” or the list is empty, then you need to update ADB, check the drivers / cord, change the USB port / computer.
Reboot your phone into bootloader mode.
To do this, turn off the device, turn it on while holding down the Volume Down key and the Power button, or enter " adb reboot bootloader". If everything is done correctly, the inscription will be displayed on the smartphone screen Start and "lying" on the back of the Android with an open lid.
The first time you connect to a computer in Fastboot mode, the system may request drivers. To install them, you must specify the path to the folder with the downloaded drivers. If this does not happen and the device is not detected, you need to go to " device Manager", expand the drop-down menu" Other devices” and double-click on the item “ unknown device" (or " Android 1.0”) with an exclamation point in a yellow triangle. In the tab " Are common» press the button « Update Driver", refuse to search the network and specify the path to the folder with the drivers, while activating the item" Including subfolders". You may receive a warning that the publisher could not be verified, but you should still ignore this message and continue with the installation. After a while, the drivers will be installed.
Check the availability of the device in bootloader mode by entering the command " fastboot devices". If the device is connected correctly, then the device ID will be displayed with the word "fastboot" (for example, " xxxxxxx fastboot"). If nothing is displayed or "waiting for devices ...", then you need to update the drivers, change the USB port, or try to do these steps on another computer.
Now you can start installing the firmware in one of two ways. Both methods assume that the phone is in bootloader mode.
Method 1 (Automatic)
At the end of the operation, the device should reboot. The initial startup may take some time, but no more than five minutes. If after this time the device is still "hanging" on the boot, you must perform the so-called. hard reset. For this you need:
This time the device should boot without problems.
Method 2 (Manual)
On the command line, perform the following steps one by one:
After a while, the device will boot up and be ready for further work. The initial startup usually takes a long time, but no more than five minutes.
A week ago, I became the owner of the LG nexus 5 phone. The advantages and disadvantages of the phone are not a dudu to describe - not the topic of the article. I will share my thoughts on the question: What is the best firmware to install on lg nexus 5? Having received the phone in my hands, I had no doubts: it was necessary to sew. But what firmware is best for lg nexus 5. There are a lot of firmware for it. Since I’m not the first device on android, naturally I first looked towards the Cyanogen mod 11 firmware, which proved to be excellent on and. After reading the forums for installing Cyanogen mod 11 on lg nexus 5, I came to the conclusion that while there is no stable Cyanogen mod 11 for lg nexus 5, it is better not to install it, but to wait. Since people who put yanogen mod 11 on lg nexus 5 experience problems with the camera and involuntary reboots of the device, again due to the use of the camera. From the nightie to the cyan nightie, the result seems to be corrected, but not massively. As the forums show, in order for the cyan to work stably on the nexus, you need to additionally reflash the custom franco kernel, there are fewer reboots and glitches on it. But I'm not such a fan of firmware. I would still suffer with a blade, but when you have a good, powerful device in your hands, you don’t really want to catch reboots and other glitches. I want everything to work out of the box. After reading more forums, I came to the conclusion that if I reflash lg nexus 5, then Cataclysm firmware is best suited for this. Based on the stock firmware 5 of the nexus, installed as root + a bunch of other tweaks on the settings. In general, people assured that Cataclysm works stably, there are no reboots and problems with the camera. Great, I thought, I saw Cyanogen mod 11 at work, let's look at another firmware.
Well, actually instructions for installing Cataclysm firmware on lg nexus 5:
1. To work, you need to download for our nexus.
2. Unzip the downloaded archive to any place convenient for you on your computer, in our example, we will consider the path C:\Nexus5
, that is, suppose that the archive was unpacked to the root of the disk WITH
and its content is in the folder Nexus5
.
All work is done on the Command Prompt, to run it - press the Win + R key combination, type cmd in the input window and press "Open" / Enter key, or find the command line in Start - All Programs (Applications) - Accessories (Utilities) - Command line.
In the command line, go to the directory with the necessary software with the command: cd C:\Nexus5
3. Put your smartphone into bootloader / fastboot mode by holding down the buttons at the same time: Volume down + Power button (Volume down + Power) and connect it to the computer.
Install the drivers, the drivers are present in the folder usb_drivers
in the archive you downloaded with the necessary software
driver installation note:
- Open Device Manager on your computer.
- Once opened, you will see a list of all devices connected to the computer in Device Manager. Just find your Nexus 5 (it will most likely be in a different list of devices with a yellow exclamation mark) and right click and choose Update Driver.
- Choose: "Search for drivers on this computer", after you will see a window with an offer "How do you want to find a driver?"
- Choose: "Search my computer for a driver"(Browse my computer for driver software) and then select the folder where you unpacked the downloaded Google USB Driver, select the extracted folder usb_driver and check the box "Including subfolders"(Include subfolders)
- During installation (as a security check) windows may ask for your permission to install drivers published by Google Inc. (would you like to install this device software) - click the button "Install"
- After the installation is complete, you will see an updated list of devices, including the Nexus 5 "Driver installed successfully"
- .On the command line, run: fastboot devices. If your smartphone appears in the list, then you did everything right.
Bootloader unlock
Run the command: fastboot oem unlock
A message will appear on the smartphone screen warning you to unlock the bootloader, use the volume buttons to select Yes and confirm the selection with the Power button.
After unlocking the bootloader, it is imperative to reboot the smartphone - run the command: fastboot reboot
After rebooting into the system, download the archive to your smartphone
Installing custom recovery
Put the smartphone into bootloader / fastboot mode by holding down the buttons at the same time: Volume down + Power button (Volume down + Power) and connect it to the computer.
(.img) must be downloaded to the main working folder (remember, in our case C:\Nexus5).
Run the command: fastboot flash recovery filename.img
where filename is the filename of your recovery image (for example − recovery-clockwork-touch-6.0.4.5-hammerhead.img
)
Go into the newly flashed recovery - in bootloader / fastboot mode, using the volume buttons, select the Recovery Mode item and confirm the selection with the power button (Power).
Further, without leaving the recovery, we proceed to obtaining Root rights, described in the next paragraph of the instruction in the 1st way. This must be done immediately after the recovery firmware, otherwise, without Root rights, when the smartphone is rebooted, the newly installed custom recovery may fail.
4. Obtaining Root rights
Now that the bootloader is unlocked on your smartphone and custom recovery is installed, you have two ways to get root rights:
Method number 1- flashing SuperSU binary files in recovery on stock firmware.
Enter recovery - To enter recovery, in bootloader / fastboot mode, using the volume buttons, select the Recovery Mode item and confirm the selection with the power button (Power).
Instructions for ClockworkMod Recovery(CWM):
- Install zip from sdcard > Find the previously downloaded SuperSU zip archive and select it
- Confirm the installation by selecting "Yes". The installation shouldn't be long, once it's finished you can reboot.
Installing the Cataclysm Firmware
Download custom firmware cataclysm to your smartphone (remember the location of the downloaded archive). Turn off your smartphone and go into recovery (in bootloader / fastboot mode, use the volume buttons to select the Recovery Mode item and confirm the selection with the power button (Power)).
The general firmware installation scheme is the following sequence: wipe data + wipe cache (factory reset), wipe dalvick-cache.
Instructions for ClockworkMod Recovery (CWM):
- Wipe data/Factory reset
- Wipe cache partition
- Advanced > Wipe dalvik cache
- Install zip from sdcard > Choose zip from sdcard > Find the previously downloaded archive with custom and select it > Confirm the installation by selecting "Yes". , then restart your smartphone. Gapps are not installed in this firmware version. They are included in it.
Keep in mind that for the first boot of the system after installing custom firmware and hard reset (wipe data / factory reset), the smartphone may take much longer than for subsequent normal downloads.
Almost all Nexus 5 owners will have to install a third-party (custom) kernel sooner or later. The reason for this is the "jambs" in the stock Google core. Firstly - the thermal threshold, and secondly - low autonomy. So which core should you choose? In this thread, I will talk about the seven best custom kernels for Nexus 5!
7. Franko Kernel
Oddly enough, the core francisco-franco took last place. I have been using this kernel since version r16, this version was the most balanced: good autonomy and good performance. But that version also had shortcomings: interface lag, no native USB OTG support, too few settings. The next versions fixed the last 2 problems, but the lags only got bigger with each version. The current version of r47 also has problems with performance and autonomy: you can’t play Asphalt 8 comfortably, and the smartphone dies after a few hours of browsing.
Outcome:
Performance - 8.5/10
Autonomy - 8/10
Features (number of kernel settings) - 9.5/10
Overall rating - 26/30
3. Chaos Kernel

This core has very little left to reach the ideal: maximum performance, good autonomy, a lot of settings and features. So what's wrong with this core? End of support for AOSP. If earlier I used this kernel with admiration, then one fine day after installing the update, I received a brick! Having restored my Googlephone, I got into the topic of discussion of this one, where it was clearly written: "Only for CAF ROMS". Now only CM and CM-like firmware supports this kernel
Outcome:
Performance - 10/10
Autonomy - 9/10
Overall rating - 29/30
2.ElementalX
Kernels from Flar2 have always been exemplary for all other kernel developers: maximum performance, best autonomy, extensive features. ElementalX is truly an ideal core and it would have been in first place if mcaserg had not decided to experiment.
Outcome:
Performance - 10/10
Autonomy - 10/10
Features (number of kernel settings) - 10/10
Overall rating - 30/30
1. Ultimate Kernel
We all know the main disadvantages of the Nexus 5: poor battery life and mediocre sound. It would seem that these are hardware problems and there is no way to solve them. It turned out you can! Core from respected mcaserg-a not just perfect, it's an ideal among the ideal! Together with him, he began to make his core garynych2010, and at first their nuclei were similar. But with each version, the UK got better and better, and as a result, the versions were distributed as follows: UK14.2 for maximum performance, UK26 for maximum autonomy. Unfortunately developer left, so version 26 is the last one forever, but that doesn't make this kernel any worse. sewn into it faux sound, which significantly increases the sound quality and volume on the Nexus 5. MP-resolution optimizations have also been carried out in the kernel, which significantly increases autonomy. So with 5 hours of screen on ElementalX with string parameters, we managed to get a little less than 2 days of work, and on UK26 with the same 5 hours as much as 3(!!!) days! The capabilities of this core exceed the capabilities of all the cores in this top combined, and the performance is so high that you will not see a single lag in the whole day of playing the heaviest games. The smoothness of the interface at the drain level, that is, the maximum
Download
Outcome:
Performance - 11/10
Autonomy - 11/10
Features (number of kernel settings) - 11/10
Overall score - 33/30
Thank you for your attention! I hope this topic helps Nexus 5 owners!