What can you do with root rights on Android? (the best options). Getting root rights through a computer

Read also
Want to take full control of your smartphone? Having received root rights on Android, this is possible, because the user opens wide opportunities. However, you will have to say goodbye to the warranty, and also be prepared for the fact that the smartphone may become unusable. All in all, not for the faint of heart.
Smartphone manufacturers and vendors have a vested interest in persuading users to opt out of receiving root, because if you make a mistake in the process of rooting, you can cause irreparable harm to your gadget.
Still, the potential benefits justify the risks. With superuser rights, you can:
- remove unnecessary software that eats memory,
- increase processor performance,
- customize each interface element for yourself.
We invite our readers to walk with us through all the necessary steps for rooting a phone. On some devices, the process may take only a few minutes. Others will have to deal with. Anyway getting root right - The best way Realize the full potential of your Android smartphone.
What is root rights on Android?
Rooting a smartphone or tablet is the same as removing the restriction on access to system files on the iPhone (jailbreaking). Both the first and the second allow you to dive into the depths of the entire operating system and smartphone subsystems. Also, having root-rights, you can bypass any restrictions set by the manufacturer or supplier.
When obtaining root rights, you should be careful and accurate in your actions. And it is better to create a backup copy of the data before starting the process.
Borrow Need Root Rights on Android: Benefits
One of the main reasons users resort to rooting their Android is to get rid of unwanted software that can't be removed without extended permissions. On some devices, access to earlier hidden settings, for example, to wireless teasing (you can distribute Wi-Fi from your gadget).
Among other advantages: the ability to install special programs and custom firmware, and those, in turn, can further expand the functionality and increase the performance of a smartphone or tablet.
Really worthy programs for rooting, in fact, not so much, but enough to have something to work with. Let's say with some programs you can create a backup android data and upload it to a cloud service, block ads in the browser and applications, create a secure connection while browsing the Internet, overclock the processor or use your gadget as an access point to a wireless Internet connection.
Flaws
Rooting on Android has four potential pitfalls:
- Cancellation of Warranty A: Some manufacturers or vendors will void the warranty if the device has been rooted. However, do not forget that this is a reversible process, and root rights can always be removed. If you need to give the device for repair under warranty, we simply restore all the data from the backup, thus returning the gadget system to its original state.
- Non-working smartphone(brick- folk.): if something goes wrong while rooting, there is a risk that the phone will come into disrepair. Therefore, you should make sure that the instructions are up to date on this moment and strictly adhere to it.
- System security breach A: Rooting comes with a security risk. Depending on the services and applications used on the device, various kinds of vulnerabilities may occur. Also certain malware can use root rights to steal user data, install other malicious applications, or launch a network attack on other devices.
- Disabling apps : Some secure apps and services don't work on a rooted device, such as payment systems Android Pay and Barclays Mobile Banking. Services with digital copyright protection, such as Sky Go and Virgin TV Anywhere, will not launch either.
Programs for obtaining root rights on Android
The easiest way to root a gadget on Android is to use specialized applications, including:
- King Root,
These programs have stood the test of time and have proven themselves well. They allow you to lay the whole process in five minutes. But some of them are not compatible with older versions of Android.
It is claimed that more than 10,000 different gadgets can be rooted with this program, but only from Android 2.0 to Android 5.0. Support for Android 6.0 devices is limited.
List of supported devices is constantly increasing, but many of them work on Android 6.0.
compatible with older devices:
- Verizon Galaxy S5
- Galaxy S4 Active
- Nexus 5
- AT&T Galaxy Note 3
- Verizon Galaxy Note 3
On new devices with Android 6.0 or higher (such as Galaxy S8 or Galaxy S7 Edge), the above apps will not work. They are also compatible with Android 6.0, but Android 7.0 Nougat is a different OS, here new feature"verified boot" checks the integrity of system files to protect the device from unauthorized access third party applications to root rights. However, it makes it somewhat difficult to get root rights.
Kingo Root- one of the few programs compatible with Nougat that allows you to carry out the process of obtaining root rights in an instant. In the list of supported phones:
- Alcatel
- coolpad
- Google/Nexus/Pixel
- Huawei
- Lenovo/Motorola
- One Plus
- Samsung
Getting root rights through the command line and Fastboot

The following instructions are suitable for getting superuser rights on a Samsung Galaxy S7, S7 Edge, Samsung Galaxy S6 or S6 Edge with Android 6.0 Marshmallow. There will also be a description of rooting a smartphone based on . The instructions below are suitable, in fact, for any smartphone, but will require the user to be careful and strictly follow the rules.
Preparing to get root rights
Before starting the process, you should back up all important data. And before installing new firmware, the smart move is to back up the current one.
It's also best to have your device fully charged.
To perform the operation, you will need to enable USB debugging and factory unlock.
Open "Settings" on your device. If the Developer Options item is missing, enable it as follows:
- Back to "Settings"
- Turn on USB debugging
Install Android SDK
Before the next step, you will need to install the Android Debug Bridge on your computer as well.
- Download the Android SDK from here. The developer platform is available for Windows, Mac and Linux (this guide is for Windows)
- Install anywhere, but we recommend to drive C.
- After installation, launch the Android SDK through the Start menu
- The SDK Manager will open. Uncheck all items except Android SDK Platform-tools at the very top
Installing device drivers
For a correct connection with a smartphone or tablet, you will need to install the appropriate USB driver.
Follow the installer's instructions. After installation, we move on.

Now we will unlock the bootloader. The bootloader is a program that loads the gadget's OS. It determines which applications are launched when the smartphone or tablet is turned on.
Some devices require a key to unlock the bootloader. Motorola, HTC, and Sony have step-by-step instructions on this topic. But note that you will need to create a developer profile.
After completing this operation, we can proceed to the next step. And now you need to put the device in mode fast loading(fastboot). On most models, it is called by holding the power button and the volume down button simultaneously for ten seconds during the reboot (on HTC, you must first press and hold the volume down button, then, without releasing, the power button).
Commands in fastboot
After transferring the device in fastboot mode, open command line on the computer. If a code is required, a long string of characters will be displayed. We insert it into the appropriate field on the developer's website, fill out the form and wait for email a message will come with a key, a file and further instructions.
To unlock the bootloader, connect your gadget to the computer and switch to fastboot mode again. Then open the command line on the PC.
For Google Nexus and most smartphones, the commands are as follows:
- For Nexus and most smartphones: type "fastboot oem unlock" (without quotes) and press "Enter"
- For Pixel: Type "fastboot flashing unlock" (without quotes) and press "Enter"
- The command for Motorola looks a little different: we enter "oem unlock UNIQUE_KEY" (without quotes), replacing "UNIQUE KEY" with the received code.
- For HTC: enter "unlocktoken Unlock_code.bin" (without quotes), replacing "Unlock_code.bin" with the resulting file.
We confirm the unlock and get one step closer to getting root rights.
On devices of some manufacturers and suppliers, unlocking the bootloader is not provided, but this does not mean that it is not feasible in principle. Again, in this case, it is worth looking for information on specialized forums.
We get root rights on Android using programs
There are many ways to get superuser rights. Here are some of the most preferred ones.
Root rights on Android using CFRoot

CFRoot is a restriction removal tool from Chainfire. I must say, obtaining rights through it is not the easiest way, but at least one of the most reliable. The program is compatible with more than 300 gadgets and provides the user with step by step instructions during the process, so that rooting is simplified to the maximum.
Download the appropriate ZIP file for your device.
Then we perform the following steps:
- Extract the folder from the archive.
- We find the root-windows.bat file there. We open it.
- We are waiting for the script to do its job, and press any key
- Next, the device should automatically reboot with already root rights.
Rooting with BaiduRoot

Baidu Root- a utility from the Chinese company Baidu, which is compatible with more than 6000 devices from Android 2.2 to Android 4.4. It is clear that the program is in Chinese, but there is also a version in English and Russian.
Removing restrictions with Baidu Root is one of the most simple ways. After downloading the program, all that remains is to follow the step-by-step instructions.
First, unzip the ZIP archive. We find Baidu_Root.RAR and extract the contents (on Windows, you can use the 7-Zip program for this).
And manually install Baidu Root. To do this, we do the following:
- On a smartphone or tablet, go to "Settings", then go to the "Security" section
- Put a tick in the box " unknown sources» and agree with the pop-up message
- Open the folder with BaiduRoot and click on the file with the APK extension. Follow the instructions to complete the installation.
Now we are working with BaiduRoot.
- Open the program and accept the license agreement
- Click on the "Root" button in the center of the screen
- After a few seconds, a message will appear stating that the device has been successfully rooted.
Root rights with Towelroot

The way to get root rights using Towelroot is one of the most optimal and does not require any extra actions from the user. Unfortunately, the program is not compatible with all gadgets - some smartphones from Motorola and HTC are not supported.
In addition, the utility is only compatible with devices whose kernel was built before June 3, 2014. You can find out the kernel assembly by going along the "Settings" path → "About the device", and, scrolling below, find the item "Kernel version".
In order to use Towelroot, you will need to check the box "Unknown sources" in the device settings (the process has already been described above). After that we can move on.
- Open Towelroot.
- Click on the "Make it rain" button. If the gadget starts to reboot, the rooting process has failed. If not, then the device was successfully rooted.
Root Android with Kingo android root
Kingo Root can be installed on a Windows computer or directly on a device that needs to be rooted.
To get started, it's worth checking this list to find out if it contains a device for which we are going to get root rights.
Then we find the version of Kingo Android Root for Windows and install the program. Or download the version for the gadget (before that, we check that the "Unknown sources" item in the settings is ticked), and also install it.
Those who will be working with the Windows version should enable USB debugging on their smartphone.
And now we perform the following steps:
- Run Kingo Root on the computer and connect the device via USB
- The program will automatically detect the user's gadget and offer to root it. Select "Root" (Root) and just wait - the whole process will take Kingo only a few minutes
Those who want to do without a computer should do the following:
- Install Kingo Root
- Opening the program
- If the device is compatible, there will be a “One Click Root” button on the screen. Click on it and be patient - the process can take a lot of time
- After successfully obtaining unlimited rights, a large checkmark will appear in the center of the screen
We get root on a phone or tablet with using KingRoot

As with Kingo Root, KingRoot has a version for Windows and for Android. Since the program supports more than 100,000 devices, the chance that it is compatible with a smartphone or tablet that needs to be rooted is very high.
You can use both the Windows version and the Android version, but we recommend using the latter. After installation, follow the instructions below:
- Open KingRoot.
- If the device is compatible, there will be a “Try to Root” button on the screen, click on it
- Be patient - the process may take some time
- In case of successful operation, a large checkmark
Programs that will be needed after obtaining root rights
Perhaps there is no other mobile OS that is as diverse as Android. That is why universal way There is no root access for this platform. If all the options mentioned above do not fit, do not lose heart. Surely there are instructions on the web for desired device you just need to find them.
After finding a suitable guide, it remains only to follow all the instructions. The process can be lengthy and some difficulties may arise. But if you follow the instructions, you can avoid many mistakes and minimize risks.
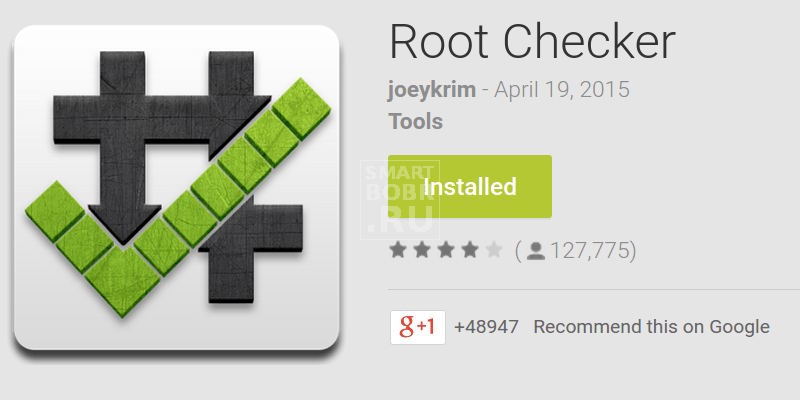
Download Root Checker
To check how successfully the rooting went, we need one application. Generally in Google Play There are several applications with which you can check for superuser rights. Root Checker is very popular for this purpose. You just need to install and run the program.
Installing the Root Manager
Rooting makes your gadget more vulnerable to security threats. With a root-rights manager, it will be more calm. As a general rule, any app that asks for superuser rights also asks permission from the user. It's for such applications that programs like SuperSU are needed. With SuperSU, you can accept or reject site requests for root rights, monitor applications that infringe on root rights, and automatically grant access permission. SuperSU also determines the number of accesses to superuser rights from a particular application.
How to remove root rights on Android
Even with all the benefits, some may want to return everything as it was. In any case, before doing this, it does not hurt to create a backup copy of the data.
Get rid of root-rights with SuperSU

To remove root rights using SuperSU, just go to the program settings and select the option " Complete removal root rights" (Full unroot). Really very simple.
Launch SuperSU. Go to "Settings", scroll down and find the item "Full unroot". Click on it, then click on "Continue" - and the process of removing superuser rights will begin.
Getting rid of root rights with Universal Unroot
There is one app that does all the hard work. It's called Universal Unroot and it handles root removal on most Android devices. However, not everything is as smooth as it seems.
For example, many Samsung smartphones are incompatible with the program, and on LG gadgets, after successfully removing root rights, the application will show that they seem to be there.
Delete using native firmware
Installing factory firmware is one of the most reliable ways to remove root rights. All traces of rooting will be removed, but let's say right away: this process is not the easiest.
First of all, download factory firmware for your device to your computer.
Then we extract the contents of the archive. Inside there will be another one - unpack it. The unpacked folder should contain a bootloader image, various scripts and another ZIP archive. Guess what to do with it?
You will also need an Android debug bridge (Android Debug Bridge) and Fastboot on your computer.
- Download Android SDK Tools from the official site. There is a version for Windows, Mac and Linux. The instructions below are relevant for Windows.
- Install anywhere, but it is better to install on drive C.
- After installation, we launch the Android SDK, we launch it through the Start menu
- The SDK Manager will open. Uncheck all items except Android SDK Platform-tools at the very top.
- Select "Install 2 packages" on the top right
- Accept the license agreement and click "Install"
Make sure bootloader unlock is enabled
Open Settings on your phone or tablet. If the Developer Options item is missing, enable it as follows:
- Click on "About device" and find "Build number"
- Click on "Build Number" seven times and "Developer Options" will appear in the settings menu
- Back to "Settings"
- Open "Developer Options"
- Enable bootloader unlock
Now working on the computer
We transfer the boot.img file from the unpacked folder to the directory with the Android Debug Bridge.
Connect your smartphone or tablet to your computer. Then open the command line on the PC
And enter the following commands (as it is written here):
- adb reboot bootloader
- fastboot flash boot boot.img
- fastboot reboot
Removing root rights using the file manager
If the device is running on Android Lollipop or lower, you can get rid of root rights by deleting the files responsible for them. We recommend using a file manager such as ES File Explorer. In the program settings we find the item "Tools" and a list appears in front of us. To enable the ability to manage root rights, set the switch opposite the “Root Explorer” item to the on position.
- Finding the main disk of the device
- We go along the path "system" →» bin", delete the folders "busybox" and "su"
- Now we go from "system" to "xbin" and delete the "busybox" and "su" folders
- And finally, go to the system folder, then open the “app” folder and delete the supeuser.apk file
- Restart the device and you should be unrooted.
Removing root rights with over-the-air updates (OTA)
Sometimes the usual installation of updates "over the air" removes root rights. To update the software, go to "Settings" and go to the "About device" section. Also, do not forget that with some rooting methods, a rollback to the original state is impossible. In this case, you may need to install the stock firmware.
There is no rooting method that does not involve risk, so before doing this, you should back up your data, fully charge your device, follow the instructions exactly and take your time.
Quite a few specialized applications today require the phone to have so-called superuser rights or simply root rights, so people are starting to search the Internet for information on how to root Android. And to do this, there is a large number of in a variety of ways, each of which differs from the other in complexity, effectiveness and, ultimately, popularity.
Some of them are free, while others you have to pay. Some are done without a computer, while others can only be done through a PC. The problem is that some method can be very convenient, be performed without a computer and be good in all respects, but not suitable for your device. Therefore, several ways will be described below on how to get root rights. It is likely that at least one of them will fit your device - phone or tablet.
Framaroot
One of the most popular programs for obtaining root rights of a computer. Its use is as simple as possible - everything, in fact, is done in one click. Now the developers have removed the download limit, so this should not be a problem. Framaroot allows you to root your device for free, but exists on voluntary donations.
You can download it on Google Play, like other applications that work without a PC. How to set root rights with Framaroot? After downloading and installing, the window shown in Figure 1 will appear. There you need to select the item "Install SuperSU" ("Install Superuser" in some versions of the program).

Next, you will need to select a character who will manage root rights (this is such a "feature" of the developers). It is best to take Boromir. Next, a message will appear about the successful installation, which will mean that the device has received root rights. At the end, you need to reboot the device for the changes to take effect.
Baidu Root
Also very simple program. Questions related to how to make the device have root rights with its help do not even arise, because when you start it, there is one simple button at the top of the program window - “Get root”. Click on it, wait a while and everything is ready!

It is worth saying that this application is best downloaded as an .apk file. Practice shows that it will work better this way.
iRoot
iRoot also works without a computer. Therefore, with how to install this program, there are no problems either. It works on almost all Android versions starting from 1.3. To date, this is almost the most effective program that allows you to set root rights on a tablet or phone.

And its use is also extremely simple - we launch it, press the "Get" button, wait for the end of the installation and use it. That is, to assign superuser rights to the device, you need to click on a single button. But what do these very rights give!
You will be able to use big amount specialized applications for restoring, deleting, redistributing data and performing other tasks that are inaccessible to the average user.
root tool
This program is a set of tools related to root control rights. Among them is a tool for managing startup, creating a backup, and much more. With how to make the device a superuser using the Root Tool, there are also no difficulties - there is a "Get ROOT" button. You need to click on it, wait and everything will be ready.

Most of the programs listed above have analogues for computers, that is, such programs that need to be installed on a PC, then connect the phone and continue to work on obtaining root rights. But best of all, they work exactly in this form, as discussed above.
In addition, there are specialized and very effective programs that are installed on your computer and help root your Android phone or tablet. They will be discussed further.
MTKdroidTools
Here everything is already done directly through the PC. To start the program you need to download, install and run. Initially, it will look like the one shown in Figure 5. But when you connect a phone with OS android buttons"SuperUser", "Build .prop", "Backup" and others will become available. Actually, we will need to click "SuperUser" and wait for the installation to complete. With this program, you can remove unnecessary applications, create backups, prepare files for FlashTool and perform many other specialized functions.

Likely to work with MTKdroidTools and others similar programs You will need to enable USB debugging. To do this, the developer options must be available on the phone. How to make them available is described below.
- We go into the settings, click "About the device" and "Information about the software."

- We find there the field with the assembly number and touch it 7 times.

- Now a new item will appear in the main settings menu - "Developer Options". We go into them and turn on the item " USB Debugging».

In general, there is a lot of controversy regarding what such manipulations give - someone writes that ordinary users cannot perform such operations. But the fact remains: Without USB debugging enabled, most root applications will not work.
VRoot
In terms of ease of use, VRoot is comparable to applications that only work on the phone. In order to give root rights, you need to run the program, connect via USB cable phone and press the ROOT button in the lower right corner of the program window. After that, just wait until the end. this process.

Kingo Android Root
Another very easy to use program - run, connect the device, press the "ROOT" button at the bottom and wait.

An overview of three more programs can be seen below.
Data-lazy-type="image" data-src="http://androidkak.ru/wp-content/uploads/2015/08/Android-Root..jpg 500w, http://androidkak.ru/wp- content/uploads/2015/08/Android-Root-300x127.jpg 300w" sizes="(max-width: 500px) 100vw, 500px">
 If you have opened this article, then you probably already have at least some idea about the rights of the superuser. But on the rare occasion that you are regular user Android and opened an article out of idle interest - a small educational program.
Superuser rights, they are also root rights (from the English “root”, which means “root”) - this is the ability to write, change and delete information located in the system (or root) partition file system. This concept similar to administrator rights on Windows and applies to UNIX-based operating systems (Linux, Android, Tizen, etc.)
Root rights can be obtained on almost all Android devices, and we will definitely go through the most popular ways to get them, but first, let's answer two very important questions: is what we are going to do now safe, and is it worth it.
What are the consequences of obtaining root rights
Data-lazy-type="image" data-src="http://androidkak.ru/wp-content/uploads/2015/08/vnimanie.jpg" alt="please note" width="145" height="121" srcset="" data-srcset="http://androidkak.ru/wp-content/uploads/2015/08/vnimanie..jpg 300w" sizes="(max-width: 145px) 100vw, 145px">
!}
 First of all, answer the question - have you read the warranty agreement that came with your phone? If you read it, then you know that getting root rights is a gray area and whether your guarantee will remain with you after the process is completed depends only on the manufacturer's policy.
Next, remember one thing - superuser gives you full access. FULL. That is, if it suddenly occurs to you to delete important system files, no one will stop you. So keep a close eye on which programs get these rights from you, and also consult with others, more experienced users Android before doing something stupid.
What are the benefits of having root privileges?
Data-lazy-type="image" data-src="http://androidkak.ru/wp-content/uploads/2015/08/android-vigody.jpg" alt="Benefits of obtaining rights" width="159" height="50" srcset="" data-srcset="http://androidkak.ru/wp-content/uploads/2015/08/android-vigody..jpg 300w" sizes="(max-width: 159px) 100vw, 159px">
!}
 The list of what can be done with root rights is simply huge. Just take a look at the most popular reasons for getting superuser privileges!
IMPORTANT: The parentheses indicate the program that allows you to perform this action.
- Removal preinstalled programs a la Facebook or Twitter from the system partition (Titanium Backup);
- Migrate application cache from internal map memory to external (FolderMount);
- Transferring a section with applications to a memory card (Xposed App2SD);
- Global modification of the interface with the ability fine tuning(almost all Xposed modules);
- Disabling ads in all applications (Adaway);
- Hacking in-app purchases from PlayMarket (Freedom);
- Disable license verification in non-crackable applications, as well as their hacking (Lucky Patcher).
Read also: How to enter engineering menu Android devices
And that is not all! In fact, once you have root access to your phone, you can make just about anything out of it. And if your fuse has not cooled down yet, let's move on to the actual process of obtaining root rights.
Instruction
data-lazy-type="image" data-src="http://androidkak.ru/wp-content/uploads/2015/08/Android-s-root-pravami.jpg" alt="Rooted android" width="165" height="91" srcset="" data-srcset="http://androidkak.ru/wp-content/uploads/2015/08/Android-s-root-pravami..jpg 300w" sizes="(max-width: 165px) 100vw, 165px">
!}
 Unfortunately, you can’t just turn on root access on Android - manufacturers have tried to protect their creations from the crooked hands of users, and this is, in fact, right - otherwise the number of calls to service centers would increase significantly. But this does not mean that it is impossible to get root-rights at all. Moreover, for most phones, this procedure is extremely routine and takes only a few minutes.
There are many ways to get root rights and as in our other instructions, we will go from simple to complex.
1. From the device itself
Data-lazy-type="image" data-src="http://androidkak.ru/wp-content/uploads/2015/08/google-play-logo-274x300.png" alt="google play market" width="92" height="100" srcset="" data-srcset="http://androidkak.ru/wp-content/uploads/2015/08/google-play-logo-274x300..png 405w" sizes="(max-width: 92px) 100vw, 92px">
![]() Despite the fact that many manufacturers block access to their smartphones as much as possible, hackers from all over the world from time to time find loopholes that allow them to get rights with just one tap on the screen. And other manufacturers simply trust their users and even publish algorithms to bypass their protection. It is on this principle that various automatic recipients of root rights are based, the most famous of which is KingRoot.
Despite the fact that many manufacturers block access to their smartphones as much as possible, hackers from all over the world from time to time find loopholes that allow them to get rights with just one tap on the screen. And other manufacturers simply trust their users and even publish algorithms to bypass their protection. It is on this principle that various automatic recipients of root rights are based, the most famous of which is KingRoot.
All it takes to root your device with KingRoot is to press one button. Of the shortcomings, KingRoot is not the most familiar rights manager for old Android users. Instead of the usual SuperSU, KingRoot uses its own program, which, however, is not very different from SuperSU in terms of functionality.
In addition to KingRoot, the Framaroot program is popular, as well as numerous other applications for Android devices, such as VRoot,
2. Using a PC and special programs
Data-lazy-type="image" data-src="http://androidkak.ru/wp-content/uploads/2015/08/android-i-pk-300x258.jpg" alt="Connect android to pc" width="150" height="129" srcset="" data-srcset="http://androidkak.ru/wp-content/uploads/2015/08/android-i-pk-300x258..jpg 473w" sizes="(max-width: 150px) 100vw, 150px">
!}
 Just because you can't send unlock instructions from within the Android system doesn't mean it can't be done at all. At least, according to this principle, programs such as SuperOneClick, Kingo and many others operate. As the basis of their work, they use the USB connection of an Android smartphone and a PC, through which commands are given.
Read also: How to reinstall android Samsung phone step by step
In order to be able to do this, you need to enable the “USB debugging” option in the settings of your Android smartphone. It is located in the hidden “For Developers” section, and to open this section (if it is closed), go to the “About tablet” section and click on the “Build version” item ten to fifteen times.
After you have enabled it, simply connect your Android smartphone to your PC (in Mass Storage mode, of course) and launch the program of your choice, then follow the instructions for working with it. You will have to think for yourself which program to choose and how to use it - the number of Android devices is too large to be able to say with certainty which ones work with one program and which ones with another.
3. Using PC and ADB terminal
For those who do not know what adb is, we answer. ADB is a special protocol that allows your Android device to receive instructions from a computer over a USB cable. Due to the fact that ADB is part of the Android system itself, such commands in most cases take precedence over the security solutions of the phone manufacturer.
For ADB to work properly with your phone, you will need at least:
- Computer with Windows 7 operating system (newer operating systems may be unstable or not work at all with the necessary drivers);
- A set of adb drivers for your device (usually issued by the manufacturer);
- USB cable;
- Actually, a smartphone with the “USB debugging” option enabled in the settings;
- Unpacked into the “X://ADB” folder, where X is a (preferably) non-system drive, an archive with an ADB terminal.
Assembly companies portable devices operating under the control of the Android system, strive by all means to achieve high reliability of their solutions. Of course, there are exceptions in the form of Chinese models sold by software, but in general this is exactly the case.
One of the conditions for stable and long-term operation is to block any attempts to make changes to the structure of system files by the user. At the same time, such a limitation does not allow to fully reveal the full potential mobile device, so a way to bypass it has long been found.
Principle of operation
Before we look at "Android" through a computer, it makes sense to recall the structure of the system. Inside any gadget is a drive based on solid-state memory cells that contain Linux files. It is this system that underlies Android. In fact it is the same Windows folder, if we draw an analogy with the solution from Microsoft.

In normal operation, the user can only view what is recorded on this drive, and that is at best. And there is no question of making any changes to the system partition - requests are blocked by the settings. To get around this limitation, you need to install special program providing the so-called
An abundance of solutions
There are a huge number of programs that provide root for Android. The owner of the gadget, through the simplest selection, must choose among them the one that will work correctly. It is worth noting that some of these programs are installed directly on the device, while others - through a computer.
Each solution has its own characteristics. It is believed that installing root rights to Android through a computer is more universal, since this method works on any version of the system, and the probability of successful rooting is quite high.
kingroot
One of the simplest and effective ways to set root rights on "Android" through a computer is to use the solution from Chinese programs ist. The King Root program exists in two versions: for a gadget and a computer. In the second case, you need to prepare a USB cable that allows you to connect the device to system unit or laptop, and download the application (version 3.1) by completing the installation. To get root rights to Android through a computer using this application, you need to open the “For Developers” item in the gadget itself by following the menu to the “About Phone” section and quickly click on “Build Number” several times in a row.

In the developer options, enable USB debugging by checking the appropriate checkbox. After that, you need to run the application on your computer and connect the gadget to the port with a cable. After the device is detected, you need to press the blue button in the application. At the same time, a request will be displayed on the gadget’s display, to which you should answer in the affirmative. In the program running on the computer, it remains to select Try it and wait for the result, watching the running interest.
Getting root rights to Android through a computer in a couple of "clicks"
No less interesting is the method offered by SuperOneClick. To use it, you need to make sure that it is disabled, and the cable is connected. Then install the application on the computer, run it and click "Root". Wait for the connection pending message to appear on the screen, enable debugging in the gadget. That's all. Sometimes it may be necessary to change the USB debugging mode several times in a row to correctly determine. It is possible to automatically reboot the mobile device during the rooting process.
vroot
As mentioned earlier, despite the abundance of programs that allow you to get root access, not all of them are effective. So, among all the abundance, VRoot is especially popular. There are a lot of positive reviews about this app. True, it was not without some features. Among them, performance with Android versions not lower than 4.4 ("Kit-Kat"), as well as the installation of the KingUser block, which opens access to Root, and not so beloved by many alternative SuperSU. To get root rights to Android through a computer using VRoot, you need to install and run this application on your computer. Connect gadget. Allow debugging. Wait for the device to be detected in the program and press the ROOT button in the interface. If everything went well, the gadget will reboot, and root rights will be obtained.

In the future, at the initial launch of any program that requires the appropriate permission in Android for its work, the user will be presented with a dialog box asking to allow or prohibit actions with system files.
Kingo Root Android
The list of Chinese programs for root access in operating systems from Google, of course, is not limited to the above-described KingRoot. No less interesting is an application with a similar name - KingoRoot. In many cases, it is this that allows you to successfully modify the protection mechanism of the operating system. In order to use it to get root rights to Android through a computer, you must first allow the installation of programs obtained from unknown (unverified) sources in the gadget's security settings. In addition, debugging via USB should be enabled. The principle of operation is similar to alternative solutions - a search is made for the desired exploit (microcode that unlocks the capabilities of Android) on the developer's website and further installation when it is detected. Using KingoRoot will not cause any difficulties even for a beginner: after connecting the gadget to the computer, you should launch the application and press the ROOT button. It remains to wait for the reboot of the mobile device and a message about the successful completion of the operation.

Peculiarities
So, getting root rights to Android through a computer is not difficult, although this requires the use of additional devices. At the same time, it often happens that where a regular APK application turns out to be powerless, it is they that make it possible to successfully root the device. If you decide to use this method, it is important to understand that the computer itself must have access to global network, as this is where exploits are downloaded from. But some "mobile" applications, such as Framaroot, work great "by themselves". This should be taken into account.
Denying Root Access
Sometimes you need to remove root rights to Android through a computer. This may be necessary in order to return the gadget to its original state, for example, before contacting service center or sale. The method that gives a 100% result is to use the basic firmware received from the manufacturer or previously saved using MTKDroidTools and FlashTools (in the case of devices based on Mediatek processors). Flashing restores everything system partitions and information on them, resetting any Root. However, this is a rather radical solution, so it is rarely resorted to, using the ability to remove root access rights using the application itself that provided them. For example, if the root is obtained through KingRoot, then there will be a corresponding label in the list of gadget applications. Having opened it, you can completely remove all changes by simply moving the switch to the appropriate position (prohibition). A similar mechanism is used in almost all other solutions.
An article about how to get root on Android devices, why root is needed and what the consequences of rooting can be.
All Windows users used to the fact that on their computer they, for the most part, are full owners. You can install almost any programs and games (limitations are only in the hardware stuffing and OS version), fine-tune the system or modify it...
After the first acquaintance with a touch Android device, many Windows users experience some confusion :) It turns out that Android has quite a lot of different restrictions by default, and in order to remove them, sometimes you need to "shovel" quite a lot of information on the Internet.
When I got my Samsung Galaxy Y smartphone, two things immediately strained me in it. The first is a very small amount of memory allocated for applications (only more than 100 megabytes). The second drawback was the presence of a whole bunch of any third-party and unnecessary software for me personally, which could not just be taken and removed (clients for Odnoklassniki, Facebook and others like them).
In order to solve the problem with the place, it was decided to find a way to remove preinstalled applications. After searching the Internet for various tips, I came to the conclusion that for this I need to root my smartphone. Actually, we will talk about this procedure, which frightens many beginners, in our article.
What is root and why is it needed?
In Linux-based operating systems (which include Android), there are quite a few possibilities in terms of settings. One of them is the strict delimitation of access rights to individual files or entire directories and functions. Windows also has such features (editing file attributes and changing accounts), however, most often we do not use them, working at a computer with a single account - Administrator.
Roughly speaking, analogous to this account in Linux is the Superuser mode or simply "rut" (English root - root). The superuser account on UNIX-like systems has a default login of "root" and a UID of zero.
With root rights, you can perform any actions in the OS. However, this is where the main catch lies. If you do not know the features of the system well enough, then with an active ROOT you can easily spoil it by deleting or renaming just one file. And, if you consider that a virus or another user who has gained access to your device can do it for you, then the risks increase significantly!
Based on this logic, most manufacturers of modern Android devices do not give the user root rights. Moreover, if you do ROOT, you will lose the warranty on your device! Another side effect root is that you will not be able to receive system updates from the Internet. Well, in the most neglected cases, an attempt to get a root can render your device unusable.
Looking ahead a little, I want to say right away that for many smartphones and tablets, the rooting procedure can be reversed :) That is, if necessary, we can block the superuser account again and at the same time there will be no traces of root in the system.
And now let's see what we can get when unlocking superuser rights:
- the ability to install any application;
- the ability to edit and modify any system files;
- the ability to remove any pre-installed programs;
- the ability to install third-party customized firmware and mods;
- the ability to fine-tune the system by enabling / disabling various additional features(e.g. SWAP activation).
As you can see, obtaining superuser rights is a procedure for more advanced users who understand at least a little the intricacies of their system and want to improve something in it. If you use your device only for calls and surfing the Internet, then rooting is, in fact, useless to you :)
Rooting Options
- Usually, getting superuser rights means full root (Full root). This type of rooting is saved in the device after numerous reboots and provides full access to all system directories and files. A sign of the successful completion of rooting the device in this case will be the appearance of the SuperSU or Superuser application for visual management of rights and requests from other applications.
- Temporary root. This type Rooting means obtaining superuser rights for a while before rebooting. Useful for performing one-time tasks, such as uninstalling unnecessary applications or installing some tweak. Such rooting does not install anything and after rebooting the device does not leave any traces. Unfortunately, not supported on all devices.
- Shell root. This type of rooting allows you to get permanent superuser rights, but differs from full rooting in that it saves system folder(/system) locked. Like Temporary Root, you can not get it on all devices.
What is characteristic, root-rights in your device may be initially, therefore, before you start "dancing with a tambourine", you can check this. Go to Google.Play and search for the phrase "Root Checker" or follow the direct link and install the application of the same name. Run it and click on the top line with the name of your device. After a couple of seconds, the program will issue a verdict):

As you can see, we don’t have superuser rights now (I unrooted the phone in advance for the purity of the experiment :)). Therefore, now that we know all the theory, it's time to move on to practice. There are two ways to get root on Android: directly from the device itself using the application and by connecting to a PC via a USB cable. Let's consider each of the methods.
Applications for obtaining root rights
A couple of years ago, in order to get a root on a smartphone or tablet, you first had to find a driver for it, then find a rooting program, configure it, and only then try to get superuser rights. And that did not always come out and not the first time.
Today, the above algorithm has remained valid only for outdated and Chinese devices. Getting root for most modern and popular Android devices has become a matter of a couple of clicks! Moreover, you do not even need to connect something somewhere. Simply install the app on your device and activate it.
I bring to your attention several such applications. Since they are designed for modern devices, not all of them worked on my Samsung Galaxy Y, but, nevertheless, thanks to one of them, I managed to get the root :) So ...
- official site .
This application is one of the most popular on various forums and it, almost in the forefront, is advised to try to get root rights to modern devices. The application features include the choice of the installed root manager (Superuser or SuperSU), several rooting algorithms for different devices and the function of removing superuser rights (anroot).
Unfortunately, the app didn't work on my phone. Therefore, in order not to get into the same situation for you, first check if your device is on the list of supported ones on the official website.

z4root- official site .
This tool is also recommended in numerous forums. Like Framaroot, it allows you to get and reset root rights in one click. But in addition to the full root, it can also produce a temporary one, which adds to its advantages! However, on my smartphone, this application did not start at all and fell out with an error, so I can’t say anything more about it than what is on the forum at the link above, alas.
un-rooting- latest APK file (Un-Rooting 2.1) .
Another craft on the topic of rooting without a PC. As you can see from the name, the application is primarily focused on the abolition of superuser rights. However, as it turned out, it can give these rights. By the way, this is the only app that rooted my Samsung Galaxy Y! But first things first.
When I found it on Google.Play, it seemed rather dubious to me. This was facilitated by screenshots only in Chinese and a score of 3.2 points. Moreover, most of the ratings were either "5" or "1" :) But, nevertheless, I decided. After launch, a screen appeared in English with only three sections:

The first section contains a link to reference materials that are not really needed. The latter allows you to write a letter to the developer. But the middle one is just what we need. There are two buttons here: "Un-Rooting", which will be active if you have root rights and allow you to remove them, as well as "Re-Routing". The latter just assumes the activation of the superuser mode. Click it and confirm all requests.
After successfully completing the installation of the root and the Superuser application, the latter will ask us to grant superuser rights for our Un-Rooting. We allow access and see that now the "Re-Routing" item has become inactive, and instead the first one has turned on, which allows you to remove the root if necessary:

In addition to the applications mentioned above, you can find a number of others. Perhaps one of them is right for you. Therefore, if you were unable to root the device using the above programs, I recommend that you enter a query in the search engine like "an application for obtaining root rights to (name of your device)". Perhaps you will find something useful in your case.
Thus, summarizing our experience, we can say that the advantage of obtaining root rights using applications is that they cannot, in principle, lead to a breakdown of the device and do not require rebooting it. That is, we can enable and disable superuser rights directly on the fly, which is convenient in some cases when we do not need root for good.
However, not all devices can be rooted this way. Therefore, we will also consider the traditional rooting algorithm below.
Getting root using a PC
As mentioned above, this method obtaining superuser rights is one of the oldest. It involves uploading a special exploit (script) to your device, which installs the "su" executable file and a number of utilities, such as the already familiar Superuser and SuperSu root managers, as well as, optionally, the BusyBox terminal application, into the /system folder.
There are quite a few programs that allow you to get root on Android using a PC, however, from the free ones, I would recommend using Kingo ROOT. This utility has a fairly large database of popular smart device models, automatically downloads drivers to work with your device, and can both grant superuser rights and revoke them (that is, unroot).
First, download the program from the official site or from ours in the archive and install it. After installation, the program window will start in connection standby mode:

In order for the connection to occur on your device, go to "Settings" - "Applications" - "Development" (or in new versions "Settings" - "For Developers") and activate the "USB debugging" option there. Now you can connect your device to your computer using a USB cable. If Kingo program ROOT will recognize your device, it will start downloading a driver for it, which will notify you:

When the driver is installed, the main working window will appear, which will display the current status of root rights and two buttons that allow you to remove the root or reinstall it:

Actually, to get superuser rights, you need to press right button"Root" or "Root Again" (if there are already root rights, but they do not work as they should). This is where your actions end :) It remains only to wait until Kingo ROOT copies everything to your device necessary files and will restart it.
After the reboot, the root will be ready. This will be clear by the fact that a new one will appear in the list of applications - SuperSu. There will also be another application called Kingo ROOT. This is a utility through which the computer transmitted commands during rooting. It can be deleted if the root rollback procedure is not planned (although even if you delete it, it will reappear when you reconnect to the PC via Kingo ROOT).
If you are the owner of a smartphone from China, then for such devices there is a specialized utility - VRoot. Its latest version (which you will find in the archive) finally began to support English language, so it will not be difficult to figure out what and what (if it is possible to get the root, there will be only one button).
Except Chinese phones and tablets VRoot also works with most popular branded models (its database includes more than 8000 devices). However, I would advise resorting to using this utility only when other methods have not worked. It's just that the problem is that VRoot installs, along with superuser rights, a number of third-party utilities in Chinese (they can, in principle, be deleted), as well as the non-standard Chinese root manager KingRoot.
It will be possible to replace it with a normal Superuser or SuperSu only manually through some file manager. To do this, you will need to do the following:
- Download SuperSu and rename the APK file to Superuser.apk.
- Upload the resulting file to the device's memory card.
- With help file manager replace the file in the /system/apk folder with this file.
In principle, the described actions are easy to perform, but these are all unnecessary gestures that might not be needed if we use one of the simpler solutions.
Root through recovery
The last way to get root (if all the previous ones did not work) can be to get superuser rights using the device's built-in recovery system (in common people - recovery).
Here, alas, there is no universal way. You will have to re-read the popular forums specifically for your device model and, most likely, somewhere in the bowels of the discussions (or in the header, as on w3bsit3-dns.com) you will find several archives with names such as recovery.zip, root.zip, superuser .zip or something like that. Next, the algorithm is as follows:
- An archive that is suitable specifically for your device must be downloaded to the device's flash card, to its root (directory / sd).
- Turn off the device and turn it on in recovery mode (usually where you download the archive from, it is written how to do it in your device model). For Samsung Galaxy Y, for example, launching in recovery mode is done with the central button and volume up key.
- Select the Aplly Update From SDCard menu and run our archive for execution.
- Wait until all files are copied and the device is rebooted.
An indicator of the successful receipt of the root will, as in all previous cases, the appearance of a root manager (Superuser or SuperSU).
conclusions
In the article, we tried to consider all the options for obtaining root rights on Android devices. The only unaccounted for method that was not mentioned is a complete flashing of the device to alternative firmware, in which the root is initially. However, this is a rather drastic measure.
I think you, after reading the article, will understand that the root is not as terrible as it is painted :) Getting superuser rights for Android today has become quite simple and safe. And most importantly - for free;) The archive for this article will help you with this, in which we have collected all the mentioned applications and programs.
If you want to take full control of your device, in most cases you can do it yourself without any titanic efforts. However, at first, think about it and name at least three reasons why you needed a root;) Named it? Then I wish you success!
P.S. It is allowed to freely copy and quote this article, provided that an open active link to the source is indicated and the authorship of Ruslan Tertyshny is preserved.