IBackup for Mac OS X: back up your data and applications. An easy backup method that works on every Mac How to back up os x
Read also
No matter how debugged the Mac platform is, there is always the possibility that, due to various circumstances, the user may lose his data, often quite important. most popular means for Reserve copy information in Mac OS X is the Time Machine program that comes with the operating system. This rather well-thought-out application, for all its merits, has one noticeable drawback - the lack of advanced backup settings. The program indiscriminately copies everything that the user has on the disk. Meanwhile, the user does not always need to make a copy of the entire disk, quite often it is necessary to save only certain data. In this case, he will be helped by alternative applications from third-party developers, which include a small utility from a developer company with the funny name Grapefruit (Grapefruit).
The multilingual interface of the program is localized in 15 languages, including Russian. It cannot be said that the Russian localization was done flawlessly - somewhere there are untranslated phrases, somewhere the translation was made without taking into account the peculiarities of the Russian language ... However, all these translation shortcomings are found mainly in the program settings menu, where the user will occasionally look.

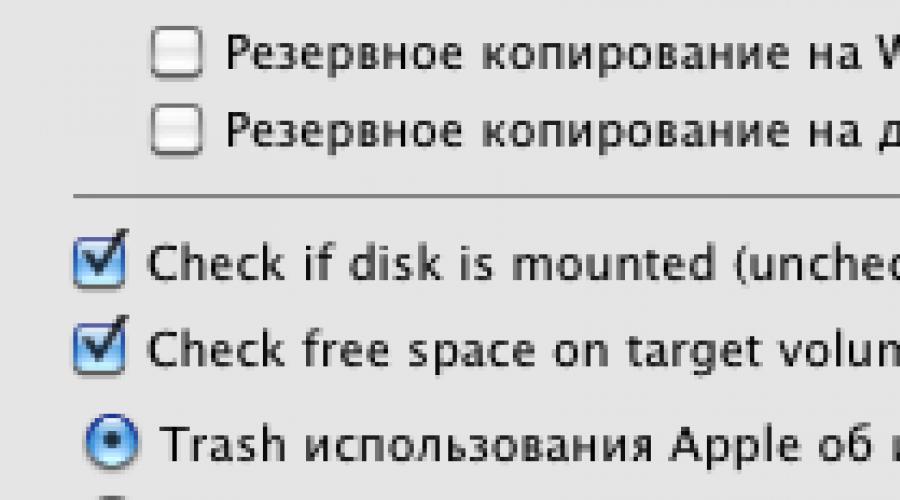
In the upper part of the program window there is a panel of program profiles, in the left part there is a list of groups of objects, the contents of which are supposed to be copied. In the right part of the window, a list of the contents of one or another selected group is displayed. At the very bottom of the window there is a very small toolbar that also performs an informational function, displaying information about the selected profile. Additionally, you can display a retractable panel that displays information from the log file of performed operations. The display of this panel is controlled using the corresponding button on the toolbar.

All copy and restore operations are carried out using profiles that are created in a special section of the settings menu. Initially, iBackup already has two profiles, " Recovery" And " Backup copy“, the purpose of each of which can be guessed already by the name. In order to be able to make a backup copy of certain data with just one click of the mouse, the user will need to configure the profile, specify the folder where the data file should be saved and mark the objects that should be copied. We select the profile we need and, using the button Set..., set the folder for saving the backup file. Now we need to select objects for backup. To do this, go to the list of groups and select one or another group, for example System Settings. After selecting a group, the list of objects included in this group will be displayed in the right part of the application window. They need to be marked so that the program knows what it should copy. If you want to copy all the objects included in the selected group, then you do not need to check each element at all - just put a checkmark next to the name of the group and all elements of the group will be automatically selected.

After completing the selection of the objects we need, use the button Create located on the mini-toolbar — and the program will save a backup copy of the marked data to the specified folder. As you can see, the operation is quite simple and it can only be easier to restore data from a saved copy. To do this, in the profile Recovery specify the path to the file with saved data, mark those elements of the list of its contents that we want to restore, and press the button Restore.

We have now described the operation for one-time copying and restoring data. If the operation of copying the same data is supposed to be performed more than once, then during the next copying session you will no longer have to mark objects again - it will be enough to select the desired profile and use the button Create.
The undoubted advantage of the utility is that if you need a regular backup, all operations can be automated using the ability of the program to work on a schedule. In accordance with additional settings profiles specified in the tab Profiles program settings menu, iBackup can copy data to a specified folder daily, weekly or monthly, on specified days and hours. Additionally, you can set the program to end after a copy operation, put the computer into sleep mode, or turn it off completely. Before the start of the operation and after its completion, you can enable the execution of certain scripts.

iBackup can copy data not only to a specific folder on the local hard drive, but also upload them to a specified AFP or SMB server (unfortunately, the program does not work with FTP servers), and automatically disconnect from it after the download is complete. To do this, the user needs to set in the corresponding tab of the settings menu full path to the desired folder on the remote server.

Why do we need several profiles, you will say, because one profile would be enough for saving and one for restoring. The use of several profiles opens up the possibility of storing data separately, for example, documents on mobile media, photos on remote server etc.
Initially, iBackup operates with 10 groups ( system settings, program settings, desktop, user home folder, programs, documents, movies, music, pictures, sites), which contains potential objects for copying. It is quite clear that the list of groups is compiled based on the average Mac and it may not contain certain applications, data folders, etc. that are used on a particular user's computer. That is why the developers have provided the ability for the user to add any other folders and objects to the general list.

As for the groups System Settings And Program Options, then the situation is somewhat more complicated. The thing is that the utility can only backup the parameters of those Mac applications OS X or third parties that she knows about. The utility takes information about applications and where exactly the files with their parameters are located from the corresponding plug-ins. Current version iBackup can copy settings 26 Mac OS X applications (including settings operating system) and more 260 programs and games of third-party developers, which is quite enough for the average user.

If the plugin for desired application was not found in the list, then there is an opportunity to create and upload your own plugin (a template for creating a plugin can be downloaded from the website of the application developer). The plugin is an XML file, the analysis of the template of which showed that the only difficulty in creating the plugin will be the need to specify the paths to ALL the settings files of the selected application, and knowledge of the program code is not required.
The program settings menu is quite simple and consists of three tabs, one of which ( Plugins), you have already met in the previous screenshot. tab Are common responsible for General settings iBackup (including launching the application at login and automatic check updates).

All in all, iBackup is a simple and convenient solution for backing up and restoring almost any data on a user's hard drive. The function of launching the application at login and the ability to work according to a schedule make the program work almost imperceptible to the user, without diverting his attention to himself.
iBackup is completely free for private use and can be recommended to all those users who want to be able to selectively back up their data, with the ability to fine tuning to level separate folder or file.
October 25, 2018 09:26It's too late to back up your MacBook when you can't access those files. Even if you're careful enough about the security of your Mac, it's hard to tell if you can protect its internal data. In other words, your Mac can be attacked by many situations including malware, system crashes, update failure, accidental deletion, etc. To avoid these annoying cases, you'd better Mac backup to iCloud make a copy.
If you want to backup your Mac without an external hard drive, then iCloud is one of the best programs for Mac backup. You don't need to prepare external storage for Mac backup as iCloud offers free 5GB cloud storage and related plans. Therefore, this article shows you how to backup your MacBook to iCloud quickly and easily.
Part 1 : Why backup MacBook to iCloud
As mentioned above, currently digital devices easily attacked by viruses and malware, including Macbook Pro or Macbook Air. If you can't afford data loss, then it's absolutely essential to back up your MacBook Pro to an external hard drive or cloud storage. And these two methods are also widely used by most Mac users to protect Mac data Book.
Some people may still be wondering if a Mac backup is better. external hard disk using Disk Utility or Time Machine. Well, you can't deny the benefits of backing up your MacBook to an external one. HDD, but you can also benefit greatly from iCloud backup. For example, you can access information about over-the-air backups. So it doesn't matter if your condition is good external hard disk or not. And once you enter your account iCloud, you will be able to restore the data of any Apple product directly. As a result, you can move your Time Machine backup to iCloud for future use. And that's why Mac needs iCloud backup.
Part 2 : How to backup MacBook to iCloud
Once you set up iCloud to back up files on your Mac, it can work automatically. In addition, you can restore all data from a backup iCloud copies on new mac By wireless network. Even though iCloud storage only has 5GB, you can upgrade it with a flexible management plan. Therefore, using iCloud to back up a Mac without Time Machine is discontinued.
Step 1
Open the Apple menu and select Update software to see if there is an update available. Before backing up your MacBook to iCloud, you need to make sure your MacBook has latest version OSX.

Step 2 Turn on iCloud for MacBook backup
Run " System settings» from the Apple menu. Then find "iCloud" and click on it. Sign in iCloud entry using your Apple ID and password. You can view all available types of backup files, including photos, mail, contacts, calendars, reminders, etc. Thus, it is quite easy if you are going to back up documents to iCloud on Mac.

Step 3. Enable iCloud Photo Backup Settings on Mac
Click Options next to Photos, and then you can tick iCloud Photo Library, My Photo Stream, and iCloud Photo Sharing according to your personal needs. After that, you can import latest photos and watch videos on all Apple devices by wireless communication. After all this, the automatic backup of the MacBook to the iCloud drive will begin.

Step 4
You can also open iTunes and find its settings to set up automatic backup. iTunes copy on Mac. Select "Downloads" and check the box in front of "Music, movies and TV shows" to backup available files over a wireless network. Click "OK" to save your changes.

If left iCloud storage not enough to store all backup Mac on iCloud, you can click the Manage button at the bottom right to upgrade to a larger storage plan that starts at 50GB for just $0.99 per month.
Don't Miss: Best Methods to Find iPhone Backup on Mac
Bonus Tips : Backup and Restore Mac with Time Machine
If you want to backup your MacBook Air and MacBook Pro with Time Machine, you can follow the steps below to resolve the issue.
Section 1 : How to back up your MacBook to an external hard drive
Step 1
Connect an external hard drive to your Mac and select "Use as Backup Drive" when you're prompted to use it to back up your Mac with Time Machine.

Step 2
Select "Back Up Now" to back up your Mac data to an external hard drive. Also, check the "Backup automatically" box to automatically make hourly/daily/weekly backups as needed. The first time you use Time Machine to back up your Mac, it will take longer for the MacBook backup process to complete.

Section 2 : How to Restore Mac with Time Machine Backup
Step 1. Open the window you want to restore
For example, you need to open your Documents folder if you want to recover an accidentally deleted document.
Step 2, Restore MacBook from Time Machine
Open the Time Machine menu and select "Enter Time Machine" to find a specific file from your previous file backup. Press the spacebar to view in detail. Finally, click "Recover" to recover Mac data from Time Machine selectively.

If you want to restore your entire Mac data, you can choose the "Recover from Time Machine" utility in macOS Recovery.
With the system backup and iCloud backup methods above, you can detail the key points of Mac data backup. If these files are really important, then it is better to back up your MacBook to iCloud and Time machine at the same time. That's all, how to backup MacBook to iCloud. Feel free to contact us if you encounter any issues while backing up and restoring your Mac.
If you still don't regularly back up Mac OS X, you should be prepared for the fact that one day all your data may be irretrievably lost. It is unlikely that there will be at least one user who would say that this is not a problem for him. Even if your Mac is full of simple garbage, it’s still garbage that is dear to your heart in the configuration you need, with which you have grown together with your soul, and its loss will sadly affect your state of mind. That is why you can and should back up your drive regularly. And even if you use an excellent antivirus, constantly check how everything works, you can still miss the moment "X".
What to do if everything has already happened - the system has fallen, burying everything that was so dear to you under the rubble? Probably to start trying to save as much as possible with the help of special utilities data recovery. But even this does not guarantee you a full refund: at best, you will be able to revive only a part of what was on the hard drive. And then it's worth introducing a new habit - regular system backups.
I think that real paranoids always keep several backups of irreplaceable, essential files, and, in different places. And rightly so, because you never know when sclerosis will come? But in fact, many do not even realize how conservative and attached we are to our personal habitat - our beloved system. And only after losing it, we begin to look for ways to prevent this from happening again. And there are indeed ways, and quite a lot. The most popular ones are backups with Time Machine and Disk Utility tools.
Using Time Machine
So, if your Mac is running OS X 10.5 or later, the easiest way to back up your hard drive is to use the built-in Time Machine utility, which automatic mode backs up the system and all important files on an external hard drive or network. System files, digital photos, music, movies, documentation and more - all this will remain safe and sound with Time Machine. This utility allows you to really "return to the past" to restore files in their original form at the moment when you need it.
Setting up Time Machine won't take much of your time. The utility dialog appears as soon as the user plugs in a second drive to the Mac, you are politely asked if you want to use this backup tool.


Your task is to answer "yes" by clicking on the "Use as Backup Disk" button. Basically, that's all. If suddenly your hard drive orders to live long, you can now not only restore all files, but also the complete system configuration before the “accident”.
Backups are stored for the last 24 hours, a week, a month until the disk is full. After creating the first backup, the program will save only those files that have changed. If you have files that you do not need to save, configure the program so that they are not backed up.

To do this, in the "System Settings" of the program, click the "Options" button, and in the dialog box that appears, specify the files and folders that should not be copied. Time Machine can also be started manually. To do this, select "Back Up Now" from the Program Menu.
Restoring backed up files created with Time Machine is as easy as running the program itself. To do this, click the Time Machine icon, opening a window in which you should select desired file using the time scale on the right. Be sure to check that this is indeed the version you were looking for using the " quick view" (select the file and press the spacebar). Then just click the "Restore" button and the required file will automatically be reborn "from the ashes".


Naturally, the main advantage of Time Machine is the ability to restore the entire system in just one click. By booting Mac OS from boot disk, just click "Restore System from Backup".
Using Disk Utility
A great alternative to backing up with Time Machine is to create virtual image disk along with everything in your Mac OS X using Disk Utility. Disk Utility has a number of unique features, such as permissions, the UUID (Universally Unique Identifier) identification standard, and the Access Control List (ACL). With Disk Utility, you can back up to an external hard drive that has enough free space.


Backup to external hard drive Disk Utility
1. Connect an external hard drive (FireWire or USB) with enough space to store your Macintosh HD backup;
4. On the left panel, select the drive you want to back up;
5. Click the Verify Disk button, if any errors need to be corrected, click the Repair Disk button;

6. Click the New Image button on the toolbar, give a name to the disk image, in addition, it will indicate the time the copy was made and the name of the disk to be saved;
Note: To increase the security level, Disk Utility allows you to create an encrypted disc backup. From Encryption: Select 128-bit or 256-bit AES encoding from the pop-up menu. When prompted, you will be prompted to enter an encryption password.
7. Click the Save button;
8. Enter the administrator name and password when (and if) required; will be saved around 1Gb/min depending on various factors;
9. After the copy process is complete, select the newly created disk image in the device panel Images > Scan Image for Restore from the menu and enable full scan.
10. Close Disk Utility (by pressing Q) and the Mac OS X installer (again by pressing Q), restart your computer.
Restoring a disk backup of your Mac OS X:
1. Connect external drive A that contains the backed up data;
2. Run the installation DVD;
3. Select a language and select Disk Utility from the Utilitie menu;
4. Select the Mac OS X drive you want to recover;
5. Click the Restore tab and drag the internal drive to the Destination: field;
6. Click the Image... button ("Image ...") next to the Source field: ("Source ...");
7. Go to the local folder where the backup copy of the disk you need is saved (on an external disk);
8. Click the Open button to continue, then click Restore;
9. Enter the administrator name and password; if you have encrypted backup disk images, enter the password that was set when saving the encrypted disk image; Depending on the size of the saved disk, data recovery takes a different amount of time.
In this article, we have described only two of several possible ways Mac OS X backups and data recovery. If you know other (better) ways to back up a disk, please share with us and other readers in the comments.
The problem of data loss was as relevant 10 years ago as it is now and will be in the future. You can lose all the necessary information different ways: Damage to the media due to infection with viruses or unintentionally remove them. There are not so many ways to restore information, and the most reliable is considered to be restoring from a backup. What's the point - you insure yourself and make a backup of the necessary data when everything is in order with them, but when an unexpected problem occurs, you simply restore them from a backup. There is no need to think that creating a backup copy is hard manual work, not at all, today there are quite a few programs that will do everything for you, once you set up such a program, you can forget about it and remember it only when you need something restore. Already built into Mac OS similar program for data backup and it is called Time Machine.
In order to perform a backup (also called backup / backup) using Time Machine, you need OS X 10.5 Leopard or higher + external media where the backup will be performed (this can be an external HDD connected via USB, Thunderbolt or firewire, network drive, AirPort Time Capsule or other similar Apple devices). Next, you need to determine the size of the external media, the calculation is as follows MAC drive OS multiplied by two, i.e. if you have 50 GB occupied on the disk, then you only need to allocate 100 GB of space for backup. In order to see how much hard disk space you have, click "Finder" - "Programs" - "Utilities".
Then select "Disk Utility".

Select your main drive and below you will see information about how much disk space is used.

In my case, backup will need about 60 GB. The backup process will look like this, the first backup will be "Full", i.e. the entire OS along with the data and will take up the same amount of space as used on the MAC OS, all subsequent backups will back up only the changed data and they will already require much less space. Time Machine stores:
- Hourly copies for the last 24 hours;
- Daily backups for the last month;
- Weekly backups for all other months of work.
As soon as there is not enough space on the external drive, the old data will be overwritten with new ones.
From theory, I propose to move on to practice, connect the media to which you will make a backup, go to "Finder" - "Programs" - "Time Machine".

In the window that opens, select "Select backup disk".

Select the media to be backed up to. If you wish, you can password-protect the backup, to do this, check the box "Encrypt copies". This procedure is optional and is only needed to protect your backup from strangers.

If there is any information on this media, it must be migrated because Time Machine will delete all information on it and format the media in Mac OS Extended (Journaled).

If necessary, you can exclude some folders from the backup, to do this, click the "Options" button, click on the "plus" and specify those folders that do not need to be backed up.
By using a macOS backup, you can avoid problems such as data loss due to a drive failure or system problems that cannot be fixed.
Anything can happen - a failed system update, disk corruption, software and system errors, or there will be a need for a pre-configured and saved system. IN this manual you will learn how to back up macOS, protecting yourself from losing important data and other problems.
Create a backup using Time Machine
To create a backup in Time Machine, you need an external drive connected to your computer, such as a USB drive of sufficient capacity.Time Machine automatically backs up hourly for the last 24 hours, daily, for a month, and every week for all past months. As the disk fills up, previously created copies will be replaced.
Connect an external drive to your Mac, go to System Preferences and open " time machine".

Click " Select backup disk".

Select an external drive, check the box " Encrypt copies" (for backup security) and click " Use Disk".

Create a password that will be used to encrypt your drive.
Important . If you forget your password, you will not be able to restore your backups.

If the drive is not properly formatted, you will be prompted to erase it.

After that, Time Machine will start periodically backing up your system.
If you want to disable automatic backup, just uncheck the " Create backups automatically".

If necessary, you can start the backup manually by selecting top menu "Create a backup now".

And also, view the status of the backup, stop the backup, enter Time Machine and open the settings.
iCloud backup
open" System settings"and go" iCloud".
Select the data you want to back up.

Don't forget to look into Options".


Now you can protect your data from loss and restore it when needed.