Installing windows 7 on imac. Ways to Install Windows OS on Mac
Read also
The operating systems of Microsoft and Apple occupy the leading places in terms of distribution in the world. At the same time, the share of Windows is 82.5%, and macOS - 12.5%. With this ratio, there is nothing surprising in the fact that corporate software is developed mainly for Microsoft products. As an example, we can take the 1C Enterprise platform, which does not have a desktop version for macOS. Installing Windows on Mac as a second OS helps to solve this problem.
The tasks that require the use of a second operating system on a MacBook are different. Depending on which programs you intend to use, you can choose one of the available options:
- installing the OS on a dedicated hard disk partition using the built-in Bootcamp utility. In this case, the user, having booted into Windows, can fully use all the hardware resources of the laptop. Suitable for work with resource-intensive applications;
- use of virtualization technologies. Parallels Desktop offers the most convenient option. Using the Coherence mode, Windows programs can be used without rebooting right in the macOS environment. In full screen mode, the user can switch between the two operating systems as between different desktops. Hardware resources in this case are limited by the user independently.
Consider how to install and use Windows in both versions.
Boot Camp Assistant
Users who have had to install two operating systems know that Windows does not tolerate "competitors" by overwriting their boot sector. Even two different operating systems from Microsoft do not get along well with each other, fighting for boot priority. Apple solved this problem in an original way by introducing the Boot Camp utility into the system. It comes standard with both iMac and MacBook Air, Rro and Retina 12-inch models.
- Before we start installing Windows, let's check that our Mac meets the hardware requirements. Click on the apple logo in the menu bar and open the information about the computer. We look at the model and year of manufacture indicated in the screenshot.
- We go to the technical support page. For example, let's check the possibility of installing Windows 10.
- Open the list and check the match. Our model falls into the group marked in the screenshot as “later”, released in 2016.
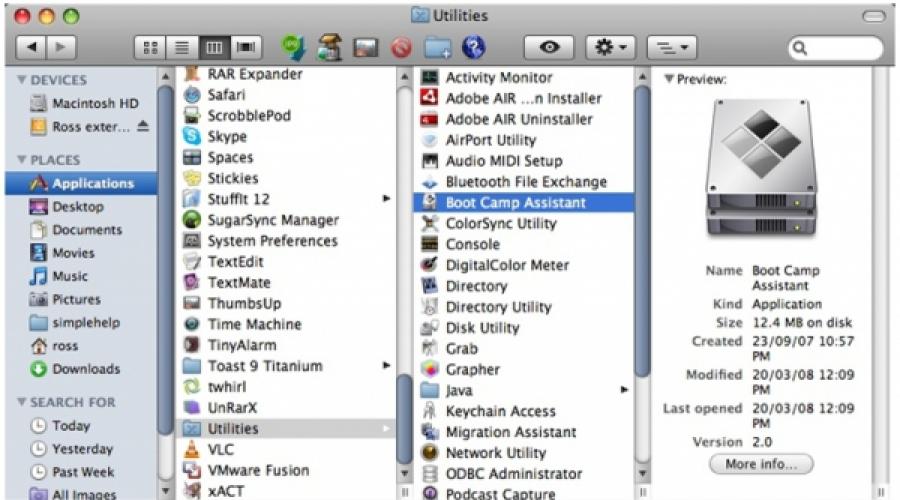
- We launch Finder, find the "Utilities" folder in the programs and open it. The Boot Camp Assistant we need is marked with a box. Before you run it, make sure that the system is updated to the latest build of High Sierra and the latest versions of other Apple software are installed. For the correct operation of the utility, this is a necessary condition.
- The first window is informational. Make sure your MacBook is connected to the mains following the instructions.
- We indicate the location of the ISO file with the Windows distribution received from the Microsoft website. By clicking on the point indicated by the arrow between the partitions of the hard disk, we set the desired size. After completing the preparation, click the "Install" button.
- The system automatically loads the necessary hardware drivers. Some MacBooks may require a flash drive to store support software. For older Pro models equipped with a DVD drive, the distribution ISO file must be burned to a disc. Installing Windows on them from a clean image is not supported and you cannot do without external media.
- After completing the preparations, macOS will ask you for confirmation to partition your hard drive.
- The computer will restart and run the standard Windows installer. Further actions are no different from installing this OS on a regular PC. The last step is to activate the Boot Camp wizard. All the drivers necessary for the operation of the second system are contained in one package that was loaded before partitioning the disk. As a result of the operations performed on the MacBook, a BootCamp partition was created, on which Windows will “live”.
Switching between the two operating systems is done by rebooting while holding down the Option ⌥ key. At startup, the computer will display a selection menu. By moving the pointer in the form of an arrow, we select the system that we will use.
If you have gotten used to gesture control in macOS, it's time to think about the mouse. It is impossible to work without it on a MacBook in Windows. With all the tricks of Microsoft, the system does not support even a fifth of the trackpad's capabilities.
Removing the BootCamp Partition
When the need to use a second operating system is no longer necessary, the BootCamp partition, along with Windows, can be deleted. The operation is fast and does not require a reboot.
Mac OS Extended
The file system used by Apple prior to macOS High Sierra is called HFS+ or Mac OS Extended. If your Mac is using a regular hard drive, it hasn't changed since the update.
- Launch Boot Camp Assistant and skip the first information window. At the stage of selecting actions, we check that the checkmark is only in the place marked with an arrow. Click "Continue".
- The system shows the new disk partitioning scheme. As you can see, the BootCamp section is no longer on it. Click on the "Restore" button.
- We confirm our desire to change the partition scheme by entering a password.
- The operation is accompanied by the appearance of a bar with a progress indicator. After a few minutes, you will see the following window.
The disk again consists of one partition and there are no traces of the presence of Windows on it.
APFS
After upgrading to macOS High Sierra on Macs using SSD storage, the file system changes to AFPS. This FS is better optimized for SSDs and is the default on all new Apple computers. However, if you try to delete the Windows partition in the way described above, the user will receive an error. The system will refer to the impossibility of performing the operation, since the boot volume is formatted in a file system other than HFS+.
- Open the Boot Camp neighbor in the Utilities folder.
- In the navigation pane, select the volume that hosts Windows. Press the "Delete" button marked with an arrow.
- We confirm the choice made.
- After successful completion of the operation, close the informational message.
- Press the button marked with a checkmark. Using the “-” sign indicated by the arrow, delete the extra BootCamp and “*” sections.
- The disk layout should take the following form. Click the "Apply" button.
- As you can see in the screenshot, the operation was completed successfully. We managed to remove the Windows partition and return the SSD to its original state.
Parallels Desktop is the best virtualization solution for macOS. With it, you can install any version of Windows or Linux and use the necessary software that only works on these operating systems.
- Since we have already downloaded the ISO image for installation on Boot Camp, we select the marked item in the wizard.
- Specify the distribution location manually or let the program find it automatically.
- Enter the existing Windows digital license key.
- Here we can configure the allocation of disk space, memory, use of network resources and peripherals. The specified parameters must not be lower than the minimum requirements for a PC by Microsoft. For example, for RAM this value is 2 GB. After the preliminary setup is completed, the Windows OS installer will start.
- After completing the necessary installation steps, you get a second operating system on your Mac in the form of a virtual machine. The buttons marked in the left corner of the window are responsible for the operating mode. The green one expands Windows to full screen mode and it will look like a regular desktop, taking up a separate workspace. Blue activates full compatibility mode. It lets you open Windows applications directly on your Mac desktop.
- Files can be left for later use or completely deleted in the trash.
Using the built-in snapshot function, you can test any software on a VM without worrying about the integrity of the system. You can return it to its original state in several movements.
Finally
As you can see, installing Windows on a MacBook as a second system is an easy task. The choice of use case depends only on the needs of the software for hardware resources.
Video instruction
The videos below will help you better understand the intricacies of installing and using Windows OC on Mac computers.
Each user knows Microsoft and Apple, which release their own operating systems. But is it possible to install the familiar Windows 7 on a Mac that Apple releases? Of course, you can, because the latter even provide the necessary software. Next, we will look at how to avoid mistakes and do it right.
Basic Mac requirements
Before installing Windows 7 on Mac series devices, make sure that your computer meets the necessary requirements:- connection to the Internet;
- installed program BootCampAssistant;
- administrator account in Mac OS;
- working mouse/keyboard;
- at least 2 GB of RAM;
- 30 GB hard disk space (more than 40 GB is recommended for additional applications and updates);
- if you are going to use a disc with an ISO image, you need a working DVD drive (external or internal);
- USB drive or disk with 8 GB free space (for installing third-party software, such as drivers);
- a Mac-brand computer that supports the ability to install the appropriate operating system on it.
Not every Mac computer model is suitable for Windows operating systems. This link indicates the correspondence of operating systems and computer models from Apple https://support.apple.com/en-us/HT205016#tables
Before proceeding with the direct installation, it is necessary to check whether this can be done in principle (the link is provided above). Only after that plan the subsequent installation. If the system is not supported, the installation will fail. By clicking on the blue number (4 or 5) indicated in the table, you will be able to download the required version of the BootCampAssistant application, ideal for installing Windows 7 on an existing computer.
Step by step installation instructions
Mac Air, Mac Pro, iMac, etc. are suitable for this process, as long as all conditions are met. The installation procedure is as follows:
It is important to choose the right partition of the disk that will be formatted before the installation itself. It is a newly created program, just right for the needs of a newly installed system, and is called BOOTCAMP.

With a flash drive
If it is not possible to use a drive or there is no DVD with a system image, then you can burn the image to a flash drive:
Video instruction for installing Windows 7 on Mac
We present to your attention a video that describes in detail all the steps for installing the Windows 7 operating system on Mac computers.Installing Windows 7 on Mac computers is easy if you use the BootCamp utility distributed by Apple. There are various ways to do this, but the one we mentioned earlier is the simplest and requires the least amount of movement from the user. Follow the instructions and you'll be fine.
Installing Windows-7 on MacBook Pro
InstallationWindows-7 onmacbookPro
First: Why is it needed? Why do you need Windows-7 on a MacBook Pro?
The answer is very simple. I constantly use Microsoft Access, as well as several programs for customs clearance of goods, there are no analogues for Mac OS and are not planned.
This article does not cover the general principles of installing Windows on a Mac. It describes the steps I had to follow on my Early 2008 MacBook Pro Model Number A 1260 to install Windows -7, and includes comments, links, and installation guides for all the necessary components that will be needed for successful and high-quality work. your Mac computer in a Windows environment.
You can read in detail about installing Windows XP on a Mac for the first time in the manual that is included with the sale. If the English language is difficult for you, then look for information about it on the Internet. There are many useful articles about this in Russian.
However, I will focus your attention on the most common mistake that is made by almost everyone who installs Windows on their Mac for the first time, and then cannot understand why the system does not want to start, even if the installation is done from a licensed disk. This error is as follows: During the installation process, Windows prompts you to format the drive on which the installation will be performed. Despite the fact that Boot Camp has already partitioned your MacBook's disk and formatted the desired partition, YOU MUST FORMAT THE PARTITION DURING INSTALLATION! Otherwise, the system will not start under any circumstances!(unless this is your first time installing Windows on your MacBook).
We will now consider exactly the process of installing the Windows-7 operating system on the MacBook Pro using the 32-bit operating system as an example, since practice has shown that 32-bit Windows-7 on the MacBook Pro works faster.
Some of the information for writing this material was taken from this article:
Necessary tools and programs:
1. Installation disk Windows -7.
2. The first disc that came with your MacBook Pro, which contains Boot Camp and drivers for Windows XP. Do not despair that these are old programs and drivers (as was the case in my case), all this will be needed and will work as it should, I promise you.
5. External mouse (preferably).
DO NOT DOWNLOAD! Just waste your time and traffic!
System installation:
Turn on M acBook, insert the installation disk with Windows-7, hold down the key "alt" and install the system. There is nothing more to write about here.
Important! Correct driver installation:
Windows -7 installation completed. And what do we see:
The keyboard does not work properly. Apple function keys not working, CD won't eject.
The trackpad does not work properly. Doesn't work even in right click mode (two fingers on the trackpad and pressing the button doesn't open the context menu)
Sound doesn't work. Despite the fact that when checking the equipment, the audio playback indicators show that the sound is playing, there is still no sound. A characteristic sign of its absence is the headphone jack illuminated from the inside with red light.
This means that you need to install all the drivers for your MacBook Pro in order for its hardware to work in a Windows-7 environment. There are several secrets here. About them and will now be discussed. So attention:
1. Installing BootCamp:
a) We take the first disk from the MacBook. It will not be possible to run setup directly from this disk, an error will appear "The installer encountered an unexpected error while installing this package. The package may not have been installed correctly. Error code 2229".
When you run any of the files from the disk directory: Boot Camp \Drivers \Apple , (for example " AppleMultiTouchTrackPadInstaller"") we get an error "Unable to execute DPInst.exe on the current operating system". The second error occurs due to the Russian interface language. After all, the Russian version of Windows-7 simply does not exist and will not exist. It will be like in Vista just official Russification. That's why:
b) IT IS NECESSARY TO CHANGE THE LANGUAGE OF THE INTERFACE TO ENGLISH FOR THE TIME OF INSTALLATION. IT IS NECESSARY TO DO IT, OTHERWISE THE DRIVERS WILL NOT BE INSTALLED!!!
c) Create a new folder on the C:\ drive and copy all the contents of the CD into it. You will have to use an external mouse or keyboard shortcuts
Keep in mind that extracting the Windows -7 installation disk is currently only possible using an external mouse, or by temporarily booting into the Mac.
d) If you haven't downloaded it yet, then download the patched Boot Camp from here: http://www.speedyshare.com/404462147.html . There are three folders in the archive with the Boot Camp LIMO patch. We need three files from it: both files from the folder " AppleBootCamp 2.1”: bootcamp And Boot Camp 64, as well as a file from the folder “ Apple Boot Camp 2.1 32-bitlatencyissue”: KbdMgr. We take these three files and copy them with replacement to the created folder in the Boot Camp \Drivers\Apple directory.
e) MAKE SURE THAT THE INTERFACE LANGUAGE IS SET TO ENGLISH. We launch one of the BootCamp files in accordance with the bitness of the installed system and perform the installation. ATTENTION, IMPORTANT: After installing Boot Camp, before clicking the “finish” button and restarting the system, be sure to replace the KbdMgr file in the directory: C :\Program Files\Boot Camp with the file from the patch!!! (in a 64-bit environment, according to the patch author, this is not necessary).
The first stage has been completed. Now you can reboot. After the reboot, all devices will appear in the device manager. Almost all the missing keyboard and trackpad features will appear. However, not all that we would like. Now you can switch to the Russian interface language. But I wouldn't recommend it just yet. We continue:
2. Installing the updated trackpad driver:
In a Windows environment, clicking the MacBook Pro on the trackpad with one finger (left mouse button) and two fingers (right mouse button) does not cause any reactions. That was the case until recently. Now this problem is solved. An updated Trackpad driver for Windows-XP-Vista has appeared on the Apple website. We will use it and add the missing features. True, you have to conjure a little, but it is even useful. If you haven't downloaded it yet, then download the updated driver here: http://support.apple.com/downloads/Multi_Touch_Trackpad_Update_for_Windows_XP___Vista . Looking ahead a little, I will say that in order to install this updated driver in Windows-7, you will definitely need Universal Extractor. If you haven't downloaded it yet, then download it here: http://www.legroom.net/software/uniextract and install it.
Have you downloaded the driver? Then try to install it, and you will see that either it does not fit your computer (designed for models from the end of 2008), or it does not fit your operating system, so you need to unpack it with the Universal Ex tractor. When installing Universal Ex tractor, select the default language "Russian". After installing Universal Ex tractor, click on the executable file “ AppleMTTUpdate” with the right mouse button and select “UniExtract here”. The executable file will be unpacked into two folders " AppleMultitouchTrackpad" And " AppleMultitouchTrackpad64". Let's remember their location. Now let's go to the Device Manager, open "HID Devices", in which we see "Apple Multitouch" and "Apple Multitouch Mouse".
FOR BOTH update drivers, specifying manually the path to one of the above folders obtained during unpacking in accordance with the system bitness. Drivers are installed in this way without problems. We check that the drivers were installed correctly: In the properties of both devices, the driver must have version 2.1.2.100.
DO NOT TOUCH THE BOOT CAM P SETTINGS YET, BUT BE SURE TO REBOOT FIRST, otherwise not all functions will work.
After starting the system in the control panel, select Boot Camp. (or right-click on the Boot Camp icon in the system tray and select "Control Panel"). Open the appeared tab "Trackpad" and set the desired options. the translation into Russian is not entirely correct there, so I recommend looking into the English version. That's it, now the trackpad responds to touches with one and two fingers, like a click of the left / right mouse button!
3. Installing the Audio Driver (solving problems with sound).
So we don't have sound. The driver is installed, the speaker indicators blink when checking, but there is no sound. For some reason, the headphone jack is illuminated from the inside with a red light.
In order for the sound to appear, you will need an updated version of the Realtek driver, which already understands what Windows-7 is. You need to download it from here: http://www.realtek.com/downloads . On the page that opens, select the link: High Definition Audio Codecs (Software) »
Or a direct link (but it sometimes doesn't work): http://www.realtek.com/downloads/downloadsView.aspx?Langid=1&PNid=14&PFid=24&Level=4&Conn=3&DownTypeID=3&GetDown=false .
In the window that appears, check the box, agreeing with everything that is offered and click " Next".
On the opened select the desired file vista,Windows-7Driver (32/64bits)driveronly (Executablefile ) and press " GO"in front of one of the sites: Site1, Site2 or Site3 but not opposite express, so as not to enter extra passwords later.
After downloading the specified driver, you just need to install it. And the sound will appear! Reboot.
4. Installing the Video Driver.
Yes, the video card driver is installed and it works. But trust me, its performance is not up to par. Therefore, I strongly recommend installing the latest video driver for the NVidia video card at the moment. You need to download it from the manufacturer's website, namely from here: http://www.nvidia.ru/object/geforce_notebook_win7_186.03_whql_ru.html.
Measure performance before installing the driver and after installing it. The difference is obvious:
Now Windows-7 is correctly installed on your MacBook Pro.
Vadim Yurasov.
Computers of the well-known Apple company are very multifunctional and have a wide selection of specially designed software. But sometimes it happens that a Mac or iMac user wants to install the Windows operating system that is already so familiar to him. Sometimes OS Windows may be needed to install some programs so that you can play your favorite games, and there is no suitable alternative for Mac.
You can install the OS yourself. This can be done in several ways, for example, through a utility or using a flash drive. Let's take an example of applications from Apple called Bootcamp, Parallels Desktop and Virtual Box.
Preparing and Installing Bootcamp
This option allows you to install an additional OS on Mac and iMac in a separately created partition on your hard drive. Choose which system you can boot into during power-on. The advantage of this utility is that by installing the program through it, all the resources of your PC will be available to Windows, this will allow you to use the performance of your Mac to the maximum. The computer will easily pull the most modern games and perform complex tasks.
Before installing an additional OS, keep in mind that it will take up a lot of space on your hard drive. Make sure it has the required gigabytes. On average, you may need about 30 Gb.
Before you start installing the operating system on your iMac or Mac, check and prepare the Boot camp program. First, make sure it has all Apple updates installed. To do this, you need to do the following:
During the launch of the utility, you will have the opportunity to select the location where OS Windows will be installed. Before starting the software, close all open applications and programs.
After the utility and flash drives for copying information are ready, you can proceed to the first steps:


Once all files have been copied, the iMac will automatically restart. Next, to display the boot manager, press and hold the Alt key. On the Mac, the disk menu will open, mark the partition with the name of the operating system. This will be followed by starting the OS and setting the parameters.
To install Windows 8, you need to proceed in exactly the same way. Only in the window Choice of actions» you should check the boxes next to the items « Download latest software" And " Create a disc to install Windows 7 or newer».
Installing Windows on a Mac, or rather, setting up the program, begins with choosing a language. Choose the right language right away, otherwise you will have to do all the steps again. Having selected all the parameters in this window, click the button Next, which is located in the lower right corner.
To install the Windows operating system on a Mac, carefully follow all the instructions. During the process, do not restart or turn off your computer. You cannot interrupt the procedure in any way.
After your iMac reboots a second time, you can begin installing the necessary drivers. To do this, download them back from the USB flash drive, install and run the installation program.
Installing Windows via Bootcamp using a flash drive
Installation can be carried out either using the operating system disk or via a USB drive. To download a program from a USB flash drive to a Mac, you must first download it. If we are talking about Windows 8, then the version of this system must be in iso format.
This installation option on Mac and iMac is no different from the previous one. Before starting, you should also check bootcamp for updates and save all the necessary data. The following instruction will help you complete the task:

But it happens that when the installation media is a USB flash drive, the utility requires you to insert a disk with the program and refuses to continue the steps of downloading the software on the iMac. In this case, you can download the Daemon Tools Lite iMac driver. With it, we mount the Windows iso image, it will serve as a virtual drive and then Bootcamp will complete the installation process of our OS without any problems.
Installing Windows on Mac and iMac via Parallels Desktop
In addition to Boot Camp, there are several other options for installing an additional operating system. For example, you can use the program Parallels Desktop, which is a Windows installation virtual machine. You will be able to run Windows programs without restarting your PC.
Installing Windows with VirtualBox
VirtualBox is one of the popular virtualization programs. With its help, two operating systems will easily work on your PC at once. Installing an additional OS through VirtualBox is quite simple.
To get started, enter the VirtualBox query into the search system, go to the official website and download the program. When the installation is complete, click on the program icon and select "Create". After that, you can start installing Windows.

Sometimes it happens that after installing an additional operating system, iMac has problems with sound or video playback. To solve this problem, you need to install on the Mac all the drivers that were previously saved to an additional storage device (disk or USB flash drive).
After all the steps taken, the installation of Windows on a Mac is completely over. Restart the program and everything will definitely work.
Related videos
Installing Windows on Mac OS is possible and quite easy if you approach it prepared. In this article, we will tell you how to install Windows on Mac OS - possible methods and options, as well as additional information and the subtleties of the process.
MacOS users may need to use the Windows operating system for several reasons, ranging from the habit of using Microsoft's OS to the need to use special software that is designed to work only on Windows. In order not to purchase a new device, but to enjoy the beauty of excellent hardware characteristics and use of the desired system, macOS has the ability to use multiple systems on one device.
What should be done before installing another OS?
- Find out about the compatibility of hardware and OS versions (compatibility with Windows 10 and compatibility with the 7th version of the system).
- Check for an update for macOS and utilities, and update if found.
boot camp
Installing Windows 10 on Mac OS Sierra can be done through the special BootCamp utility.
Utility Boot Camp Assistant- Software from Apple, which allows you to create an additional partition on the disk to install an additional OS and further use.
Before installation, you must download the image of the desired Windows system. You can do this on the official Microsoft website.
- Go to the download page for the Windows 10 image (or version 7, but this will require a key).
- Select the desired system and language, and then start downloading the image.

To start Boot Camp, open Programs - Utilities and choose Boot Camp Assistant.

In the Boot Camp window, you will need to select the amount of free space that will be allocated for Windows. When choosing, we recommend starting from your needs - whether you will play games and install "heavy" applications, or rarely use the system.
It is worth noting that if you allocate 100 GB of free space in Boot Camp, after installing the system, about 75 Gb will be available to you.
In the ISO disk image line, specify the path to the downloaded system image. Click the "Install" button and the software will start downloading for further configuration.

After rebooting the device, the standard Windows installation process will begin. Using the example of "tens", consider the main points.
- Initially, agree to the terms of the agreement faces.
- Select the OS version and bit depth.
- At the stage of choosing a partition where files will be copied to, you need to select a partition called BootCamp.

- The process of copying files and preparing the main components of the system will begin.

- At the end of all reboots, you will be greeted with a system pre-configuration window, where you will need to specify a Microsoft account to log in to the system, if there is none, create a local profile. You will also need to specify the privacy settings that it is recommended to disable - this will speed up the device a little and Microsoft will receive less of your data.
- When finished, you will be greeted by the Windows desktop and a small window of the BootCamp application. You will need to allow the application to configure the system drivers so that the screen resolution becomes correct and all components such as network connectivity, Bluetooth and others.

Installing Windows 7 on Mac via BootCamp is done in the same way, the only difference is the welcome screen and the initial screen.  It's also worth knowing a few extra facts about Boot Camp if you want to know how to install Windows on Mac through BootCamp:
- Updating all the device drivers necessary for correct operation is also performed through Boot Camp.
- It is recommended that you first download the required driver package from the Apple website.
- The system will work quickly and responsively, using the maximum resources of the device. It is also unlikely that there will be problems with the drivers, since Apple takes this very seriously and carefully. But no one canceled the bugs and problems on the part of Windows, although on the 10th version, there are fewer and fewer problems (before the release of a major update).
- Using MacOS and Windows at the same time is not possible, as the device can only work and use resources with one system running. And here virtualization tools come to the rescue, which will be discussed later.
Important! Sometimes when installing Windows on a Mac, a no Bootable device error can occur. To resolve this issue, use the following tips:
- Using a legal image (no pirated builds).
- Try changing the boot priority to MacOS and retry the installation.
- Try using USB sticks or ISO files when using Boot Camp.

Parallels Desktop
There are situations where you might want to install Windows 7 or 10 on a Mac without using BootCamp. For example, when you need to use both MacOS and Windows at the same time, but having 2 devices is too expensive and inconvenient. Virtualization tools will come to the rescue, one of which is Parallels Desktop for Mac.
Parallels Desktop is a software solution for creating a virtual machine and then installing Windows, Linux and other operating systems. Allows you to use a different operating system without rebooting the device and enjoy the functionality of different operating systems at the same time.
The latest version of Parallels Desktop 14 is currently available starting at $4,990.
The application has truly outstanding functionality:
- Shared desktop for Windows and MacOS.
- Using Win-applications in the MacOS interface without the need to start a virtual machine.
- Backup, shared clipboard, Drag-n-Drop, a huge toolkit for working with the "window" OS and much more.

With Parallels Desktop, you'll learn how to quickly install Windows 10 on your Mac as a second system with just the click of a button. What do I need to do:
- Download and install the trial version of Parallels Desktop from the official website.
- And click Install to start


- And at the end of all procedures, you will receive a notification about the successful completion of the installation.

The developers have made sure that the process is as simple and fast as possible for Mac users. Let's also look at how you can clean install Windows 7 or 10 on Mac OS high sierra or later using Parallels, using version 11 as an example:
- Launch Parallels Desktop and select "Install".

- Specify the path to the installation disk, USB flash drive, or system image.

- You can choose express installation of the system, which requires only a system key and a minimum of actions from you. Or you can uncheck the express installation box and set up the process yourself.

- You can choose not only the number of active cores, RAM or drive memory, but also video memory, system usage, boot priority and more.

- After that, the standard installation procedure will begin. You will need to select a language and select an installation location.

- After that, Windows 7 will be successfully installed. You only need to give a name to the profile and PC, create a password (if required), enter an activation key, set the time and settings for connecting to the Internet.
- The system is ready to use

The application is really very functional and at once we solve a lot of problems. But if you don’t have 5 thousand rubles to buy a license, we’ll show you another way to install Windows 7.10 on Mac OS using VMware virtualization tools.
Oracle VirtualBox
VM VirtualBox is a virtualization tool from Oracle. A free app that will let you run Windows 7 or 10 without a separate installation on a Mac or BootCamp. The functionality is not as rich as Parallels Desktop, but this solution is free and allows you to use 2 systems at the same time. What is needed for this:
- Download and install VM VirtualBox for OS X hosts from the official website.
- Download the image of the desired system, for example, "Ten"
- Create a new virtual machine. Enter the name, type and version of the OS

- Set the amount of RAM

- Set the volume of the drive for the virtual machine and specify the disk type as VDI (VirtualBox Disk Image)


- Once the virtual machine has been created, click on Settings.

- In the "Storage" tab, specify the path to the image of the loaded OS, and then start the virtual machine.

- The standard system installation procedure will begin. You can find the order in the paragraph about Boot Camp.
As you can see from this article, instead of Mac OS it is quite easy to install Windows 7, 8 or 10, you just need to choose the option that is convenient for you. Using all the power of the device, but putting up with only one active OS, or taking full advantage of all the advantages of Windows and MacOS, but with minor performance losses.
Have a great day!