Where to look for a cloud on a computer. How to download cloud mail to computer
Read also
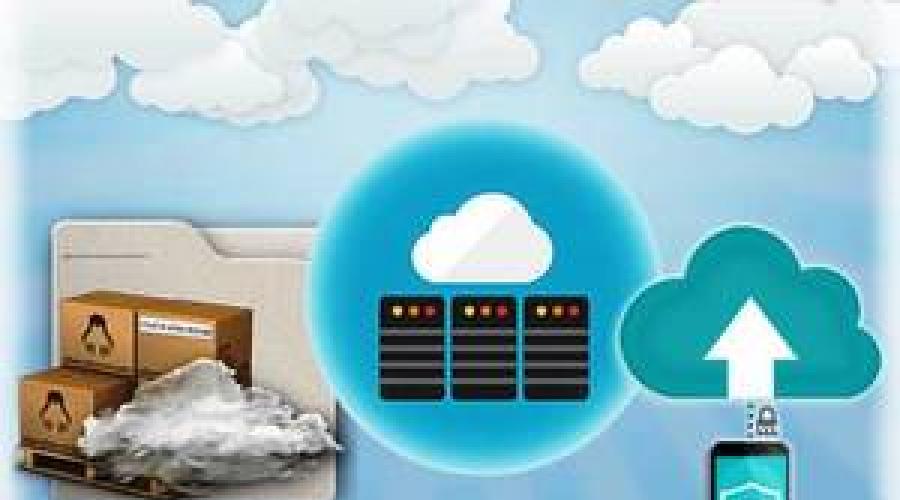
Cloud services are a new trend in Internet technologies. A cloud is any remote resource that helps save, create, transfer files. In this article, we will look at the cloud from Mail.ru. So what is the cloud storage and how to work with it, read the article.
What is mail.ru cloud
Mail.ru cloud is a service where you can store and manage data. With the help of mail.ru, the user can store, check files, download them, transfer to another user. All actions take place on the Internet. One of the advantages of this service is that it is free and affordable. That is, each user can get such extra bed to store documents online.
Essentially, this is HDD, the same one that is installed on your computer or laptop. A distinctive point is the use of the Cloud on different devices , the main thing is to have access to the Internet. From the service, the user can send a link to his friend or partner to the material, and he will be able to download, watch the video, document.
Let's summarize what the service is for:
- To store files, folders.
- To work with documents and files on any gadget. The main thing is to have access to the Internet.
- For fast file transfer between users.
 You can upload any files to the Cloud and download from it from any device, you can also view, transfer or download them from any device. You can upload anything: books, documents, videos, pictures.
At the same time, you can configure access to documents. You can set the mode when only you can see the files, you can set public access to some materials, that is, such files can be viewed Internet users and another user will be able to download them. If access is open, a link will be generated that can be passed to the user to view the file or download it.
How to use the Cloud from mail.ru
We figured out what the Cloud is, now let's deal with the process of working in this service. In order to start working in the service, you must perform the following steps:

Now you can use virtual disk. To upload files larger than 2 GB from your computer, you need to install cloud drive to your computer. It can be installed both on a computer with windows, IOS, and on android.
Let's figure out how to install the Cloud on a computer:
- Let's go to the cloud. On the left side there will be a blue form "Install Cloud on smartphone". Here you can choose any device from all offered, on which you want to install. We are looking at a computer.
- Now click on "PC Application".
- A form will appear in which you need to select your operating system.
After downloading, you need to open the file and configure:
- Click "Start".
- Select the language of the program. In our case, Russian, click "OK".
- The Installation Wizard will start. We press "Next".
- Now you need to select the folder where the program files will be installed. Select "Browse", click on the desired folder, click "Next".
- We agree that a shortcut will be created on the desktop. We press "Next".
- After that, click "Install".
Mail.ru cloud


After installation Setup Wizard will notify you that the installation process was successful. You just have to click on the "Finish" button. After that, you can open the Cloud from your computer.
How to upload and download documents from the mail ru service
Learned how to use the Cloud. Now you need to deal with the process of uploading material to the Cloud. To begin with, try to transfer only one document there. Move files possible through the cloud online or use mounted drive on the computer. If you decide to transfer documents to the Cloud installed on your computer:
- Select the required document.
- Click "Copy"
- Go to the downloaded disk. Click "Insert".
You can not do copying, more precisely, do it much faster. We cling desired file and move it to the Cloud. You don't need to do anything else, the document will be copied.
Now let's take a look file upload option from a computer to a Cloud that is not installed on the computer:

The video will be downloaded to your computer.
if you need to upload video or documents to another user, you need to do the following:
Files are deleted just as easily as they are loaded. You need to select the desired file and click "Delete". Do not forget clean the trash too, since all deleted files are moved there.
So, we have considered such a service as Cloud Mail.ru. Here you can watch, save videos, pictures, documents. You can also create files in any text editor. When you first register, you will be presented with a 100 GB Cloud. If you need more space, then it is possible to connect new tariff. You can check the contents of the disk from any gadget.
Cloud Mail ru - special program, which allows you to store your personal information on the Internet. You can save photos and videos on it. mobile device and then view them from any device. The main condition is free access to the Internet (preferably a fast connection). Cloud Mail provides the user with about 25 GB of memory for free. Let's take a closer look at two ways to use the Mail.ru cloud: download the program on the Internet or install it as an extension in the browser via email.
How to download the Mail cloud to your computer - installation
For devices with operating system Windows, Mac OS X, Linux, Android, iOS, Windows phone you can download the cloud program from this link. Let's step by step download and install the Mail ru cloud program on your computer:
- Let's follow the link.
- Press the green "Download" button, another window will open with the "Download as" command.


- Click the small triangle next to the "Download" option, a list of operating systems for which there is a Mile ru cloud application will appear.
- Click the desired operating system in the list.


- The download window will open. We select a folder to save the application (remember the save path, so that later we can find the program for subsequent installation), click "Save".


Mile ru cloud application is already on your computer. Let's install this program:
- Your downloaded files are displayed in the lower left corner of the browser, look for Mail ru Cloud, click on the small triangle next to the downloaded file (or open the downloaded file through "My Computer", the path to save your file). We execute the "Open" command.

- The installation of the application will start, follow the instructions. We select the language of the program "Russian", "OK".


- On the monitor screen, you will see a new window "Welcome to the Cloud Mail ru setup wizard", click "Next".


- “Select installation folder” - select your save path with the “Browse” button, or agree with the default (drive C). Let's click on "Next".

- The installation wizard asks "Where should the program create shortcuts?". By default, the cloud can be opened through the "Start" key. If necessary, you can create a shortcut in any folder on your computer, to do this, click "Browse", select the desired folder, "Next".


- Next, a window will appear with the following commands "Create a shortcut on the desktop", "Run at startup", "Make home page”, next to which the checkboxes will already be checked. We remove them where it is not relevant - for example, “Make Mile ru home page” is the first page that you will see when you start the browser. If this is not relevant, uncheck the box. Similarly, other options - consider if you need them. We press "Next".

- A window will open with the final results of the application settings, we are viewing them. Click "Install" and then "Finish". Installation on the computer is complete.


- A window for entering the program will open - if you have an e-mail Mile ru, enter your address and password, if not, click "Register". We indicate our agreement to the license terms.


- “Select a folder for synchronization with the cloud” - click “Browse” and select a folder on the computer in which the data will be copied to the installed cloud. Then "Continue". If the system displays "The specified folder does not exist - create a new folder?", Click "OK".


- Selective synchronization is also available in the Mile ru cloud, if necessary, you can configure it (select a folder that will be copied to both the computer and the cloud). Thus, you can save more free space on your computer's hard drive and save half of the information only in the Mail.ru cloud. These folders can also be accessed via mobile program or Cloud Mile.ru online (via email). Click "Finish" - your cloud is ready to go. After pressing this key, a shortcut to the Mail.ru cloud will appear on your desktop.


How to download the Mail cloud to your computer if you have a Mail mailbox
If you have mail account to mail ru (such abbreviations in the mailbox name are @mail.ru, @bk.ru, @inbox.ru, @list.ru,@mail.ua), then you already have a web version of the Mail cloud. RU. It remains only to install it on your browser. To do this via email, follow these steps:
- We go to our mail on the mail ru page - enter “mail ru” into the search engine, click “Enter mailbox”.


- The login page will open, enter your password and email box, click "Login".


- Your mailbox window will expand to full screen. Above the list of incoming letters is the "Cloud" tab, click on it.


- Your Mail cloud will open and the system will prompt you to install it on your computer (in the right upper corner the message “Install Clouder” will appear, click on it).


- Execute the "Install" command open window applications.

- The application will ask you for permission to use some functions - “Install Clouder?”, Confirm the installation, click “Install extension”.


- Checking and then adding the "Clouder" extension to your browser.

- After installing the application, follow the instructions on the screen. A small cloud icon will appear on the taskbar in the browser - you can immediately save information when browsing the Internet.


- Click on the cloud icon in the upper right corner, it will appear extra menu- click on the gear (internal settings).

- Entering account, re-give permission to access user information (first name, last name, address Email), access to the directory structure in the Mail.Ru Cloud, uploading files to the Mail.Ru Cloud, creating directories in the Mail.Ru Cloud, creating public links in the Mail.Ru Cloud, click "Allow".


- The web version of the Mail.ru cloud is active on your computer. You can view the contents of the cloud through your mailbox, or through the cloud icon on the browser taskbar.
- It is very convenient to use this cloud through mobile app May ru mail (upload photos and videos from your phone, and then view them through a browser on your computer).
Note: All screenshots were taken in Google program Chrom on the example of the Windows 8 operating system.


We considered installing the Mile ru cloud application on a computer in order to save space on the hard drive, as well as installing a special cloud expansion Clouder, which allows you to save information directly to the cloud, and is also available from any device via e-mail Mail.ru.
Hello friends! Today's article is about Mail.Ru cloud storage. Let's figure out how to use the cloud through the web interface:
How to upload files there and share links to them;
How to create folders and configure access to them;
How to move, rename and delete files.
How to create documents, spreadsheets and presentations directly in the cloud.
And other subtleties of use.
The beauty of any cloud storage is that it gives you extra space to store your files online.
No need to clutter up your computer again.
It is convenient to share files with other people (just open access via the link).
And since I have a mailbox on Mail, I decided to use this storage as well. Moreover, 25 GB of memory is available for free here. Insert from 2018 - now they give 8 GB for free.
Basically, it's all theory. And we will move on to practice.
Watch my video tutorial on working with the Mail.Ru cloud below:
So, as you already understood, in order to access the cloud on Mail.Ru, you need to register a mailbox here. Thus, you create your account, through which you can use other Mail services, including cloud storage.
Although it is not necessary to register a mailbox, you can use Mail to enter your mail located on another service. I showed it in the video (watch from the 11th minute 46th second). Thus, your box, for example on Yandex, will open in the Mail.ru interface and you can also use the cloud.
To move to the cloud, being on home page Mail.Ru, you need to click on the "All projects" tab and select "Cloud".

Initially, pictures and a video file are already loaded there, which you can delete. Delete files possibly in several ways. If you need to delete several files at once, mark them with a checkmark and click on the "Delete" button at the top.

Or right click mouse click on the file and select "Delete". Again, if you marked several files, they will all be deleted.

And such a nuance - in the Mail.ru cloud there is no basket into which deleted files, as on the same Yandex disk. From there we can restore them. We delete from the cloud immediately!
To add files from computer to cloud, use the "Download" button in the upper left corner.

You can upload using the "Select files on the computer" button, or drag and drop them into the download window with the mouse. There is a limitation - the size of the uploaded file is up to 2 GB.

Next to the "Download" button, we see the "Create" button. We use it for creating folders, documents (Word), spreadsheets (Excel) or presentations (power point) directly in the cloud.

If you want to organize your files in the cloud, then create special folders for them. To move file to folder, select it with a checkmark, right-click, select "Move".

A window will open in which you can select a folder to move or immediately create a new one.

Generally, we can use the right mouse button to different actions above files– delete, move, copy, download, generate a link for other people or send by mail. It is very comfortable.

By the way, if you need download several files from the cloud at once. You select them with checkboxes and for downloading they will be automatically packed into one archive.
![]()


If you open access to a file for a while, and then want to remove this link, then select the desired file with the mouse, right-click - select "Remove Link".

All your files that you have shared can also be found in the " General access».

If a link to a file from the Mail.Ru cloud is shared with you, then you can immediately download it or save it to your cloud. You will have the option to specify a folder (where you want to save this file), or you can create a new folder for it.

Now a few words about setting up access to folders. You can share any folder with the possibility of editing. That is, other users will also be able to add files to this folder.
To configure access to a folder, check its box, click on the “Set access” tab.

Editing access can only be granted to individual members that you invite via email.

If you are going to send an invitation to a user with a mailbox not on Mail.ru, then he will receive an invitation only if he enters his mail via Mail. More about it Here.
This user will see the following prompt in their mailbox:

Having accepted it, in his cloud, in the "Sharing" section, he will find the folder that you have opened for him, and will be able to add his files to it. You, in turn, will see all the changes he made in your folder.
I wish you success!
Sincerely, Victoria
“It seems to me that the more data we give to the network, to the clouds, the less we actually control it.”
Can cloud storage be trusted?
I think the majority will answer negatively to the first question, but at the same time positively to the second one.
At present, cloud services have become so widespread and closely integrated with the equipment of leading manufacturers of computers and various gadgets that many do not even think about where exactly their data is stored and what can happen to them.
Are the clouds so scary, and are our home computers so safe?
Let's look at Steve's arguments.
The first argument is “nothing belongs to you in the clouds”. Information created by you, especially information about yourself (personal data), always belongs to you, no matter where it is located. By transferring it to a cloud service for storage, you do not transfer any rights to information to its owner. She was and is yours.
The second argument is “the more data we give to the network, to the clouds, the less we actually control them.” Have you ever encountered such a situation: you are trying to boot your computer, it does not boot, and an offer to pay money for unlocking is displayed on the screen, or you are accessing a file, but it is encrypted, and again they demand a certain amount for decryption? Millions of computers in the world are infected and are part of botnets. Perhaps your computer is no longer under your control, and, accordingly, all the data that is on it.

Do we have reason not to trust cloud services?
The theory teaches that in order to protect information, it is necessary to ensure its confidentiality, integrity and availability. Let's see if these properties are provided when using clouds.
Legal aspects
The terms of use for cloud services almost never include a commitment to maintaining the confidentiality and integrity of your data. Organizations should remember that, as operators of personal data, they need to provide the full range of processing requirements and that is not always feasible in the cloud.
In addition, a ban on the storage of PD in databases located outside of Russia should come into force in the near future (this provision should come into force on September 1, 2016, although the transfer of this period to September 1, 2015 is being actively lobbied for). .).
In terms of the availability of the cloud service, at first glance, everything is fine. Most cloud service providers guarantee high service availability. But let's figure out where the responsibility of the cloud service provider ends and where you are with your Internet access devices.
There are dozens of reasons why your data stored in the cloud may not be available to you, even though the cloud service itself will be fully operational. Therefore, the actual availability of the cloud service is much lower than stated in user agreement digits.
Added to this are the risks associated with Western sanctions against Russia. Most, I think, have heard about the decree of the President of the United States on additional sanctions against Crimea, the consequences of which could be the blocking of services on the peninsula, such as Gmail, Skype or iCIoud. In the current difficult political situation, you cannot be sure that at one fine moment you will simply not be disconnected from the cloud service, especially if this service is provided by an American company.
Let's try to assess what is the real situation with ensuring the integrity and confidentiality of information in the cloud.
Despite the fact that the provider has no formal obligations to ensure these properties of information, all well-known global IT companies, when organizing cloud services, provide a sufficiently high level both from unauthorized access to them and from destruction for some reason. technical reasons. Those. attackers are unlikely to be able to achieve their goal by a direct attack on the resources of a cloud service provider. Although, as they say, there is a hole even for an old woman, as evidenced by loud statements periodically appearing in the media about the leakage of user data from large IT companies and Internet services.
The main vulnerability of Internet services lies in the use almost exclusively of password authentication and the use of not quite reliable methods for recovering forgotten authentication data - logins and passwords (primarily via e-mail). True, in recent years, in terms of recovering authentication data, there is a clear trend towards their complication.
When connecting cloud services, organizations should immediately attend to the implementation of some kind of two-factor authentication mechanism. The maturity of cloud services in terms of provision information security on this moment leaves much to be desired. You will hardly find in them a wide range of authentication methods, a very flexible access control system, advanced event auditing with support for SIEM systems, built-in cryptography tools, etc.
If you do not trust the cloud service provider or want to ensure additional protection information in the cloud, then you should apply . This method of protection is possible if you do not plan to process information in the cloud (for example, edit photos or text), but only store and transfer data in its original form.
At the same time, it is necessary to take into account the difficulties with the distribution and management of cryptographic keys (especially for large organizations) and the loss in mobility (in order to access data, you must have an up-to-date cryptographic key stored in a safe way, and this may cause technical or technological problems).
Yes, we have reason not to trust cloud services. Yes, large organizations that invest heavily in data security can provide a higher level of data protection by hosting information in their data center than in the cloud.
But at the same time, it is clear that the use of cloud services will only expand. It’s convenient when you don’t have to think about creating this or that IT service and maintaining it in working condition, but you can use the clouds almost instantly.
By analogy, most prefer to buy a cake rather than bake it themselves. Moreover, a cloud service, as a rule, allows you to quickly change the parameters of the service, which is not only convenient, but necessary for most organizations with a significantly increased pace of changes in business requirements. It should be noted that the significantly greater adaptability of cloud services for mobile users, and business and we ourselves are becoming more and more mobile every year.
Therefore, whether you trust the clouds or not, they have already entered or will soon enter your life. And now it’s worth thinking about what information you are ready to entrust to the clouds and how you can minimize the risks that we discussed in this article.
Anatoly Skorodumov
In this article, I will continue to talk about working with various online storages and we will consider 3 more good service: Cloud Mail, Mega and Microsoft OneDrive.
From this manual you will learn how to register in each of the above services, as well as how to work with them through web interface And special application for operating systems (I will show on the example of Windows).
I talked about working with Yandex and Google Drive services in a separate previous article - because they are the most in demand and popular.
Each of the above 3 services provides its own specific volume for storing your data for free, and also has its own rules for expanding the volume both by paid and free means.
You can read such general information and a comparison of all the most popular online discs in a separate article:
Let's start with the Cloud@Mail service.
Registration in the Cloud@Mail service
The Mail service provides a free 100 GB remote data storage.
Consider step by step how to register and connect your account and get 100 GB right away.
Go to the Cloud@Mail service page using the link:
At the very bottom of the page that opens, there will be a big button "Try the cloud". We press it:
A login form will appear. If you already have an account on Mail.ru (for example, email), then simply enter your login, password and click the "Login" button, after which you will immediately find yourself in your remote storage account from Mail.
If you do not have an account on Mail.ru, then click on the "Registration" link:
A window with a registration form will open. Fill in all fields with your data: First Name, Last Name, Date of Birth, City, Gender.
In field " Mailbox» Specify the desired login, by which you will later log in to all Mail services. For you, the mail of the format will also be automatically registered: “Your [email protected]”.
Enter the password below and repeat it on the next line. Try to specify a password more difficult for your own security. At the same time, Mail should report that the password is strong.
Next, you can enter your existing phone number and complete the registration, or you can leave out the number (you can do this at any time) and enter a security question instead. To do this, click on the link "I don't have a mobile phone":
After clicking on this link, 3 more points will appear below. You need to fill in the top 2: "Secret question" and "Answer". In the first one, you, respectively, choose a security question and indicate the answer to it below. This answer is useful in case you forget your login information:
Press the "Register" button.
A window for entering captcha will appear. Just specify the characters exactly the same as in the picture on the right and click "Finish":
On this registration is already completed, but windows with settings will still appear. For example, in the next window, you are offered to collect all your mail from other mailboxes into one mailbox just created on Mail. Of course, if you constantly use the created mail from Mail, it makes sense to do this, but we are not talking about working with mail now, and therefore we press the "Skip" button:
In any case, you can set up the collection of mail at any time through the account settings.
Next, a settings window will appear, where they offer to put a signature that will be attached to every letter you send from Mail and upload an avatar for your account. This does not affect the Cloud service, which we are considering, and therefore you can do it now, or you can do it later. Press the "Save" button:
This was the last settings window, after which you will be taken to your Mail account and mail will be opened at first. Let's move on to reviewing the main functions when working with the Cloud@Mail service through the Web interface.
Working with the Cloud@Mail service via the Web interface
After you register an account with Mail, you will immediately be signed in to the account you created. From there, you can go to the online storage service by clicking on the button with the image of a cloud in the upper part of the window:
A window will open with a greeting from the service, where we simply click "Next":
And in the last window, we accept the terms of the license agreement by checking the appropriate box and click "Get Started":
Let's move on to the possibilities of working with online disk from Mail through the Web interface
After switching to the online storage service from Mail, we will see this interface:
Let's start to consider the useful functions step by step:

On this, we have analyzed all the most important functions for working with the Cloud@Mail service. Let's move on to consider how to work with the Cloud through a very handy application for the Windows operating system.
Working with the online disk Cloud@Mail through the application for Windows
Working with any online drive through an application for your system is much more convenient and allows you to use more features, such as the ability to download folders, not just files.
Let's consider everything step by step.
Installing the Cloud@Mail application on a computer:
First you need to download the application. You can do this directly from the main window of your account by clicking on the "Download app for computer" button:
If there are requests, I can also separately tell you about working with any similar online storages via Smartphones / Tablets, which is also very convenient!
In a new window, we are prompted to select the operating system for which the application will be downloaded. In our examples, we are only looking at Windows systems so far. But the principle of working with the application on other systems is completely similar. So, click on the button with the image of Windows:
The installation file will download to your computer. Find it and run:
In the first installation window, select the language and click "OK":
In the next step, you can change the installation path by clicking the Browse button if necessary. But I recommend leaving the default path.
It will now prompt you to change the folder in the start menu. There is no point in this, but if you want to change it, click "Browse" and select another folder.
In the penultimate installation window, we can disable automatic start applications at Windows boot and disable desktop icon creation. Create a shortcut on the desktop or not - you decide and you can create it in the future at any time. But I recommend that you never disable the launch function with Windows so that your files are always synchronized with your account, and you always have access to latest versions your files from any of your devices. Otherwise, you never know, you forget to run the application manually, and in this case, changes in your previously downloaded files will no longer be saved to the server.
After you have chosen what you need, click "Next":
Well, in the last window, click the "Install" button:
Installation usually takes a few seconds.
At the last final stage, click "Finish", leaving the checkbox "Start Cloud Mail.ru" in order for the application to start immediately:
All! The application is now installed on your computer. Let's get to work with it.
Working with Cloud Mail through the application installed on the computer:
The first thing you need to do is sign in to your account. The authorization window will be displayed immediately after you install the application.
We enter the login and password for the account in Mail (it must be indicated in the format of your email on Mail), leave a checkmark "I agree with the terms of the license agreement" and click "Login":
After that, the application will be launched. It will be displayed in the Windows tray and you will receive a notification:
Access to your account folder [email protected].
So the app is working. In order to see the files that have already been uploaded to the Cloud, open the specially created "Cloud Mail.ru" folder. This can be done from the desktop shortcut:
You can also always open the disk folder by double-clicking the Cloud Mail icon in the tray.
In the folder, you will already see all your previously uploaded files through the Web interface, for example:
Uploading files to the Cloud through the application is as easy as shelling pears. Just copy to the Cloud Mail.ru folder all the file and folders that you would like to upload to your online Mail drive:
Please note that now, using the application for a computer, you can upload entire folders in addition to files!
To check if the files have been completely downloaded to your disk, right-click on the application icon in the tray:
If all the files are uploaded, it will say “Synchronized” at the top, if the download is still in progress, it will say “Synchronization in progress”.
Deleting files from your storage is also easy. To do this, you just need to delete them from the Cloud Mail.Ru folder located on your computer.
Consider the last important function through the application - access for downloading the selected file to other users.
In order to get a link to download any file located on your disk through the application, open the Cloud Mail.ru folder where all your files are located, right-click on the one you need and select [email protected]: Copy Public link":
On this, we have analyzed all the main functions for working with the [email protected] service, and it's time to move on to next service– Mega.
Registration in the Mega service
Consider the process of creating an account in the Mega file storage, which provides 50 GB of free disk space for free. As you can see, the service is in English by default, but you can change the language to Russian immediately after creating an account.
So, let's start registration:
This completes your account creation! Now let's move on to reviewing the functionality through the standard Web interface (i.e. through the browser).
Working with Mega online storage through the Web interface
After you register an account, the service interface will look like this:
Let's start step by step to consider all the main functions of the service:

Now let's look at the interaction with the Mega online storage through a special application for Windows.
Mega online storage management via Windows application
Let's start by installing the application:
To get started, the application, as usual, needs to be downloaded. You can do this from your account.
Go to the "Menu" section, select the "Applications" submenu and then the "Sync Application" item:
On new page go down a little and click the button "Download free for Windows":
Will begin automatic download file. Sometimes you need to specify the download folder manually. It depends on the browser.
After the file is downloaded, find it on your computer and run:
The installation process will begin. Similar programs tend to have pretty much the same setup process. In the first window, select the language and click "OK":
Accept license agreement"Accept" button:
At the next stage, I recommend switching the button to the item "Install for anyone using this computer", which means - install for all users this computer so that in the future there will be no problems with access to the program:
In the next window, you can specify a different name for the folder in the Start menu, where program shortcuts will be placed. It's best to leave the default name. Click the "Install" button:
The download process will start additional files for installation, which will take about a minute:
In the new window, enter the login (E-Mail) and password that you specified during registration and click "Next":
Now, from the two synchronization options, select "Full synchronization", so that all the files and folders that you have already uploaded to the Mega storage are synchronized with your computer (i.e. you can see the downloaded folders and files directly on your computer):
Press the "Forward" button.
We are now given the opportunity to change the folder for the Mega storage on your computer. In this folder you will upload all the files that you want to be on the online drive. You can leave the default folder, or you can change it by clicking "Change". As a rule, I leave the paths the same, because it is more convenient and, in principle, it does not make sense to change the path.
After that, click "Forward":
In the last window, click the only button "Finish":
This completes the installation of the application. Immediately after installation, you will receive a notification, and in the Windows tray there will be an application icon - Mega:
We turn to the principle of working with the Mega service through installed application.
Mega online storage management through the application
The Mega application for the computer has no settings and its management is as easy as shelling pears. Any computer user can handle it :)
Let's analyze everything that is available to us through the application:
We also figured out the Mega storage. And now let's look at the last service that I promised to talk about in this article - Microsoft OneDrive.
Signing up for Microsoft OneDrive cloud storage
Microsoft's OneDrive storage will give you 15 GB of free storage, which is comparable to the free storage provided by Google.
Let's start the registration process:
Immediately after completing the last step, a page with your online storage on OneDrive will be opened.
Consider how to work with it through the browser.
Working with OneDrive on the Web
The OneDrive service interface looks like this:
As you can see, it is basically similar to all similar services that we considered earlier. The principle of interaction here is also exactly the same. Let's break it down:

In general, nothing complicated this service I do not have it either:)
And finally, I will show you how to work with OneDrive through the application, as I showed earlier for everyone similar services.
Work with OneDrive through the Windows app
The OneDrive online storage app is not supported by Windows XP!
Installing the application on a computer:

All! The OneDrive desktop app is fully installed and configured. It remains to consider how to work with it.
Manage OneDrive online storage through the Windows app
Well, in principle, managing your OneDrive storage through an installed application is nothing new. Everything is exactly the same as in the previously considered similar services. Read below and see for yourself :)

Well, that's all. There are no other special features in the OneDrive app. Everything is exactly the same as in the previously discussed applications from other developers.
Today I told you about working with 3 more services that provide a normal free amount of file storage, and I’ll probably stop there. Of course, there are a dozen more such services, but many do not provide more than 5 GB of free space for free. For example, the well-known Dropbox provides only 2 GB of space for free, which is too little, and, accordingly, you need to pay money for the extension.
Therefore, I think that those services that you have read in my articles will be enough for you through the roof for convenient operation with your details :)
Have a nice day! Bye;)