Internet guide - all the most interesting things on the web. Sync all changes in OneNote notebook Onenote windows phone not syncing
Read also
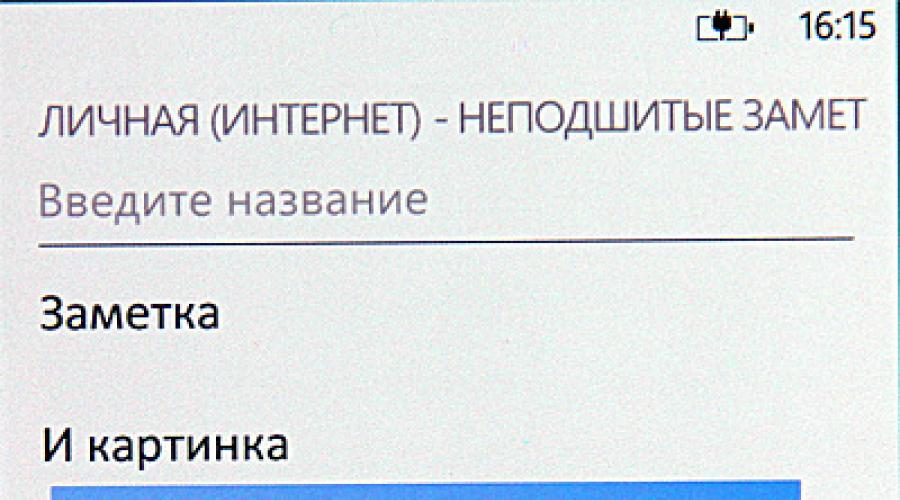
As part of the study of the cloud service, SkyDrive tested how OneNote note synchronization works on Windows Phone 7. (I have already talked about photo synchronization.) OneNote is a note service that can be placed under a single-level rubricator of so-called notebooks. You can include formatted text, lists, checkboxes, images, audio recordings, highlights in the text in a note. The last created notes in the phone are located in the form of large icons of the corresponding section of the mobile office.
When creating a note, you can attach an image from the phone's albums to it, as well as simply take a photo with the built-in camera, you can also attach a voice message, which is written right at the moment the note is created.

The created note is saved automatically - when you press the "Start" button or the return button.
If the phone is connected Windows account Live, then, as in the case of photos, newly created notes are automatically copied to your section of the SkyDrive cloud service.

You can work with notes right there, or you can call them in OneNote app from the MS Office package. If notes are edited in SkyDrive or OneNote on a computer, they are reflected in the phone after a short time and vice versa.
Unfortunately, for some reason, you can’t create notebooks on your phone (which, by the way, is sad) - only in SkyDrive or OneNote on your computer. But the notebooks created in SkyDrive appear in the phone. And if you need to create a note in a specific notebook, then you just need to go there.

Checkboxes are convenient to use for creating various tasks - for example, from the series "what to buy so that my wife does not swear."

Any note can be placed as an icon on the desktop - so it will always be in sight.

Well, and, accordingly, if you have synchronization with SkyDrive, you simply give your wife access to this particular note so that she can edit it. At the same time, Zhenya does not even need to have MS Office on her computer - she just goes into her SkyDrive, goes into a general note with these purchases, and edits everything she needs there. Having checkboxes is very useful for husbands like me - I keep forgetting to buy something from the list. And then - bought, noted, now everything is clear.
I looked at how synchronization is done. When creating a note - almost instantly there is a command to synchronize it with SkyDrive. When you change a note on your phone, the update immediately goes to SkyDrive.
In the opposite direction, everything is somewhat slower: SkyDrive does not immediately send a command to update the note on the phone, it takes some time, several minutes. But here it is always possible to make sure that the latest version of the file is on the phone: you can simply click the "sync" button on it, and then the synchronization is done immediately.
Of course, I will not say that this is the most convenient way in the world - I personally take notes in Evernote (which also has clients for all platforms, including Windows Phone 7) and I like this application much more than OneNote. (Although, by the way, Evernote also has certain inconveniences and glitches.)
But I needed to see the basic functionality of Windows Phone 7 in conjunction with SkyDrive - it turned out that it works quite well. Although the inability to create a notepad on the phone - pretty surprised.
To fix OneNote sync issues on your mobile device, try the following:
Make sure OneNote is running in the foreground.
Sign out and sign back in to OneNote to reset your credentials and avoid authentication issues.
Force sync.
OneNote for iOS (iPhone and iPad)
Reset Credentials
On an iPad, tap the gear icon on the right upper corner.
On iPhone Tap the ellipsis icon ( ... ), and then select Options.
In Microsoft OneNote for iOS, go to " Options" on your device:
Open OneNote, tap the back icon < in the upper left corner of the screen to see the list of notebooks, and then tap the gear icon next to the account name and email address.
On the screen Options In chapter Account select an account name.
Tap the account name again and select a team Delete account .
Confirm the logout in the prompt that appears on the screen.
Double-click the home button on your device and swipe up on the OneNote screen to close the app.
Force sync for iOS
OneNote for iPad or iPhone does not support forced syncing of notebooks.
OneNote for Android
Reset Credentials
Open OneNote and in the lower left corner, tap notebooks.
Options.
Touch an item Account.
Click Exit, and then- OK.
Tap the recent apps button at the bottom of the screen (to the left of the Home button), find the OneNote app, and swipe to close it.
Launch OneNote and sign in to your account.
Forced sync for Android phone
In OneNote, find the notebook that isn't syncing.
Tap the three-dot menu at the top right of the screen, and then select Synchronization (account name).
Advice: To sync all notebooks, go to the list of notebooks. Tap the three-dot menu, then select a command synchronize everything.
Do not turn off your device while the sync is in progress. You may need to leave your device overnight, especially for very large notebooks or when synchronizing for the first time.
Note: This page is translated automatically, so it may contain inaccuracies and grammatical errors. It is important to us that this article is useful to you. Was the information helpful? For convenience also (in English).
While working with a notebook stored on the computer Microsoft office OneNote 2007 always automatically saves your changes, thereby eliminating the need to use the command Save. However, when multiple users are working on a shared notebook at the same time—a notebook that is stored in a public location—it becomes more difficult to save and manage changes made by all users.
By saving side-by-side changes to a shared notebook, OneNote periodically syncs the notebook on each user's computer with the notebook files that are stored in a shared location. The parameters that control this process are configurable. In some cases, conflicts may need to be resolved to accurately reflect the changes that each user makes to the shared notebook.
Intended action:
- View sync status
- Change sync options
- Resolving Sync Conflicts
View sync status
By default, OneNote automatically syncs shared notebooks at regular intervals. On the navigation bar Notebooks OneNote displays a sync status icon showing the current status for each shared notebook.
OneNote app syncs changes This icon is displayed when OneNote attempts to sync changes made at the same time as other users. During the synchronization process, do not disconnect from the network or turn off the computer.
OneNote has finished syncing changes This icon is displayed when changes in a shared notebook have been successfully synced to a shared notebook file. In this case, other users will be able to see latest version notes.
OneNote cannot fully sync changes This icon is displayed when the shared notebook location cannot be accessed, or when errors occurred during the last synchronization. To determine the cause of the error, hover over the name of the notebook in the navigation bar Notebooks and wait for the tooltip to appear. If you are not connected to a public location, you can continue to modify the local copy of the selected notebook on a separate computer. These offline changes will be automatically synced when you connect to a public location.
Note. OneNote must be open to sync shared notebooks. If your computer is connected to a shared network location but OneNote is closed, the shared notebooks will not sync.
View Sync Errors
- On the menu File select a team Synchronization, and then click the button.
- In the dialog box, select the tab Mistakes.
Note. If a particular section of a shared notebook fails to sync, OneNote will continue to sync the rest of the sections in that notebook.
Change sync options
For most cases, automatic syncing of notebooks is fine, but you can control this process manually by setting the sync time. This is useful when you want synchronization to happen quickly (for example, just before you turn off your computer). You can also delay automatic sync if you don't want to show changes or additions to other users before they're made to a shared notebook.
Manually syncing a shared notebook
- On the menu File select a team Synchronization, and then do one of the following:
- Select an item Synchronize all notebooks to sync all shared notebooks listed in the navigation bar Notebooks.
- Select an item Synchronize current notebook to sync only the notebook that is currently being modified.
Turn off automatic notebook sync
By default, automatic synchronization of shared notebooks is enabled. If you don't want other users to see changes until they're in a shared notebook (for example, when the content hasn't been reviewed), you can turn off automatic sync.
- Open the shared notebook for which you want to turn off automatic synchronization between your computer and the shared notebook file.
- On the menu File select a team Synchronization, and then select Offline work.
Important. When working offline, OneNote will not attempt to sync changes to notebooks, even if you exit and then restart the OneNote app. Changes made to the notebook will no longer be visible until the automatic sync feature is re-enabled.
Turn on automatic notebook sync
- Open the shared notebook for which you want to enable automatic synchronization between your computer and the shared notebook file.
- On the menu File select a team Synchronization, and then select Notebook sync status.
- In the dialog box Synchronizing a shared notebook select sync mode Automatic synchronization when there are changes, and then click the button close.
Resolving Sync Conflicts
Interrupted connections to the public location of notebooks and network conditions can cause sync conflicts that notebook owners or other users need to resolve manually.
Version conflict messages usually appear when multiple users are trying to change the same paragraph at the same time, or when changes are made while another user's changes are being synced. The error message may also appear if multiple users have made changes to the same paragraph while offline.
In this case, an error message will appear in the yellow information bar. An icon will also appear on the page where the conflict occurred.
To resolve a conflict in a shared OneNote notebook, follow these steps:
- Click the yellow info bar at the top of the page to view a page that lists the changes that caused the conflict (highlighted in red).
- If necessary, include changes to the master page.
- When finished adding changes, delete the Conflicts page by right-clicking its tab and selecting context menu command Delete.
Note. It is not necessary to resolve conflicts immediately. Pages that have caused certain conflicts will continue to sync when further changes are made to the notebook. Subpages listing conflicts are retained in notebook sections until a decision is made to resolve those conflicts. Conflicting subpages from a particular shared notebook appear on all users' computers, so anyone can resolve the conflict.
Overview of missing sections
Missing sections can appear when OneNote tries to sync changes made to a notebook section whose file was not found. In such cases, near bottom navigation bar Notebooks above the button All notebooks button appears Moved Sections.
Missing sections may also appear in the following cases.
- When you make changes to a section that has been removed from the public space by another user.
- For example, you are making changes to a partition that was moved to another location by another user. If a section has been moved to another shared notebook that's open on your computer, OneNote can find that section's file and sync the changes in it to the new location. In this case, the icon Moved Sections will disappear after the changes are synchronized.
The missing sections will remain in the shared notebook until OneNote finds a new location for the section, or until someone deletes or moves the missing section.
Removing a missing section
If a shared notebook section was intentionally deleted and you no longer want to sync or save changes to it, follow these steps:
- At the bottom of the navigation bar Notebooks press the button Moved Sections.
- In the list of missing sections, right-click the name of the section you want to remove, and then select the command from the context menu Delete.
Important. If you delete a missing partition, the data it contains will also be deleted. If you may need this data later, you can not delete the section, but move it to another part of the notebook.
Move a missing section to another notebook
If a section in a shared notebook can no longer be synced, but you want to keep the data it contains, you can move the unsynced section to another notebook. This will remove it from the shared notebook while saving its contents.
- Right-click the tab of the missing section you want to move, and then on the context menu, select Move.
- In the dialog box Moving a section Perform one of the following actions:
- To place the current section in front of another section tab, click that tab in the list, and then click Post up.
- To place the current section after another section tab, click that tab in the list, and then click Place after.
- To place the current section in a section group or in another notebook that does not contain sections, click the desired group or notebook in the list, and then click Place in.
Advice. For creating new group sections, select a location in the list, and then before moving the current section, click Create section group.
Problem
When you try to sync changes made to a notebook in Microsoft OneNote for Windows 10, OneNote 2016, OneNote for Mac, OneNote for iOS (iPhone and iPad), or OneNote for Android, you may encounter the following error:
Sorry, there was a problem trying to sync your notebook. (Error code: 0xE0000007)
State
The OneNote development team is actively investigating this issue. We apologize for the inconvenience caused by it. We will update this article as more information becomes available.
In the meantime, try the workarounds below.
Problem Solving Instructions
To exclude the most probable causes error 0xE0000007 in OneNote, do the following:
Make sure you are using the latest version of OneNote.
Depending on your version of OneNote, do one of the following:
Wait a while. In some cases, the error may be caused by a temporary issue with our servers.
Make sure that network connection computer or mobile device works, using another cloud application or web browser.
Force sync your notebook by doing the following:
Try opening notes in OneNote for the web
If the steps above didn't resolve your issue, check if you can view your notebook in OneNote for the web.
In a browser, go to www.onedrive.com and use the same account you use to sign in to OneNote.
Navigate to the folder where the notebook is located (usually Documentation or Notebooks), and then click the notebook name to open it in OneNote for the web.
Further instructions depend on the results of these actions:
If you were able to open your notebook in OneNote for the web and it has all the latest changes, continue working in OneNote for the web.
If you were able to open your notebook in OneNote for the web, but it doesn't have recent changes, make a copy of the pages that haven't synced with OneNote for the web. To do this, go back to your main OneNote app (OneNote for Windows 10, OneNote 2016, or OneNote for Mac) and copy the pages to a notebook that doesn't get the 0xE0000007 error. This notebook can then be opened in OneNote for the web.
If you can't open a notebook in OneNote for the web, it means you don't have permission to open and edit it. For example, if you got a notebook through OneDrive or OneDrive for Business, make sure the owner hasn't revoked your permission.
Close and reopen notebooks that are experiencing error 0xE0000007
If the steps above didn't resolve the issue, you can close and reopen your notebooks to force notes to sync with OneNote. You should only attempt this if you have an up-to-date backup copy notes.
Warning: Performing the following steps may result in data loss. In particular, if the notebooks with the 0xE0000007 error had out-of-sync changes, they might be lost. Please understand that if you choose to perform these steps, no one, including the service technical support Microsoft will not be able to recover lost information.
If you are sure that all important changes are in sync, or you are not afraid of losing them, follow these steps:
After closing your notebook, try opening it again. If the issue persists, you can create a new notebook and then copy the pages and sections from the notebook that is experiencing error 0xE0000007 into it and sync the changes.
OneNote is a great note-taking tool, but unfortunately it's not talked about often. This program has more features than many people think, undeservedly depriving it of attention. A few tips to help you use OneNote more effectively than those who are not yet familiar with it Microsoft product, and those who constantly work in it.
First: OneNote is a cool program
OneNote is included in the Microsoft Office suite and has been around for about 10 years. Despite this, users still continue to explore it, and very often the program becomes a real discovery. Here are a few things that attract users:
- OneNote is similar to an electronic version of a notebook. You can create an unlimited number of notebooks in it, they have different sections, and sections have pages. The pages inside the notebook are organized by color to make it easier to navigate.
- You can insert anything into the pages: pictures, audio, video and files (just drag and drop). All this variety can be placed in different parts pages as you wish. You can add an audio recording next to the meeting note and attach a photo of the event next to it.
- OneNote is incredible convenient search: You can search for text in pictures and even audio and video as easily as handwritten notes. The program can read your handwriting without converting it to text, although you can do that too if you want. Stylus support is one of OneNote's biggest selling points and sets it apart from Evernote, although you'll need a Tablet PC for that. Be that as it may, the 2013 version of OneNote allows you to write and draw with your finger.
- The program can be integrated with Outlook and other Microsoft Office programs.
Take quick notes without opening the program

Two program shortcuts help you create new notes even faster. If you press Win + N, a small panel will open, and Win + S will take a screenshot of any part of the screen.
In Windows 8.1, to take a screenshot, press Win+Shift+S. Quick notes are automatically saved in the "Unfiled Notes" section, and screenshots can be saved in any section.
Another feature - if you right-click on the OneNote icon on the taskbar, you can start recording audio or assign any other action: a quick note, a screenshot, or launch OneNote.
Edit and format notes with keyboard shortcuts

You can quickly add tags, insert checkboxes and special note names with keyboard shortcuts. In fact, there are a lot of these combinations, but we will indicate only four of them, with which you can create a new note:
- Add new page at the end of the section - Ctrl + N
- Add a new page below the current tab at the same level - Ctrl + Alt + N
- Add a subpage below the current one - Ctrl + Shift + Alt + N
- Make the current page a subpage or vice versa, move it to a higher level: Ctrl + Alt + ] (right bracket) or Ctrl + Alt + [
Cutting a web page to paste into OneNote
If you have OneNote installed, Internet Explorer appears two handy tools: Send to OneNote and Link to OneNote. The program saves the web page, the time you use it and adds its URL.

If you haven't used IE in a while, you can paste a printout of your document from your browser using the Send to OneNote panel.
Embed audio, video, math formulas, links and more
As mentioned above, one of best features OneNote - support for embedding anything, which simplifies not only work, but also search. Feel free to experiment with search. Here are some ideas on how you can use it:
- scan handwritten prescriptions;
- record lectures and then search for them by key terms;
- add screenshots and search for text in them;
If you need to find something in video and audio files, you can find it like this: File>Options>Audio and Video
If you have a stylus-enabled screen, OneNote can help you:
- paint ;
- turn your doodles into text;
- write notes on cut or scanned pages;
Change the view to make it easier to work
In normal mode, you see all notebooks, tabs, sections, and pages, but the view menu offers more options. F11 opens full screen mode, which is great if you're working on a note. The maximized workspace helps you focus on your work without distractions, while the Pin to Desktop mode is great for taking notes and browsing at the same time.
Use templates and add-ons

Templates and add-ons enhance OneNote. In the "Page Templates" tab, you will see what you can work with right now: templates for students, for work, and many others. You can also download beautiful templates from the Microsoft Office website. IN empty templates there are even options for resizing the page, such as up to 3x5 for a file cabinet or postcard. If you often use the same type of documents, you can customize the template that will be applied to the page and save it to save time.
As well as to others office programs, OneNote has several apps, such as the free Onetastic, which works with 2010 and 2013 apps. With this app, you can view OneNote pages on your calendar, crop and rotate images in the program, create your own macros, pages, sections, and more.
There is another useful addition - Outline, which is useful for cross-platform use. It takes notes made in OneNote and syncs them to your iPad or Mac. You can view OneNote files on your iPad and they will look exactly the same as on your computer. There is a free version of this program and Outline+ for $14.99.
Use with other Microsoft Office programs
If you are constantly using Microsoft programs Office, OneNote will help speed up and simplify your work. In version 2013, it became possible to insert tables Microsoft Excel or even create them. In this case, the table will be edited in Excel, but all changes will be displayed in real time. You can also add shapes for Visio and simpler flowcharts.
One of the most useful features- integration with Outlook. You can check the box next to any line on a OneNote page and it will turn into an Outlook task. You can also send format-preserving pages to others so they can read your notes even if they don't have OneNote installed on their device. Finally, you can transfer meeting notes along with all the details from Outlook to OneNote.

These tips only scratch the surface of OneNote's ability to organize notes, and if you don't already have a favorite note-taking program, maybe you should give it a try?