What are the means of manipulation in informatics. Let's divide computer parts into four main groups: System block; Peripherals
Read also
Computer Basics Purchasing a computerPart 1
Chapter 1
¦ Choosing a computer store.
¦ Buying a ready-made computer.
¦ Self assembly computer.
you decide to buy Personal Computer. In addition to wanting to buy electronic assistant, you need to know how to choose its configuration correctly. Of course, you can just go to a computer store or computer market, where you will be offered many models for every taste and for almost any amount of money. However, don't rush.
Without thinking well in advance about the choice of every detail of the future computer, you most likely will not get what you want for the amount of money you have. Moreover, this will not be revealed immediately, but only over time. Very often, users are faced with a situation where a computer does not have hardware support for a particular function, or that they overpaid for one part, buying its latest model, saving on another, but they should have done the opposite. Sometimes it happens like this: having bought an expensive video card and saving money on a monitor, after a while you realize that the capabilities of the video card are used by about one tenth. It is logical that in this case it was possible to buy a cheaper video card.
When buying, keep in mind: you should not hope that the seller of computer components will draw your attention to such subtleties. Market laws also apply to computer stores. If the seller needs to sell an expensive video card, he can paint its merits without deceiving you in the least. However, if after that, having paid a large amount of money for it, you have to save on a monitor and you cannot appreciate all its advantages, you will be to blame. It is pointless to blame the seller - after all, he was telling the truth, and it is not his responsibility to evaluate the compatibility of devices.
I'll give you a real life example. One person ordered a computer from the company to perform standard office tasks - typing, creating spreadsheets, sending faxes, etc. After opening the box, it turned out that the computer had an expensive video card with support for 3D effects and sound with 5.1 system output, which is absolutely unnecessary for working with text and spreadsheets. At the same time, the computer was equipped with a small volume random access memory, which does not allow you to install a modern version of the operating system and software on it. In addition, the computer did not have a built-in modem needed to send faxes.
Thus, before purchasing a computer, be sure to do the following:
¦ clearly formulate the tasks for which the computer will be used;
¦ determine the price niche (how much money can be spent on its purchase);
¦ if necessary, check the documentation for software, which you intend to install on your computer in order to find out system requirements;
¦ determine the priority of components: what is worth saving on, and what is not;
¦ consult with a specialist regarding the selection and compatibility of components with each other and the intended software.
I will give the most common options for matching tasks and components.
¦ If large databases are stored and processed on the computer, then a large amount of RAM and a large amount of hard drive.
¦ When buying a computer for solving office problems, the quality of the monitor and video card is of particular importance. Moreover, when choosing a video card, only drawing a two-dimensional image and supporting as much as possible high frequency screen updates.
¦ If you plan to watch movies and DVDs on your computer, pay attention to the speed of the processor, the quality of the monitor and video card, as well as the sound system. It is best if the sound card has an output for a 5.1 decoder or has a built-in decoder. You also need a DVD drive and HDD large volume. If you want to watch movies on your TV screen, get a video card with TV out.
¦ To be able to professionally work with sound, you need a large hard drive, as well as a high-quality sound card (it is best to install a professional one). For multi-channel compositions, the presence of a large number random access memory. To burn your work, you can't do without a CD or DVD burner.
¦ To work with video, purchase a computer based on a powerful processor, plenty of RAM, be sure to have a video card with TV-out and a large hard drive specially designed for inputting video data. It is also desirable to have a video capture card and a monitor big size. To record the results of work, buy a recording DVD drive.
¦ A computer designed for typesetting books, notes, magazines, etc. must be equipped with big amount RAM, video card with support high resolution and screen refresh rate and at least a 22-inch monitor.
¦ Play modern computer games (with 3D graphics) is only possible on a computer that has an expensive 3D graphics card installed and enough powerful processor.
Of course, this description will help to create only a general idea of the principle of assessing the tasks of the future computer system.
If you already know which programs you need to install on your computer, check their system requirements in advance. However, remember that the description contains the minimum system requirements - as a rule, the computer configuration in which the program will work, but at such a slow speed that it can piss off even a very patient person. A more specific guideline is the recommended system requirements.
If they are not listed, calculate them yourself. To do this, increase the value of each of the items of the minimum requirements.
For example, the program you need to work has the following minimum system requirements:
¦ processor with a frequency of 1000 MHz;
¦ 128 MB of RAM;
¦ GeForce2 MX video adapter;
¦ monitor with a resolution of 800 x 600.
Therefore, for this program, you must select a computer configuration not lower than the following:
¦ processor with a frequency of 1800 MHz;
¦ 256 MB of RAM;
¦ GeForce4 video adapter;
¦ monitor with a resolution of 1024 x 768.
If you decide to build a computer yourself, be sure to carefully study it. However, if you feel that you are not very versed in components, it is better to invite a specialist or a more knowledgeable friend to determine the configuration of your computer. However, you should not completely rely on someone else's recommendations; proceed from the requirements that you put forward to the computer system.
Choosing a computer store
After you have thought over the tasks of the future system and roughly represent the priorities when choosing components, you can go directly to buying a computer.
You can buy a computer either in an ordinary or in an online store. In the latter case, you will need (at least desirable) access to a computer with Internet access. Although in many online stores you can place an order simply by phone.
Online stores have both advantages and disadvantages compared to traditional ones. The main positive is more low price for components, due to the fact that online stores do not pay for their own retail space and often may not even have their own warehouses. In addition, they carry out free shipping computers at home. This is very convenient, since you do not have to carry the entire system home or to the office, being afraid to shake it on the way, etc.
A significant disadvantage of online stores is the inability to see and evaluate a future purchase in advance. Of course, for components that are inside the system unit, this is not so important. But for details like a computer case or monitor, this can make all the difference. For example, when choosing a monitor in a regular store, you can test it using the Nokia Monitor Test program, which perfectly reveals all the disadvantages and advantages of the monitor. This is very important point, since the characteristics of several monitors even of the same model and manufacturer differ significantly.
In an online store, at best, you can look at the photo of the product in advance, if it is posted on the site. Very often this is not enough. If you place an order only by phone, then you lose this opportunity. However, for those who are well aware of the components of various models, this does not matter much. In addition, you can always look for parts in a regular computer company, and then purchase the same ones in an online store at a lower price.
On fig. 1.1 shows how the websites of online stores selling computers and accessories usually look. As you can see, in most cases, only lists of provided components with a brief description are presented here.
Rice. 1.1. Website of an online store.
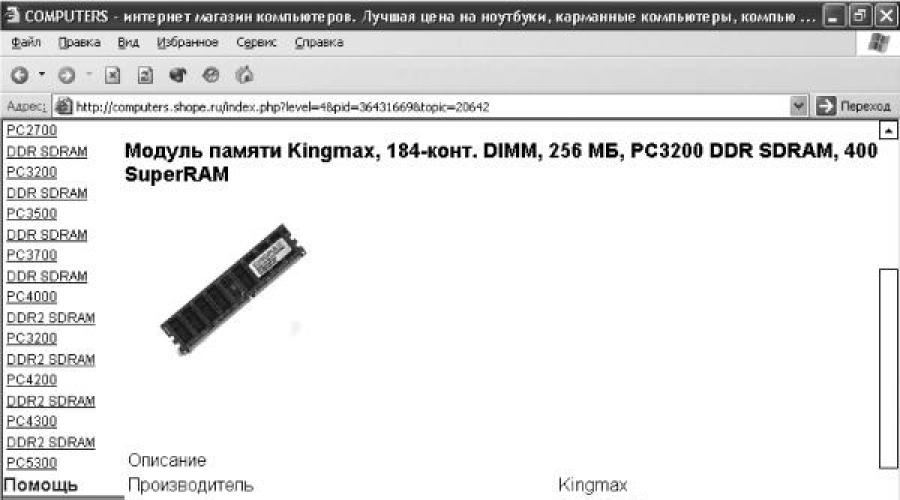
The websites of some online stores also contain Additional Information about accessories appearing in separate window after clicking on one of the links in the list (Fig. 1.2). In this window, you can read more detailed specifications product, and also in most cases look at its photo, which is very useful if the device is external, that is, it will not be hidden inside the system unit, and the way it looks is of any importance to you.

Rice. 1.2. detailed information on the website of the online store.
Opposite each of the devices in the list there is a special shopping cart icon or a Buy link. In all online stores, the system for ordering goods is approximately the same: you find the necessary components and click on the purchase link next to those that you have chosen for yourself. They will be placed on the site in the "shopping basket". Then you can go to the shopping cart section, where the selected items will be listed and their total cost will be calculated. Further, if something does not suit you, you can change the set of purchases, and if everything is in order, place an order. Ordering process varies from store to store. However, in most cases, you will be prompted to fill out a form indicating the phone number by which the operator or courier can contact you to clarify the time and other points of delivery.
If you do not have access to the Internet, then you can place an order in the online store simply by phone. However, this will significantly complicate the process of choosing computer components. You will have to discuss all the nuances over the phone, and given the quality of such a connection, it is likely that many important details may be missed during the conversation, especially if you do not know the exact name of the models you need. All this can lead to annoying mistakes, which will make themselves felt after the purchase. Of course, an experienced operator will try to understand your needs and offer exactly those components that, in his opinion, will suit you best. However, he cannot absolutely accurately guess your desires, so you will either have to describe in great detail by phone what you are going to do on the computer and what characteristics of components you need and which are undesirable, or simply listen to the characteristics of each product from the list and try to choose the right one by ear . Considering that an online store, as a rule, has a wide range of components, it is almost impossible to remember all the information received, and even more so to analyze it.
So it's better to "go" to online stores, having access to the Internet. Then you yourself will choose everything you need, and phone conversation with the operator will be reduced mainly to order confirmation. In some cases, the operator may indicate the incompatibility of certain components or advise replacing something with a model similar in characteristics. This usually happens already during the build phase, so it's best to stay in touch - in case technical problems the operator will be able to call you back to clarify and change the details of the order.
Buying a ready-made computer
There are two options for buying a computer - the purchase of a finished model and the independent selection of components. Both of them have advantages and disadvantages. Let's look at them briefly.
First, let's talk about purchasing a finished computer model (computer assembly). The main advantage in this case is that you can be sure that all components will be matched correctly and will be compatible with each other. You will receive ready system unit, usually sealed (the company guarantees its operation only in its original form, if you change the configuration yourself, all responsibility falls on you), sometimes even with a preinstalled operating system and some programs.
However, a computer is a complex device and consists of many components. Therefore, you will need to consider a large number of options and spend a lot of time before you find a computer with the required configuration. Most often, stores sell computers assembled on the basis of a universal, in their opinion, combination of components.
The main characteristics of the computer system unit are as follows:
¦ type and clock frequency of the processor (sometimes indicating the amount of cache memory);
¦ type and amount of RAM;
¦ motherboard model and chipset on which it is based;
¦ the model of the video card and the amount of its RAM (sometimes indicating the output frequency of RAMDAC, although this does not matter as much as it might seem at first);
¦ availability sound card or built-in audio codec;
¦ availability network card/modem or appropriate integrated solution;
¦ the size of the hard disk;
¦ the presence of a CD or DVD drive and its characteristics;
¦ hull type.
Sometimes other characteristics are indicated. At first glance, there are not very many of them, but, oddly enough, it is often quite difficult to find them in exactly the combination that is needed.
Of course, you can buy the first ready-made computer model you like without thinking too much about how its configuration will meet your requirements. In the process of work, you will definitely understand what components you still need. Buy and install on a computer, for example, second hard larger disk or additional module RAM is not difficult. However, you will have to carry out partial assembly and change the contents of the system unit. In doing so, you will lose all the benefits of buying a ready-made computer, including the warranty on it.
Some stores offer reconfiguration services for off-the-shelf computer models. For a buyer who is not very well versed in components, this is the best option. In this case, you can first select one of the proposed models, and then indicate what needs to be changed in it. For example, you can ask to install 512 MB of RAM instead of 256 MB or add a second hard drive, etc. However, remember that some stores provide this service for a fee, so ask the seller about this in advance.
Even if you choose a ready-made system unit model, some devices will have to be purchased separately. First of all, it's a monitor.
His choice should be approached responsibly. If the purchase is not made in the online store, ask to inspect the proposed monitor models. Nokia Monitor Test is the best way to determine the picture quality.
Today, stores offer monitors of two types - cathode ray tube (CRT or CRT monitors) (Fig. 1.3) and liquid crystal (LCD, LCD, or thin film transistor, TFT) (Fig. 1.4).

Rice. 1.3. CRT monitor.

Rice. 1.4. LCD monitor.
CRT monitors are cheaper, and what's more, the image quality on them is better. In addition, such monitors can operate in various screen resolution modes, while LCD monitors are recommended to be used in only one fixed resolution. In turn, LCD monitors take up much less space.
If you decide to buy a CRT monitor, which is the best solution in most cases, first of all, make sure that the model you choose has a flat screen. From such a screen, information is perceived better, and you can set a higher resolution for it without fear of loss of quality.
Screen resolution is the number of horizontal and vertical pixels (dots) that make up the entire image. For example, a screen resolution value of 1024 x 768 means that the picture is 1024 pixels horizontally and 768 pixels vertically. The higher the resolution, the more detailed the image, and the more information can fit on the screen.
As mentioned above, CRT monitors can operate in various resolutions. In this case, usually the higher the resolution, the lower the refresh rate of the screen. For normal perception of information, it is necessary that it be at least 75 Hz (that is, the picture on the screen is drawn at least 75 times per second). A refresh rate of 85Hz or higher is required for comfortable operation.
For example, if the specifications of a monitor indicate that it is capable of maintaining a resolution of 1024 x 768 at a screen refresh rate of 85 Hz, then this means that you will only be able to work normally at this resolution or lower. As the resolution increases, the maximum screen refresh rate value will decrease. Remember: at a refresh rate of 60 Hz, it is almost impossible to work - your eyes will get very tired and you will spoil your vision.
Another criterion for choosing a monitor is the frequency range for drawing lines (horizontal scan), that is, the characteristic of a line transformer. The higher the maximum value of this parameter, the higher the screen refresh rate the monitor will be able to keep at a given resolution.
For example, if the maximum horizontal frequency of the monitor is 70 kHz, then at a resolution of 1024 x 768 it will not be able to support a frequency greater than 85 Hz. This is quite acceptable, but if you need to increase the resolution, for example to 1280 x 960, then the maximum screen refresh rate will be already approximately 65 Hz, which, as you already know, is not enough to work.
Thus, if the specifics of your work require a high resolution setting, choose a monitor with a horizontal frequency of at least 100-120 kHz. This will allow you to work even at a resolution of 1600 x 1200 with a screen refresh rate of up to 100 Hz.
If the monitor setting exceeds the horizontal refresh limit, the image on the screen will flicker or turn into ticking stripes. Many modern monitors in such cases display a message about exceeding the permissible frequency of the horizontal transformer.
ATTENTION!
On older monitors, it sometimes happens that when the maximum horizontal refresh rate is exceeded, the image on the screen does not disappear or be disturbed. However, after some time of operation in this mode, the horizontal transformer, and hence the monitor, may fail.
As for the linear dimensions of the monitor, for most tasks today a monitor with a diagonal of 17 inches is enough. You can work quite comfortably on it at a resolution of 1024 x 768 or 1152 x 864.
If you need to perform special tasks, such as laying out books or sheet music, or working with multi-channel audio and video playback programs, then it is better to purchase a larger monitor, such as 19 or 21 inches.
Choosing an LCD monitor is recommended only if you need to save space on your desk (Fig. 1.4). When choosing such monitors, keep in mind that each of them is designed for only one resolution, corresponding to the number of cells in the matrix. Theoretically, you can set a different resolution, but the image on the screen will become more blurry.
Screen refresh rate for TFT monitors is not a big deal. In particular, 60 Hz for such monitors is a completely normal operating refresh rate. This is due to the fact that if on a CRT monitor the beam that draws the image is located at only one point on the screen at a time and we see the whole picture only due to the inertia of our vision, then in LCD monitors the image is present on the screen entirely all the time, and updating cells is only essential to keep track of fast movements and changes. However this feature LCD monitors cause zigzag distortion of smooth lines to become noticeable. In addition, a trail will inevitably follow a rapidly moving object. True, this effect has already been minimized and an undemanding user may not even notice it.
In addition to the monitor, necessary external elements The computer's input devices are the keyboard and mouse.
Today, the computer market offers a wide range of various types keyboards. However, for most tasks, a standard 102-key keyboard is fine (Figure 1.5).

Rice. 1.5. Standard computer keyboard.
If you have to do a lot of typing, you can also try using one of the ergonomic keyboard models that are curved so that the hands are not parallel to each other, but at an angle. In some cases, the keyboard is generally divided into two parts - separately for the left and right hands. However, not everyone likes such models.
A really necessary purchase for those who often engage in typing is the purchase of a special gel pad for the hands, which is placed in front of the keyboard. It's also a good idea to buy a mouse pad with a gel backing. This significantly reduces the fatigue of the hands during work.
Recently, a lot of multimedia keyboards have appeared on sale. On them, in addition to the standard keys, there are additional ones (Fig. 1.6). As a rule, their functions can be configured by means of the operating system. However, manufacturers usually immediately label them as, for example, the keys to play music and stop, adjust the sound, launch the browser program and the client. Email etc. In some cases, it is convenient to set up these additional keys to launch the most frequently used programs.

Rice. 1.6. multimedia keyboard.
Working on a computer today is almost unthinkable without a mouse, since many modern programs (as well as operating systems) are designed for input. graphic information. On sale you can find a wide variety of models this device input information. The main advice that can be given is to try to match the mouse to the size of your hand. The hand should freely wrap around the mouse, while the fingers should be on its buttons. If the computer is going to be used by several people with different hand sizes, get a medium sized mouse.
Now they produce both ordinary mice with a ball at the bottom, and optical ones that track movement on the table using a light beam. Optical mice are generally more reliable and last longer than ball mice, as dust and dirt usually quickly stick to the ball, after which it begins to slip, and the mouse pointer on the screen slows down. If not only the ball becomes dirty, but also its contacts inside the mouse, it will be very difficult to restore its normal operation. Thus, when choosing a mouse, it is better to give preference to the optical model.
Previously, mice usually had only two buttons. Almost all modern models are equipped with an additional scroll wheel, which is also the middle button. This solution is really very convenient at work.
There are also mouse models with additional buttons and a second wheel. The second wheel is usually used for horizontal scrolling. In the model shown in Fig. 1.7, the first wheel (for vertical scrolling) is also the middle mouse button, and there is no button under the second one. In addition, there are two additional buttons on the sides, the functions of which can be configured using the operating system.

Rice. 1.7. Five-button mouse with two wheels.
Both keyboards and mice are available with both traditional PS/2 connectors and USB interface(Such interfaces are described in more detail in Chapter 2). Despite the fact that almost all modern computer models are equipped with a USB interface, it is preferable to opt for keyboards and mice with a PS / 2 interface. Some programs BIOS settings, and system programs, such as operating system loaders, are not yet capable of handling USB input devices. Of course, not all users need these funds (or not every day), but you can never assume in advance what you may need tomorrow.
Recently, various wireless models of keyboards and mice have been very popular. In most situations, they are a pleasant overkill. By the way, as a rule, such devices still use a traditional wired connection to a computer connector. In this case, at the other end of the wire there is a transmitter / receiver, and already separately from it - a keyboard or mouse, which really do not have wires and work on the basis of some kind of wireless signal, for example, infrared.
There are also real wireless keyboards and mice, for example, based on Bluetooth interface. If getting rid of a lot of wires around the computer is essential for you, pay attention to such models. True, in this case, you will have to equip the computer itself with support for the Bluetooth interface, for which, as a rule, you have to buy an additional adapter.
Self-assembly of a computer
From the previous section, you already know how to choose the right ready-made computer model. However, in most cases optimal solution there will be the purchase of individual components and their subsequent assembly. Without going into too much detail, I will short description the main characteristics of components and a few tips for choosing them.
System unit
The main parts of the computer responsible for its operation are located in the system unit (Fig. 1.8). Outwardly, it usually looks like a rectangular box, on the front panel of which, in the standard case, the power on and reset buttons and two multi-colored LED indicators are displayed. On older models, there was also a Turbo button, which gradually lost its practical meaning and fell into disuse, as well as a small digital display (usually fluorescent-vacuum) to indicate the processor clock speed, which can sometimes be found today.

Rice. 1.8. The system block of a computer.
The purpose of the power button is obvious. Shutting down a computer today is usually done programmatically. For example, to do this, you can select a special command from the menu or type it on the keyboard in command line. If the computer needs to be turned off by hardware (button), then in most cases you need to press the power button and hold it for more than four seconds. You can also set different values for this action.
Pressing the Reset button causes a "cold" restart of the computer. In this case, all devices are initialized and start working as if the computer was just turned on. This button should only be used in extreme cases when the computer does not react to anything - as they say, it hangs. This can happen with various software or hardware failures and errors. Software bugs often happen due to wrong setting parameters.
However, do not be intimidated by the need to configure work settings computer devices. In modern operating systems, for example in Windows XP, most of the settings are made automatically during installation. Only some specific programs are specially configured.
Before pressing the Reset button, you should always try less radical means. On operating systems Windows families pressing the combination CtrL + ALt + DeLete brings up a system window on the screen in which you can close (crash) any of the currently running this moment programs.
Two LED indicators located on the case of the system unit, usually glow green and red. Green is the power-on indicator, and red indicates that the hard drive is being accessed. This indicator is of great practical importance, since it is strictly not recommended to restart the computer or turn it off while accessing the hard disk, otherwise you can permanently lose any data, and even the entire contents of the disk. IN modern systems it is generally not recommended to restart and shut down the computer otherwise than programmatically.
Sometimes there is a small digital display on the case, with which you can specify the processor clock speed. However, it has nothing to do with the processor itself, and its readings are set using jumpers on the case. Thus, any numbers and even letters can be displayed on it (one of my acquaintances put the combination “1US” on this indicator). Many modern cases do not have such an indicator.
In addition to the above elements, various drives are usually displayed on the front panel of the system unit.
Inside the case of the system unit (Fig. 1.9) are located:
¦ power supply;
¦ motherboard;
¦ processor;
¦ RAM modules;
¦ expansion boards, including a video adapter;
¦ Data drives.

Rice. 1.9. System block from the inside.
In some cases, something else can be added to this list, for example, such an exotic thing as an internal source uninterruptible power supply.
The power supply provides all computer components with power. It has an external input connector (for connection to an outlet or uninterruptible power supply) and several four-pin internal connectors. These connectors connect to drives and other items that require power. The large connector of the block is designed to connect to motherboard. Usually, the power supply supplies +5 and +12 V to the output connectors. Each of the connector pins has its own voltage.
CPUThe processor (Fig. 1.10, 1.11), despite its small size, is the most important component of the computer. The speed of the entire system largely depends on the speed of the processor, which is measured in cycles (since it is provided by the system bus clock generator) and is called the processor clock frequency (measured in hertz). For example, if a processor is being fed 800 million cycles per second, then it is said to be running at 800 MHz. However, this does not mean that the processor performs 800 million operations per second. Older models of processors often performed one operation in several cycles (and different operations required a different number of cycles). Modern superscalar processors, on the contrary, often perform several operations in one clock cycle.

Rice. 1.10. Intel Celeron processor.

Rice. 1.11. AMD Ahtlon processor.
The first x86 line processor appeared a long time ago. Since then, several more advanced models of it have been released. However, they are all backwards compatible. This means that a later model processor could perform all the same operations as its predecessor, but not vice versa. In each new processor model, new features were added, which gradually began to be used by programmers.
Today, two companies produce processors for computers - Intel and AMD. The question of choosing between the processors of these two manufacturers is the main one in the independent selection of components for a computer.
So, Intel or AMD?
AMD processors are significantly cheaper, so if you need to save money without sacrificing performance, you should pay attention to them. However, along with a lower price, AMD processors also have a number of disadvantages.
Let's compare AMD and Intel processors.
¦ Intel processors are more versatile, they support the maximum set of instructions. Some programs may function normally on Intel processors, but run slowly or not at all on AMD processors.
¦ AMD processors heat up more strongly, therefore, when buying such a processor, you need to think in advance about ways of additional cooling.
¦ Intel processors are more reliable, and Pentium 4 models have built-in overheating protection. If the temperature reaches a critical value, they automatically reduce the clock frequency until the activity stops completely. AMD processors can fail if overheated.
Choosing the type of processors, in the case of AMD today, you should pay attention only to the Athlon XP Barton models. For Intel processors there is a choice between Pentium 4 and Celeron models. Celeron processors are less productive mainly due to smaller cache. Accordingly, this model is cheaper. However, for tasks that are not resource-intensive (for example, for office applications), the use of Celeron processors is more profitable, since in this case the performance difference with Pentium 4 will be almost imperceptible. If the computer is designed to process video streams or databases, the Pentium 4 with the same clock speed is significantly faster than the Celeron.
One of the main indicators of the processor is its clock speed. Today in the computer market there are processors with a frequency of 1000 to 3200 MHz. Of course, the speed of the entire system depends on this characteristic, but still, many people often exaggerate the role of the clock frequency. Other factors, such as the amount of RAM, are just as important. For example, if you buy a very powerful processor and install little RAM, then all the benefits of a fast processor will be invisible.
When buying AMD processors, keep in mind that their marking does not indicate the clock speed, but a rating, which indicates the speed of the processor in comparison with Pentium processors. Real clock frequency AMD processors always less than the rating value. For example, the Athlon XP 2400+ actually runs at around 1.7 GHz, not 2.4 GHz as its name suggests.
MotherboardThe motherboard is usually attached with screws to the right wall of the system unit case (Fig. 1.12). It is one of the main elements of a computer system. The motherboard provides information exchange between devices using various buses: system, memory, etc. The motherboard also contains connectors for connecting various devices.

Rice. 1.12. Motherboard.
The BIOS chip is located on the motherboard. base system I / O, which provides the initial boot of the computer and the ability to input / output information. The FDD and IDE controllers are also located here. The first provides information exchange with a floppy drive, and the second is designed to connect IDE standard devices, among which may be hard disks, CD and DVD drives, etc. Typically, an IDE controller has two channels, each of which allows you to connect two devices.
As a rule, the motherboard also contains controllers for parallel and serial ports through which information is exchanged with external devices (printer, modem, etc.), a keyboard controller with an external connector, special connectors for connecting a processor, memory, expansion cards, and etc.
The motherboard should be selected based on the selected type of processor. One of the main characteristics of any motherboard is the chipset on which it is based. For Intel Pentium 4 processors with a clock speed of 2400, 2600 and 3000 MHz, as well as some others, we can advise you to purchase a motherboard based on the i865, i915 or i925 chipset with support for Hyperthreading technology. Using this technology, you can make a computer work as a dual-processor machine by parallelizing tasks on two virtual processors. This allows full use of the power modern processors, which otherwise tend to sit idle most of the time, waiting for information to arrive from slower devices.
One more important characteristic motherboard is the system bus clock. For example, if a processor is selected that is designed to work with an 800 MHz system bus, then you need to select a motherboard that supports the same frequency.
Motherboard chipsets are usually designed for a certain type of processor. By choosing a processor and the corresponding chipset, you can choose a motherboard based on its other characteristics. For example, pay attention to the presence of integrated sound or a network card. In some cases, a good option would be to purchase a motherboard with an integrated video adapter, as this will eliminate the need to buy a separate video card. You can also pay attention to the presence of a SATA (Serial ATA) controller, the speed of conventional IDE controllers, to which hard drives and CD and DVD drives will be connected, etc.
RAMThere are several types of memory modules (Fig. 1.13), each of which requires a special connector on the motherboard.

Rice. 1.13. SDRAM memory module.
Previously, computers used the following types of memory modules: a 72-pin (or 30-pin) SIMM for DRAM memory and a 168-pin DIMM for SDRAM memory, which was six to seven times faster. SDRAM memory operates at 66, 100 or 133 MHz.
Today, practically the only type of RAM that is smart choice, can be called DDR SDRAM. When choosing memory modules, you should pay attention to the clock frequency at which they can operate. For example, if your system bus frequency is 800 MHz, then it makes sense to choose memory modules designed for a frequency of 400 MHz, and if the system bus frequency is 533 MHz, then it is quite enough to purchase those that operate at a frequency of 333 MHz. Faster, but much more expensive DDR2 SDRAM memory is also used.
If your system supports Hyperthreading technology, the logical choice would be to purchase two separate memory modules, since they can work in parallel. Otherwise, a faster and more economical solution would be to purchase one larger memory module.
On modern systems, it makes no sense to install less than 256 MB of memory. For specific tasks, it may be necessary to increase it to 512 or 768 MB, and when working with resource-intensive applications, such as video processing or 3D modeling, up to 1 GB or more. When doing this, do not forget to make sure that the motherboard supports the required amount of memory.
Video adapterThe video adapter (Fig. 1.14) is the only mandatory expansion card. Without it, the computer simply will not work. Of course, this does not apply when the motherboard has a corresponding integrated solution. However, this option can be advised only if you absolutely need to save money. In any other case, it is better to purchase a separate video adapter.

Rice. 1.14. Video adapter.
A video adapter is a device that converts information from a computer into video signals for subsequent transmission to a monitor or television screen. The comfort of working at a computer largely depends on the video adapter. After all, if the monitor screen, for example, often flickers, then after an hour of work your head will hurt or your performance will simply deteriorate. The flickering effect occurs if the screen refresh rate is less than 60 Hz, that is, the image is completely redrawn less than 75 times per second. A good video adapter should support a refresh rate of 85 Hz or more at high screen resolution (at least 1024 x 768) and support for a large number of colors (for example, in True Color mode). The full capabilities of the video adapter determine only the color, since the refresh rate and resolution also depend on the monitor. If you set the video adapter to a mode that is not supported by the monitor, you will see flickering bars on the screen, etc. Windows provides a preliminary check before changing the mode. However, sometimes it may not work correctly. In this case, when loading a graphic Windows shells all the time will switch to this mode, and return to normal image for an inexperienced user will not be easy. If you encounter this, try using the Windows system crash protection mode. To do this, when the system boots, press the F8 key immediately after it starts booting and from the start menu select Failsafe Mode or Safe mode. IN Linux system you can simply switch to another virtual terminal using, for example, Ctrl + Alt + F1 and edit the graphics mode settings file.
Today, all video adapters can be divided into two groups - based on chips from ATI and nVidia. The latter are currently more popular.
If the computer is intended for games in which rendering of three-dimensional images plays an important role, then it is better not to save money and choose a video adapter based on at least a GeForce FX chip. For more modest tasks, the GeForce 4 or even its truncated version, the GeForce 4 MX, is suitable.
HDDThe most important characteristic of a hard disk (Fig. 1.15) is its volume. If the computer is intended to be used primarily for tasks with text information, then a small hard drive, for example, with a capacity of 40 GB, will suffice. If you plan to work with sound or video, get a 100-120 GB hard drive, or even better, two hard drives.

Rice. 1.15. HDD.
As for the speed of the hard drive, for most tasks it is enough if it works in UDMA 100 mode. As a rule, the choice hard drives with UDMA 133 interface does not give a very noticeable performance boost.
By the way, in order to work with the specified speed, it must also be supported by the IDE controller on the motherboard.
Recently, hard drives have appeared with support for the faster Serial ATA interface. If your motherboard has a Serial ATA controller, you can try using such a hard drive. However, keep in mind that while supporting this standard at the software level, problems can sometimes arise.
CD and DVD drivesThe choice of drive largely depends on your preferences. However, at least a modern system should have at least one CD-ROM drive (Figure 1.16), since most software comes on CD-ROMs. To watch movies on DVD is better instead, purchase a DVD drive (Fig. 1.17). If you are working with music or video, you must have a CD or DVD-RW/DVD+RW burner to burn your work.

Rice. 1.16. CD drive.

Rice. 1.17. DVD drive.
If you need to have a CD or DVD burner, but you also expect to do a lot of work with the drive in read mode (for example, playing games from a CD), then it is better to purchase two drives: one for reading information only, and the other for for the record.
Keyboard and mouseAlmost all devices that are not included in the system unit (peripheral) are used to input or output information or to exchange it with other computers.
Consider first the main input devices. First of all, it is a computer keyboard.
102-key keyboards are the most common today. Other models are similar.
The keys on the keyboard are most often painted white or grey colour. In the main part of the keyboard, this coloration is functional: in White color alphanumeric keys are painted, and control keys are gray.
The specific actions performed when a key is pressed depend on the program you are working with. However, there are a few common points.
Alphanumeric keys in most text windows or on the command line are entered into the computer and displayed on the screen the corresponding letter or number, evoking the association with a typewriter. At first glance, this seems completely natural. However, after a deeper acquaintance with the principles of the system, this fact often causes surprise or even admiration.
The Shift, Alt and Ctrl keys, each of which is present on the keyboard in two copies, individually usually do not cause any action. They are usually pressed in combination with an alphanumeric or other control key. In this case, pressing Shift usually changes the case of letters, and Ctrl and Alt are used for various additional functions.
The Enter key moves the cursor to the next line or allows you to confirm any action. The Esc key, on the other hand, denotes the abandonment of previous actions. The NumLock key toggles the numeric keypad mode (located on the right side of the keyboard). When the NumLock indicator is lit, the white keys on the numeric keypad duplicate the number keys, that is, they have values from 0 to 9 and “.”. Otherwise, they duplicate the cursor keys.
In many programs, pressing the F1 key brings up a help window. After pressing the Print Screen key in many modern systems, the contents of the screen are photographed and sent to the clipboard, from where it can be transferred to any graphics program using the standard Paste command. The Backspace and Delete keys are used to delete something.
On different computer keyboards slightly different designations may occur special keys. Do not be surprised if the keyboard does not have, for example, the Ctrl key. It is simply labeled differently (for example, Control). Here is a list of the most common key mappings:
¦ Ctrl - Ctl - Control;
¦ Shift - ^ - ^Shift;
¦ Alt - Alternate;
Backspace -<=;
¦ Delete - Del;
¦ Insert - Ins;
¦ Page Up - PgUp;
¦ Page Down - PgDn;
¦ Escape - Esc.
In addition to the keyboard, there is such an input device as the mouse. It specializes in entering only graphical information. With the mouse, you can only move the pointer around the screen and mark any of its locations by pressing the device buttons.
Mice are available with different numbers of buttons and wheels.
Monitor
In order for the user to see the result of the computer, a device is needed to output information. In modern computers, this is usually the monitor, although others (printer, plotter, etc.) may exist.
Almost all the information that the user has to work with is displayed on the monitor.
Monitors are characterized by such parameters as the size (diagonal length) of the screen, the maximum possible refresh rate, the maximum possible resolution, and the size of the screen “grain” (the diagonal of one “dot” that physically draws the image). Most of these options were covered in Chapter 1.
Let me remind you once again that cathode ray tube monitors remain the highest quality and most popular to this day, despite the spread of other types.
The diagonal size of a monitor screen is traditionally measured in inches. Models are available with a diagonal of 15, 17, 19, 20, 21, 22 inches. In addition, sometimes there are larger monitors that are mainly intended for non-personal use, and earlier monitors were produced in smaller sizes, such as 14-inch. The maximum possible resolution depends on the screen size: for example, on a 14-inch monitor it is 1024 x 768. On such a monitor, with a standard grain size of 0.28 mm, already at a resolution of 1024 x 768, the size of one pixel (pixels are screen dots from which it adds up video adapter image) must be smaller than the actual grain size. Naturally, this leads to insufficient clarity (blurring) of the image, which is very inconvenient for work.
As for other information output devices, only printers (printing devices) are now widespread among them.
Chapter 2
Introduction to the computer
¦ The principle of operation of the computer.
¦ Interaction of computer devices.
The principle of the computer
You may not need the information in this section for everyday use of your computer. However, it is necessary to have a general idea of the principle of operation of the computer - this can help in solving some sudden problems.
Without exaggeration, the “heart” of a computer is the processor. It is often referred to by the English abbreviation CPU, i.e. Central Processor Unit. The processor is a very complex device whose main function is to execute programs.
Each type of processor has its own instruction set. The processor is given special numerical sequences, which, in accordance with its internal table, are interpreted by it as certain commands. For example, in the PDP-11 processor command system, the binary number 0110000001000000 means “add the number in register #1 with the number in register #0 and place the result in register #0” (registers are a special area of the processor for storing temporary data). In other command systems, the same number may be interpreted completely differently or mean no command at all. Any program enters the processor in the form of such binary instructions, so a program written for one type of processor cannot be executed by a processor with a different instruction system.
Another important part of a computer is a storage device, or memory. Storage devices can be roughly divided into two categories:
¦ ROM - read-only memory (it stores immutable data);
¦ RAM - random access memory (used to write and read data).
In RAM, for example, the results of the program can be recorded for their subsequent output to some external device. The data stored in the ROM is stored "forever", written in the RAM - it is irretrievably lost when the power is turned off.
In today's popular English terminology, ROM is called ROM (ReadOnly Memory), and RAM is called RAM (Random Access Memory). In some cases, a special type of memory can also be used, the information from which is not destroyed when the power is turned off, as in ROM, and at the same time it is possible to write data to this memory programmatically (as in RAM, only slower). This type of memory was almost never used before, but in recent years it has become widespread. It is called Flash memory.
So that the processor can navigate "in the vastness" of the storage device, all memory is divided into cells. Each cell has its own unique address, written as numbers. Typically, memory is organized as a matrix, and to access a memory cell, the processor must specify the number of its column and row. This is controlled by the CAS and RAS system signals.
Before starting, any program must be fully or partially loaded from an external device into RAM. The processor in a certain sequence reads instructions from the RAM and executes them. To do this, it has a special register - the program counter, which always contains the address of the memory cell where the instruction that will be executed next is located. Before the start of the program, this register contains the address of the memory cell into which the first instruction of the program is loaded, and during the execution of each instruction, the content of the instruction counter is automatically increased until the next operation is executed.
The above diagram superficially describes the process of program execution. Modern processors are able to start the execution of a new instruction before the completion of the previous one, initiate the execution of several instructions at once, etc. But the general principle remains the same.
In order to "communicate" with a person, a computer needs devices for input and output of information. The primary input device is now a keyboard with alphanumeric and control keys. Each key transmits a unique binary code to the computer, and a special program, which is usually stored in the computer's ROM, converts these codes into a form acceptable for use in programs. The result of the program is displayed on the monitor screen.
Almost always, the result of the work needs to be saved in order to be able to return to it another time. For this, as well as for recording the texts of programs (program code) themselves, external storage devices are intended. Now, as a rule, floppy and hard magnetic disk drives, as well as laser optical disks, are used for this purpose.
Now you have an idea about the principle of the computer and it's time to move on to a detailed description of its components. Let me remind you that depending on the hardware platform and the manufacturer, the location of some computer parts may differ. Therefore, we will assume that the user has a PC in a standard vertical case, such as MidiTower.
Interaction of computer devices
All the devices discussed above, of which a computer system may consist, interact in a certain way with each other.
Schematically, the interaction of devices is shown in fig. 2.1. It shows that the central transmission nodes are the system and functional controllers - the main elements of the motherboard chipset. The system controller communicates with the processor (and cache memory) via the system bus, with RAM via the memory bus, and with the video adapter via the AGP bus. The functional controller supports "dialogue" with expansion boards on ISA, PCI, VLB, USB, IDE buses, with devices connected to PS/2, serial and parallel ports, as well as with a floppy disk drive and a BIOS chip.

Rice. 2.1. Scheme of interaction of devices in a computer.
The coordinator of all actions is the processor, which executes programs and sometimes in the process must receive information from various devices. In order for devices to inform the processor in time about the need to process incoming information, an interrupt system is used.
When an active interrupt is signaled, the processor suspends the current process, such as the execution of a program. This is done to process the received information. After this and, possibly, corresponding actions, the processor returns to the previously interrupted process.
The interrupt system is usually explained using an everyday metaphor. Mentally replace the processor executing the program with a person having dinner. Eating is a process. Suddenly the phone rang - this is a signal to interrupt: lunch is suspended, the information received from the interlocutor is being processed. When the information is processed, the conversation is over, the person returns to dinner. You can also create a list of possible interruptions for a dinner person: a phone call, a knock on the door, a whimpering child in the next room, etc.
In the same way, the processor executing the program can, if necessary, suspend the current process in order to process the information received (for example, about the key pressed) and, possibly, take the appropriate action in response (generate a signal to display the corresponding letter on the screen).
There is a certain order in which interrupts are processed by the processor (depending on their priority, expressed by a certain number). The lower the interrupt number, the higher its priority. Interrupt signals come from devices not directly to the processor, but to a special interrupt controller that knows which interrupt number corresponds to which device, and, having received a signal from the device, sets the interrupt signal with the corresponding number to the active state.
In total, there are 16 interrupts, which are numbered from 0 to 15. This, as it turns out, is very small.
NOTE.
In some cases, an extended interrupt controller may be involved, and then there are 24 interrupts.
Why are interrupts not enough if there are usually no more than three or four expansion cards connected?
The fact is that some interrupts are already assigned to system devices, so there are very few free ones left. In addition, there are devices that tend to take more than one interrupt (if several different devices are combined on the board). It's good that modern devices for the PCI bus, as a rule, "know" about problems with a lack of interrupts, and often they can quite get along on one interrupt with two or even three people. However, it is easy to guess that the stability and speed of the system is reduced from this.
Let's briefly consider how interrupts are used and which ones can be allocated to expansion cards.
¦ Interrupt 0 - the highest priority, rigidly assigned to the system timer. It cannot be used by any other device.
¦ Interrupt 1 - is rigidly assigned to the keyboard controller. Thus, keyboard signals are by default the highest priority for user signals. The first interrupt cannot be assigned to any other device.
¦ Interrupt 2 - has a technical meaning. With its help, the initial number of interrupts, through some system manipulations, was increased from 8 to 16 at one time. Thus, this interrupt cannot be used by any device either.
¦ Interrupt 3 - usually used by the computer's second serial port. If so, then it cannot be assigned to other devices. However, if this port is not needed, then it can be disabled, and thus interrupt 3 will be freed for use by other devices.
¦ Interrupt 4 - Same as using interrupt #3 for the first serial port only.
¦ Interrupt 5 - is initially free and can be assigned to various devices at the discretion of the user (or the operating system, if it provides for automatic configuration).
ATTENTION!
If you need to use sound in games (especially old ones) or if the system has a sound card that is compatible with Sound Blaster Pro and connects to the ISA bus, then the fifth interrupt must be assigned to the sound card.
¦ Interrupt 6 - is rigidly assigned to the floppy drive controller. It cannot be used by any other devices (unless the system does not have a floppy drive and the BIOS can inform the operating system about it).
¦ Interrupt 7 - usually used by the computer's parallel port. However, if this port is not needed, then it can be disabled, and interrupt 7 can be assigned to other devices.
¦ Interrupt 8 - is rigidly assigned to the real time clock and cannot be used by other devices.
¦ Interrupt 9 - is initially free and can be used by expansion boards at the discretion of the user or the operating system. However, quite often this interrupt is used by an advanced power management system or a USB port controller, so there are quite a few contenders for it.
¦ Interrupt 10 - is initially free and can be used by expansion boards at the discretion of the user or the operating system.
¦ Interrupt 11 - is also initially free and can be used by expansion boards at the discretion of the user or the operating system. However, it is usually assigned to the video adapter, unless, of course, a separate interrupt is allocated for it at all.
¦ Interrupt 12 - is rigidly assigned to the mouse connected to the PS / 2 port. Since most modern computers are equipped with just such a mouse, interrupt 12 is busy. If there is no PS/2 mouse on the system, the interrupt can be released and assigned to other devices.
¦ Interrupt 13 - is rigidly assigned to the built-in or external mathematical coprocessor. Even if there is no such interrupt (for example, an 80 386SX based system is used with no 80 387 coprocessor), interrupt 13 remains busy and other devices cannot use it.
¦ Interrupt 14 - is rigidly assigned to the first channel of the IDE controller. Usually an IDE controller is used in the system, so you can forget about assigning an interrupt to 14 expansion cards.
NOTE.
Theoretically, in the rarest cases, when the first channel of the onboard IDE controller turns out to be unnecessary, it can be disabled, and, if the BIOS setup program allows, release interrupt number 14 for assignment to other devices.
¦ Interrupt 15 - the possibilities of its use are similar to interrupt 14, only in relation to the second channel of the IDE controller.
Thus, there are very few interrupts left for use by expansion cards - numbers 5, 9, 10, and possibly 11.
In some cases, for correct interaction with the system, expansion cards also use Direct Memory Access (DMA) channels. Although there are only eight such channels (they are numbered from 0 to 7), only channel 4, which is used by the DMA controller for correct operation, and 2, which is hard-coded to the floppy drive controller, are inaccessible to expansion cards.
If the computer's parallel port is in ECP mode, then DMA channel 3 is usually assigned to it (it most likely will simply not work with another channel).
The concept of device interaction using a system of interrupts and direct memory access channels can help you quickly solve a problem at the operating system or BIOS level in the event of a resource conflict between devices.
Chapter 3
Turning on and getting started
¦ BIOS setup.
In order to better navigate the settings of the computer during its operation, it is necessary to understand what happens when the computer boots up, how its components interact with each other, and also what role the BIOS plays.
NOTE.
The BIOS is a basic input/output system whose program is stored in memory on a special chip on the motherboard. The BIOS is responsible for the initial boot of the computer after it is turned on.
First of all, after turning on (rebooting) the computer, it searches for the video adapter that is installed in the system, since without it the computer will not be able to display any information on the screen. If the video adapter is not detected, the system stops booting with an appropriate error beep.
When a video adapter is found, it is initialized, after which an image appears on the screen for several seconds containing information about the video adapter installed in the system, its memory size, etc.
Thus, the search for a video adapter occurs even earlier than determining the type of processor and installed RAM. However, if the processor is not installed or cannot be used, then the system usually cannot display any image on the screen at all, or signal with a sound.
The next step is to determine the processor type. This step also sets its clock speed according to the BIOS settings. At the same time, information about the type of processor and its clock frequency is displayed on the screen.
Then the boot program determines the amount and type of RAM installed in the system, and also tests it. The results of all processes are displayed on the screen.
After that, the initialization and verification of devices connected to the IDE controllers begins. These can be hard drives, CD or DVD drives, and other storage devices. Information about them usually comes from the BIOS settings. If auto-detection of drives is specified in the settings (Auto value), the system will automatically try to determine them - however, this requires additional time.
The computer's boot program then checks the floppy drive (if installed on the system). To do this, the controller sends him several commands, and the system captures his response.
Next, the search and verification of expansion cards installed in the system begins, such as an internal modem, sound card, video capture card, TV tuner or FM tuner, etc. Some of these cards (for example, a SCSI controller) may also have their own own BIOS. In this case, control can be temporarily transferred to her.
After all the described actions, a summary table of information about the computer configuration is displayed on the monitor screen, which indicates:
¦ type of processor;
¦ identification number of the processor (if any);
¦ clock frequency of the processor;
¦ the amount of installed RAM;
¦ the amount of cache memory;
¦ information about the form factor of the floppy drive;
¦ information about installed IDE devices;
¦ type of video system;
¦ detected serial and parallel ports and their I/O addresses;
¦ information about installed memory modules;
¦ information about expansion cards, including devices that support the Plug and Play standard.
However, let's go back to the very beginning of booting the computer and consider a process called system self-test (POST). In case of its successful completion, a short beep is usually given. Sometimes, however, no signals may be given.
What happens if all is not well? If any minor errors are found, messages about them are displayed on the screen, after which the computer can continue to boot. If, however, more serious problems were found during the self-test, the computer system will also try to report them to the user, but sometimes the screen remains dark in such cases. Therefore, the user cannot even see the corresponding message on the screen.
If this happens, then sound signals can be used to determine the cause of the error. With their help, the system informs the user about the results of the self-test process.
As a rule, it is impossible to give an unambiguous answer to the question of what this or that combination of sound signals means, since each BIOS subsystem has its own set of sound signals given in its description. However, often such information may not be available at all. In this case, try to visit the manufacturer's website or request the relevant information from the technical support service of the BIOS or motherboard manufacturer.
However, there are some combinations of beeps that are often used to indicate the same errors. If your system emits one of the following combinations of beeps after a self-test, then it is likely that it is signaling the following:
¦ one short beep - testing was completed successfully, the download continues (some systems do not give any sound signals);
¦ no sound - the processor or power supply is faulty (there is no image on the screen);
¦ one long continuous signal - the power supply is faulty;
¦ two short beeps - minor errors detected, it is necessary to make changes to the BIOS settings (Award); this could also be a memory parity error (AMI);
¦ three long beeps - keyboard controller error;
¦ three short beeps – lower memory operation error;
¦ one long and one short beep - RAM is not working properly;
¦ one long and two short beeps - the video adapter is not working properly;
¦ one long and three short beeps - video system error: monitor not connected, video adapter not working, etc. (AMI); or problems with the keyboard controller (Award);
ATTENTION!
Experience shows that in Award BIOS this signal can also be used in the first value. This is one of the most common mistakes.
¦ one long and eight short beeps - video system error: monitor is not connected, video adapter does not work, etc.;
¦ one long and nine short beeps - an error in reading BIOS data;
¦ four short beeps - the system timer does not work;
¦ five short beeps - the processor is not working properly;
¦ six short beeps - the keyboard controller is faulty;
¦ seven short beeps - problems with the motherboard;
¦ eight short beeps - the video memory is not working properly;
¦ repeated long beeps - the RAM module is faulty or incorrectly connected;
¦ repeated short beeps - the power supply is not working properly;
¦ nine short beeps - checksum error when checking the contents of the BIOS; usually the BIOS settings are reset, after which you can enter the setup program and continue working;
¦ ten short signals - an error in writing data to the CMOS chip;
¦ eleven short beeps - the external cache memory is not working properly.
Keep in mind that all the given values are indicative, that is, in each case, the meaning of a particular sound signal may differ depending on the manufacturer of the BIOS or motherboard.
ATTENTION!
Ignore the quiet short beeps that many ASUS motherboards emit when you turn on or restart your computer. With these signals, the system simply signals the number of connected USB devices. For example, if you hear two short, quiet beeps during boot, it means that two connected USB devices have been detected. If there are no devices connected to the USB port, the system will not beep on successful completion of the self-test.
As practice shows, sometimes in the process of self-testing a computer system, an error may occur that cannot be localized using sound signals. To analyze such a situation, a POST fee is used.
POST-board - a special expansion board for the PCI bus (or less often for the ISA bus), which has a special digital indicator (for example, liquid crystal or, more often, fluorescent-vacuum).
A special port has been allocated in the port space specifically for the purpose of displaying the results of self-testing. The hexadecimal address of this port is 80. Before initializing a particular device present in the system, some code is necessarily placed in this port, with which you can accurately determine what exactly is being initialized at the moment.
If the initialization of one device was completed successfully, the system will move on to determining the next one. In this case, the following code will be written to the 80th port.
The POST board reads the codes that were written during the initialization of devices in the 80th port and displays them on its indicator. Accordingly, if the system was interrupted, you can see the code written to the 80th port last. It can be used to determine which operation failed, as well as which device could not be initialized. For example, if the value 04 was last displayed on the indicator, then this (when using a system with an Award BIOS) means that the system is not generating RAM regeneration signals correctly.
POST code values may vary for different BIOS and motherboard manufacturers, but most of them are the same. In table. Table 3.1 lists the POST procedure codes that are commonly found on Award BIOS-based systems.
Table 3.1. POST code values

The use of POST boards in some cases can be of invaluable help in the process of diagnosing a broken or incorrectly working system.
However, to apply such diagnostics, you must at least install a POST board in the appropriate slot (PCI or ISA), unless, of course, this was done when assembling the system unit, which is quite rare.
Some motherboard manufacturers place POST code indicators directly on the surface of the motherboard to help diagnose problems. Sometimes the POST code indicator pins are also placed on the motherboard, and the indicator itself is supplied in the kit. In this case, it can be displayed anywhere in the computer case.
Such solutions greatly facilitate troubleshooting. However, unfortunately, they are still quite rare and have not yet entered into widespread use.
What happens after the computer system self-test is completed and the parameters of all installed devices are determined?
Up to this point, the behavior of the system is controlled by the built-in BIOS. At this point, control is transferred to the master boot record of the hard drive.
This area should contain a small loader code, the purpose of which is only to transfer control to the boot record of the desired logical partition on the hard disk, in which the operating system loader should be placed.
The operating system loader is a program that reads the kernel of the operating system into RAM and runs programs that initialize it and transfer control to it. After that, the operating system (OS) takes control of the computer system, under the control of which all further work on the computer is performed.
However, a more flexible program can also be placed in the master boot record of the hard disk, for example, it allows you to display a menu for selecting the boot of the desired operating system if several operating systems are installed on the computer.
In addition, in the BIOS settings, it may be prescribed to boot the operating system not from a hard disk, but from a floppy disk or CD. In this case, the BIOS will try to read the boot sector of the floppy disk or CD into memory instead of the bootloader from the hard disk master boot record. If this succeeds, then control will be transferred to the read program.
If the boot sector cannot be found on the hard drive or removable media, a warning message will appear on the screen, the appearance of which depends on the manufacturer and BIOS version. After that, the system will stop.
The search for bootloaders on the hard drive and removable media is always done according to the boot order instructions that come from the BIOS settings.
True, in fact, everything is somewhat more complicated. Control will be transferred to code read from the boot sector only if the BIOS determines it is actually executable.
If the BIOS in the boot sector of a device defined as bootable finds a meaningless sequence instead of the bootloader code, the further behavior of the program may be different. In most cases, if a removable media is specified as bootable, and the bootloader code is not found in its boot sector, the BIOS may decide that the wrong disk is simply inserted into the drive. As a result, the computer will be suspended, and a message will appear on the screen stating that you need to insert a boot disk. After pressing the Enter key, the BIOS again tries to read the boot sector code. If the media is not found in the drive, the BIOS tries to examine the next device specified in the settings as bootable.
However, in most cases, the operating system is loaded from the hard drive. Unlike other media, the hard drive contains several partitions, each of which has its own boot sector. In addition, the hard disk contains a master boot record at the beginning. It is she who is read into memory, and already her code must transfer control to the bootloader of the desired hard disk partition.
This loader, in turn, performs the functions of loading the operating system kernel. Once the kernel is found, the same bootloader usually runs device initialization programs, as well as others that prepare the operating system for user interaction.
Now you know that loading the operating system is a multi-stage process. This is important to understand in order to correctly assess the causes of failures that occurred during system boot. This information is also necessary for those who use more than one OS on their computer.
Speaking about loading operating systems, one cannot fail to mention how they can be located on a computer's hard drive. This is especially true if two or more operating systems must coexist on hard drives at the same time.
First of all, you need to remember that physical hard drives often do not correspond to the logical partition names that are used in the system. For example, if hard drives marked as C:, D: and E: are visible in an MS-DOS or Windows system, this does not mean at all that three hard drives are installed in the computer. It may well be one hard drive, divided into logical partitions.
Moreover, a hard disk can be used in almost any operating system only if it is divided into partitions. Even if you want, without breaking, to use a disk with a volume of, for example, 80 GB in Windows, then you need to create one large logical partition on it, which occupies almost the entire space.
At the beginning of the hard disk, its partition table is necessarily located, and if it is empty (there are no partitions), then data access is impossible (unless, of course, we are talking about standard access methods, and not about programs such as Disk Editor that directly work with physical sectors on disk). Data is accessed within each of the existing partitions, and the way it is accessed depends on the organization of the data within the partition.
Partitioning a disk is usually done with fdisk or something similar. Under this name, completely different programs can appear in different operating systems. There are also special tools such as PartitionMagic (Fig. 3.1) or Acronis OS Selector.

Rice. 3.1. PartitionMagic program window.
Traditionally, a physical hard drive cannot contain more than four logical partitions, because the partition table at the beginning of the hard drive is given too little space by the standard. However, this limitation can be bypassed.
Partitions, information about which is in the main partition table at the beginning of the disk, are called primary. Thus, it would be more correct to say that there cannot be more than four primary partitions on one physical hard disk.
By the way, some operating systems can only be booted from the primary partition. For MS-DOS or Windows operating systems, in addition, this partition must be located on the first physical disk (if there is more than one) and be marked as active. In some cases, its physical distance from the beginning of the disk also plays a role.
Moreover, when using MS-DOS or Windows 95/98/Me operating systems, be aware that they can only use one primary partition on each of the hard drives.
In addition to primary partitions, the hard drive can host extended logical partitions, which are essentially secondary. This technology was obviously invented to get around the limitation of four partitions on one disk.
So, one of the four primary partitions can be marked as extended. Such a partition contains another partition table, which no longer has a size limit and, therefore, can contain information about almost any large number of partitions.
This picture can be presented in different forms. For example, when using the fdisk program with respect to MS-DOS or Windows operating systems, it appears to the user that all logical partitions are inside an extended one, although it would be more convenient and logical to represent it differently - as shown in Fig. 3.2.

Rice. 3.2. Layout of logical partitions on a hard drive.
For MS-DOS or Windows operating systems, using an extended partition is the only way to split one physical hard drive into multiple logical ones. If the disk has one primary partition for these systems, then the rest must be located in the extended partition.
Theoretically, logical partitions located inside an extended partition are no different from primary ones in terms of data access. However, many operating systems should not be placed on these partitions because they will not be able to boot from them in most cases.
There are some other features of their application. In particular, MS-DOS or Windows operating systems designate drives as follows. All primary partitions come first (the primary partition of the first disk, the primary partition of the second disk, etc.), and then the logical ones (first on the first disk, then on the second, etc.). Thus, if one physical disk with partitions C: and D: was previously used, and then a second physical disk with a single primary partition was installed in the computer, then the new partition will be called D:, and the former D: partition will be called E:. This is confusing for some novice users.
In the latest versions of operating systems, this situation can be corrected. For example, in Windows 2000/XP, you can assign any letters to each partition, but in Linux, BeOS, and other systems, such problems do not arise at all, since the disks in them are not indicated by letters and the partitions themselves are mounted in the directories.
Let me remind you once again that access to data on a disk also depends on the organization of data within each of the partitions. Such an organization is called a file system, since the data in it is located on the disk in the form of named sequences - files, and access to them is carried out by referring to the corresponding names.
Different operating systems approach the organization of data within a partition differently. The common thing is that in order to use a particular file system, you must first create it inside the disk partition. Creating a file system on a partition is called formatting it.
Consider the most common file systems.
¦ FAT16 is a file system based on a 16-bit file allocation table. It is "native" in MS-DOS and Windows 95 operating systems, however, it can be used with certain reservations in almost all operating systems. However, it is not popular, as it is characterized by low stability and significant loss of disk space in the presence of a large number of files (especially small ones). In addition, a FAT16 partition cannot exceed 2 GB.
¦ FAT32 is an improved version of FAT16 that uses a 32-bit file allocation table. It cannot be used only in MS-DOS and Windows 95 operating systems, it is characterized by rather slow performance.
¦ FAT12 is another file system variant based on the file allocation table (12-bit). This option only applies to small media such as floppy disks. Almost never used on hard drives.
¦ HPFS is a high-performance file system designed for the OS/2 operating system. Can also be used in earlier versions of Windows NT (up to and including 3.5).
¦ NTFS is also a fairly high-performance file system, conceived as a competitor to HPFS. Designed for Windows NT/ 2000/XP operating systems, however, it can be used in Linux, FreeBSD, BeOS and other systems, usually in read-only mode.
¦ EXT2FS is a very compact and powerful file system designed for the Linux operating system. Can also be used on FreeBSD, QNX, and some others. In addition, there are programs for (usually read-only) access to the EXT2FS system from various versions of Windows.
¦ EXT3FS is a journaling variant of the EXT2FS file system.
¦ UFS is a file system used almost exclusively in the FreeBSD operating system. It is characterized by the fact that inside the disk partition (slice) in this system another partition system is organized, and only in each of these partitions is the file system itself.
¦ ReiserFS is another very fast journaling file system commonly used in Linux.
There are other file systems, each of which, as a rule, was created for use in its own operating system. So, BeOS, QNX, etc. have their own file systems. The most universal for various operating systems is the FAT32 (or FAT16) system.
Traditionally, operations with disk partitions are considered the most dangerous of the software operations on a computer. And this is not accidental: after all, when using any program for operations with disk partitions, one rash action can destroy the file system, which means losing access to all the data that was inside it. For most users, this situation is equivalent to deleting all data from the disk.
In the usual way with disk partitions, you can only perform the following manipulations:
¦ creating a partition (if there is space on the disk that is not occupied by other partitions);
¦ deleting a partition (resulting in the deletion of all data within the partition);
¦ changing the partition type (if the program supports different file systems, data is usually lost);
¦ displaying information about existing partitions.
These actions in different programs may be called differently. For example, the fdisk program from the DOS/Windows 95/98/Me package understands only FAT partitions, and all the rest for it are simply not DOS partitions. In addition, the creation of an extended partition and a logical partition within it for a given program are two independent operations, etc.
With simple tools such as the above program, it is not possible, for example, to resize a partition. However, this is often necessary. For example, you made one FAT32 partition for the entire disk space, and after a while you wanted to install Linux or Windows NT using their own ext3fs or NTFS file system format, and data is already written on the partition. In this case, you will have to:
¦ delete a disk partition (all data on it will be lost);
¦ create two new ones in its place (and, if necessary, restore data from external media to them, having previously installed the operating system).
To avoid such a long process, programs have been developed that allow you to resize a partition without losing data. One of the first was the FIPS program. True, it does not change the size of the partition in the full sense of the word, but only knows how to divide the existing one into two, but without losing data.
NOTE.
The instructions for this program say ten times that important data must be saved and the author does not bear any responsibility, but practice shows that FIPS works very well - data has never been lost.
The most functional in this context is Acronis OS Selector. It allows you to easily not only resize partitions in graphical mode, but also move partitions around the disk, as well as copy or move them to another physical disk. In addition, you can arbitrarily change the type of the partition's file system, hide partitions from a particular operating system, and much more.
Now that you already know enough about booting a computer after turning it on, you need to understand what role the BIOS plays and what can be achieved by properly configuring its parameters.
BIOS setup
The BIOS plays an essential role in the operation of a computer system. User settings stored in the BIOS largely determine the efficiency of the computer system as a whole or its individual subsystems.
Proper BIOS setup can greatly improve system performance or stability. Inept handling of BIOS settings leads to computer malfunctions, and in some cases to a complete system failure.
For customizing the parameters of the basic input / output system, there is a special program built into the BIOS of all versions and manufacturers. Traditionally, you can enter it only when you turn on and restart your computer.
NOTE.
Recently, special programs have appeared that allow you to access the BIOS during operation. However, in most cases, it is still better to configure the basic input / output system using a standard program built into the BIOS.
To enter the BIOS setup program, as a rule, after turning on or restarting the computer, you must press a key or key combination. The most commonly used key is Delete. However, this is not the only way. Quite often, the following keys and their combinations are also used to enter the BIOS setup program:
Ctrl+Alt+Esc;
Other keyboard shortcuts may also be used. In most cases, a hint message appears on the screen, like Press to Enter Setup, which disappears after a while. Sometimes the hint is not displayed on the screen so that inexperienced users are not too tempted to experiment.
The basic input/output system for virtually all computers comes from just three major manufacturers. The best known of these is Award Software (now legally a division of Phoenix) (Figure 3.3).

Rice. 3.3. Award BIOS appearance.
The Award BIOS is installed on most computers in the world. The most famous Award BIOS versions are: 2.50, 2.51, 2.51U, 2.51G, 4.51PG, 6.0 and 6.0PG.
The BIOS version number, as well as the manufacturer and often even the release date, can be seen when the computer is turned on (usually on the bottom line of the screen). Almost all modern computers have Award BIOS versions 6.0 or 6.0PG.
The BIOS from American Megatrends Inc. (AMI) used to be very popular (Figure 3.4). At a time when the market was dominated by computer systems built on class 80 386 processors, AMIBIOS was installed on almost all computers. Recently, AMIBIOS has been used less and less, although motherboard manufacturers such as Gigabyte and MSI still refer to the BIOS of this company quite often. Sometimes AMI BIOS is also installed on ASUS motherboards.

Rice. 3.4. Appearance AMIBIOS.
AMI BIOS is characterized by much less flexibility in settings than Award BIOS, although its interface has changed quite noticeably from version to version. Currently, only two versions of AMI BIOS are distributed - 1.24 and 1.45.
Occasionally you can find BIOS from other manufacturers. Of these, Phoenix stands out. Some time ago, she was actively involved in the development of her own BIOS versions, but they all had a big drawback - a small number of user settings. Accordingly, it was very difficult (and often even impossible) to optimize a computer system using the Phoenix BIOS for its own tasks. Because of this, motherboard manufacturers began to gradually abandon the BIOS company Phoenix.
As a result, the company itself decided to abandon the development of its own versions of the BIOS. Phoenix BIOS is currently only used by Intel, whose motherboards are not popular.
However, as mentioned above, today Phoenix absorbed Award Software, the main BIOS developer for modern computers. At the same time, the Award trademark was retained as more popular among computer and motherboard manufacturers.
In addition to a small number of settings, the Phoenix BIOS has another unpleasant feature: often, to change its parameters, you need to rearrange jumpers or change the position of the microswitch.
The BIOS setup program may have a different user interface, but traditionally it consists of several sections, each of which contains parameters that are close in meaning or related to similar settings.
The standard interface of the BIOS setup program is quite archaic. When entering it, the user sees the main screen, at the top of which is the name of the program, information about its manufacturer, etc.
Its middle part lists the sections of the program that have the following names in the Award BIOS 4.51PG version:
¦ Standard CMOS Setup - used to set the date and time, as well as determine the configuration of disk drives - various drives and hard drives;
¦ BIOS Features Setup - in this section, you can set the order for polling media in search of an operating system, as well as settings for the operation of cache memory, processor, keyboard and hard drives;
¦ Chipset Features Setup - here are collected various settings for the operation of the motherboard chipset, and also set the speed of access to RAM;
¦ Power Management Setup - this section is designed to determine the power saving modes, the behavior of the Power button, as well as monitoring the temperature and rotation of the cooling fans;
¦ PNP/PCI Configuration - allows you to configure the distribution of resources between devices;
¦ Load BIOS Defaults - a command to load default settings to ensure the most stable operation of the computer;
¦ Load Performance Defaults - is also a command to load default settings to ensure the most productive operation of the computer;
¦ Integrated Peripherals - this section contains settings for the operating modes of the IDE controller, computer ports and other integrated devices;
¦ Supervisor Password and User Password - here you can set passwords to enter the BIOS setup program and boot the computer in general;
¦ IDE HDD Auto Detection - is used to automatically detect the parameters of hard drives installed in the system;
¦ Save & Exit Setup - means exiting the BIOS setup program with saving all the changes made;
¦ Exit Without Saving - means exiting the BIOS setup program without saving the changes made.
One of the listed sections in the program window is always highlighted in color. Moving through the sections is carried out using the cursor keys. To enter the selected section, use the Enter key (sometimes the Spacebar). Using the F2 keys and the Shift+F2 combination, you can change the color scheme of the program interface. To exit the program without saving the changes made, you must press Esc, and with saving the changes made - F10.
At the bottom of the main screen are hints about how to use the keys, as well as a brief description of the highlighted section. For example, when the Standard CMOS Setup section is selected, the inscription Time, Date, Hard disk type appears in the lower part of the window, briefly explaining the essence of the section parameters.
To enter the selected section, press Enter. A list of parameters will appear on the screen, opposite each of which its current value is indicated. One of the parameters is always highlighted in color.
The cursor keys are used to move between parameters. You can change the value of the selected parameter using the Page Up and Page Down keys, or "+" and "-". If you need to restore the settings that were current before entering this section, press F5. The F6 key is used to load the default settings for this section, which provide the most stability, and F7 - which provide the best performance. In addition, using the F2 key (and the Shift + F2 shortcut), you can change the color scheme here, and by pressing F1, you can display a quick help on the screen.
To exit the selected section, use the Esc key. In this case, all changes made are saved in a temporary buffer. Thus, it is possible to discard the changes made by exiting their BIOS setup program without saving the changes made.
Although the standard BIOS setup interface is more familiar to most users, there are occasional BIOS setup programs with a different interface. For example, AWARD BIOS version 6.0 (but not 6.0PG) inherited the interface from the Phoenix BIOS, causing the Phoenix-style interface to become quite common again in recent years. Sometimes it is also used in the AMI BIOS.
The main screen of the Phoenix BIOS settings program is characterized primarily by the fact that in its upper part there is a line of sections (highlighted by inversion), where their names are listed in short form (for example: Main, Advanced, Power, Boot and Exit). Moving between sections is carried out using the "left arrow" and "right arrow" keys.
The content of the selected section is always displayed in the main part of the screen. Use the v and ^ keys to navigate between options. Values can be changed using the "+" and "-" keys (sometimes also the traditional Page Up and Page Down). By pressing the Enter key, you can get a complete list of possible values for the selected parameter (and then select the desired one).
Use the F1 key to call up help. Brief help for the selected parameter is always located on the right side of the screen. The default values of the selected partition can be loaded by pressing F5.
The F10 key is used to exit the setup program with saving changes, and Esc - without saving changes.
To the left of some options are triangular arrows, indicating that these options are actually directories that contain a list of additional options with their values.
In some cases, the BIOS setup program may use a windowed GUI. It is convenient to make settings here using the mouse, although all changes can be made without using it. Such an interface is typical, in particular, for some AMI BIOS versions (usually not the newest ones).
When using the window interface, each section of the parameters on the screen is located in a separate window. To get to an additional window with a list of possible values, double-click on the required parameter. The desired value can also be selected with the mouse.
If the mouse is not connected to the computer or is not detected by the BIOS setup program, you can navigate between windows using the Tab key, and select options in the active window using the cursor keys. The Enter key is used to change the parameter value.
Despite some convenience in navigation, such interfaces for BIOS setup programs have not become popular and are extremely rare today.
In some emergency situations, it is necessary to reset all BIOS settings to their default state. In most cases, this can be done from the BIOS setup program itself, but sometimes this method is not suitable.
For example, after incorrectly setting the processor clock speed or any bus, the computer may stop booting or the image on the monitor will disappear. In addition, you cannot enter the BIOS setup program if you forget your password to enter it (although one of the engineering passwords that are suitable for all BIOSes of a certain version can help in this case).
If the computer cannot boot due to incorrect BIOS settings, you can reset the settings to their original state. Depending on the motherboard, this can be done in two different ways.
The first is as follows. Look in the documentation for the motherboard, where the pins and jumper for resetting the BIOS settings are located on it. If there is such a jumper, power off the computer, open the computer case, find this jumper on the motherboard and set it to the reset position. Then (without closing the computer case) turn it on for 15-20 seconds (the screen will remain dark) and turn it off again. Then return the jumper to its normal position, close the case, and turn on the computer again. It should start downloading normally.
ATTENTION!
Before setting jumpers on the motherboard, it is advisable to physically turn off the power to the computer. Otherwise, the consequences can be the most unpleasant. The fact is that the power to the computer motherboard continues to flow, even if it is turned off by software.
The second way to reset BIOS settings (software) is used if jumpers are not provided on the motherboard. In this case, you need to turn on the computer while holding down any key (which one is written in the documentation for the motherboard) on the computer keyboard. Usually C or K is used for this.
If the two methods considered were unsuccessful, you can try "non-standard" methods for resetting BIOS settings. The simplest is to remove the CMOS chip power battery for a long time - it may take more than a day for the capacitors built into the power chip to discharge.
Another method is to short the pins of the CMOS chip to the computer case. This should be done with the power off, using a wire whose ends are stripped of insulation. For shorting, select an unpainted area of the housing. You can experimentally detect the necessary CMOS pins - only the CMOS chip is powered by the battery, so any other such short circuit cannot damage it when the power is off.
If the computer somehow works, but you need to reset the BIOS settings, you can use the software method - write any number in the range from 10 to 2F (hexadecimal values) into the port with hexadecimal address 70, and any value into the port with hexadecimal address 71 , not equal to the previous one.
Chapter 4
Operating system installation
¦ Preparing for installation.
¦ Selection of additional programs and system components.
¦ Copying system files.
¦ Installing device drivers.
¦ Additional programs.
Preparing for installation
Installing an operating system is a responsible matter. The number of problems that arise in the process of working on a computer directly depends on this. If possible, invite a specialist or at least an experienced user to install the OS. If you want to do everything yourself, then carefully study this section.
The installation of the operating system can be divided into several stages:
¦ preliminary preparation for installation;
¦ selection of the necessary programs included in the distribution kit;
¦ copying packages to the hard drive;
¦ setting up work with devices.
To start installing the OS, you need to boot your computer from the CD, which is the first in the package of the purchased distribution kit.
Your computer may already be set up to boot from the CD. If it does not do this automatically, then when you restart your computer, enter the BIOS settings. Then select the Advanced BIOS Settings section (depending on the BIOS version, its name may differ, but in any case it is very similar to the one shown) and enter it by pressing the Enter key. Here, in the parameters, find the Boot Sequence item (boot order), or, if it is not there, the 1st boot device item (first boot device). By changing its value using the Page Up and Page Down keys, assign CDROM as the first boot device. After that, press the Esc key to exit the partition, and then F10 to exit the BIOS and save the settings. Most likely, the computer will ask you to confirm this intention. In this case, as a rule, you should press the Y key, which means Yes (yes).
All modern computers allow you to boot from a CD. However, if your computer for some reason does not have this capability, then you will have to create a bootable floppy disk to install the operating system. To do this, the distribution CD usually contains special tools, usually located in the dostools folder (or a directory with a similar name). For example, to install Windows XP, you need to prepare six boot floppy disks. If no operating system is installed on your new computer yet, then the best solution is to create them on some other computer.
After making all the necessary settings, insert the distribution CD into the drive and restart the computer. The Windows XP installation package is designed so that the installation program starts automatically.
The operating system installation process is usually managed by the installation program. You should only answer her questions.
First of all, the program independently collects information about the computer and copies the files with which it can pre-start the system. There is no need to interfere with this process. However, at some point the user needs to decide on which partition of the hard drive the operating system should be installed.
If the computer is completely new, does not contain any data, and it is planned to install only one operating system on it, then you can also not interfere with the partition selection process. In this case, select automatic installation, and the OS installer will partition the hard disk at its own discretion, deleting those partitions that are already on it, creating new ones and formatting them.
However, if there is already some data on the hard drive, then care must be taken to save it.
ATTENTION!
In any case, it is better to save important data in advance on some external media.
If you chose to install in manual mode, then the Windows XP installer will prompt you to select a hard disk partition to install the system. It might look something like this:
<Свободное пространство>5 GB
ATTENTION!
At this stage of the Windows XP installation, graphics mode is not yet enabled, so the mouse will not work, and all actions must be performed using the keyboard.
Selecting a partition, you can delete or format it. To do this, follow the instructions at the top of the screen. For example, you can use the D key to delete a partition.
To create a new partition, you must select the free space option. To do this, press the N key. The program will ask you to specify the size of the new partition, as well as the type of file system.
If only Windows XP is intended to be used, it is best to have all partitions of the NTFS type. You can also get by with one partition that occupies the entire hard drive, although it is still better to create at least two: one for the system and programs, and the other for storing work files. Subsequently, for example, from the Explorer program, the system partition C: and the working partition D: will be visible.
If, in addition to Windows XP, it is planned to install another OS on the same computer, for example Linux, then you can do the following:
¦ for the Windows XP system and its programs, create a partition with the NTFS file system;
¦ for working files that should be available from both operating systems, create a partition with the FAT32 file system;
¦ for the future second operating system (for example, Linux) just leave free space.
In this case, the partition intended for the Windows XP operating system and its programs must be at least 5 GB.
Selecting additional programs and system components
After the partitioning of the disk is completed, the installation program may ask which additional programs or system components to install and which not. The following options are available here.
If you are installing the Windows XP operating system, this step will be skipped. The installer of this system does not ask such questions during its installation. You will simply see the main graphical Windows XP installation screen, where the program will explain the installation process. You will have to just watch the process for a while. The set of additional programs and system components can be changed at your discretion after the installation is completed.
When installing other versions of Windows, the system may ask you which additional programs and features to install.
In this case, all additional programs and system components are divided into groups. You can choose to install an entire group of programs by checking the box, or cancel the installation of the entire group by unchecking it. To select or cancel the installation of each program separately, select the desired group and click the Advanced button.
Most versions of Windows offer control during installation of the following programs and their groups.
First of all, this is the Standard Programs group. It usually includes the following elements.
¦ Calculator - a program that imitates a conventional calculator that has engineering functions.
¦ Character table - a program for selecting any character, including non-standard, which cannot be entered directly from the keyboard, and copying it into any program.
¦ Clipboard viewer - a program that allows you to view the contents of the clipboard (used quite rarely).
¦ Pictures for the Desktop - a set of "wallpapers" for placement on the Desktop.
¦ Mouse pointers - a set of various mouse pointers.
¦ Paint is the simplest drawing program.
The Games group can include various games supplied with the system.
The Faxing group contains built-in system components for sending and receiving faxes. These components require at least a modem to function.
Programs such as an Internet wallet, Frontpage visual web editor and other programs for advanced work with the Internet are contained in the Internet Services group. You do not need to install programs in this group for normal web browsing.
The Network group includes programs and protocols that are required if the computer is connected to others in a local network. If the computer is used offline or connected only to the Internet via a dial-up connection, you do not need to install this group.
Copying System Files
So, a set of additional programs and system components for installation has been selected. Now comes the most pleasant part of the installation of the system, during which nothing needs to be done at all. You just need to wait a while until all the files necessary for the further operation of the system and the selected programs are unpacked and copied to the computer's hard drive.
Usually during this phase, the system installer will show something like a progress bar that fills up as the files are copied and at the same time displays the amount of work done as a percentage. So that the user is not bored, additional information is also displayed on the screen, for example, about the merits or features of the system that is installed on the computer.
Installing device drivers
At the last stage of the installation, the system tries to do the following:
¦ determine the model of each specific device installed in this computer;
¦ find a suitable driver for this model;
¦ install this driver.
At each of these stages, the system may fail. For example, the model of some devices is not detected automatically. In this case, sometimes only the type of device is recognized (for example, printer, scanner, etc.) and in some cases its manufacturer. In such situations, the system tries to install a universal driver with which this device may work (and often some of its functions are not available).
In addition, even if the device model is determined correctly, the system may not be supplied with a suitable driver for this particular model. Accordingly, a driver for a similar model from the same manufacturer will be installed. As a result, this will lead to the same thing as described in the previous paragraph.
Finally, in some cases, the device driver cannot be installed correctly. However, for the drivers that are included in the delivery of the system, this is not typical.
Many manufacturers supply their devices with drivers. Usually, the package includes drivers for the Windows 95/98/Me operating system. Sometimes drivers for Windows 2000 and Windows XP are also included. Much less often today, manufacturers write drivers for the Linux operating system. In some cases, the device comes with a CD with drivers for one operating system, and for other systems, they must be downloaded from the manufacturer's website.
Sometimes a situation arises when a device comes with a manufacturer's driver for Windows 98, but you need to make it work under Windows 2000/XP. At the same time, it is not possible to do this using standard drivers supplied with the system. In this case, you can try to apply drivers for the related Windows 98 system. Practice shows that sometimes this gives a positive result, although the probability of correct operation is quite small.
Since manufacturers quite often write drivers for their devices under the Windows operating system, this system has a rather limited set of standard drivers. Therefore, in all cases when a CD with a driver for a specific system is supplied with the device, it is recommended to install it.
The process of loading device drivers during a Windows system installation usually proceeds as follows. If the system finds a driver that it thinks fits the device, it installs it without telling the user. If the driver is not found or the device model is not defined, then a window appears informing you that the device has been found. In this case, you need to insert the driver CD into the CD drive and click the Install from Disc button. Then you need to specify the exact location of the required driver on the disk (often it is enough to select only the letter of the desired drive, for example E:). If the CD contains drivers for different operating systems, you must specify the directory in which the required driver is located. For example, the disk might contain win98, win2k, and winxp directories. Accordingly, if the installed system is Windows 98 or Windows Me, then you must select the first of them, if Windows 2000 - the second (2k is the traditional abbreviated American designation for the number 2000), and if Windows XP - the third.
After that, if you are installing Windows XP, a dialog box may appear warning you that the driver is not digitally signed. This should not be scared. Most device manufacturers simply ignore obtaining a Microsoft digital signature that certifies driver compatibility with Windows XP.
After the system installs the driver, you usually need to restart the computer. The system may not require this at this stage, but be sure to do so before you start working with it.
By the way, the Windows operating system may require a reboot several times during installation. In any case, at the first such request, you should cancel booting from the CD and designate the hard drive as the first device to be polled. To do this, go to the appropriate section of the BIOS setup program, make the necessary changes and exit it saving the settings (usually by pressing F10). Otherwise, the reload will start the installation of the system again, or at least try to do so.
What to do if the system itself, without asking anything, installs a device driver from its delivery, and you have a CD with a manufacturer's driver?
As a rule, in such a situation, it is necessary to replace the driver supplied with the system with the manufacturer's driver.
To do this, after installing Windows XP, follow these steps:
1. Press Windows+Break or select Control Panel from the Start menu and then double-click the System icon in the window that opens.
2. In the window that opens, select the Equipment tab (Fig. 4.1).

Rice. 4.1. System properties window.
3. Click the Device Manager button. As a result, the window shown in Fig. 4.2.

Rice. 4.2. Device Manager.
4. Find the group that contains the device for which you want to change the driver. Click on the plus to the left of it to expand the list of devices.
5. Double-click on the name of the required device, or right-click on it and select Properties from the context menu.
6. In the device properties window that opens, go to the Driver tab (Fig. 4.3).

Rice. 4.3. Start updating the device driver.
7. Click the Update button. A wizard window will open asking you to update the connection to the Windows Update service. Set the radio button to No, not now and click Next. You will be taken to the next window shown in Fig. 4.4.

Rice. 4.4. Start updating the device driver.
8. Set the radio button to Choose from a list or install from a specified location.
9. In the next window, check the Include the following search location box, click the Browse button, and specify the path to the desired directory with the device driver.
10. After clicking the Next button, the system should automatically detect the required driver and install it. In this case, at some point, a warning about the absence of a digital signature may appear, which must be ignored by clicking the Continue Anyway button.
The specified sequence of actions works in almost all cases. The exception is the process of replacing the video adapter driver.
1. Right-click on the Windows XP Desktop and select Properties from the context menu.
2. In the window that appears, go to the Parameters tab (Fig. 4.5).

Rice. 4.5. Display properties window.
3. Click the Advanced button.
4. In the additional settings window that opens, go to the Adapter tab. In the upper part of the window (Fig. 4.6), the video adapter model, the driver for which is currently active, will be indicated.

Rice. 4.6. Video adapter properties window.
5. Click the Properties button and in the window that opens, go to the Driver tab.
6. Click the Update button.
7. A driver update window will open, in which (as in the previous case) set the switch to Install from a specified location.
8. In the next window, check the Include the following search location box, click the Browse button, and specify the path to the desired directory with the device driver.
After that, copying of the necessary files will begin, and after a while the system will prompt you to restart the computer, which is necessary to activate the new drivers.
NOTE.
If the wrong video adapter driver is loaded after the system is installed, you will most likely notice it right away: for example, the number of colors on the screen will be four, it will not be possible to change the video mode, etc.
Additional programs
The delivery of the Windows operating system includes only the simplest utilities, so you will definitely need to install additional programs.
Some programs can be downloaded for free from the Internet, as they are supplied under the GPL license or on a free distribution basis (Freeware), such as the Winamp software player.
Other programs may be shareware. They are also free to download and install. However, they will work for a limited period, such as 15 days, a month, etc. Some programs are designed for a certain number of launches.
After the specified time, if you want to continue working with such a program, you must pay for its registration. How to do this is usually written in detail in the program itself or on the website of its developers.
Another type of software is commercial products that can only be purchased from dealers. Typically, the license for such programs limits the number of computers on which the program can be installed.
Some programs, usually small in size, do not require installation. Such, for example, is the program for copying contents from audio CDs CDex. Such programs just need to be copied to the hard drive. After that, they can be launched (for example, by double-clicking on the executable file) and work.
If you intend to use such a program often, then for convenience, you can create a shortcut to it on the Desktop. In Windows XP, to do this, right-click on the Desktop, select New from the context menu, and then Shortcut. In the window that opens (Fig. 4.7), enter the path to the program's executable file and click the Next button. In the next window, enter the label name (any). Then click Finish. A shortcut to the program will appear on the desktop.

Rice. 4.7. Create a shortcut to launch the program.
Other programs come with their own installation script. In this case, you need to run it. It is usually called setup or install. Such an installation script, for example, is provided with the Microsoft Office suite.
When you run the installation script, in most cases you will see the program installation wizard (Fig. 4.8). It may look different - it depends on the specific program. However, its meaning always boils down to the fact that the user is asked several questions, the answers to which are needed to configure the program.

Rice. 4.8. Installing the program using the installation script.
During operation, the installation wizard usually automatically creates shortcuts to its program, and sometimes to several auxiliary ones that come with the main one. A shortcut to launch a program can be created either on the desktop, or in the start menu, or both. After installation (or before the first launch), some programs require you to restart the operating system. It's best to do this just in case, even if the installation script didn't ask you to.
Microsoft in modern versions of Windows has introduced the technology of using the universal Windows Installer script, which is included with Windows. Programs that use the Windows Installer usually come as a single packaged MSI file. To install it, just double-click on its icon, after which the Windows Installer will automatically start.
Chapter 5
Preliminary system setup
¦ Video mode setting.
¦ Fonts.
¦ Design and screen saver.
Video mode setting
One of the most pressing problems at the beginning of working with a computer is setting the video mode. This means that you need to choose:
¦ screen resolution;
¦ color;
¦ update frequency.
These parameters are closely related, since the video adapter is responsible for them. Accordingly, sometimes an increase in color and refresh rate leads to the need to reduce the screen resolution, or vice versa.
The choice of screen resolution, that is, the number of pixels that will fit on the monitor, of course, is an individual matter. However, it must be remembered that at too high resolutions, the pixel size may be smaller than the physical grain size of the phosphor. This will result in some blurring of the image, so you should be guided by the physical dimensions of the monitor when setting the resolution. Here are some resolution options for various CRT monitors:
¦ 15 inches - 800x600 or 1024x768;
¦ 17 inches - 1024x768 or 1152x864;
¦ 19 and 20 inches - 1152 x 864 or 1280 x 1024;
¦ 22 inches - 1600 x 1200.
As for liquid crystal and thin-film transistor monitors, for each of them, only one resolution is possible to display a high-quality image, which corresponds to the physical number of image cells.
To set the desired video mode settings in Windows XP, right-click on the Desktop and select Properties from the context menu. Then, in the window that opens, go to the Options tab.
Here you can change the screen resolution and color. In this case, the refresh rate will be selected automatically.
Use the Screen Resolution slider to set the desired resolution. The list of possible values depends on the video card driver and also the monitor if it is defined correctly.
The Color quality drop-down list is for setting the color. It often only presents two values:
¦ Average (16 bits) - 216 is displayed, that is, 65,536 different colors;
¦ Highest (32 bits) - 232 is displayed, that is, 4,294,967,296 different colors.
In fact, only 16,777,216 colors are displayed in the second case, but this is still much more than the human eye can distinguish (it can distinguish about 200,000 colors and shades). Mode Average (16-bit) gives fewer colors than the eye is used to seeing, which is unacceptable in working with images.
Names of modes in different systems may vary. For example, Hi-Color can represent 65,536 different colors, while True Color can represent 16,777,216 colors.
Sometimes there may also be values of 256 colors, 16 colors, or even 4 colors. The latter usually only happens when the video adapter driver is incorrectly configured or installed.
If you need to manually set the screen refresh rate, click the Advanced button and in the window that opens, go to the Adapter tab.
You cannot enter the refresh rate from the keyboard here, but there is a List All Modes button. By clicking it, you will see a window listing all the modes (Fig. 5.1) that the system considered acceptable for this combination of video adapter and monitor.

Rice. 5.1. Video mode list window.
For each mode, the resolution, color, and screen refresh rate are listed here.
ATTENTION!
You should not set Default Refresh instead of specifying a specific refresh rate, as the default refresh rate is usually 60 Hz, which is not enough.
In some cases, the additional window of the properties of the video adapter contains non-standard tabs corresponding to a specific model of the video adapter. Sometimes there is the possibility of adjusting the refresh rate of the screen.
Fonts
The delivery of the system includes a certain number of fonts, which is quite enough for further work. However, sometimes you want to install additional fonts, such as decorative fonts, handwriting, etc. It is also highly recommended that you install the Arial Unicode MS font of the Arial typeface, which contains all the characters defined by the Unicode 3.0 standard, on any system. This font comes with the Microsoft Office package, but can also be purchased separately.
Today it makes sense to use TrueType or OpenType fonts in the system. They scale well and look the same on a computer screen and when printed on paper. Other types of fonts may be screen-only or print-only.
To install a new font in Windows XP, from the Start menu, select Control Panel and double-click the Fonts icon. You can also just open the Fonts folder, which is located in the Windows system directory. It will be displayed as follows (Fig. 5.2).

Rice. 5.2. Fonts system folder.
As you can see, the first column contains the name of the font, as it will be displayed in the system programs. By right-clicking on one of the existing fonts, you can view its properties, open or delete it.
To install a new font, select Install New Font from the File menu. The font installation window will open (Fig. 5.3), where in the Drives and Folders fields, specify the required media and the folder where the fonts to be installed are located. Also make sure that the Copy fonts to the Fonts folder check box is selected so that the installed fonts are copied to the system fonts folder.

Rice. 5.3. Font installation window.
Then select the desired fonts in the Font List box and click OK.
On Windows, you can also install fonts by simply copying their files to the Fonts system folder. The system itself recognizes new items in this folder and makes the necessary settings.
Decoration and screen saver
To make work more enjoyable in the future, modern operating systems allow you to independently customize the design of the desktop, windows, etc.
In Windows XP, to do this, right-click on the Desktop and select Properties from the context menu.
A window will open in which you can customize the appearance of various elements of the system. For example, a picture for the desktop background can be selected by going to the tab of the same name (Fig. 5.4).

Rice. 5.4. Selecting a wallpaper for the Desktop.
Here, the Wallpaper list lists all the background pictures that are in the Windows system folder. By selecting one of them, you can immediately preview the view of the modified Desktop in the upper part of the window on the drawn monitor.
You can also select none from the list, which means there is no picture on the desktop. In this case, its background becomes one-color. The background color can also be selected here using the Color drop-down list. Clicking on it opens a palette of 20 possible background colors. If none of them suits you, then click the Other button. As a result, a window will open allowing you to select any possible color.
To select an image as your wallpaper that is not included in the standard set of Windows wallpapers, click the Browse button. A window will open (Fig. 5.5), allowing you to navigate through all the folders on your computer. As a background image, you can choose not only static images, but also animated ones (in GIF format).

Rice. 5.5. Selecting a background image file.
Notice also the Location dropdown. It defines the method for placing a background image on the Desktop:
¦ in the center - the selected image is located in the center of the screen, and the background color selected in the Color drop-down list is visible around it;
¦ tile - the screen is covered with tiles, each element of which contains the selected image;
¦ stretch - the selected image is stretched to the screen borders.
NOTE.
If the selected image is the same size as the screen resolution, then all three methods will give the same result.
In addition to the desktop wallpaper, sometimes you want to customize the appearance of windows. To do this, right-click on the Desktop, select Properties from the context menu, and in the window that opens, go to the Appearance tab.
In its upper part there is an area for previewing the appearance of windows, and in the lower part there are settings elements.
From the Windows and buttons drop-down list, select one of the two styles of system windows and buttons: Windows XP style (Fig. 5.6) or Classic style (Fig. 5.7).

Rice. 5.6. Windows XP style.

Rice. 5.7. Classic Windows style.
The Color scheme drop-down list is used to select the color scheme for the appearance of windows. There are only three color schemes for the Windows XP style, and more than 20 for the classic one.
Here you can also select the size of system fonts for window titles and other elements from the Font Size drop-down list. Three options are available:
¦ Normal - regular size fonts;
¦ Large font - enlarged fonts;
¦ Huge font - fonts are very large.
By clicking the Advanced button, you can change the individual properties of various system objects. However, the customization of some elements is available only for the classic Windows style.
NOTE.
Experience shows that for elements that are constantly in front of the eyes, it is better to choose a neutral, unattractive sans-serif typeface.
In addition to the settings discussed above, it is impossible not to talk about one more design element - the screen saver.
NOTE.
A screen saver is a picture or animation that replaces the normal screen image when the user does not use the computer for a long time. In the simplest case, the screen turns black after a few minutes. Pressing any key or moving the mouse returns the original image to the screen.
To configure it in Windows XP, right-click on the Desktop and select Properties from the context menu. In the window that opens, go to the Screensaver tab (Fig. 5.8).

Rice. 5.8. Screen saver selection.
Here, the selected screensaver is shown in a smaller view at the top. The Screen Saver drop-down list is for selecting and setting up a screen saver. If you don't need a screensaver, select No.
The Options button allows you to configure the selected screen saver (Fig. 5.9).

Rice. 5.9. Set up the selected screen saver.
You can view it in full screen using the View button.
In the Interval field, enter the time interval (in minutes) after which the screensaver will start. The smallest possible value is a minute, and the largest is 9999 minutes.
If you check the Password protection box, then when you return to normal mode, the system will ask for a password that matches the current user's system password, if such is set, of course.
The Energy Saving area allows you to manage energy savings. By pressing the only Power button in this section, you will open an additional window (Fig. 5.10). In it, on the Power Schemes tab, you can set the time interval after which, if there is no user activity, the power of the monitor and hard drives should be turned off. In addition, here you can also select the optimal (from the point of view of developers) parameters for such a shutdown, based on the type of your computer.

Rice. 5.10. Power management.
On the Advanced tab (Fig. 5.11), you can specify whether to display the launch icon for these settings on the Windows system tray, as well as what to do when the user presses the power button on the computer case - turn off the computer, ask the user for the desired action, or ignore the press.

Rice. 5.11. Advanced tab of the Properties: Power Options window.
The UPS tab allows you to configure the behavior of the uninterruptible power supply (if one is installed) - tell it what to do in the event of a power failure on the network, which programs to close, whether to shut down the computer, etc. - the UPS tab allows.
Installing an uninterruptible power supply can save your work in the event of a sudden power outage.
Chapter 6
Working with files and directories
¦ What you need to know about files?
¦ Catalogs.
¦ Create, copy and move files and directories.
What do you need to know about files?
In modern computers, hard drives, as well as other storage media and storage media, usually contain a lot of different data presented in binary code at the same time. To access information (for example, to read a text recorded in electronic form, or to run a program that is recorded on a medium, etc.), it is required to specify from which specific location on the disk the data should be read. In other words, the computer needs to specify its exact address. For example, for a disk drive, this should be the disk sector number, track number, etc.
Remembering the location of the data in this form, especially when there is a lot of information, would be rather inconvenient. Therefore, the data that is written to the disk is usually combined into named sequences - files. In this case, the first sectors of the disk store information about which file name corresponds to which address of the physical location of data on the disk.
For example, it would be inconvenient to remember that the text editor program is recorded on track 10, sectors 12 and 13, and to run it you need to access these sectors. Instead, a given program file is given a name and appropriate sector data is assigned, which is recorded at the beginning of the disc. When accessing this file by name, the computer will search for it in its own list and, having found it, will automatically turn to the necessary sectors in order to read data from them.
A file can be a program that can be run, text typed by the user, a digitized sound clip, or any other data sequence.
Usually, the name of a file refers in some way to its contents. For example, the file of the standard text editor program Notepad from operating systems of the Windows family is called notepad. Thus, it is easier for the user to navigate the data recorded on the disc.
So, the user specifies only the file name, and the specific location on the disk is determined by the operating system.
On some older operating systems, such as MS-DOS, the file name can be up to eight characters long. Among them can only be Latin letters and some special characters (for example, underscore or exclamation point).
On modern systems, the file name can be very long—for example, up to 255 characters in recent versions of Windows. At the same time, different characters can be used in the file name, including spaces and even Cyrillic. However, it is better not to get carried away with the use of Russian letters in file names. Firstly, they may not be perceived by some systems, and secondly, in some emergency situations, extracting or even saving such files is much more difficult than files whose names contain only Latin letters, and sometimes even impossible.
File Format
When a user starts working with a file, the system needs to know in what format it is written and with what program it needs to be opened. For example, if a file contains plain text, then it can be read in any text program (for example, Notepad). If the file is a sound fragment, then it can be opened in a player program or in some sound editor.
If, for example, you try to open a text file in a sound editor, then you will most likely see an error message (wrong file format). If you open a sound file as text, the computer will display a meaningless set of characters on the screen.
In order for programs and operating systems to determine the type of a file, an extension consisting of a small number of characters is often added to its name. In older systems like MS-DOS, it was limited to three characters, and although modern systems, including Windows XP, have no such limit, most files still contain three-letter extensions. The extension is separated from the file name by a dot.
Many modern systems and the Internet have adopted a number of standard file name extensions. Some of them are given in Table. 6.1.
Table 6.1. File name extensions


Of course, it does not list all possible extensions and file types. Each newly created program can use both the already existing standard type for its working files, and have its own. For example, the Adobe Photoshop graphics editor works with standard image formats (BMP, JPG, TIF, etc.), but at the same time has its own file format (PSD). The music program Cubase can handle standard MIDI files (MID) or sound files (WAV), but the original format (CPR) is more commonly used.
In addition, since there are so many programs, it is possible that two or more programs will try to use the same extension for files of their format. For example, the MUS extension is traditionally used for music files in the Finale format, but music files of the completely different MusicTime format also have it.
Having received a command to open a file (usually by double-clicking on the name or icon of this file), the system first of all determines the type of this file (usually by its extension). If the file turns out to be a program, then its contents are loaded into memory and passed to the processor for execution. If the file has another known type, then the system first opens the program that works with this type of files, and then opens it from it. If the file type is unknown to the system, then the user will be prompted to select the working program himself (Fig. 6.1).

Rice. 6.1. Selecting a program to open the file.
Catalogs
As long as the number of files on the disk does not exceed two dozen, remembering what their names mean and understanding them is quite easy. However, there are usually many more files, especially on large disks. For example, while the author is writing these lines, there are about 30,000 different files on the hard drives of his computer. Why do we need such a huge number of them and how to understand the files?
Modern programs (with very rare exceptions) never consist of a single executable file. As a rule, a single program requires several dozens, and sometimes hundreds of auxiliary files (for example, the Windows XP system consists of almost 10,000 files). To organize them, it is convenient to combine all files related to a particular program into one group.
In addition, it is logical to combine the files of a specific user into one group (if several people work at the computer), as well as divide them by type, purpose (for work, entertainment, children, etc.), etc.
You can and even need to create such groups of files. They are usually called directories, directories or, in the new terminology, folders (Folders). All directories, like files, have their own names. Externally, directory names are no different from file names, although they usually do not have extensions (however, theoretically, they can have them).
So, some files (and sometimes all) are located inside directories (folders). Inside one directory there can also be another directory, another one inside it, etc.
To open a file, in addition to its name and extension, you must specify the path to it. Path (Path) consists of the names of all directories inside which the file is located. In MS-DOS and Windows systems, it looks like this: at the beginning of the file path, the letter name of the drive (logical partition) is indicated, after which a colon is always placed, and then the names of the directories in which the given file is located through a backslash (\) are listed. For example, if you recorded a sound file and named it MySound.wav and then placed it in the Sounds directory, which in turn is located in the MyFiles folder on your D: hard drive, then the full filename (including the path) would look like this:
D:\MyFiles\Sounds\MySound.wav
Sometimes a situation arises when files (or rather, entire logical drives), which are perfectly visible in one operating system, disappear without a trace in another. As a rule, this is due to the fact that sometimes operating systems can use different file systems.
NOTE.
A file system is a format in which information about the location of files on a disk is recorded. The universal file system is called FAT or FAT16. It can be used in MS-DOS, and in Windows, and in OS / 2, Linux, BeOS, etc. The FAT32 file system has the same property, which is an improvement on the previous one for use on large hard drives (after all, the partition size when FAT16 file system cannot be larger than 2 GB). The FAT32 file system is understood by almost all operating systems except DOS. Other file systems are not as versatile. For example, there is an HPFS system that only OS/2 (and earlier versions of Windows NT) recognizes. The NTFS file system used on Windows NT/2000/XP is not understood by Windows 95/98/Me, and on Linux it's better to use it read-only, not write-only. The Linux-specific ext3 file system is usually not readable by Windows.
If you need to use several operating systems so that each of them accesses the same disk (logical partition), the FAT32 file system is the most versatile choice.
Create, copy and move files and directories
The ways of manipulating files and directories are generally intuitive on modern GUI operating systems, but still require some explanation.
The basic manipulations with files and directories are:
¦ creation;
¦ removal;
¦ copying;
¦ movement;
¦ renaming;
¦ creation of shortcuts;
¦ change the current directory.
The main environment for performing these actions in operating systems with a graphical user interface are:
¦ Desktop;
¦ a program that displays files on a computer (for example, Explorer) (Fig. 6.2).

Rice. 6.2. Explorer program.
To create a new file or directory, go to the desired folder, right-click, select New from the context menu, and then select Folder to create a new directory, or one of the available file types to create a file. For example, if you want to create a text file, you should select the Text Document item.
NOTE.
The choice of this item can also be advised when creating files of an unknown type or one that is not displayed in this menu. When creating an empty text document, an empty file appears, which can later be filled with any content.
As a result, the icon of the new directory or file will appear in the Explorer window, after which you can give it any name. When finished entering the name, press Enter.
To delete files and directories in modern operating systems, the deletion system is used through the Recycle Bin. When deleting a file, it is not completely thrown out of the file system, but is transferred to the Recycle Bin, from where it can be restored if desired. Files thrown into the Recycle Bin, which is a special system folder, continue to take up space on the computer's hard drive.
To delete a file (move it to the Trash), select it in Explorer and press the Delete key. You can also right-click on it and select the appropriate command from the context menu.
To delete several files at once, you need to select them all. To do this, click on each of them in turn, holding down the Ctrl key. If you click on an already selected file while holding down the Ctrl key, it will be excluded from the selection.
If you need to select several consecutive files at once, then you can click the mouse first on the first of them, and then, while holding the Shift key, on the last one, or vice versa.
ATTENTION!
These methods of selecting a group of files can be used not only for deletion, but also for performing other actions, such as copying or moving.
If you are completely sure that the file being deleted is no longer needed, then you can delete it immediately without placing it in the Recycle Bin by selecting and pressing the Shift + Delete combination.
An inexperienced user is advised to always delete files to the Recycle Bin. To empty it (which you need to do from time to time), you need to right-click on its icon on the Desktop and select Empty Trash from the context menu.
There are two ways to copy and move files and directories, and create shortcuts. The first one is using the clipboard. This is done in the following way.
With the desired folder open, select one or more files and press Ctrl+C (or select Copy from the Edit menu).
Then open the folder where you want to copy the files, and press Ctrl + V (or select Paste from the Edit menu) - the files will be copied. If you want to create a shortcut, choose Insert Shortcut from the Edit menu instead.
To move files, select them and press Ctrl+X (or choose Cut from the Edit menu). After opening the destination folder and pressing Ctrl+V (or selecting Paste from the Edit menu), the files will be moved.
The second way is to use drag and drop (Figure 6.3). In this case, the files are dragged with the mouse while the left button is pressed. In doing so, keep in mind the following:
¦ you can drag and drop files both into open folder windows, and simply onto the folder icon, as well as the disk;
¦ when dragging files or folders to a folder located on the same drive as the original one, the files will be moved, and when they are dragged to a folder located on a different drive than the original one, they will be copied;
¦ when dragging files with the executable (EXE) extension, shortcuts will be created on them;
¦ if you need to copy files, then hold down the Ctrl key while dragging them, and if you move them, hold down the Shift key;
¦ if you drag files not with the left, but with the right mouse button, then when you release it, a context menu will appear in which you can choose what to do with such files: copy them, move them or create shortcuts.

Rice. 6.3. Drag and drop a file from one folder to another.
To change the current directory, in the left part of the Explorer program, select the desired directory from the folder tree and click on it with the mouse. The contents of the selected folder will be displayed in the right part of the window. In addition, you can enter the path to the desired folder in the address bar at the top of the window, similar to how you enter website addresses.
To rename files, right-click on the required file and select Rename from the context menu. You can also select the desired file by clicking on it and pressing the F2 key.
An input field will appear where you can enter a new file name. When finished, press the Enter key.
Of course, everything described above concerns the standard graphical file manipulation tools in the Windows operating system.
In addition, these actions can be performed using the command line.
To use the command prompt in Windows XP, select All Programs from the Start menu, then Accessories, then Command Prompt. After that, a command line terminal window will open (Fig. 6.4).

Rice. 6.4. Command line.
Usually, users of the “old” school, which everyone is used to doing manually, work with the command line.
Computer device in pictures. The computer has become an integral part of our everyday life. Some people will probably not have a TV, but a computer is always in a prominent place. And there is nothing surprising in this, because on a computer you can watch a movie, listen to good music, and even earn serious money.
Some people create masterpieces on their computers that are simply breathtaking. Someone sells their work via the Internet, someone creates custom-made websites and plug-ins for them, someone mounts videos, slide shows, presentations, etc.
For photographers, in general, the “golden age” has come. Well, if you know how to create some kind of course on any topic (after all, EVERYTHING is searched on the Internet), then it will not be difficult to sell your knowledge for good money. Of course, not everyone can earn in this way, but what, or who is stopping you from buying a computer, studying some course on Photoshop, slide shows, creating a website, and your future and the future of your children are secured.
And if you are well versed in cars, plumbing, gardening, assembling furniture with your own hands, then share your experience with people who also want to learn this. And just for this you need to create your own video course or write an e-book. And if you also have your own website, then your opportunities and chances of making money increase hundreds of times. In short, I gave you the direction of using the computer at least 30%, and then everything depends on your imagination and perseverance.
But in any case, first you need to master the computer so as not to be afraid of it, but to make friends with it, and get the maximum benefit from this friendship for yourself and your loved ones.
What does computer consist of
Let's start with the fact that conditionally the entire computer can be divided into four main groups.
- System unit;
- Means of displaying information;
- means of manipulation;
- Peripherals.
System unit , this is the most important thing in a computer. It can be compared to the body and head. Can you imagine such a monster, with cool brains? It is in the processor that all calculations and information processing take place. This is not a simple device. What it consists of, we will consider later.
Means of displaying information it is, of course, a monitor. Once upon a time, we may not need it, but so far we have not yet learned how to receive information only through signals. It is on the monitor that we see the information processed by the processor, in a language that is understandable to us, namely in pictures, numbers, and letters.

Manipulation tools (not to be confused with the media). These include keyboard, mouse, game joystick, steering wheel, etc. It is with the help of these tools that we give commands to the computer, and the means of manipulation translate these commands into a machine language that is understandable to the computer. Yes, the computer has its own language, which only a programmer can understand.


Peripherals - these are devices that have their own control, but work on the commands of the system unit. Such devices include equipment such as a modem and other external storage devices. A computer can do without them, but for us, such devices make life much easier.


System unit device:

- Motherboard - the largest and most important board inside the system unit. It is to it that all other computer devices are connected, which it supplies with power, and exchanges information with them. Devices that are in the processor unit are connected to the motherboard using special connectors. These connectors are called buses. The speed of the computer depends on the speed of the buses.

- is the brain of the computer. It is he who performs all the logical operations. The speed of the computer depends on its speed and frequency.

- serves for temporary storage of data. All this data is stored in it only while the computer is turned on. As soon as the computer is turned off or restarted, the memory is cleared. The speed of the computer depends on the amount and speed of RAM.

- (or as it is also called - Winchester)- serves to store information. In order for you to store your data (folders and files) on it, you need to format the hard drive and install an operating system (Windows, Linux, etc.) on it. And only after installing the operating system, you can install other auxiliary programs, such as Office, browsers (programs for working on the Internet), Photoshop, etc.

- - a board designed to process video signals that are transmitted to the monitor. Without this board, we will not see anything on the screen. A modern video card has its own microprocessor and its own RAM. The more memory, and the higher the frequency of the microprocessor of the video card, the better the image and the faster the picture changes. This is especially noticeable in cool games. The video card can be built into the motherboard or on a separate board.

- Sound card This is a board for processing audio signals. Many modern computers have it already built into the motherboard.

- LAN card used to connect a computer to a local network. Now many people are creating a local network at home so that all family members can work with shared documents and access the Internet, independently of each other. The network card can also be built-in.

- , is used to read and write CDs.

- card reader- a device for reading and writing information on various memory cards (telephone, camera, video camera, etc.). Card readers also differ in read/write speed. They are built into the system unit or external (connected via a USB port).

- serves to supply and distribute electrical energy throughout the motherboard and devices connected to it.

These are the components that our favorite computer consists of. Study it and use it to your fullest.
Units.
Many people are interested in a computer, its programs and other accessories of a computer, but few people thought about the fact that all files in the form of pictures, videos, music are stored on a computer due to its memory. And it happens like this: The computer must have a drive (HDD-disk, flash-disk, etc.) - this time. The memory of the computer is not infinite, so the file should not exceed the size of the free memory of the drive. In the recent past, PC memory was stored on disks that were capable of storing text smaller than a given one, but at the same time they were the size of a room, and now a computer with a box is capable of storing hundreds of thousands of such texts, or even more.
Let's explain it all in the language of computer science:
Memory- in computer science - the ability of an object to provide data storage. Storage is carried out in storage devices.
Address- a number that identifies individual parts of memory (cells) and registers.
Associative memory- in informatics - unaddressed memory, in which information is searched for by its content (associative feature).
Bit- the minimum unit of measurement of the amount of transmitted or stored information, corresponding to one binary digit that can take on the values 0 or 1.
Byte- in storage devices - the smallest addressable unit of data in the computer memory processed as a whole. By default, a byte is considered to be 8 bits. Typically, in data encoding systems, a byte is the code for a single printable or control character.
Byte- in the dimension of information - a unit of measurement of the amount of information, the amount of memory and the capacity of the storage device and the basis of derived units: -
1 byte = 8 bits,
1 kilobyte = 1024 bytes,
1 megabyte = 1024 KB,
1 gigabyte = 1024 MB,
1 terabyte = 1024 GB,
1 petabyte = 1024 TB.
On the Internet, there is such a thing as connection speed. It is measured not in bytes, but in bits. Those. data is downloaded (under reference conditions) at a speed 8 times slower than the connection speed to the node. (because there are 8 bits in 1 byte)
Example: the real throughput of the communication channel is 1 Mbps, i.e. 1024Kbps Accordingly, the maximum data download speed through this bandwidth = 1024/8 → 128Kb/sec. With this connection, a 10 MB file will be loaded in 10/0.128 = 80 seconds
How PC works
Consider the principle of operation of a personal computer
The structure of a computer is somewhat similar to the structure of a person. The processor, RAM and hard drive perform the functions of the brain; the motherboard and chipset are the circulatory and nervous systems; keyboard, mouse, microphone, scanner and webcam (input devices) are similar to human vision, hearing and other functions of sensing the world around; monitor and printer (output devices) are something like a language. Technically, the principle can be described in the following way:
A certain amount of information has emerged. The device that receives the information processes it and prepares it for sending using a common protocol. Such a device can be called a transmitter. Then, another device designed for data transmission transmits the prepared information. The receiver or, as you already understood, the device receiving information read the data using the same protocol and, based on some information that was laid down earlier, made a decision. As a response, this data was sent back using the same communication device. This is how computer devices work with each other: they constantly process something and exchange data using common protocols that specify how to transmit and receive this data.
All information is stored on the hard drive. When you turn on the computer, some of the data necessary for the normal functioning of the system is loaded into random access memory (RAM - random access memory). In addition, other devices can also send their data there while the computer is running. The processor (CPU - central processing unit) is responsible for processing the data. Information enters the CPU from RAM, and after processing, it returns there. And then it can be sent to the addressee, that is, to the device that sent this data to the RAM for further processing (although this does not always happen, but more on that later). If you need to save information for a long time, then you “dump” it to the hard disk, since RAM can only store data if it is constantly powered. If some device suddenly wants the CPU to process something for it, then first you need to prepare the data, then send it to memory and tell the processor that this data needs to be processed. Wait, and then maybe (depending on the task at hand) get the processed data back, or maybe send it to some other device. There are many devices, but there is only one processor and it is not enough for all of them at once. What to do? Very simple - get in line and wait. There is a hierarchy among devices. For some, the CPU will process the data immediately, while others will have to wait until the second coming.
It is clear that the user must observe some result of his work. This is what the monitor is designed for, the data for which is prepared by the video card (by the way, it is this device that can access the CPU bypassing the RAM).
For example: You launched MS Word and pressed some key, say [G]. On the screen, in the text field, a letter appeared and, not least, it is the letter G. What happened? Firstly, by launching the MS Word program, you gave it control of the computer (which is also under the control of the operating system). Secondly, pressing the [G] key caused the keyboard mini-processor to send the code for that key to the computer. Thirdly, the processor, having processed the command and data that were prepared by the program, sent them to the video card. Fourthly, the video card, having received the command and data and processing them in its own way, sent everything to the monitor, which, in turn, displayed what was ordered. All. You see the letter G on the screen. From the last example, we can conclude that a computer is not only its hardware (hardware), but also its software part (software). That is, one cannot be separated from the other. Moreover, I will tell you - any computer device has its own control program, which is called a driver. Without such programs, most computer devices will not work. The operating system (OS) takes over the overall control of the computer. By the way, this is the weakest point of the modern PC. In general, it should be noted that all PCs operate according to the von Neumann principles of program control. John von Neumann, a Hungarian by nationality, emigrated to the United States in 1930, where in 1945 he developed the principles of computer program control. And until now, the world of information technology uses these rules (although not the most convenient and having its own drawbacks), since no one can really offer anything else (there are non-Fonneim computers, but they still have even greater drawbacks). Here's what those rules are:
1. The principle of binary coding. This means that all information in a computer is transmitted and stored in binary form.
2. The principle of program control. Here we are talking about the fact that the program is a set of instructions that the processor executes automatically and in a certain sequence.
3. The principle of memory homogeneity. Diverse information differs in the way it is used, not in the way it is coded.
4. The principle of targeting. Information is placed in memory cells that have an exact address. Knowing the address, the CPU can access the necessary information at any time.
PC device
Let's divide the parts of the computer into four main groups:
· System unit:
The system unit, the main part of the computer, where all computing processes take place. The system unit is quite complex and consists of various components. These components will be discussed later.
· Peripherals:
Peripheral devices - a device structurally separated from the system unit. Devices that have their own control and work on the commands of the system unit. Serve for external data processing. Peripheral devices include printers, scanners, modems, external storage devices.
· Manipulation means:
Means of manipulation: keyboard, mouse, game joystick. All those devices with the help of which we “tell” the computer what to do, what computing processes to run at the moment.
· Display means:
The means of display is, first of all, the monitor. All information about the operation of the computer is displayed on the monitor. The monitor allows you to track what is happening in the computer at a given time, what computing process the computer is busy with.
System unit device:
· Motherboard- the main part of the system unit, to which all devices of the system unit are connected. Through the motherboard, the devices of the system unit communicate with each other, exchange information, and supply electricity. The faster the buses (device communication channels) of the motherboard, the faster the devices communicate with each other, the faster the computer works. 
· CPU- the brain of the system unit, performs logical operations. The speed of the computer and its entire architecture largely depend on its speed and frequency. 
· RAM- memory for temporary storage of data in the computer, used only when the computer is running. The speed of the computer depends on the amount and speed of RAM. 
· HDD- serves for long-term storage of information, it contains programs necessary for the operation of a computer (Windows, Office, Internet Explorer.) And user files (Mail files, if a mail client is used, video, music, pictures). 
· video card- a board inside the system unit, designed to connect the system unit and the monitor, transmits the image to the monitor and takes over part of the calculations for preparing the image for the monitor. Image quality depends on the video card. The video card has its own built-in RAM and its own image processing processor. The higher the frequency of the processor of the video card and the more memory of the video card, the more cool (later released) games you can play on your computer. 
· Sound card– designed to prepare sound signals reproduced by speakers. The sound card is usually built into the motherboard, but it can also be structurally separated and connected via a bus. 
· LAN card- board, device, installed in the motherboard or built into it. A network card is used to connect a computer to other computers via a local network or to connect to the Internet. 
· CD/DVD-ROM- a device for reading / writing CDs, CDs, DVDs. These devices differ in the speed of reading or writing information, as well as the ability to read / write various media. It's hard to find anything other than omnivorous CD-ROMs on the market these days. Modern CD-ROMs are capable of reading and writing both CDs and DVDs of various capacities. 
· Drive- a device designed to read / write information on floppy disks. Rarely installed on modern computers. Instead of disk drives in modern computers, a card reader is installed. 
· card reader– a device for reading/writing information on memory cards. Card readers differ in the speed characteristics of reading / writing information. Card readers are built into the system unit or are structurally independent, connected to the system unit via a USB port. 
· Computer ports- connectors on the system unit designed to connect peripheral devices, manipulator devices and display devices. We will not talk about the connectors in detail, we will just list some of them: USB, VGA, Power connector, COM port, Ethernet port, Standard audio output connector, etc. 
· power unit- a block that powers all devices inside the computer. Power supplies vary in power. The more powerful the power supply, the more load it can "hold" 
· Coolers– fans designed for air cooling. Usually coolers are installed inside the power supply, on the processor, on the video card. An additional cooler can be installed on the system unit to cool the entire unit.
· Radiators- metal plates, installed to remove heat from the processors in the system unit. Usually radiators are cooled by coolers, but not always.
Main PC Peripherals:
The main peripheral devices of a computer include a printer and a scanner. The printer is designed to output information from a computer to paper. Printers can be divided into laser and inkjet.
· Inkjet printers printed on paper using ink, which is taken from cartridges. Printers can be equipped with a different number of cartridges, it all depends on the model. Inkjet printers are usually in color. There are inkjet printers that can print photos. Some photo printers can be connected directly to a camera/phone, bypassing a computer. The disadvantage of inkjet printers is expensive printing, ink from paper is usually washed off with water. 
· Laser printers are in color and black and white. Laser printers print using a laser beam. The laser beam bakes the toner on the paper, which falls from the cartridge onto the paper. Laser printers differ in printing speed, the number of sheets printed per minute. As a rule, laser printers are in offices, because. have a high printing speed and a printed sheet that is not expensive at cost. Like inkjet printers, laser printers have cartridges. These cartridges are filled with toner (powder). 
· Scanner- a device for scanning documents, photographs and even photo negatives. The most common type of scanner is flatbed. Different scanners have different scanning speeds. Also, scanners can be divided according to the extension that they support when scanning. Some scanners have a special device for scanning negatives. The scanner is usually connected to a computer via a USB port. 
· Multifunction devices- printer / scanner / copier (copier) in one device. Combine all of the above features. A distinctive feature of such devices is the ability to use them as a copier, bypassing the computer. Such combined devices can be both inkjet and laser. 
· Graphics tablet- a device for manual input of graphic information, images by moving a special pointer (pen) across the tablet; when moving the pen, the coordinates of its location are automatically read and these coordinates are entered into the PC 
Manipulation means:
· Keyboard and mouse- these are the main means of manipulation, computer control. Also, the means of manipulation include various joysticks, steering wheels with pedals, steering wheels, but they are mainly designed to control the gameplay. It can be noted here that not all released games can correctly use or even use one or another game pad. 
DDR SDRAM
Compared to conventional SDRAM type memory, with double the data rate, the bandwidth has been doubled. (Initially, this type of memory was used in video cards, but later chipset support for DDR SDRAM appeared.)

For reference: DDR SDRAM memory operates at frequencies of 100, 133, 166 and 200 MHz, its full access time is 30 and 22.5 ns, and the duty cycle is 5, 3.75, 3 and 2.5 ns. Memory module designation examples: DDR200, DDR266, DDR333, DDR400
DDR2 SDRAM
Structurally, a new type of RAM DDR2 SDRAM was released in 2004. Based on DDR SDRAM technology, this type of memory, due to technical changes, shows higher performance and is designed for use in modern computers.

For reference: the memory can work with bus clock speeds of 200, 266, 333, 337, 400, 533, 575 and 600 MHz. In this case, the effective data transmission frequency will be 400, 533, 667, 675, 800, 1066, 1150 and 1200 MHz, respectively. Some manufacturers of memory modules, in addition to standard frequencies, also produce samples that operate at non-standard (intermediate) frequencies. They are intended for use in overclocked systems where headroom is required. Full access time - 25, 11.25, 9, 7.5 ns and less. Working cycle time - from 5 to 1.67 ns.
DDR3 SDRAM
This type of memory is based on DDR2 SDRAM technologies with twice the data transfer rate on the memory bus. Differs in the lowered power consumption in comparison with predecessors. The bandwidth frequency ranges from 800 to 2400 MHz (the record frequency is over 3000 MHz), which provides more bandwidth than all its predecessors.

DRAM Memory Designs
DRAM memory is also designed as separate chips in DIP, SOIC, BGA packages and as SIPP SIMM, DIMM, RIMM memory modules (for PCI connectors of system units)
The illustration on the bottom of the chassis shows: from top to bottom: DIP, SIPP, SIMM (30-pin), SIMM (72-pin), DIMM (168-pin), DIMM (184-pin, DDR)

For example, case versions of RAM cards used in modern laptops are provided: 

HDD.
Hard Disk Drive or HDD(English hard (magnetic) disk drive, HDD, HMDD), a hard disk, in computer slang "hard drive", "screw", "hard", "hard disk" - an information storage device based on the principle of magnetic recording. It is the main storage medium in most computers.

Unlike a "flexible" disk (floppy disk), information in a hard disk drive is recorded on hard (aluminum or glass) plates coated with a layer of ferromagnetic material, most often chromium dioxide. The HDD uses one or more platters on the same axis. Reading heads in the operating mode do not touch the surface of the plates due to the layer of air flow formed near the surface during rapid rotation. The distance between the head and the disk is several nanometers (in modern disks, about 10 nm), and the absence of mechanical contact ensures a long service life of the device. In the absence of rotation of the disks, the heads are located at the spindle or outside the disk in a safe zone, where their abnormal contact with the surface of the disks is excluded.
Also, unlike a floppy disk, the storage medium is combined with a drive, a drive and an electronics unit and (in personal computers in the vast majority of cases) is usually installed inside the computer system unit.

Main characteristics
Interface(English interface) - a set of communication lines, signals sent over these lines, technical means that support these lines, and exchange rules (protocol). Commercially available internal hard drives can use ATA (aka IDE and PATA), SATA, eSATA, SCSI, SAS, FireWire, SDIO, and Fiber Channel interfaces.
Capacity(English capacity) - the amount of data that can be stored by the drive. Since the creation of the first hard drives, as a result of continuous improvement in data recording technology, their maximum possible capacity has been continuously increasing.
Physical size(form factor) (English dimension). Almost all modern drives for personal computers and servers are either 3.5 or 2.5 inches wide - the size of standard mounts for them, respectively, in desktop computers and laptops. 1.8-inch, 1.3-inch, 1-inch and 0.85-inch formats have also become widespread. The production of drives in the form factors of 8 and 5.25 inches has been discontinued.
External HDD

An external HDD is a conventional hard drive placed in a case and having a USB or FireWire output for connecting to a computer or other device with which it is necessary to exchange data. External USB hard drives became popular in the 2000s, thanks to the general “mobilization”. Portable hard drives differ primarily in size and speed.
Practically, external USB HDD drives have exactly the same volumes as conventional ones, so now you can buy an external HDD up to 1 TB. Currently, external hard drives are produced by more than 30 companies around the world.
Network adapters.
Wired network controllers
network card, also known as a network card, network adapter, Ethernet adapter, NIC (English network interface card) - a peripheral device that allows a computer to interact with other network devices. At present, especially in personal computers, network cards are quite often integrated into motherboards for the convenience and cheapening of the entire computer as a whole.
Types of NICs:

internal- Separate boards inserted into ISA, PCI or PCI-E slot;

external, connecting via USB or PCMCIA interface, previously mainly used in laptops;

built-in to the motherboard.
On 10 megabit Network cards for connecting to a local network use 4 types of connectors:
· 8P8C for twisted pair;
· BNC-connector for a thin coaxial cable;
· 15-pin transceiver AUI connector for thick coaxial cable.
Optical connector (en:10BASE-EL and other 10Mb Ethernet standards)
These connectors can be present in different combinations, sometimes even all three at once, but at any given moment only one of them works.
On 100 megabits boards install either a twisted pair connector (8P8C, aka RJ-45) or an optical connector (SC, ST, MIC). Next to the twisted pair connector, one or more information LEDs are installed to indicate the presence of a connection and the transfer of information. Since our networks within the entrance are built using Fast Ethernet technology - network card must support 8P8C connector.
It is customary to separate several generations of network controllers. Network adapters produced today can be attributed to the fourth generation. These adapters necessarily include an ASIC that performs the functions of the MAC-level (English MAC-PHY), the speed is developed up to 1 Gb / s, and there are also a large number of high-level functions. The set of such functions may include support for the RMON remote monitoring agent, a frame prioritization scheme, remote computer control functions, etc. In server versions of adapters, a powerful processor is almost required, which offloads the central processor.
Wireless network controllers
WIFI is a technology that allows you to create computer networks that fully comply with the standards for conventional wired networks (for example, Ethernet), without the use of cable wiring. The transmission medium in such networks is radio waves 2.4 and 5 GHz
Wireless network controller. As you can understand, this is an adapter that connects your computer to a wireless network.
Wi-Fi controllers come in several types:
· Embedded. Already built into the motherboard. Most often used in laptops or PDAs. As a rule, you cannot remove the integrated controller from the computer, but you can disable it and use another instead. Most modern laptops are equipped with built-in Wi-Fi controllers. It is worth highlighting mass-produced controllers built on chips: Atheros, Broadcom, VIA, Realtek.

Internal with PCI interface. Perhaps one of the most common types of network controllers for personal computers. As a rule, these network cards have one LED, an activity indicator, and an antenna socket. The boards can be supplied with different types of antennas: pin, which is installed directly on the adapter bar, and remote.

Internal with PCMCIA interface. The most convenient way to add wireless networking to a laptop that does not come equipped with it by default. They have a built-in antenna, are compact and easy to set up. There are also adapters with foldable large antennas that provide an increased range of the wireless network.

External USB controllers with USB interface. This is the most versatile type of controller and the most convenient. You can use the USB controller with both a laptop and a personal computer. This type of controller is especially relevant for owners of SFF format computers, such as the Shuttle XPC. Such controllers are convenient to carry with you and you can take them on a trip or vice versa - keep them at home or in the office as a spare, in case guests with laptops without Wi-Fi controllers come to you, but who desperately need Internet on their machines.
Fundamentals of Information Networks
The concept of a computer network
Let's start with the definition of a computer network.

A computer network is two or more computers connected by a transmission medium (for example, a network cable). The main function of the network is to enable the exchange of information between network users.

The principle of resource sharing fits into the same concept, when a network user can access information, a program or a device located on another computer. For example, network users can work with network programs and files on a remote computer or print on a printer that is physically connected to a computer on the network. To implement network access to resources, programs, files or printers must be shared.
Network evolution
The first multi-terminal systems appeared in the early 60s as a way to organize the computing work of users. The principle of operation of multiterminal systems is to share the computing resources of one powerful computer between a certain number of users. Terminals only display information and provide keyboard input. The entire computational load is taken over by a large and powerful computer. In the 60s, IBM mainframes acted as such computers - powerful and reliable general-purpose computers.

WANs (wide area networks)
The first global networks (Wide Area Network - WAN) appeared as a result of solving the problem of access of the terminal to the central computer, remote from it at a great distance, about hundreds of kilometers. And in order to connect central computers with each other, a type of communication "computer-computer" was developed. There was a possibility of access from the terminal to the resources of several large computers of the supercomputer class. With the help of the computer-to-computer communication type, some network services have been implemented, for example, file sharing service, e-mail, and others.

LAN (local area networks)
The first local networks (Local Area Network - LAN) appeared in the early 70s as a result of a technological breakthrough in the field of electronics - large integrated circuits appeared. Large computers were replaced by minicomputers, which were much cheaper and were as good as mainframes in terms of performance. Thus, each department of the enterprise was able to install its own multi-terminal system. And in order to connect the systems of departments into a single enterprise network, various non-standard interface devices were used.

Standard LANs
The next step in the evolution of computer networks is the emergence of the first personal computers (PCs). It was the advent of the PC that gave impetus to the standardization of local area network technologies. In the mid-80s, standards such as Ethernet, Arcnet, Token Ring appeared. Thanks to standards, the process of deploying local networks has become easier. To deploy a network, it is enough to install standard network adapters, for example, Ethernet, connect them with a standard cable using standard connectors, and install an operating system (OS) on a computer that supports standard network protocols.

Network classification
LAN (Local Area Networks - local area networks) - networks connecting computers within one or more adjacent buildings.
A distinctive feature of local networks is the use of high-speed highly reliable transmission media, such as coaxial cable or twisted pair. Distances covered by local networks usually do not exceed a few kilometers.

WAN (Wide Area Networks - global networks) - networks connecting computers or local area networks that are separated from each other over long distances. Global networks can connect different cities, countries and even continents. An example of a global network is the World Wide Web. A distinctive feature of global networks is the use of a variety of data transmission technologies, including low-quality lines. This is due to the use of highly reliable protocols in global networks that can guarantee data delivery without loss and distortion. In addition, data transfer rates in WANs are generally much lower compared to LANs.

MAN (Metropolitan Area Networks - regional networks). This class is not always accepted as a separate class in the classification of networks. It refers to networks covering distances up to hundreds of kilometers. As a rule, they unite local networks of a single administrative subordination. Typically, the transport basis of such networks is formed by high-speed networks using optical fiber as a transmission medium.

Logical topology of the ER-Telecom network
The structure of the ER-Telecom cable network assumes four levels. The first three are optical: main (city level), sub-main (campus level) and house inputs (mini-campus level). The fourth level is electrical (house distribution networks). The backbone layer combines the central headend with the headend stations. Currently, the backbone layer has a star topology. The subtrunk level connects the Underhead Stations (PGS) with the mini-campus nodes. All intra-campus wiring is carried out by a four-wire optical cable. Two cores are used for the needs of cable television, two - for the needs of the Internet. An optical coupler is installed on each house, which divides the optical signal as a percentage. The topology of the sub-trunk layer is an optical ring. Each mini-campus node serves 24 optically connected houses. This scheme allows you to cover the maximum number of houses. The ring connection topology used by ER-Telecom makes it possible, firstly, to increase the economic efficiency of network construction. Ring connection saves cable. Secondly, the use of coaxial cable for external laying between houses is minimized. The ring circuit for switching on mini-campus nodes provides for the redundancy of optics for supplying a television signal. Thus, when the optical ring breaks, the optical signal is switched in the opposite direction. This greatly increases the reliability of the network.

TIRE
In bus networks, the computers are connected to a single cable. Information can be distributed along the cable in both directions. The advantages of networks with the "Bus" topology are the low cost and ease of cabling. The cable is connected to the computer network board using a special T-shaped connector.

Disadvantages - low reliability (with any defect in the cable system, the entire network fails) and low performance, because. only one computer can transmit at a time.

STAR
In networks with the "Star" topology, computers are connected to a central hub (hub), which serves to transfer information from one of its ports to all the others. Advantages - higher fault tolerance, since only the failure of the hub can bring the network to a halt. In addition, some models of concentrators can act as intelligent filters that control the flow of information or block transfers prohibited by the administrator. Disadvantages - additional costs for equipment and installation of the network.

RING
In networks with a ring topology, computers are connected in series, completing the ring. Information circulates around the ring in one direction. Networks with a ring topology provide a convenient opportunity for the sender to control the correctness of receiving a message, since the data, having made a turn, will be returned to the sender. The disadvantages of such networks include the complexity of algorithms for monitoring and restoring the integrity of the ring.
Manipulators are special devices that are used for convenient cursor control.
The first mouse appeared in 1963 at Stanford University.
*Mice are divided into:
Mechanical (the movement is carried out by the ball, and this rotation is monitored by mechanical sensors).
Optomechanical (when you move the mouse, the ball rotates inside and the rotation is tracked by optical sensors).
Optical (its movement is monitored by optical sensors).
By connection method:
Wired
Wireless
*Mice with multiple buttons - up to 40
* trackball (inverted mouse)
* touch pad - a touch pad, on which they drive with a finger, or with a special wand.
* penmouse - a pen on the screen.
* Mouse point - push-button system (as on a mobile phone). Pressing the button in one direction or another corresponds to the same movement of the cursor on the screen.
*Joystick - usually a rod-handle, the deviation of which from the vertical position leads to the movement of the cursor in the corresponding direction on the monitor screen. Often used in computer games. In some models, a pressure sensor is mounted in the joystick. In this case, the harder the user presses the knob, the faster the cursor moves across the display screen.
* Digitizer (graphic tablet) - a device for converting finished images (drawings, maps) into digital form. It is a flat panel - a tablet, located on the table, and a special tool - a pen, with which the position on the tablet is indicated. When moving the pen on the tablet, its coordinates are fixed at closely spaced points, which are then converted by the computer into the required units of measurement.
The main characteristic of the mouse
is the resolution, measured in dots per inch (dpi). Normal
a mouse is considered to provide a resolution of 300-400 dpi.
Ergonomics really turns out to be the main category in the characteristics of manipulators and keyboards. Ergonomic modern mice provide the most comfortable work. They differ from the usual easy mouse not only in design, but also in additional functions that speed up and facilitate work in networks, with graphics, with large document packages. In addition, when buying a mouse, you need to try it on, it should please your hand. If the mouse fits the size, the hand will not have to be held on weight, which means that the wrist will not hurt, and productivity will increase.
Manufacturers today offer just a huge number of different models of mice. A simple ordinary mouse with three buttons (for example, Easy mouse, Pilot mouse) is the most common among users, the cheapest among all. Scroll mouse: The scroll mouse is a more sophisticated form that is gaining in popularity. Scrolling - a scroll wheel or a switch key - allows you to quickly view documents and work on the network (Net mouse). There are models with two wheels that provide vertical and horizontal scrolling. Optical mouse - Another option, this is an optical mouse with a mouse pad that has special markings on it. It moves quickly and smoothly, while it has a very high accuracy of hitting the right place on the screen, which has gained the love of designers.
If you are tired of the tail reaching for the mouse, you can purchase a wireless manipulator. The only drawback of tailless mice is that since nothing holds them, they often fall off the table.
It is necessary to mention the additional buttons on modern mice. Such buttons are usually located on the side, perform the function of a window button in Windows (Alt + Tab) or are programmed by the user.
The next type of manipulators is trackballs. Outwardly resembling an inverted mouse, they differ from it in high accuracy and ergonomics. Direct control of the ball does not require movement on the mat. Certainly a more comfortable manipulator than a regular mouse. Some manipulators combine the functions of a trackball and a mouse, have many buttons, levers, etc. These are more expensive models, highly valued by professionals.
Articles to read:
Belt conveyors general device purpose types main characteristics
The system unit contains the following elements (not necessarily all at once), which are connected to the motherboard using connectors (slots):
1. Power supply. It powers the computer.
2. A hard disk drive (HDD - hard disk drive) is more often called a hard drive. This nickname arose from the slang name for the first model of a 16 KB hard drive (IBM, 1973), which had 30 tracks of 30 sectors, which coincidentally coincided with caliber "30/30" of the famous hunting rifle "Winchester". The capacity of this drive is usually measured in gigabytes: from 20 GB (on older computers) to several Terabytes (1TB = 1024 GB). The most common hard drive capacity is 250-500 GB. The speed of operations depends on the rotational speed (5400-10000 rpm). Depending on the type of connection between the hard drive and the motherboard, ATA and IDE are distinguished.
3. A floppy disk drive (FDD - floppy disk drive) - nothing more than a floppy disk drive. Their standard capacity is 1.44 MB with a diameter of 3.5 "(89 mm). As a storage medium, magnetic disks use magnetic materials with special properties that allow fixing two magnetic states, each of which is associated with binary digits: 0 and 1.
4. Optical disc drives (CD-ROMs) come in a variety of diameters (3.5" and 5.25") and capacities. The most common of them - with a capacity of 700 MB. It happens that CD discs can be used for recording only 1 time (then they are called R), and it is more profitable to use rewritable RW discs.
5. DVD originally stood for Digital Video Disk. Despite the name, you can burn anything to DVDs, from music to data. Therefore, in recent times, another decoding of this name is increasingly common - Digital Versatile Disk, loosely translated meaning "digital universal disk". The main difference between DVDs and CDs is the amount of information that can be recorded on such a medium. A DVD disc can contain from 4.7 to 13, and even up to 17 Gb. This is achieved in several ways. Firstly, a laser with a shorter wavelength is used to read DVDs than to read CDs, which has significantly increased the recording density. Secondly, the standard provides for the so-called dual-layer discs, in which data is recorded on one side in two layers, with one layer translucent, and the second layer is read "through" the first. This made it possible to write data to both sides of DVDs, thus doubling their capacity, which is sometimes done.
6. Other additional devices (mouse, printer, scanner, etc.) can also be connected to a personal computer. Connection is made through ports -- special connectors on the rear panel. Ports are parallel (LPT), serial (COM) and universal serial (USB). On a serial port, information is transmitted bit by bit (more slowly) over a small number of wires. A mouse and a modem are connected to the serial port. A parallel port transmits information simultaneously over a large number of wires corresponding to the number of bits. A printer and an external hard drive are connected to the parallel port. The USB port is used to connect a wide range of peripheral devices - from a mouse to a printer. It is also possible to exchange data between computers.
7. The main devices of the computer (processor, RAM, etc.) are located on the motherboard.
1) Microprocessor (simpler - processor) - the central unit of a PC, designed to control the operation of all blocks of the machine and to perform arithmetic and logical operations on information. Its main characteristics are the bit depth (the higher it is, the higher the computer performance) and clock frequency (largely determines the speed of the computer). The clock frequency indicates how many elementary operations (cycles) the processor performs in one second. Intel Pentium processors and its economy version Celeron are respected on the market, and their competitors are also valued - AMD Athlon with the economy version Duron. Intel processors are characterized by high reliability, low heat generation and compatibility with all software and hardware. And AMD show great speed with graphics and games, but are less reliable.
2) Computer memory can be internal and external. External memory devices include the already considered HDD, FDD, CD-ROM, DVD-ROM. Internal memory includes read-only memory (ROM, ROM English), random access memory (RAM, RAM English), CACHE
ROM is designed to store permanent program and reference information (BIOS - Basic Input-Output System - basic input-output system).
RAM is fast and is used by the processor for short-term storage of information while the computer is running. No information is stored in RAM when the power source is turned off. For the normal functioning of a computer these days, it is desirable to have from 1 GB to 3 GB of RAM.
CACHE memory is an operational ultra-high-speed intermediate memory.
CMOS memory -- CMOS RAM (Complementary Metall-Oxide Semiconductor RAM). It stores computer configuration settings that are checked each time the system is turned on. To change the configuration settings for your computer, the BIOS contains a computer configuration program -- SETUP.
8. Sound, video and network cards can be either built into the motherboard or external. External boards can always be replaced, while if the integrated graphics card fails, you will have to change the entire motherboard. Of the video cards, ATI Radeon and Nvidia are most often used. The higher the video card memory, the better.
Peripherals.
The main peripheral devices of a computer include a printer and a scanner. The printer is designed to output information from a computer to paper. Printers can be divided into laser and inkjet.
Inkjet printers print on paper using ink from cartridges. Printers can be equipped with a different number of cartridges, it all depends on the model. Inkjet printers are usually in color. There are inkjet printers that can print photos. Some photo printers can be connected directly to the camera/phone, bypassing the computer. The disadvantage of inkjet printers is expensive printing, ink from paper is usually washed off with water.
Laser printers come in color and black and white. Laser printers print using a laser beam. The laser beam bakes the toner on the paper, which falls from the cartridge onto the paper. Laser printers differ in printing speed, the number of sheets printed per minute. As a rule, laser printers are in offices, because. have a high printing speed and a printed sheet that is not expensive at cost. Like inkjet printers, laser printers have cartridges. These cartridges are filled with toner (powder).
Scanner - a device for scanning documents, photos and even photo negatives. The most common type of scanner is flatbed. Different scanners have different scanning speeds. Also, scanners can be divided according to the extension that they support when scanning. Some scanners have a special device for scanning negatives. The scanner is usually connected to a computer via a USB port.
Multifunction devices - printer / scanner / copier (copier) in one device. Combine all of the above features. A distinctive feature of such devices is the ability to use them as a copier, bypassing the computer. Such combined devices can be both inkjet and laser.
Manipulation tools
The keyboard and mouse are the main means of manipulating and controlling the computer. Also, the means of manipulation include various joysticks, steering wheels with pedals, steering wheels, but they are mainly designed to control the gameplay. It can be noted here that not all released games can correctly use or even use one or another game pad.