How acronis disk director 12 works. Description and brief instructions for working with Acronis Disk Director Suite
Read also
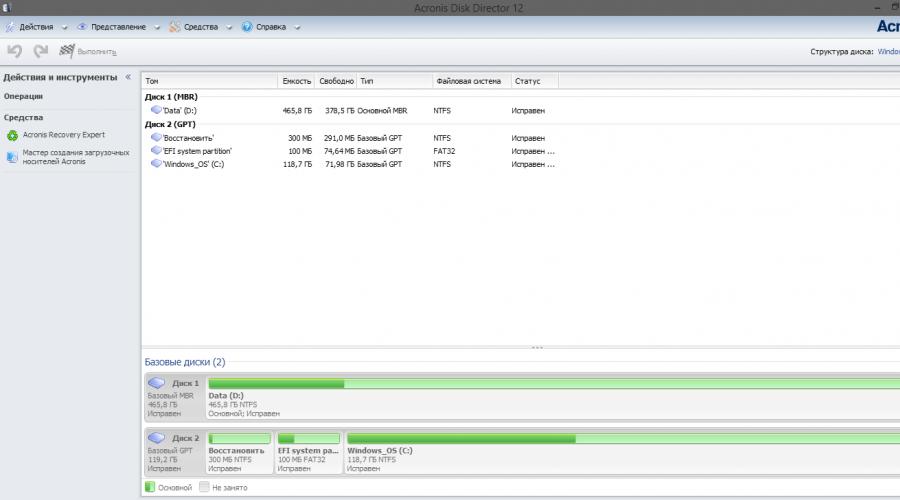
You already have installed program Acronis Disk Director 12 downloaded from the official site Acronis and pre-activated. Briefly about the program itself and its capabilities.
Acronis Disk Director 12 is designed to work with partitions hard drive: create / delete / move / overwrite / format / defragment partitions, redistribute the size of hard disk partitions, copy partitions, convert file hard disk, preparing the hard disk for installation operating system. In general, an indispensable tool for working with hard drive and its sections in full, which will help ordinary user in difficult situations with his computer or laptop. Sometimes it is extremely necessary to quickly boot from boot disk and solve problems with the hard disk and its partitions. About creating a bootable disk based on WInPE with Acronis Disk Director 12 completely ready for use. Such a disk must always be at hand.

Before you start creating a boot disk for Acronis Disk Director 12, you need to download the Windows Deployment Environment. If you have Windows 7 installed on your computer, you need to install Windows AIK, for Windows 8/8.1 - Windows ADK, for Windows 10 - Windows ADK, respectively. Without installing this component, creating a boot disk impossible. Download and install Windows Deployment Environment. After installing it, open Tools - Bootable Media Builder.


In the next window, select the ISO disk image as the bootable media to be created.

Then we select the places to save the created image. Not recommended for this stage rename the Acronis Disk Director 12 disk image you created. Let the program work as is, otherwise errors may occur when creating the image, which will backfire later. During the image creation process, you will be prompted to add custom mass storage drivers, do this if necessary. In my case, the disk image was created on a 64-bit system with UEFI support, so there is no need to add it to the disk image. It will be copied to the created Acronis Disk Director 12 boot image.


Here now finished image The disc can be renamed as you like and you can burn it to CD-R/RW for use.

About creating a Linux-based boot disk and adding other Acronis products to one disk, creating boot image to add to bootable flash drive We will talk in other articles.
For many PC users, work on the simplest setup operating system cause a feeling of apprehension and self-doubt. In turn, attempts to solve more challenging tasks, requiring additional knowledge, self-destruct.
A striking example of this is the desire to break HDD(HDD) of a computer into several logical partitions using the Acronis program.
Many users are of the opinion that working with Acronis Disk Director Suite is insanely difficult, but we hasten to inform you that this is absolutely not the case.
This article will tell you in detail how to work with this program. Of course, we will not consider everything in a row, but will highlight the most basic manipulations with the HDD.
Instructions for creating logical drives in Acronis Disk Director
We start the program.
If you are seeing the Acronis interface for the first time and do not know how to work with the program, then select " Auto mode". In it the most basic functions will be available.
Over time, when the key points are clear, you can experiment in "Manual Mode".
As a result, we see the following:

You need to click on the menu item "Masters".

As a rule, the first two points are the most popular in the work.
Consider "Creating Partitions"
For example, we have a 1TB hard drive. Please note that this means that there is one HDD installed in the computer. In our example, the HDD is initially divided into three local partitions, and we will create another one, for this: we click the item in the menu "Wizard" -> "Partition Creation", as a result we see the following:

To create a new partition, we will use the space from disk "E".


Acronis will lock the partitions during this process. In this state, files and folder contents cannot be changed.

As you can see in the screenshot, it is possible to use only 354.4 MB.
note. Before partitioning a disk, it is necessary and only then to use its space.

Important. If the partition being created is needed only for storing files, then select the "Logical" type. If for installing the system, then "Active". By switching the types of sections, you can study their purpose in detail.
This example shows how to create logical drive to host data files.


We do not enter anything and continue.

The latest version of Acronis® helps manage disks for servers. The program has been improved once again and it combines all the functions that the administrator needs.
For those who downloaded Acronis - how to use the program? We can reassure you, it's very simple. There intuitively clear interface and those who know at least a minimum about working with disks can easily manage with this program. Acronis makes it easy to move Windows, which is described in our article How to transfer Windows to another drive.
Attention: A newer version has been released Acronis True Image , you can read about its capabilities on our website. How to use Acronis True Image 2016
So, what this program is capable of? Or maybe she's a lot - Windows support 2008 R2, dynamic and GPT disks, self-cloning of MBR disks to a separate hard disk, and much more. The owner has the ability to place a volume across multiple disks, create a mirror, restore array elements, manage from the central console remote servers to restore lost or remote drives, as well as scale and move partitions, reorganize or optimize the hard drive, edit its sectors manually, and much more. And among the possibilities acronis backup copying, which is worth mentioning separately, because you just need to specify the settings and the program will do everything itself.
This is why acronis is so popular - data recovery is enough difficult task for many similar programs. Also few other than acronis support windows 7. There is another similar option - acronis true image. This great program to sync with support various devices. Download Acronis True Image quite simple, however, in view of the very interesting possibilities almost everywhere it is paid.

This program protects your computer during synchronization. The protection area includes music, videos, photos, contacts, calendars, programs and more. It will help you recover not only information, but also the entire computer configuration - settings, applications, programs.Acronis true image performs permanent backup
of all changes on the computer, so you can return to the file, moment or folder you need at any time, even if you have already deleted them. It can be started automatically. You just need to set the timer and the program will do everything itself.
Backup is performed not only on the hard disk, but in any place. Wherever it is convenient for you - to flash drives, disks and to cloud storage.Try&Decide technology allows you to visit unsafe sites - no viruses will penetrate without your consent, the program will not allow you to install a single file. By the way, she protects hard disks larger than 2 TB.
In addition, you can encrypt your data if you are afraid of outside interference. Generally acronis true image there are a lot of functions and here we have considered only the main ones.
Due to the popularity of this article, I wrote a more detailed article on this topic.
Right ? The program has a lot of functions and tools, the inexperienced can get confused. The fact is that I did not manage to use the recovery at startup using the F-11 key. I had to recover from a pre-created bootable media, but it turns out sometimes it confuses drive letters, besides, I probably changed the default settings in vain, in short, I mistakenly deployed the backup to the wrong partition and of course erased all the files I needed, eventually let people down and this is if you have Acronis True Image on your computer, which is doubly offensive, because the program is expensive. I read a lot of articles on the net, but apparently the versions of the program do not match. Can you give some guidance, so that this Acronis of yours would work exactly 100%? Michael.
Acronis True Image 2011 how to use
Friends, this article covers the work in detail outdated version Acronis True Image Home 2011, if you have a newer version of the program, then go to our special section with articles about the program Acronis, all new articles are there.
- Note: I also offer you an overview AOMEI programs Backupper Standard being direct and free competitor Acronis True Image Home
What if all possible ways Restoring the operating system did not lead to success? Of course you have a lot desired programs, installed by you in more than one day, reinstalling and configuring which will take a lot of time and effort. The entire arsenal Windows recovery XP can be used mostly on a running operating system, and if it doesn't start, you resort to help XP recovery consoles, a rather limited and inconvenient tool, at the sight of which an inexperienced user will have great doubts, and it will not always help. That's when many people think about programs Reserve copy, similar Acronis True Image Home, the program is no doubt good, but it also has its own characteristics, let's try to figure them out.
But this is what concerns Windows XP, but what about Windows 7, is Acronis needed here? We have an article-> How to restore the Windows 7 system, you can read, she undoubtedly has more opportunities for self-healing, but as they say, everything is decided in comparison and you yourself need to pick up a saving tool for a rainy day, having tried everything. How to use Acronis? Very simple, friendly and clear interface, but you need to learn how to work both in a working operating system and from bootable media that you create yourself. Let's take a look at the main features of the program first.
- Note: An older version of Acronis will not see a backup created more than new version programs, you will not be able to perform the process of restoring your data. Also, the Russian version of Acronis True Image does not always accept backups created in the English version of the program.
- After installing Acronis, you need to immediately create a backup of your operating system and bootable media with the program, you can on a flash drive or CD (I personally have both just in case) and you can take advantage of the main advantages of this program - restore your operating system system even if it does not boot.
- It is also important to know that when restoring the operating system from the backup you created, all files on the restored disk will be replaced by the contents of the backup, that is, deleted, so before the restore operation, you should copy your important data to a safe place. In case of serious violations of Windows, that is, if it is impossible to boot the system in the normal way, you should use any Live CD, boot from it and copy your files in the same way.
So how do you use Acronis on a running operating system and also from the Bootable media?
If you have not installed the program yet, you can use our instructions How to install Acronis.
Note: our article covers working with Acronis True Image Home 2011 latest version, if you have an older version of Acronis, then its principle of operation is not at all different from ours, they are all very similar.
We start Acronis. Go to main window

Note that you hardly need to configure anything, Acronis is fully prepared to create an archive copy of your operating system and even knows where to place it. If we click Archive, then an archive copy of our entire C:\ drive with the operating system and programs will automatically be created on local disk D:\ in the My backups folder.

The location where your archives will be stored can be changed by clicking on the Operations button.

You can also manually select Backup the disks and partitions we need

In the drop-down menu, you can change the archive storage settings by selecting a drive and folder, or you can create it yourself.

In general, it can be noted that everything is very convenient, at least for now.
Let's say I'm satisfied with Acronis' offer to place a backup copy of the archive with my operating system on the D:\ drive in the My backups folder. I choose Archive. Data backup in progress

And here it is my backup, at the ordered address.

If you have already created a backup, you can easily find it by clicking the Search button backup.

Let's say your Windows is unstable and you want to restore its state at the time of creating the archive.
In order to restore the operating system from a backup, you need to select our archive and click restore.


You can also set up continuous protection of your files according to a schedule.
Use Online Storage to store archives.
Consider Tools and Utilities

Very interesting feature Boot recovery. Let's say you have problems with Windows startup, this function will allow you to load Acronis True Image before starting the operating system by pressing the button F-11. Then you can enter the program and deploy a workable and previously created image of the operating system to the place of the damaged one, for example, from the effects of a virus. Unfortunately given function let me down several times, so let's play it safe and create Acronis bootable media.
- Note: When the archive is created, we will be able to restore our Windows from a working operating system at any time, but if due to some circumstances we are unable to load it, we will use the Boot media we previously created with the Acronis True Image program.
Bootable Media Builder, you can create it in this Tools & Utilities window.
Or in main->Create bootable media So let's create.

Further


We put ticks everywhere, but in the first place we are interested in full version, it was in working with her that I personally noticed the least unpleasant surprises.

We can place the Acronis True Image Bootable Media on a CORSAIR flash drive (H) or on a CD, I repeat, it’s better to have two options and make them one by one


Proceed
Copying files
Boot media successfully created


Let's look at the use of Acronis True Image in combat conditions. For example, your operating system is blocked by an advertising banner that asks you to put money on such and such a phone and you are allegedly unblocked, which of course is a hoax.
If Windows contained all the functionality that is implemented using a third-party software, only to install the operating system would need a mega-flash drive with an impressive weight. But even this is not the main problem. Imagine what horror would seize the inexperienced minds of computer neophytes, if they encounter a hyper-stream of information hitherto unknown to them. Therefore, the operating system can only be the basis for unlocking the potential of a computer with a vector given by the user's interests.
And sometimes the regular capabilities of the operating system can also have a kind of “underformat” - get something frivolous for free, and sensible things, kindly, look on the side and for a fee. For example, to work with hard computer disk in its arsenal of standard Windows tools has a disk management utility. But its capabilities are very limited: the maximum that can be done in terms of reorganizing disk space is to create one partition at the expense of the volumes of another.
To carry out any more or less serious operations with disk partitions, you need to resort to special programs- disk managers. The leading position in the software market in this niche is occupied by the program - a professional product for system administrators, which provides extensive functionality for working with computer disk space.
About Acronis Disk Director 12
Among other features, the latest current version Acronis Disk Director 12 provides for resizing disk partitions, copying and moving them, splitting and merging without losing existing data. Acronis Disk Director 12 can be written to bootable media to work with disk partitions on a computer without an operating system installed.
The products of the Acronis developer company, including the Disk Director disk manager, are paid. From the free demo version of Acronis Disk Director 12, which can be freely downloaded from the official website of the program, after registering with email address, it will make little sense. Any operations to organize disk space can be performed only if the volume size does not exceed 100 MB.

This is a negligible amount, and, as we can see, we are offered to just play around on a small scale in order to test the program. Therefore, to allocate disk space, we will immediately use paid version. At the time of this writing, Acronis offers to purchase Disk Director 12 for 1600 rubles.
Dividing a hard drive into two partitions
Consider an example of dividing a hard drive into two partitions. We have a hard disk of 100 GB in size, on which there is only one partition - drive C, automatically generated during the process. Windows installation. In our case, we will leave the system only 30 GB of space, and from the remaining disk space we will form a non-system partition - disk D. This example of disk space allocation is a test one, and it is not exemplary. In fact, in order to realize the possibilities of modern Windows versions just requires a system partition of about 100 GB in size. But, regardless of the size of the hard drive, regardless of whether we are dealing with a classic hard drive or an SSD drive, the program will work in the same way.
Acronis Disk Director 12 takes away excess space from the system partition without losing data or crashing the operating system. Naturally, the space taken from the system disk must be free.
In the main window of the program, we will see a visual picture of the existing disk partitions, and in order to change it, in our case, to system partition call context menu and select the command to split the volume. The same command is duplicated by a separate option on the toolbar on the right.

In a new window, set the size of the space taken from the disk of the system, which will be formed in new section. In our case, in the column new size volumes" set to 70 GB. Click "OK".

Returning to the Disk Director window, we will see the future picture of disk space allocation. To apply the operation done, click the appropriate button at the top of the program window.


The computer will restart, and Disk Director will enter preboot mode, where it will redistribute the disk partitions.

After starting the system in the program window, we will observe exactly the picture of disk partitions that we planned.

Formation of several disk partitions at once
The process of forming the second partition of the disk at the expense of the space of the first is considered above. It is suitable if what needs to be done is to divide the section into two parts. But if we are talking about the radical redistribution of disk space with the creation of several partitions, the arsenal of Acronis Disk Director 12 has more convenient functionality for these purposes. Let's consider how to create several disk partitions from one at once using the volume resizing function.
So, again we have a hard drive with an operating system installed on a single system partition. We make a right-click on it and select resize the volume.

In the "Volume Size" column, set the system partition to 30 GB. Click "OK".

Returning to the main window of Acronis Disk Director, we will see that the remaining disk space is now indicated by unallocated space. We call the last context menu and select the only thing that is offered to us - "Create volume".


The next step in the wizard is to set the size for the new partition. In our case, we will allocate 30 GB again and get disk D. Click "Finish".

After that, in the main window of the program, we will see a future picture of disk partitions with two formed and the remaining 40 GB of unallocated space. Let's create a third section. We again call the context menu on an unoccupied place and repeat the procedure for creating a volume.

In the window for setting the size for the created partition, traditionally for our case, we will specify 30 GB and complete the process of forming disk E.

In the main window of the program, we will now see three partitions and 10 GB of unallocated space. Let's define them in a small section of the disk. Context menu again, volume creation again.

We give all the remaining space to disk F. We complete the process.

All available disk space is partitioned, now it remains to apply all these changes. At the top of the program window, click the button to apply scheduled operations.

As in the previous case, this will be followed by an information window with the parameters of the operation being performed and confirmation of the reboot.

Well, after Acronis Disk Director 12 performs the operation in preload mode, and Windows starts up, we will already observe the results of our work - instead of one partition, in our case there will be as many as four.

By the way, you will find many interesting articles on this and other topics from our colleagues at inforkomp.com.ua.
Have a great day!
Acronis Disk Manager- one of the most powerful software systems for handling storage.
Today we will figure out how to use Acronis Disk Director 12, and specifically, what steps need to be taken when installing a new hard drive into the system.
First of all, you need to connect the hard drive to motherboard, but we will not describe this step, since it does not quite fit the topic of the article and, usually, does not cause difficulties for users. Most importantly, do not forget to turn off the computer before connecting.
So, the hard drive is connected. We start the car and, in the folder "Computer", no (new) disk is visible.

It's time to turn to Acronis for help. We launch it and find an uninitialized disk in the list of devices. For further work the drive needs to be initialized, so click on the corresponding menu button.

The initialization window appears. Choosing a partition structure MBR and disk type "Base". These options are suitable for drives used to install an operating system or store files. Click OK.

Section creation
Now let's create a section. Click on disk "Unallocated Space") and press the button "Create Volume". In the window that opens, select the partition type "Base" and press "Further".

We select our unallocated space in the list and again "Further".

In the next window, we are prompted to assign a letter and a label to the disk, specify the size of the partition, file system and other properties.
We leave the size as it is (into the entire disk), we also do not change the file system, as well as the size of the cluster. We assign a letter and a label at our discretion.
If the disk is planned to be used to install the operating system, then it must be made Primary, this is important.

Preparation is over, click "Complete".
Application of operations
In the left upper corner there are buttons to cancel actions and apply pending operations. At this stage, you can still go back and correct some parameters.
Everything suits us, so we click on the big yellow button.

We carefully check the parameters and, if everything is correct, then press "Continue".


Ready, new hard disk appeared in the folder "Computer" and ready to go.

Like this, using Acronis Disk Director 12, we installed and prepared a new hard drive for work. There are, of course, system tools to perform these actions, but working with Acronis is easier and more pleasant (author's opinion).