How to install old drivers. How to install an older version? Driver update program
Read also
This is not such a common situation, but when servicing a large fleet of user computers, sometimes it happens that for some device the manufacturer has not released drivers for the required version OS. This could be an old version of the OS, or an old device. All in all. Sometimes you need to install drivers manually. They are usually supplied in the form of several files. Most often they have the extension inf or sys, but they can also be different.
The procedure for installing a driver in Windows 10 depends on how you install it. Each method has its pros and cons. The most important advantage is that any user, from a beginner to a master, can choose the most convenient one for himself, avoiding system errors and the departure of programs in the future. We will look at each method in detail separately. Remember that the most important thing is to use drivers from reliable sources so as not to damage operating system and not accidentally launch a virus, the elimination of which will take much more time and effort than installing any driver.
What you need to install the driver
In order to install the driver manually, you need an installation disk or special software, which will guide you through the entire installation procedure step by step. Below we will look at one of these programs - Driver Easy. There are situations when, due to incompatibility of the driver with installation disk gives an error message. It is in such cases that we need programs that will help us find and update the driver. In addition, this option will be more acceptable for owners of netbooks, which often do not have a disk drive. For such cases, there is an option to install the necessary driver from a USB drive, we will also look at that today, since this method has its own characteristics.
Manual installation - instructions
Installing the driver manually using Device Manager
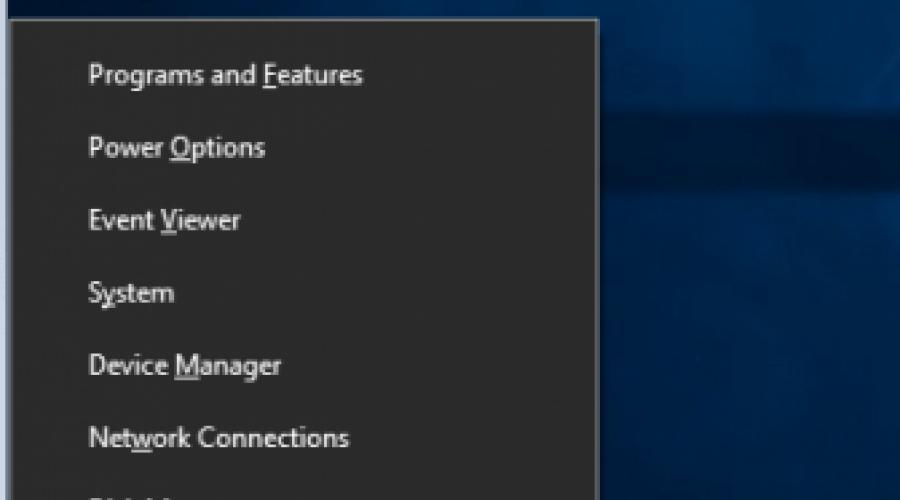
1. Open the panel Windows management 10 by pressing simultaneously Win key+X( Windows key and the X key) and left-click on the “Control Panel” item

2. For convenience, it is advisable to set up small icons.
3. Click on “Device Manager”.

In the Device Manager window, expand the categories and find the device you need. Then click right click mouse over the device name and select Update Driver Software. The photo shows an example of driver installation network adapter Realtek PCIe GBE Family Controller.

Installing the driver manually using Driver Easy
1. In the main window of the Driver Easy program, click on the driver of the device that needs to be updated. After this, you will see the standard task manager window, which was described above. Select the device to update.
2. You will see two options in the pop-up window. Click Browse My Computer to install the driver software.

3. Click Browse to locate the downloaded driver file.

Click the Down Triangle button in Driver Easy, then select Open File Location to open the driver folder.
For convenience, you can copy and paste the location of the downloaded files into the field.
The path to the file:


As you already understood, the update takes a lot of time and requires basic knowledge of working with personal computer. In addition to updating manually, Driver Easy can perform automatic search, downloading and installing all drivers that need updating. But, as we already said, this is not safe, since this function works in automatic mode, and in this case it is impossible to do backup copy in case of a serious failure.
Installing the driver from a CD or DVD
Almost all computer and hardware manufacturers provide a set of drivers for various hardware devices. For example, the driver CD that comes with your printer contains drivers for many different printers, not just the one you purchased. When installing drivers, make sure that you are installing drivers for your printer model and not for another one. Also, make sure you install it for that Windows versions, which is installed on your computer. The process of installing a driver from a CD is no different from the standard installation process of any other program. Be sure to follow all instructions in the installer the first time you run it. In some cases you need to remove old driver before installing a new one.
If you have a driver CD but your computer doesn't have a drive or it doesn't work, you can also load the drivers from a USB drive.
Installing drivers from a USB drive
After copying the drivers to a USB drive, you can install the necessary software on your computer. Make sure the drive is connected to your computer, open Windows Explorer and find the name of your device in it. For example, if you have a USB drive that is assigned to the E: drive when connected, then you need to click on the icon named E: in order for the contents to open.
Once the drivers are found on the disk, you must determine exactly how they will be installed on your computer. If the directory contains executable files or an installation file (extension *.exe), then you can install the driver using this file. If the drivers are compressed into a ZIP file, you will need to extract the file using archivers such as 7-Zip and WinZip.
Installing inf file
If the above recommendations did not help you, then all instructions for installing drivers and hardware devices are always contained in a file with the .inf extension, which is located in the C: Windowsinf folder. The folder containing the information files is protected and hidden. For it to be displayed, in the folder view settings, check the box " Hidden elements" To find the information file for the device you need, follow these instructions:

Once you know the file name, return to the Task Manager, select the device, click "Update Driver" and specify the path to the *.inf file (in in this example it will be C:Windowsinfoem3.inf).
Your question:
How to install more old version?
Master's answer:
If your computer has problems with graphics, then do not think that you can solve them by installing new driver For NVIDIA video cards. There is often a situation when it turns out that programs worked much better with the old version of the driver. Attention, next you will need to perform several steps in a certain sequence to install an older version of the driver for the NVIDIA video card.
Before installing an older version of the driver, you must decide where you will install it from, either you will get it on the Internet, or install it from the disk that came with the video card. In the second option, everything is simple and clear - you simply load the disk, and the installer's instructions will tell you what to do next.
If you don’t have a disk and decide to download the old version of the driver from the Internet, then a search problem arises. To solve this question, you should visit the official NVIDIA website, and then go to the “Drivers” section. In the menu that appears, select the “Beta and archived drivers” item and select it with the left mouse button.
In the window that appears, use the drop-down menu to enter the type, series and family installed video card In addition, you should note the installed operating system and its language. To do this, you need to select the “Search” button and wait for the list to be built.
On the official website, from the established list, select the desired driver version and left-click on it, this action will take you to the driver page. When you go to the page, take your time, but first read the information and select the “Download Now” button. Specify the path to save the downloaded file and wait for it to download.
First, be sure to uninstall the driver version currently installed on your computer. Typically, this action is performed in several ways. For example, you can simply click on the icon of a freshly downloaded file. When the installer has completely collected all the information, he will give you a signal that Current version will be replaced with a new one and automatically delete the previously installed one.
The second method involves removing the installed driver yourself. To do this, right-click on the “My Computer” icon and select “Properties” in the menu. A window will appear in front of you, go to the “Hardware” tab and click on the “Device Manager” button.
From the list of equipment presented to you, select the “Video adapters” item. By clicking on the line, or highlighting the “+” symbol to the left of it, you will see your video card. If you double-click on it with the left mouse button, a window will open in front of you in which you can go to the “Driver” tab and highlight the “Delete” button.
You need to confirm the removal of the driver version and restart your computer. After restarting the system, do not be alarmed, since the desktop is not fully displayed, but only in limited mode. Start installing the older version of the driver that you downloaded on the Internet; you can do this by clicking on its icon with the left mouse button. Strictly follow the installer's instructions until the driver is completely installed. Restart your computer.
And finally, some useful tips. In a situation where you do not know what video card is installed on your computer, click “Run” from the “Start” menu, type “dxdiag” into the line and look at the information about the video card in the “Display” tab. In the same way, you can see the driver version currently installed on your PC.
Instructions
Before installing an older one version drivers for the NVIDIA video card, decide where you will install it from: download it from the Internet or run the disk that came with the video card. Installing the driver from a disk is more or less clear - you just need to insert the disk into the drive and follow the installer's instructions.
If you don't have an installation disk to install the old one version driver, you must first find it. Go to the official NVIDIA website ( http://www.nvidia.ru) and select the “Drivers” section. In the drop-down menu, select “Beta and archived drivers”, left-click on the line.
In the window that appears, use the drop-down menu to indicate the type, series and family of your video card, and also select the operating system installed on yours and its language. Click the "Search" button and wait until the list is generated.
On the NVIDIA website, select the required one from the list provided. version driver and left-click on it to go to the driver page. Once completed, review the information on the page and click the “Download Now” button. Specify the path to save the file and wait for the download to complete.
Next you need to remove the driver that is installed on your this moment. There are several options. You can click on the icon of the file you just created. Having finished collecting information, the installer will notify you that the current version will be removed and will automatically remove the driver.
Another option involves removing the existing driver yourself. To do this, right-click on the “My Computer” icon from the desktop and select “Properties” from the drop-down menu. In the window that opens, go to the “Hardware” tab and click on the “Device Manager” button.
From the generated list of equipment, select “Video adapters”. By clicking on the line or clicking on the “+” icon to the left of it, you will see your video card. Double-click on it with the left mouse button (or once with the right mouse button and select “Properties” from the drop-down menu). In the window that opens, go to the “Driver” tab and click on the “Delete” button.
Confirm driver removal, wait until the computer restarts. After the system restarts, the desktop will be displayed in limited mode. Run the old one downloaded from the Internet version driver by clicking on its icon with the left mouse button. Follow the installer's instructions until the driver installation is complete. Restart your computer.
If you don't know what video card you have, select Run from the Start menu bar, type "dxdiag" without quotes or spaces, and look for information about your video card in the Display tab. There you can also see what version of the driver is currently installed on your computer.
Several years ago, players for video formats other than traditional MPEG and DivX appeared on the multimedia device market. Just like multimedia devices, I have HD media players.
You will need
- Flash drive or HDD, previous firmware version
Instructions
Reboot the HD media player for the changes to take effect.
Video on the topic
note
It is important to have several versions of the firmware and strictly follow the instructions. If the procedure is violated, the firmware may be damaged, and some firmware may not work correctly on the device.
Helpful advice
You should download not only new version from the website of the HD player manufacturer, but also an older one. It is best to download the version that is already installed in the player.
Sources:
- website of the manufacturer of HD media players with a description of its operating principles in 2018
When installing third-party software or drivers for newly added devices, there are times when the operating system loses its functionality. It is for such cases that the system creates recovery checkpoints. This feature is enabled immediately after it is installed on your personal computer, and it is not recommended to disable it. Turning off System Restore will mean that you may have to reinstall it again. To perform a system rollback, follow these steps:

You will need
- - operating system Microsoft Windows XP
- - help file, if necessary
Instructions
Use it to get started simple solution System Restore – use the “System Restore” procedure. To do this, boot your personal computer into safe mode. The operating system is usually in normal mode; in order to call the boot menu, you must click on function key F8 and select the appropriate boot mode. After booting, a diagnostic message will appear asking whether to continue booting into safe mode or proceed to system recovery. Select System Restore.
Click Next in the System Restore dialog box that appears. In the next window, select the desired recovery point. There may be several of them. A calendar option may also be offered. Those numbers that will be highlighted or in bold contain system restore points. Once selected, confirm the selection of the restore point. This is necessary in order to start the rollback process. This process is irreversible, i.e. if you wait for completion this process, then during normal system loading some data will be lost. Therefore, you need to take care of their safety in advance. Click "Next". Wait for the system rollback process to complete and restart your personal computer if this is not done automatically.
Perform the system recovery process from within the operating system itself if it boots but is not stable. In this case, go to “Start” - “Programs” - “Accessories” - “System Tools” - “System Restore”. The same dialog box will appear as in step 2. Follow the same steps. Wait for the rollback process to complete and restart your personal computer.
To use the Skype program, you must have a username and password. After logging into your computer for the first time, you can save them so you don't have to enter them each time. However, if you need to log in from any other device, you will have to remember your registration data. If you cannot do this, try to restore them.

You will need
- - email address specified when registering in the system.
Instructions
First, launch the program itself. After that, click on the field called “Forgot your password?”. It will open immediately in your main browser. new page, where you need to specify the email address to use. Click on the “Submit” button. Next in your mailbox, to which the Skype account was registered, a message about the procedure for changing the password and its confirmation will appear. It is worth noting that only 6 hours are given for recovery after receiving the letter.
Next, you will be asked to select the login for which you want to recover the password (if you created several). Specify New Password twice and click on the “Change password and sign in to Skype” button. Do not forget that the code you come up with cannot consist of less than six characters, at least one of which must be digital.
If you cannot remember your email address or password, and also, have made any transactions in this program over the past 6 months, then use another method. In the Skype start window, click on the link “Can’t remember your email address?” By the way, this link is available in personal account on the official website of the program. Now provide details such as login and settlement details for at least one transaction. These may include the user’s first and last name, his order number and country, as well as data credit card, which was used to pay the bill.
There are situations when it is difficult to remember not only the password, but also the login itself. To restore it, click on the column “What is my username and password?”, which is also available, like the previous ones, in the Skype authorization window. In the window that appears, enter email, with which you registered your account.
Video on the topic
note
If you cannot provide your email address, login, or password, then restore your account You can’t, because this requires at least some data.
Sources:
- Website Skype programs in 2018
The decision to return to an older version of the Skype application can be caused by a variety of reasons, not the least of which is dissatisfaction with the external feed of the program.

Instructions
Call the main system menu by clicking the "Start" button and go to the "Control Panel" item. Expand the Add/Remove Programs link and select installed version Skype applications. Remove it. After that, download and install an older version of the program from the Internet on your computer. The Skype developers recommend this method.
Another way to return to an older version of the Skype application is to replace some program files. To carry out this operation, find and download the distribution kit of the required version of the program to your computer. Unpack the downloaded archive into any convenient directory and find three folders in it with the names:
Phone;
- Plugin Manager;
- Toolbars.
Co Windows time stores many backup copies in the system, temporary files, old drivers, which will gradually take up space on your hard drive. Of course, you can free up space on your hard drive, but what to do if old drivers for a device interfere with the installation of new versions? Particularly problematic wireless mice, keyboards and others USB devices, which sometimes do not want to work until we remove the old drivers and install new ones.
Drivers are necessary small applications to connect any device and make it work. IN Windows system very large database of drivers for different types devices: printers, mice, sound cards, boards, etc. Some manufacturers release their own versions of the driver, which are necessary for operation and not always in windows based drivers can work with a particular device. To do this, we need to remove old unnecessary driver versions and install new ones from the manufacturer.
How to remove a previous driver version
Every time the driver is updated over and over again, the old backup copies of the drivers remain in the system, thereby clogging the hard drive and preventing the installation of new driver versions. For removing previous versions write drivers in "Search" (near Start) Command line or CMD, right click on it and run from administrator name, then in the window that opens, enter the command cleanmgr.
Check the box next to the item Device Driver Packages and click OK. This will clean up all old driver packages.


How to remove old device drivers in Windows
Most often, native hidden installed drivers remain, which the above method will not remove them. Hidden drivers remain in the system and when a new device is detected, they automatically install their hidden, old drivers and therefore interfere with the installation of new ones.
- Press a combination of buttons Win+R and enter the following command devmgmt.msc to open Device Manager.


- In Device Manager, click View >
Note: If for some reason they are not displayed, then see below how to fix hidden display of devices.


We see poorly highlighted devices in the picture above; these are hidden drivers that sometimes interfere with us.
- To remove old hidden drivers, just right-click on it and Delete.
- If you have the option to check a box, check the box.

How to identify hidden device drivers in the device manager
Note: The command is related to displaying hidden drivers in Device Manager, older versions of Windows XP, 7.
- Run Command line on behalf of administrator and enter the command:
SET devmgr_show_nonpresent_devices = 1
You can go to Device Manager and try to show hidden ones.

This is not such a common situation, but when servicing a large fleet of user computers, sometimes it happens that for some device the manufacturer has not released drivers for the required OS version. This could be an old version of the OS, or an old device. All in all. Sometimes you need to install drivers manually. They are usually supplied in the form of several files. Most often they have the extension inf or sys, but they can also be different.
The procedure for installing a driver in Windows 10 depends on how you install it. Each method has its pros and cons. The most important advantage is that any user, from beginner to expert, can choose the most convenient one for themselves, avoiding system errors and program crashes in the future. We will look at each method in detail separately. Remember that the most important thing is to use drivers from reliable sources so as not to damage the operating system or accidentally launch a virus, the elimination of which will take much more time and effort than installing any driver.
What you need to install the driver
In order to install the driver manually, you need an installation disk or special software that will help you step by step through the entire installation procedure. Below we will look at one of these programs - Driver Easy. There are situations when, due to incompatibility, the driver from the installation disk generates an error. It is in such cases that we need programs that will help us find and update the driver. In addition, this option will be more acceptable for owners of netbooks, which often do not have a disk drive. For such cases, there is an option to install the necessary driver from a USB drive, we will also look at that today, since this method has its own characteristics.
Manual installation - instructions
Installing the driver manually using Device Manager
1. Open the Windows 10 Control Panel by pressing the Win + X key at the same time (Windows key and X key) and left-click on “Control Panel”
2. For convenience, it is advisable to set up small icons.

3. Click on “Device Manager”.

In the Device Manager window, expand the categories and find the device you need. Then right-click on the device name and select Update Driver Software. The photo shows an example of installing the Realtek PCIe GBE Family Controller network adapter driver.

Installing the driver manually using Driver Easy
1. In the main window of the Driver Easy program, click on the driver of the device that needs to be updated. After this, you will see the standard task manager window, which was described above. Select the device to update.

2. You will see two options in the pop-up window. Click Browse My Computer to install the driver software.

3. Click Browse to locate the downloaded driver file.

Click the Down Triangle button in Driver Easy, then select Open File Location to open the driver folder.

For convenience, you can copy and paste the location of the downloaded files into the field.
The path to the file:


As you already understood, the update takes a lot of time and requires basic knowledge of working with a personal computer. In addition to updating manually, Driver Easy can automatically search, download and install all drivers that need updating. But, as we already said, this is not safe, since this function works in automatic mode, and in this case it is impossible to make a backup copy in case of a serious failure.
Installing the driver from a CD or DVD
Almost all computer and hardware manufacturers provide a set of drivers for various hardware devices. For example, the driver CD that comes with your printer contains drivers for many different printers, not just the one you purchased. When installing drivers, make sure that you are installing drivers for your printer model and not for another one. Also, make sure that you are installing it for the version of Windows that is installed on your computer. The process of installing a driver from a CD is no different from the standard installation process of any other program. Be sure to follow all instructions in the installer the first time you run it. In some cases, you need to remove the old driver before installing the new one.
If you have a driver CD but your computer doesn't have a drive or it doesn't work, you can also load the drivers from a USB drive.
Installing drivers from a USB drive
After copying the drivers to a USB drive, you can install the necessary software on your computer. Make sure the drive is connected to your computer, open Windows Explorer and find your device name in it. For example, if you have a USB drive that is assigned to the E: drive when connected, then you need to click on the icon named E: in order for the contents to open.
Once the drivers are found on the disk, you must determine exactly how they will be installed on your computer. If the directory contains executable files or an installation file (extension *.exe), then you can install the driver using this file. If the drivers are compressed into a ZIP file, you will need to extract the file using archivers such as 7-Zip and WinZip.
Installing inf file
If the above recommendations did not help you, then all instructions for installing drivers and hardware devices are always contained in a file with the .inf extension, which is located in the C: Windowsinf folder. The folder containing the information files is protected and hidden. To make it appear, in the folder view settings, check the “Hidden items” checkbox. To find the information file for the device you need, follow these instructions:
Open Device Manager;
Right-click on the selected device and select “Properties” from the menu
After that, go to the “Details” tab. Expand the list and select “INF Name”. The file name will be displayed in the "Value" field.

Once you know the file name, return to the Task Manager, select the device, click "Update Driver" and specify the path to the *.inf file (in this example it will be C:Windowsinfoem3.inf)