Enable flash player for chrome. How to enable the Adobe Flash Player plugin in Google Chrome
Read also
Adobe Flash Player is a technology created by Adobe for playing and creating multimedia content on the web. This platform extensively used to create animated advertising images, web games, animation design, and audio and video player programming. Is one of the most popular multimedia platforms, despite the fact that many companies are abandoning it in favor of their products. At the same time, the developer company declared the technology obsolete in 2017 and plans to complete its support by 2020.
In the article you will find ways to configure and enable the flash player different ways, in browsers such as: Google Chrome, Yandex.Browser, and in addition, in Mozilla Firefox and Opera.
Yandex.Browser settings
Yandex.Browser runs on a redesigned engine from Google called Chromium and was created Russian company Yandex.
Standard Tools
If you get a pop-up window stating that your flash player is disabled or not installed, then first you should check availability browser plugins adobe flash player in the plugins window:
Inclusion and content settings for Flash Player
I also exist advanced options for flash player. They will help you configure the plugin so that it turns on only when you need it.


Filter disables
Yandex.Browser has a built-in extension for blocking Adobe Flash, due to the fact that some developers abuse the capabilities of this technology, loading the computer.

Inclusion on the site
Sometimes, to turn on the flash player, just click on the video window to launch adobe flash player. 
On other sites they write that the user needs to download Adobe Flash from the developer's site or update your web browser. 
Setting up Google Chrome
Google Chrome is a branded browser from Google. Program in this moment is one of the most popular in the world. All thanks to the speed of the web browser, which is achieved using the Chromium engine. Now other programs are also moving to this technology, since it is the most optimal.
Editing chrome plugins adobe flash player via " Content settings»:

IN latest updates Google Chrome developers have removed other options for editing this function.
Opera
This web browser was developed back in 1994 and is actively progressing to this day. Since 2013, he switched to the Chromium engine to improve the speed of the browser.
Add-on options:


Mozilla Firefox
Firefox is a browser created by Mozilla and uses the proprietary Gecko engine. Given software especially popular in some countries: in June 2016 it ranked second in polarity in Russia.
Add-on options:

If nothing helped
If none of the above worked for you, then the last few options remain:
- Try refresh browser. This can be done in the "About the browser" section, in any of the programs listed in the article.
- Reinstall or updateAdobeFlash. This can be done by going to the Adobe website.
- Sometimes antivirus blocks addition. Check the list of programs blocked by the antivirus and, if necessary, add Flash to the exceptions.
You have now learned how to disable and enable Adobe Flash technology for different browsers, as well as several additional solutions. We hope this article was helpful to you.
"Adobe Flash Player" is needed in order to play flash content. Its use is very popular today. In the Google Chrome browser, it is already enabled by default, but in a situation where flash content cannot be viewed, you need to activate it.
You can't delete it permanently, as it's a built-in feature. But if necessary, the player can be turned on or off. All playback problems are solved quite easily: you need to activate it.
The most popular way is to turn it on through the settings. To do this, you need to perform a simple algorithm:
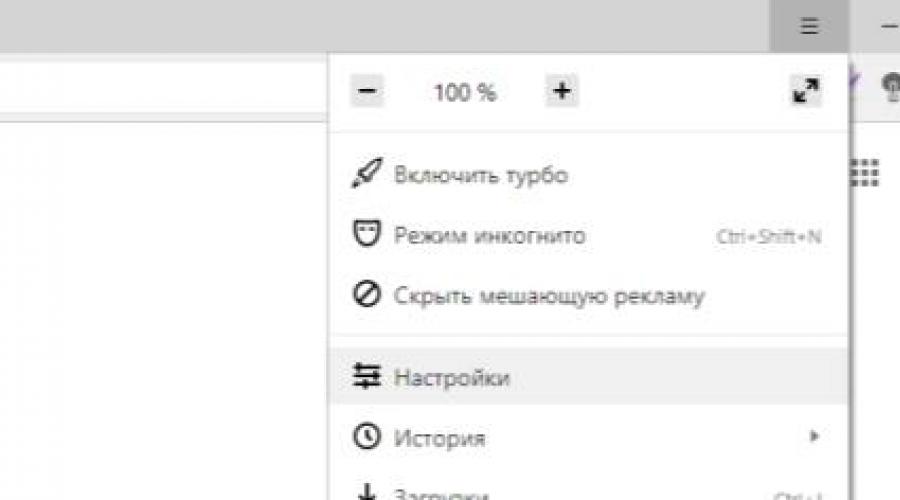
- You need to open the browser and find the icon with three dots near the address bar in the corner. You need to click on this icon and click "Settings" in the drop-down list.

- You need to scroll through the settings to the very end, where the "Advanced" button will be.

- Additional settings contain thematic blocks where you need to find "Privacy and Security". Toward the end of the list, there is a Content Settings tab, which you will need to click on.

- There you need to find an icon in the form of a mosaic called "Flash", which you need to click on.

- If the user has problems with this player, then he will not see the "Always ask" entry. To activate it, you need to click on the parameter once, thereby moving the slider to the right.

- Next, you need to go to the "Allow" section. Here you can register sites for which this application will always be active. To do this, you need to click on "Add".

Switching to the player control menu through the address bar
The above method is generally accepted. However, you can use more fast method. It is enough to write the required address at the very top of the screen in the corresponding line.

Turning on the player after entering the site
This method is relevant only for those users who have already activated this plugin using the settings menu. If not, then it can be done following the above instructions.

Note! This player is repeatedly tried to change to HTML5. But these attempts have not yet been successful, since there are a lot of flash files on the network that cannot be viewed without an appropriate player.
Download "Adobe Flash Player" for the browser "Opera" and others
It should be borne in mind that there are a lot of offers on the Internet to buy or upgrade to the most current version for a fee. However, the latest version is absolutely free, and you can do all the steps on the official website. The instructions below are suitable for the browser "", "" and any other.
- Go to the official website, where the version will be automatically selected according to the user's system settings. The first column will determine the operating system and browser that the user is currently using. In "Additional offers" you can leave checkboxes at will in front of the relevant items, but if the goal is just to install the player, then they can be removed. Then you need to click on "Install Now".

- It will take some time for the next window to appear. This is due to the fact that there is an individual selection for the system and the user's browser. Then the download will start. If the user chooses to download to the Downloads folder, then the application will be found there. In the case when a permission request is set, you will need to specify the desired location of the file. Now you need to click on the downloaded file to open the "Adobe Flash Player" installer.

- It will notify you that various security updates and improvements are released from time to time. The user needs to either agree to automatic updates, or refuse. It is recommended that you agree to this request. Refusal is appropriate only if the user's Internet is slow. But even in this case, you will have to install updates, but on your own, referring to the official website.

- At this point, the installation will begin. After completion, you will need to click on the "Finish" button and restart your usual browser.

Plugin update
The user must always be aware of new versions. As soon as the update is released, the following message will appear on his desktop:

Just click on the "Install" button and this plugin before latest version.
However, there is also a manual way. It is relevant in cases where the system update was disabled or a message appeared about a failure or an outdated plugin. To solve this question, you can use different methods:

Thus, the installation and update process is absolutely the same.
Problems with "Yandex Browser"
With this plugin, there are practically no problems for those users who use any browsers other than Yandex.Browser. To date automatic detection For this browser not provided, so the assembly must be done manually.
But also at self assembly, where you need to select your operating system and version, this browser is not.

In this case, it is enough to select the item "FP 24 for Opera and Chromium - PPAPI" at the second stage of configuration. This choice is due to the fact that Yandex.Browser is still operating on the Chromium engine.
Video - How to enable flash player in Google Chrome in 2018
No person would call a professional programmer to find out in Google Chrome. The answer to this question is better known to everyone who deals with computers. This is especially true for people who constantly work on the Internet. Below we will tell you everything about installing, enabling and disabling Flash Player in Chrome. Even a preschooler can cope with these operations!
Description
To begin with, we will try to find out what utility we are dealing with. What is it and what functions does it perform?
This is a module required to work with graphics and media files in the browser. Without it, you won’t be able to watch a video, listen to a song, or just look at pictures on the Web.
But how to enable Flash Player in Google Chrome? How to start working with this module?
Utility activation
You will have to follow some instructions. Typically, Flash Player is enabled automatically as soon as the application is initialized. Therefore, the first method for solving the problem is to install the module.
It is done approximately like this:
- Open the official page of the program.
- Tap on "Install Now".
- Select the OS used on the PC.
- Specify additional software, which will be installed along with Flash Player. This step can be skipped.
- Install the downloaded file.
- Follow the instructions to complete all necessary steps.
- Reload browser.
That's all. It is desirable that Internet browsers be closed during the installation of the utility. This way you can avoid system crashes. By launching the browser, the user will see that the "Flash Player" has earned.
Quick activation
But it also happens that for one reason or another the program is turned off. Then it will have to be turned on again. How to activate Flash Player in Google Chrome?

You can do this:
- Find and launch any movie in the browser after installing the module under study.
- Click on the "Allow"/"Enable" hyperlink.
Ready! In a second "Flash Player" will be activated. But this is far from the only way bringing ideas to life. You can go the other way.
Normal activation
How to enable Flash Player in Google Chrome? To do this is not difficult. We have already studied one of the possible layouts. What's next?
It is worth paying attention to working with the settings of the Internet browser. This is the official way to activate browser plug-ins.
Enable Adobe Flash Player in Google Chrome comes down to the following steps:
- Launch Chrome.
- At the top and right, click on the browser function button with 3 dots. In some browser versions given element looks like 3 horizontal lines located one below the other.
- Go to "Settings".
- Select "Additional...".
- Click on the "Content settings" button in the "Personal data" section.
- Next to the Flash item, check the box next to the "Allow" command.
- Click on the "OK" button.
Now "Flash Player" is not only enabled, but also allowed to be used on all pages opened in Chrome. Everything is extremely simple and clear.

From the address bar
Go ahead. The listings listed are not exhaustive. Citizens can quite quickly answer how to enable Flash Player in Google Chrome, disable this module or remove it altogether. For example, using the address bar of an Internet browser.
What to do? Enabling Adobe Flash Player in Google Chrome is done by performing the following operations:
- In the browser search engine write chrome plugins.
- Click "enter" on the keyboard.
- Find "Flash Player" in the menu that appears.
- Click on the "Enable" command. To deactivate the module, use the "Disable" button. To remove the application, you will have to click on the trash can icon.
All that remains now is to restart the browser. After the actions taken, the module under study will be activated or deactivated. Everything is extremely simple and clear.
Operation failures
Often users complain that in Flash Player. In this web browser, the module will be recognized until 2020. In the meantime, if it does not work, then there are some problems.

Most often, in order to return the functionality of the plugin being studied, you need to:
- Update Flash Player or reinstall it.
- Go to "Plugins" in browser settings and remove one of several "Flash Players". This happens if the user installs the module himself or manually updates it.
- Restart browser. Sometimes this technique really helps.
- Disable and re-enable the utility in question.
- Allow access to the module on visited sites. We have already talked about how to do this.
- Scan your computer for viruses and clean it of all possible threats.
It's really not that hard to understand. And working with "Flash Player" in "Chrome" will not cause any trouble if you follow the suggested recommendations. In just a few minutes, you can answer the question posed at the beginning of the article.
Adobe Flash Player is the most widely used plug-in for playing web content, despite the introduction of its competitor - HTML5. You can install and activate it on any browser you use. In this article, we will show you how to install and configure the flash player in just a few steps.
Update flash player to the latest version
Step 1.Download and install the latest flash player.
Step 2
Download Adobe plugin flash system. You will find a big yellow button that says "Install Now" (click it).
Note: along with the flash player, Adobe also offers to download additional software. Usually this is McAfee antivirus. If you do not want to install it, uncheck the box under "Additional offer".

Go to the directory where you downloaded installation package. double click open the downloaded installer. This will start the installation process. Follow the instructions on the screen to complete the installation.

Note: it is recommended to close all browsers during installation, otherwise the changes will not take effect until they are restarted.

Enabling flash in your browser
In most browsers, the flash player is automatically activated after installation, however, with some security settings, it may not be activated. In this case, it must be enabled manually.Open the browser you use the most.
Go to the "Tools" menu. And select "Extensions" or "Add-ons".

Find the Adobe Flash Player plugin or shockwave flash and check the box "Enable Flash Player" (Always include).

Testing Flash Player
Step 1Restart your computer. You can do this manually by pressing the "Reset" button (not recommended) or by looking for the appropriate option in the start menu operating system Windows.
Open your browser and load a page that uses Flash technology, such as the popular video resource YouTube. Try uploading a video. If it loads without any problems, you have successfully enabled Flash Player.
Configuring the Adobe Flash Player Plugin
To configure the flash player, use the local storage manager, which can be opened by going to the "Control Panel" and selecting the "Flash Player" item.
Local storage settings are used to manage permissions to use the plugin and store information.
With local storage settings, you can allow or block websites from storing information through Flash Player, as well as set the amount of information stored. Sites can store browsing history, flash game statistics, and computer information.

To allow online resources to store data on the user's computer, select the Allow sites to store data on the user's computer option.
To allow only certain websites to store data, select the "Ask before allowing new sites to store information on this computer" option.
To prevent all web resources from storing data on your PC, select the option "Prohibit all sites from storing information on this computer".
Note. When you select the last option, absolutely all local storages are deleted from your computer. Before that, you will see a request to confirm the deletion of local storage and set the data storage ban.
The Google Chrome browser has a positive difference from a number of other browsers - it is already "embedded" by the developers of the Adobe Flash Player, which is located at chrome://settings/content/flash. Users of other browsers must install the player manually every time they change browser. But in 2016, Google stopped using Flash technologies, making an exception for only 10 sites. Therefore, when launching media content in the browser or Online Games using the technology may experience problems.
If you have a problem with the player, the first step is to check if your Chrome version is up to date. You may need to update your browser to the latest version. But if this did not help in solving the problem, you need to configure Flash plugin player manually.
Path to Flash settings - chrome://settings/content/flash
To enable the Flash player, you can enter in the Chrome address bar://settings/content/flash, which will take you to a page where you need to enable the slider opposite the line "Allow Flash on sites". Here below are the “block” and “allow” items, in which you can add sites at your discretion.

You can also go to the plugin settings by clicking:
- Menu button in the top right corner.
- Next, click on the "Settings" line in the drop-down menu.
- Scroll to the bottom of the page and click on "Additional".
- Scroll down again, find the line "content settings", click on it.
- In this last drop-down menu, we will see a puzzle icon with the word Flash.
- We get to the same page in which we move the slider "Allow Flash on sites" to enable it.
Installing the player separately
If none of these Chrome://settings/content/flash tips solved your problem with the player, you can try installing it separately. For this you need:
- Go to the Adobe website and download the installation package with the player.
- Open setup file on your computer, specify the installation path and click "Install".
- After installation, you need to restart your browser.
Checking Google Chrome for conflicts with other software
In the event that this did not help, you need to use a special check of Google Chrome for conflicts with other software installed on your PC. The browser has a specially provided page that checks for external conflicting programs with Chrome. To open it, type in the address bar: chrome://conflicts or copy and paste from here. If you wrote the address correctly, a window should open that displays all installed modules in the browser and their libraries. As well as conflicting software or problematic plugins, modules that will be connected later.

If you notice a plugin that does not work properly or similar violations, you can remove them at the address indicated on the page of conflicting applications.
Google already has an archive of apps and plugins that conflict with Chrome. It is called “software that causes a crash”, by visiting it you can familiarize yourself with the list and check if there are any on your computer. The company has developed special utility for your browser, which independently finds conflicting, outdated or slow-down plug-ins. You can download it at - https://www.google.com/chrome/cleanup-tool/.
Most fast way enable Adobe Flash Player - this is to enter a problem site that has unplayable content Chrome browser. It can be a video or even an advertising banner. Hover over the "click to enable plugin" message. When pressed, the system will display a message to "allow" or "cancel" the launch of Flash. We enable the plugin.
In contact with