Microsoft Word. Using Styles When Designing a Document
Read also
WITH using CSS you can create bulleted and numbered lists, and use a suitable image as a marker.
In table. 1 lists the properties of elements intended for creating and modifying lists.
| Property | Meaning | Description | Example |
|---|---|---|---|
| list-style-type | disc circle square decimal lower roman upper roman lower-alpha upper-alpha none |
Marker type. The first three are used to create a bulleted list, and the rest are used to create a numbered list. | LI (list-style-type: circle) LI (list-style-type: upper-alpha) |
| list-style-image | none URL |
Sets the marker character to any picture. | LI (list-style-image: url(check.gif)) |
| list-style-position | outside inside |
Selection of the position of the marker relative to the block of lines of text. | LI (list-style-position: inside) |
| list style | Universal property, includes all of the above properties at the same time. |
Because the tag
- or
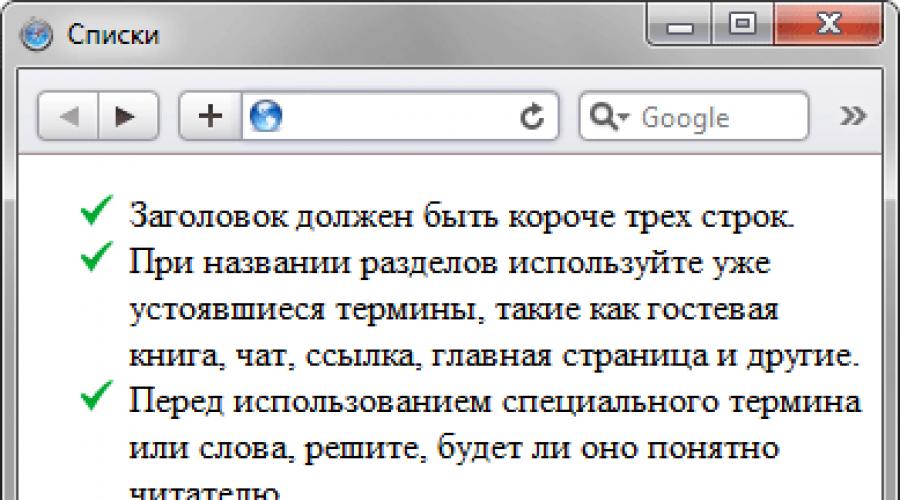
- The title should be shorter than three lines.
- When naming sections, use established terms such as Guest book, chat, link, main page and others.
- Before using a special term or word, decide whether it will be understandable to the reader.
- all links working
- support different browsers
- text readability
- all links working
- support for different browsers
- text readability
- all links working
- support for different browsers
- text readability
- first
- second
- third
- first
- second
- third
- first
- second
- third
- first
- second
- third
- first
- second
- third
- Character styles. Applies to one or more selected characters. Set the type and size of the font, style, color, etc.;
- Paragraph styles. Sets the appearance for sections of text. Includes line spacing, indents, paragraphs, and more;
- Combined styles - combining the first two options
- Right-click on the selected style in the gallery and click Edit. The style settings window will open. Configure all the necessary settings and click OK. Check the "Update automatically" box for the changes to take effect immediately.
- Click (or press the down arrow) on the style name in the Styles menu. Next, a window will open, as in the previous paragraph, the sequence of actions is the same.
- Style the text manually the way it should look, select it. After that click on desired style in the gallery or the Styles menu, choose Update Style According to Selection from the context menu.
- Font- registration of a marker in the form of a text symbol.
- Symbol- registration of the marker in the form of a character table symbol.
- Drawing- registration of a marker in the form of any drawing available in Pictures collections.
- alignment- determination of the position of the marker.
- Number format- select the text to be placed after the number:
- numbering- numbering type;
- Font- number design in the form of a text symbol.
- alignment- determination of the position of the number.
- that acts as its parent, then you can set the style for both the UL selector and the LI selector. So, in example 1, the UL selector is used, and style parameters are set for it.
Example 1: Create a Bulleted List
Result this example shown in fig. 1. Square markers are used and their external placement relative to the text.
Rice. 1. View of the list, modified using styles
To set your own image as the marker, use the list-style-image property, as shown in example 2.
Example 2: Using Images as a Marker
The result of this example is shown in Fig. 2. A small picture is used as markers.

Rice. 2. Images as markers
Some examples of creating various lists are given in Table. 2.
| HTML code | Example |
|---|---|
| |
|
| What to consider when testing a site: |
|
| What to consider when testing a site: |
|
|
Numbered list with Arabic numerals: |
|
|
Numbered list with lowercase Roman numerals: |
|
|
Numbered list with capital Roman numerals: |
|
|
Numbered list with lowercase Latin letters: |
|
|
Numbered list with capital letters of the Latin alphabet: |
Style is a named description of the format of a paragraph or text characters. Instead of manually formatting each paragraph, you can set the style and set the options you want for it. Then, any block of text can be styled with this style, as a result, the style settings will be transferred to a specific fragment of the document.
Styles are of two types:
* paragraph - sets the design of the whole paragraph;
* symbolic - sets the font, style and design of the text fragment of the paragraph.
Any text character always has two styles: paragraph and character. By default, Word assigns paragraph style to text. Ordinary and character style Main paragraph font. All the text formatting techniques discussed earlier in this lesson did not affect its style. Now let's create two new styles.
1. Create new document. Choose a team Format > Styles and Formatting. On the right side of the screen in the task area, the corresponding window will open, as shown in Fig. 6.14.
Rice. 6.14. Styles window in Word
2. The section lists the available styles. Put your mouse pointer on one of them. A tooltip appears with brief description specified style. Click on the selected style. In chapter Formatting selected text the name of that style appears and a drop-down list containing the available operations.
Note Thanks to the presence of a task pane in applications Microsoft office XP has made the job of creating, modifying, and applying styles much easier.
3. Click the button Create Style, a dialog box will open Style creation shown in fig. 6.15.
4. Drop Style leave option paragraph, since now we need a style for the paragraph design.

Rice. 6.15. Create a new style in Word
5. In the field Name enter a title Beautiful paragraph.
6. Listed based on style select item Ordinary. As a result, all parameters of the new style will correspond to the style parameters of the same name. Ordinary, which we will then change slightly.
7. Click the button Format Paragraph. A standard paragraph formatting window will open (see Fig. 6.4 above), with the help of which, in this situation, the font parameters of the custom style are set.
8. Select alignment mode By width, enter 1 cm for the left and right paragraph indents, 2 cm for the first line indent, and 6 points for the paragraph spacing. Then double click on the OK button. The new style will appear in the list Choose the formatting to apply dialog boxes Styles and Formatting.
9. Click the button again Create Style.
10. Drop Style dialog box that appears Style creation select item sign to define a new character style.
11. In the field Name enter a title Large text.
12. Listed based on style select item Main paragraph font.
13. Click the button Format and select from the drop-down menu Font.
Note Button menu Format gives access to any paragraph or font options. Learn the rest of the commands on this menu on your own.
14. In the font formatting dialog box that opens (see Figure 6.11), select the font ArialCyr, size 20 points, style Bold italic.
15. Double click the button OK and then click the button close. The document now contains descriptions of two new styles that you can use to format paragraphs and text snippets.
16. Enter a few paragraphs of text and highlight the first three.
17. Drop Style toolbar Formatting select the new style Beautiful Paragraph. The three selected paragraphs will be styled according to the paragraph style you just created.
18. Highlight a few words in the first paragraph and select from the same list Style paragraph Large text. The highlighted words will change to match the new character style.
19. Repeat this operation, highlighting the words of the second, third and fourth paragraphs (Fig. 6.16).

Rice. 6.16. Styling in Word
It would seem that the same operations can be performed using ordinary formatting commands, but styling text with styles provides several advantages.
* The style is capable of storing complex formatting that can be quickly assigned to any paragraph or fragment.
* A style can be placed in a template and all documents based on that template will inherit it.
* By changing the style, you will instantly change the appearance of all fragments of the document, designed in accordance with this style.
* By modifying the style in the template, you will immediately change the appearance of all text fragments formatted with this style in all documents based on the adjusted template. (To achieve this, for each of the selected documents in the dialog box Templates and add-ons, which is opened by the command Tools > Templates and add-ons, must be checked Automatically update styles).
20. To feel the power of templates in action, select the command again Format > Styles and Formatting, in the list Choose the formatting to apply select the Beautiful paragraph item and select the command from the drop-down list Change.
21. In the dialog box Style change click on the button Format, and then select from the drop-down list Paragraph.
22. In the dialog box Paragraph increase the left and right padding to 2 cm. Double-click the OK button, and then click the close.
Notice that the indents of the first three paragraphs, which have been assigned the Beautiful Paragraph style, have increased. In a similar way, you can quickly adjust, for example, the font size of fragments marked with the Large text style. Think about how long it would take for such a design change. standard means, if it were necessary to modify several paragraphs scattered across a multipage document.
By preparing custom styles for specific text elements (such as captions), you can customize the format of all captions by simply adjusting the appropriate style. With the help of styles, you can perform any text formatting. In the absence of sufficient experience, this approach will require additional time, but by learning how to change the design of documents through manipulation with styles, you can save many hours.
Hello dear friends. Today I’ll talk about what styles are in Word, how you can use them to organize visual design, simplify document navigation, and prepare for automatic creation content. After taking a few minutes to read this article, in the future you will be able to develop your own unique design. text document, automate its work, simplify subsequent changes in design.
Before reading this post, it will be useful to study the article about , because styles are an integral part of the template.
What are styles in Word
Style in Microsoft Word is a way of writing and rendering text. As I said earlier, this is an important component of the template. All styles are logically divided by purpose - document title, headings, subheadings, links, highlights and much more. Each style element has its own formatting. Applying a template corresponding to each part of the text will help you arrange it in one or two clicks.
Styles can be divided into three types:
If earlier you used to increase the font size and choose a more catchy color for your headings, today it is better to move on to applying styles. This will speed up the work, avoid many repetitive actions when changing the format of text of the same type. For example, you marked up 30 headings in a document, after which you decided to slightly change their appearance. Instead of making edits to all 30 headings, you can fix one style, and edits on the page will be made automatically.
How to set text style
The developers have provided several groups of styles, you can select one of them by going to the ribbon: . Expand the gallery to select the appropriate group.
Now you can mark up the document. Place the cursor in the title of the text and select on the ribbon: Home – Styles – Title. The Title style will be applied to the title.
Now place your cursor in the section heading. In the same gallery on the ribbon, select Heading 1. First level heading formatting will be applied. If this section has subsections with their own names, apply the “Heading 2” style to them. In total, Word has nine levels of headings. Why are these levels needed? First, to make the text easier to read. Secondly, to create the structure of the document.
Press Ctrl+F to open the Navigation menu. Go to the Headings tab and you will see all the headings you marked up in a hierarchical view. By clicking on their names, you can quickly move to the desired section. This is especially useful in large, complex documents. In addition, you can make auto-content.
Unfortunately, the gallery on the ribbon cannot accommodate all kinds of styles. To select from a complete list, as well as open additional settings, click on the arrow icon in the lower right corner of the gallery.
The Styles menu opens with recommended options. By default, if you have "Heading 1" on your worksheet, "Heading 2" will appear in the list. Use Heading 2, Heading 3 will appear. Thus, Word tries to rationally use screen space.
To display all available styles in this window, click Options and select from the drop-down list: Display Styles - All. You can also select the sort order here. For example, by recommendation, alphabetically, etc.
By the way, in Microsoft Word (starting from version 2013), you can collapse and expand the contents of headings right on the sheet to hide unnecessary text while reading from the screen. To do this, click on the triangle icon to the left of the title. It appears when you hover the mouse over its location.
How to add style to gallery
If you don't like having the Styles menu open on your screen, you can move the style options you want to the gallery on the ribbon. To do this, find the desired style in the menu, click on it. right click mice and context menu select Add to Style Collection.
To remove unwanted styles from the gallery, right-click on it and select "Remove from Styles Collection".
How to change the style
If any of the predefined styles is not entirely to your liking, you can change it. I will describe to you 3 ways how to do it:
If you want to make your own set of styles from the generated styles, expand the gallery on the ribbon Design - Document Formatting and select " Save as new style set».
How to create your own style
To create your own style from scratch, expand the style gallery and select Create Style. The New Style window will open. Give the new style a name and click the Edit button to select formats.
The same window can be opened by clicking the "Create Style" button in the "Styles" menu
Please note that the styles will automatically change to yours when you switch style sets, they must have the same name. Be sure to keep this in mind when modifying and creating new styles. In any case, I recommend sticking to the names provided by the developers.
Let's summarize. Styles are a special design method that allows you to customize the design once, and then apply it many times in different parts of the text. Comparison is made with css styles in website development, if you are familiar with them. Also, styles allow you to organize the structure of a document, making it easier to navigate through it. Based on this structure, the program can automatically build a table of contents.
I think each of you appreciated the undeniable advantages that the use of styles provides. For me, this is an everyday tool, without which, as without hands. However, sometimes you need to, without resorting to template and style settings. How this is done - we will consider in the next article. See you soon!
Style– a set of text design elements, including font, paragraph, fill, and other elements.
Styles in Word
A style is a named description of the format of a paragraph or characters of text. Instead of manually formatting each paragraph, you can set the style and set the options you want for it. Then, any block of text can be styled with this style, as a result, the style settings will be transferred to a specific fragment of the document.
Styles are of two types:
* paragraph - sets the design of the whole paragraph;
* symbolic - sets the font, style and design of the text fragment of the paragraph.
Any text character always has two styles: paragraph and character. By default, Word assigns paragraph style to text. Ordinary and character style Main paragraph font.
A common method among users is when the entire document is formed using one style (“Normal” or “Document Body Text”). In the future, formatting is performed by highlighting a certain element of the text and changing its display (for example, the typeface is Arial, the style is italic, the size is 10 pt, the alignment is Justified). This method is called manual formatting.
This method is suitable for formatting small documents, but if we are talking about large documents (such as graduate work or a dissertation, contract or legal act), then this method of formatting the text will be of little use - it will require a lot of both manual labor and time.
One of the solutions for formatting large documents seems to be the use of styles for various blocks of the document.
A style is a set of formatting options that is applied to text, tables, and lists to quickly change them. appearance. Styles allow you to apply an entire group of formatting attributes at once, including defining the outline level for a paragraph, in one action.
MS Word defines the types of styles that you can create and apply. A paragraph style completely defines the appearance of a paragraph, that is, text alignment, tab stops, line spacing, and borders, and can also include character formatting.
character style defines the formatting of a selection of text within a paragraph, defining text parameters such as font and size, as well as bold and italic style. A table style defines the borders, shading, text alignment, and fonts.
a list style applies the same alignment, numerals or bullets, and fonts to all lists.
Applying Styles in MS Word
A common way for different versions of MS Word (from the sixth to the eleventh) to set styles can be considered the assignment of a style through a selection in the "Style:" combo box of the "Formatting" menu bar. In this case, the selected style will be applied to the current paragraph or selected text fragments.
Applying Styles in Word XP
In the "Format" section of the main menu, select the "Styles and Formatting" item.
An element called "Task Pane" will appear on the right side of the window, which will display the formatting of the current piece of text and the styles that can be applied to it.
To apply specific formatting to the selected text, select the appropriate style from the styles list.

Using the "Styles and Formatting" section in the Task Pane, in addition to a convenient presentation of document styling, also allows you to quickly change any of the existing styles and create new ones.
Through the "Select All" element, it is possible to select all text fragments that have the same style as the current fragment. Which is convenient, if necessary, to change for the text its affiliation from one style to another.
Creating styles.
Creating a style is not difficult at all.
In the Name field, a unique name for the created style is specified. It should be borne in mind that you cannot use the names of already existing styles for the style being created. On such actions, the program will report an error.
Defining style text properties: typeface, font style, justification, and paragraph leading is almost the same as standard text formatting. There are both icons for setting parameters, and a menu for "advanced" formatting.

Note on style-specific properties:
In the "Style" field, the type of style being created is set - paragraph, character or table
In the "Based on style" field - the parent style for the created style is set.
Changing the properties of the parent style will cause the generated style to have the corresponding changes for properties that were not changed when it was created.
For example, if when creating the Style1 style based on the Regular style, the font size was changed (from 12 pt. to 16 pt.), And the typeface was left the same, then when changing the typeface in the Regular style (for example, from Times New Roman to Arial) in the "Style1" style, the typeface will also change (to Arial), and the font size will remain the same (16 pt.)
In the "Style of the next paragraph" field - sets the style of the paragraph following the paragraph to which the created style has been applied. By default, the style of the next paragraph determines the style that is created.
The "Add to template" flag determines whether the created style will be added to the template.
Often it is necessary to highlight some parts of the text visually (for example, when listing). Simply highlighting a paragraph does not give the desired effect. In this case, it makes sense to use markers or numbering. Bullets group together items related to the same topic. Numbered lists contain items that follow each other. Examples of using numbered and bulleted lists you can find in this book.
To create numbered and bulleted lists, you can use the corresponding buttons in the group Paragraph tab home on the tape. The buttons on the toolbar allow you to quickly number paragraphs or set bullets in front of them, as well as set Extra options formatting.
For quick creation list, do the following.
bulleted list
When creating bulleted lists, you can use different types of bullets. By clicking on the down arrow next to the button Markers(fig. 4.43), you can choose one of the eight most used markers. You can also create your own marker type. To do this, select the command Define new marker.

Rice. 4.43.
Dialog window Defining a new marker(Fig. 4.44), which will open after completing this action, allows you to set the marker parameters.

Rice. 4.44.
In area Sample
numbered list
When creating numbered lists, you can use different types of numbering. By clicking on the down arrow next to the button Numbering(Fig. 4.45), you can choose one of the seven most used numbering types. In addition, you can create your own numbering type. To do this, select the command Define new number format.

Rice. 4.45.
Dialog window Defining a new number format(Fig. 4.46), which will open after completing this action, allows you to set the marker parameters.

Rice. 4.46.
In area Sample you will be able to see what the list will look like with the given parameters.
Multilevel list
Microsoft Word also allows you to create multi-level lists containing up to 10 levels of different lists. In addition, each level can have its own marker or number. By clicking on the down arrow next to the button Multilevel list(Fig. 4.47), you can choose one of the seven most used types of multi-level lists. In addition, you can create your own type of such a list. To do this, select the command Define a new multilevel list.

Rice. 4.47.
Clicking this button opens a dialog box. Defining a new multilevel list(Fig. 4.48).

Rice. 4.48.
The parameters presented in the window are similar to the settings contained in the window Changing a numbered list, however, in this case, you can select the numbering settings separately for each level.
Create your own layered list style
If you often use multilevel lists with certain parameters, you can create your own style. You can set the design options for a multilevel list in the dialog box Defining a new list style (