How to quickly abort an update. Limiting updates using metered internet
Read also
With the development of the Internet, constant updating operating system has become commonplace. Now developers can fix and improve the system throughout its entire support period. But frequent Windows updates 10 is not always convenient. That's why it would be good to be able to turn them off.
Reasons for turning off automatic updates
The reasons can be very different, and only you can decide how much you need to disable updates. It is worth considering that along with improvements to certain capabilities, important fixes for system vulnerabilities are supplied.
- And yet, situations when independent updates should be disabled arise quite often:
- paid Internet - sometimes the update is quite large and downloading it can be expensive if you pay for traffic. In this case, it is better to postpone the download and download later under other conditions;
- lack of time - after downloading, the update will begin to install while the computer is turned off. This can be inconvenient if you need to quickly shut down work, such as on a laptop. But what’s even worse is that sooner or later Windows 10 will require you to restart your computer, and if you don’t do this, then after some time the restart will be forced. All this distracts and interferes with work; security - although the updates themselves often contain important system changes, no one can ever foresee everything. As a result, some updates may open your system to virus attack, while others will simply break it right after installation. A reasonable approach in this situation is to update some time after release next version
, having previously studied the reviews.
Disable automatic Windows 10 updates
Disabling via Update Center
Using Update to disable is not the best option, although it is offered as an official solution by Microsoft developers. You can really switch off automatic download updates through their settings. The problem here is that this solution will be temporary one way or another. The release of a major Windows 10 update will change this setting and bring back system updates. But we will still study the shutdown process:
After these changes, minor updates will no longer be installed. But this solution will not help you get rid of downloading updates forever.
Disable Windows 10 Update Service
Since Windows Update is a system service, we can completely rid ourselves of updates by simply disabling this service. On versions of Windows 10 Home or Home Premium it's done like this:

Unlike the previous option, operating system updates will be disabled forever. Well, or until the user independently turns on this service.
Instructions for Windows 10 Pro
The professional version of the system contains elements that are not present in home version. This allows you to use the local editor to disable Windows updates. group policy. The result will be exactly the same as if you disable it using another method:

Disabling Windows 10 updates by editing the registry
Disabling it through the registry will also disable updates once and for all. But it is worth remembering that you make any changes to the registry at your own risk, and inattention can harm your computer. You need to create in the registry new parameter

and configure it:
Limiting updates using metered internet

Windows updates should not be downloaded when connection traffic is limited. Automatically, this feature does not always work correctly, but we can enable this setting to limit updates manually:
Video: Disable Windows 10 updates
Disable Windows restart for update As mentioned above, Windows 10 may force a reboot to complete the update. It is worth limiting this feature of the operating system if you want to work with convenience. Eat different ways

, how to configure the reboot so that it does not occur on its own. The simplest one is to increase the number of notifications before restarting:
If Windows 10 is about to reboot, this task appears in the corresponding service. So do the following:

Unfortunately, just disabling this task is not enough. In the future, Windows 10 can reactivate it without the user's knowledge. To fix this, do the following:

Setting the time to restart
If your main problem is not the fact of a forced reboot itself, but the fact that it occurs at an inconvenient time, you can independently set up a schedule for such work. This is done by setting the time when the user is active on the device. After setup, update to specified time will not be carried out. The setup itself is done as follows:

Disabling automatic reboot through the Local Group Policy Editor
IN Windows versions 10 Professional, this element can also be configured through the Group Policy Editor:

Thus, we prevented the computer from restarting if there are active user sessions.
For other versions of Windows 10 that do not have a Local Group Policy Editor, you can configure the same through the registry. The instructions are almost exactly the same as the guide for disabling updates through the registry, there is only one difference: the DWORD value that we created in the AU directory should be called NoAutoRebootWithLoggedOnUsers  Create a NoAutoRebootWithLoggedOnUsers parameter with a value of 1
Disabling Windows Store software updates
The Store in Windows 10 can start downloading updates for installed programs on its own. In some situations this is convenient, but sometimes it is undesirable for the user. To disable these updates, follow these steps:

After this, your programs will not be updated and you will be able to work in older versions. You can return the ability to download updates by simply sliding this slider back.
Disable automatic downloading of drivers
The next thing that Windows 10 can download without users knowing is hardware drivers and their updates. You can also disable this action:

Prohibition of peer-to-peer distribution of updates
Windows 10 uses a p2p system for downloading updates. This means that you download updates not only from Microsoft servers, but also using a network of other users. It means heavy load to your network, as update files will be distributed from your computer. You can disable this as follows:

These steps will be enough to prevent other users from receiving Windows 10 updates using your Internet traffic.
Programs to disable Windows 10 updates
If you don't feel like manually disabling updates, there are many reliable and convenient programs. Most of them are simple utilities, whose only task is to turn off Windows updates.
A simple program that comes in two versions. In one case it will require installation on the system, and in another it will work as a utility. Portable version, of course, more convenient, since it can work from a flash drive. It's easy to use:

After rebooting, you can see in Windows Update that everything was successful.  If you see an error in the update center, then the shutdown was successful
Windows Update Blocker utility
Another one simple program, made for the same purpose. After downloading, do the following:

Video: Quick way to disable Windows 10 updates permanently
Disable update notifications
In another situation, the updates themselves will not bother you, but annoying messages about the need to install them will be quite distracting. They can also be disabled:

Windows 10 is a good operating system made by professionals. But, unfortunately, it is not flexible enough to configure important functions. In this way they try to protect users from rash actions, which can sometimes include disabling updates. But now that you know why you should disable them and how to do it, you are experienced enough to bypass this limitation in any way convenient for you.
Windows updates are sometimes of dubious value. In the case of the tenth version, all updates except the first one after installing the system are very specific and controversial. Moreover, they always start unexpectedly, without notifying the user, and their sudden use causes a long reboot of the computer. However, you can interrupt updates at absolutely any stage.
How to quickly abort an update
If you want to quickly abort a Windows 10 update, depending on its stage, the first thing you need to do is the following:
- if the update has just started downloading, disconnect from the Internet;
- if the update has downloaded and the system asks to restart to apply it, do not do this under any circumstances;
- If, when you turn on/off/restart the system, installation or application of updates begins, turn off the computer by holding down the power button on the case.
Regardless of the option you are faced with, all further steps will look almost the same. Now you need to start canceling the update that has started. For the last problem, start the system in safe mode.
Starting the system in safe mode
Starting the system in safe mode is guaranteed to help start the computer without installing downloaded updates.
If you skipped downloading updates and turned off your computer, canceling them will pose some difficulties: every time you try to log in, an attempt will be made to apply the updates. This problem has been fixed in later versions of Windows 10, but it's best to start your computer in Safe Mode just in case.
How to cancel an update
The described method is suitable for quickly interrupting an ongoing update. Now the update needs to be canceled so that you can safely turn on the Internet or restart your computer.
There are several ways to cancel an update that has started. For example, enable a metered connection or Airplane mode. However, such methods will only interrupt the downloading of new packages and will not prevent the installation of already downloaded ones. The only way to guarantee that an update has started is through the command line.

To resume the update, you need to repeat the above commands, replacing stop with start.
How to permanently disable downloading updates
The method mentioned in canceling the update also includes prohibiting further system updates. But there are others that will be more convenient and reliable in the long term.
Via Group Policy Editor
This method will not work for the home version of Windows and some unlicensed versions of the system, but by using it you will retain the ability to manually run system updates.

Through services
This method is available on all versions of Windows, but it completely prohibits system updates: you will not be able to download updates even by running the scan manually (the scan will run, but will not be able to find anything).

Via Registry Editor
This method can be considered the most correct, but also the least safe: it makes changes directly to the system configuration, and you can cancel it only by doing the same steps again. If you intend to use this method, save the path to the parameter you are changing somewhere so that you can roll back the changes.

Via Windows Update
Blocking updates through Windows Update is official, but it is also the least reliable. In this way, you will mark your own Internet connection as metered: updates are not downloaded through such connections in order to save traffic.
On this moment There are three different problems that Windows 10 users face when installing updates. Firstly, there is an error downloading the update or the download process is frozen. Secondly, there are problems during the installation of the update, and finally, the system crashes with BSOD after a reboot. Below are several possible solutions for troubleshooting.
Fixing Windows 10 update download problem
If the cumulative update does not download, try the following steps:

If a cumulative update freezes during download or the installation fails, something has gone wrong with the update files. After the folder containing the update files is cleared, Windows Update will try to download the update components again. Go to the following location:
C:\Windows\SoftwareDistribution\Download

Delete all files/folders, but do not delete the Download folder itself. Select all files and folders using CTRL + A and press Delete key to delete. Restart your computer and run the update process again.
If the cumulative update freezes during download, try the following solution:

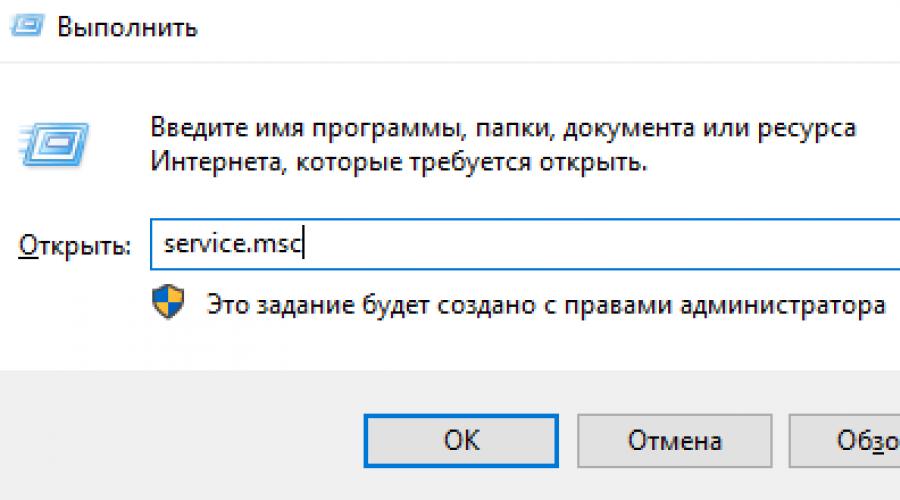
- Enter Services
- Scroll to Service Delivery optimization.
- Right-click on the service and select Properties.
- Change the “Startup Type” to “Manual”.
- Restart your computer.
- If Windows 10 update still gets stuck, change the startup type to Automatic (Delayed Start).
Stop the Windows Update service
If stopping the Delivery Optimization service does not solve the problem, also try stopping the Windows Update service. If your Windows 10 update is stuck at the “Initializing...” step, try the following solution:

- Click on the Start menu icon.
- Enter Services and launch the classic application of the same name.
- Scroll to Service Windows Update.
- Right-click on the service and select Stop.
- Restart your computer.
- Check for new updates.
- The update should proceed as normal.
Windows Update reset script

Completely reset the Windows Update client settings. It has been tested on Windows 7, 8, 10 and Server 2012 R2. The script will configure services and registry keys related to Windows Update, restoring the default settings. It will also clean up files related to Windows Update.
Fixing Windows 10 update installation problem
In some cases, you may encounter a problem while installing the update. If the update installation is stuck at some point, try the next solution.
If your computer is frozen at the stage, then follow the instructions below.

- While holding the power button, turn off the machine.
- Restart your computer and boot into Safe Mode.
- Sign in account(if it is needed).
- Before continuing, make sure everything is antivirus scanners disabled.
- From the Start menu, type Recovery and select the appropriate desktop app.
- Click Running System Restore.
- Select an earlier restore point, and then click Next.
- Follow the instructions to begin system recovery.
- Wait while your computer completes the system restore process.
- Regardless of whether the restore is successful or fails, you will most likely get rid of the error stuck at the moment “Preparing for Windows setup. Don't turn off your computer."
- Sign in to your account if required.
- Disable virus scanners before continuing.
- Start the Windows update process.
- The update should now install without problems.
Some users may encounter a stop error causing the display blue screen death (BSOD) during system reboot.

If you encounter a BSOD crash when upgrading Windows 10, check out this article:
Other Windows 10 update problems
After installing Windows 10 updates, you may encounter some problems such as internet connection errors.
To fix these issues you need to run the following commands in command line(cmd.exe). In the search box on the taskbar, type Command line, press and hold (or right-click) “Command Prompt” and select “Run as administrator.” After opening the command line, enter the following commands one by one:
netsh winsock reset catalog
netsh int ipv4 reset reset.log
If you still encounter the “No Internet Connection” issue, please update your computer's IP address. To do this, open a command prompt (Win + R, enter cmd.exe and press Enter) and enter the following command:
ipconfig /renew
Disabling Windows 10 updates and drivers
Sometimes you may need to disable the installation of Windows 10 updates on your computer. Windows 10 Pro users can defer updates for a certain period of time, but Windows 10 Home users do not have this option.
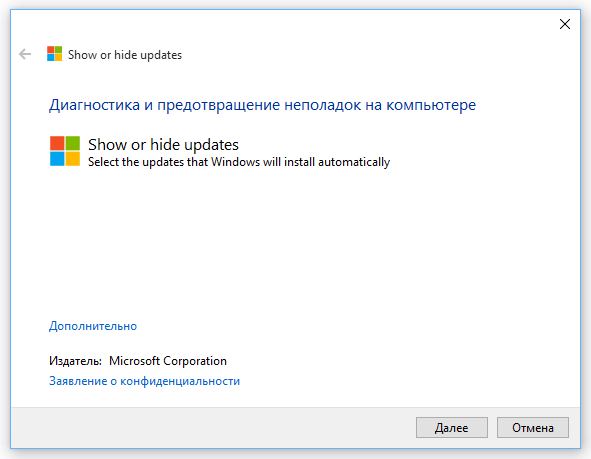
Microsoft has provided a separate "Show or Hide Updates" tool to disable cumulative updates or even drivers.
DISM commands to check for problems with Windows 10
You can use the official DISM commands to restore a Windows image to fix any problem with your updates. Before you start, it's a good idea to take a full system backup or create a system restore point in case something goes wrong.

Using the CheckHealth option in DISM
Team /CheckHealth DISM allows you to detect potential corruption. This command is used only to find damage, but does not perform any repair operations.
Command line, right-click on the link that appears and select "Run as Administrator" because running DISM requires device administrator rights.
DISM /Online /Cleanup-Image /CheckHealth
UsageoptionsScanHealth inDISM
Team / ScanHealth DISM allows you to scan your Windows image for any damage. Unlike /CheckHealth, the /ScanHealth check can take up to 10 minutes.
To start it this command do the following steps:
1. Search for Start menu Command line
2. In the "Command Prompt" type the following command and press Enter:
DISM /Online /Cleanup-Image /ScanHealth
UsageoptionsRestoreHealth inDISM
Team /RestoreHealth DISM allows you to automatically repair damaged Windows images. Unlike /ScanHealth, the /RestoreHealth scan can take up to 10 minutes.
To run this command follow these steps:
1. Search for Start menu Command line, right-click on the link that appears and select "Run as administrator."
2. In the "Command Prompt" type the following command and press Enter:
DISM /Online /Cleanup-Image /RestoreHealth
Note: While running /RestoreHealth or /ScanHealth, you may notice the procedure hangs between 20% and 40% - this is completely normal behavior.
Found a typo? Highlight and press Ctrl + Enter
Without a doubt, this has happened to everyone Windows user. After installing updates, the operating system decides that you must restart your computer, pestering you with a pop-up window that continues to harass you until you do what Windows wants you to do. If you leave your computer and miss the pop-up window, Windows will automatically restart your computer, and when you return, you will find that all your open programs are now closed because Windows decided to restart without your permission.
Restarting your computer after installing updates ensures that all updates take effect, but Microsoft has gone too far - the operating system should not harass its users and restart the computer without permission. In Windows 8, the situation with these forced reboots has changed a little, but the OS still continues to pester us and eventually reboots the computer automatically.
Disable forced reboots through the registry
You can disable automatic reboots by making changes to the registry. This works on all versions of Windows 8, Windows 7, Windows Vista and Windows XP. After making Windows changes will download and install updates as before, but the operating system will forget about automatic reboots once and for all.
So, open the Registry Editor. To do this, press Win + R to open, enter the command regedit and press Enter.

In the Registry Editor window, navigate to HKEY_LOCAL_MACHINE\SOFTWARE\Policies\Microsoft\Windows\WindowsUpdate\AU.
Most likely, you will not find the “WindowsUpdate” and “AU” folder in the specified path. If so, you need to create them yourself.
To do this, right-click on the “Windows” folder, select “New” from the context menu, and then click on “Partition”. Now enter WindowsUpdate and press Enter. Next, right-click again, but on the newly created “WindowsUpdate” folder, select the “New” command and click on “Partition”. Enter AU and press Enter. We now have the required registry key structure.

Next, select the “AU” folder, right-click on the right side of the Registry Editor window, select “New” -> “DWORD Value (32 bits)”. Enter NoAutoRebootWithLoggedOnUsers and press Enter to name the new parameter.

Double-click the newly created parameter and enter a unit in the “Value” field. Then click "OK".

You can restart your computer for the changes to take effect, but this is not necessary as it can be done without rebooting.
Just open a command prompt window with administrator rights. If you have Windows 8 (8.1), press Win + X and select “Command Prompt (Admin)”. If you have Windows 7, open the Start menu, find the command prompt shortcut there, right-click on it and select “Run as administrator” from the context menu.

At the command prompt, type the following command and press Enter to make the changes take effect immediately:

Disable forced reboots through group policies
This method is simpler and faster, but it is only suitable for those who have professional, maximum or enterprise versions of Windows. Many users have a version of Windows without the Local Group Policy Editor tool, so they will have to use the registry editing method described above. However, both methods work the same, but this method is more convenient.
First, we need to open the Local Group Policy Editor. To do this, press Win + R to open the Run dialog box, type the command gpedit.msc and press Enter.

Now navigate to the following folder: Computer Configuration\Administrative Templates\ Windows components\Windows Update

On the right side of the window, find the policy “Do not automatically reboot when automatic installation updates if there are users in the system." Double-click on this policy with the left mouse button, then select “Enabled” and click “OK”.

Now either restart your computer or run the gpupdate /force command we mentioned above.
Manual installation of Windows updates
Instead of messing around with Windows registry or group policy, you can prevent automatic computer reboots in a more traditional way. All you need to do is change your Windows Update settings. To do this, in the computer control panel, open the Windows Update settings and enable the option “Search for updates, but I make the decision to download and install them.”

This way, Windows will inform you about the availability of new updates through the system tray icon and notifications. When you want to install them, click on this icon and click on the corresponding button to begin installing the updates. The updates will be downloaded and installed in the background, and once the process is complete, you will be prompted to restart your computer.
With this method of installing updates, you can ignore notifications about the availability of updates until you want to install them and then reboot.
Have a great day!
Some Windows 7 users are experiencing problems with the standard Update Center operating system. Windows 7 searches for updates endlessly, cannot download them, and continues to look for others.
A problem like this can cause a lot of trouble. Firstly, the latest patches will not be installed on your computer, which may reduce work efficiency OS. Secondly, while the search is ongoing, processor and physical memory heavily loaded. This may not be very noticeable on powerful PCs, but on “weak” ones it is very unpleasant. This article describes what to do if Windows 7 Update can't complete searching for updates.
Setting up automatic search
Firstly, you need to completely disable Windows update, which loads the operating system as it goes on forever. Subsequently, you will be able fix the problem and activate it back, if you want. But even without Windows updates it still works stably. Many users disable them on purpose and do not experience any problems.
You will need to do the following:
This is followed by to restart a computer to stop searching. Now your system will not try to search for new updates. If you need to enable this function, you can do this in the same menu.
Stopping a service
In some cases, the above method may not work. For example, when you try to reboot, the computer will try for a long time to download and install some kind of patch. And after turning it off and on manually, all settings return to the initial state. And accordingly, the endless search for Windows 7 updates will begin again. To fix this problem, you need completely disable the service responsible for the work Update Center.

After these steps, the search for updates will be completed. To run it, you must return the service configurations to their original state.
In some cases, stopping the service and starting it again may solve the problem. Try this before resorting to more complex methods if your computer takes a long time to search for new patches.
Correcting errors in system files
Often such problems arise as a result damage to important system files. This may occur as a result system failures, actions of virus programs, incorrect installation previous updates and so on.
In Windows OS there is special utility , with which you can automatically find and correct such errors. It does not have a GUI, so users need to launch the system command prompt to use it.
This is done as follows:

If you would like to copy this line, you need to use context menu by right-clicking inside the window. The Ctrl + V combination in the console does not work.
After that Windows will scan everything system files . All detected errors will be corrected. After this, you should restart your computer and start searching for updates again. If the process is still too slow- need to search other ways to solve the problem.
Microsoft has released special update for their operating systems, patching Windows Update, which endlessly searches for updates. Download links are located on the official website of the developer, so you can download the patch without resorting to services Update Center.
- For owners 32-bit version Windows - https://www.microsoft.com/en-us/download/details.aspx?id=49542
- For Windows with 64-bit architecture - https://www.microsoft.com/en-us/download/details.aspx?id=49540

You need select the interface language of your OS and click on the red Download button. Then just run the downloaded file, wait for the installation to complete and restart your computer. In most cases, this patch solves all problems that arise.
Updates KB3020369 and KB3172605
If the previous solution did not help, then you should update the seven by installing two more updates, rebooting the computer between their installations. This method was suggested by several of our readers and it really helps.
Microsoft Troubleshooter
Another way to solve the problem is to use the Microsoft Troubleshooting Tool. Its action is somewhat similar to “sfc /scannow”, with the difference that it was created specifically for Update Center and can make a significant difference large quantity problems. Besides, it has a graphical interface, which makes it easier for users unaccustomed to working in the console.
Do the following:


Wait until the operating system scan is completed. If the utility detects any problems, it will report it and automatically apply fixes.
We hope this article helped eliminate the endless search for updates to the seventh version of Windows, significantly speeding up your computer and making it much more stable.
Video on the topic