Power bank from a laptop battery. DIY Power Bank from an Old Laptop Battery
Read also
Your smartphone is dead and there is no power outlet nearby? The situation is common - modern smartphones quickly dry up if you use them to their fullest. This is where a portable charger comes in! But how to make the right choice so as not to be left without communication and entertainment? Let me show you what I chose and what problems I encountered in the end.
According to tradition, first a little theory.
Nowadays the most popular power source is a lithium battery. They are everywhere - in phones, cameras, laptops... Even disposable electronic cigarettes have a rechargeable lithium battery.
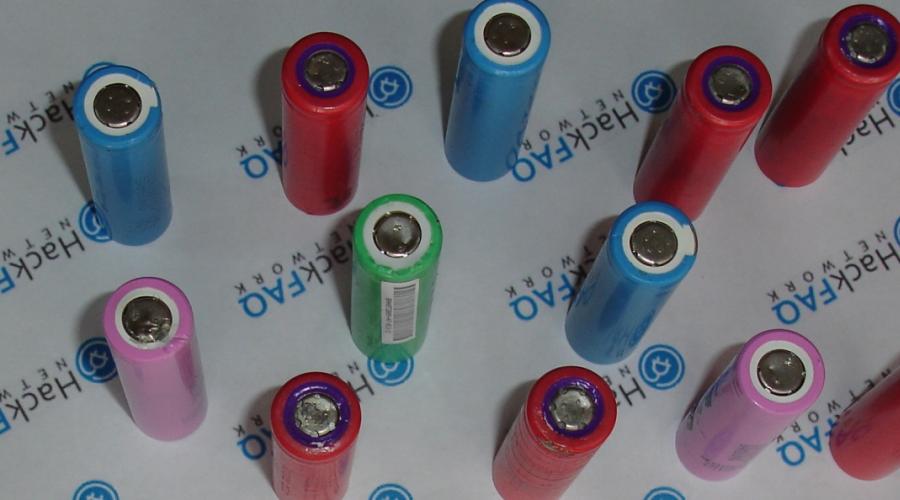
The most common format for lithium is 18650 (18*650 mm). Such “banks” are used in most laptop batteries.
Well, since laptops are one of the most popular products in the world, manufacturers are striving to improve this particular type of battery.
Which makes 18650 ideal for use in flashlights, e-cigarettes and portable chargers.

Lithium batteries have their drawbacks - they do not like to be very discharged and deteriorate when charged uncontrolled. Therefore, in regular stores you will not find “naked” lithium batteries; they are built into devices or sold together with a charge/discharge controller. But no one is stopping you from finding a used laptop battery and removing the batteries from it. Their condition may be far from ideal, but they are a freebie.

It would seem, what does this have to do with batteries from laptops, if portable chargers are sold ready-made and often non-separable? It’s enough to type the cherished words in the search - and here they are, full of bright colors:

Let's think about it. The average buyer, of course, will never disassemble the charger and never think about replacing the batteries. Therefore, the manufacturer can put anything in there - from low-quality Chinese batteries to the same used laptops. But even if the power bank contains high-quality batteries, they do not last forever - a couple of years and they’re in the trash. Therefore, the ability to replace the power source is simply necessary, otherwise the device may turn out to be “disposable”. Try to find a replacement battery like this:

I’m used to buying everything from China, and I recommend it to you too - you won’t find normal things here at a reasonable price. More than two years have passed since my review, during which time I ordered dozens of Chinese goods and visited many sites. There have been cases of fraud, and there have been very long delivery times. I liked it most for the very fast delivery and many options free shipping. There I bought several chargers I liked.
All of them can be replaced with a battery and, importantly, are supplied “empty”, that is, batteries are purchased separately.

Familiar to all flashlight lovers, the ML-102 is very easy to use. Just insert the battery and... that's it. There are no buttons or charge level indicators. I connected the phone via USB - the charge started, connected via microUSB to the PC - the battery itself began charging. Stated current limit - 1.2A
The blue LED shows the current current consumption via USB. The brighter, the more power-hungry device is connected.

Red changes to green when battery is fully charged

The internals are as simple as the charger itself:


We connect a 1A consumer and see that charging works fine:

When the battery is discharged, the charger tries to supply the requested current until the last moment, then goes out:

My conclusion: best charger by 1*18650. It is extremely simple and therefore convenient. Due to the independence of the charging and conversion circuits, you can simultaneously charge it and connect something to it. But if you have a completely discharged smartphone, you won’t be able to “squeeze the last juice” out of the charger - it won’t be able to deliver the required current and will pass out.
The downside is that it is not designed for protected batteries. They simply don’t fit in there, although some manage to push them into it by modifying the design with a knife and a file. There is no charge level indicator. It is constantly on and in standby mode (the blue diode is barely noticeable, but lights up).

This charger is already larger; it fits three batteries. Some versions also have a built-in flashlight (it shines really well). There is a button and a charge indicator. When in use, the indicator blinks red/green/yellow alternately; when charging the internal batteries, it blinks first red, then orange, then green, depending on the charge level. The declared current is 1A

Everything inside is not very good - the LED has no cooling, some parts are not soldered. The photo shows details from versions with and without a flashlight:


On this moment, I don’t have such a charger on my hands, so you won’t see the tests.
From the conclusion - I didn't really like it. At least in this device and three batteries, all three channels are independent! This is good in terms of the fact that the batteries will not influence each other, but the bad thing is that energy is taken from only one of them at a time. If none is able to supply the requested current, the device turns off. Batteries connected in parallel could “jointly” produce the required current.
What I like is that it’s convenient to change batteries. I took the cover off, changed the battery and I was done. It is made really conveniently, there are special recesses for removal. There is a lot of space, protected batteries fit, the springs are soft and inserted without difficulty.
Also, when used, the indicator simply blinks. It is impossible to find out the charge level without disconnecting the device being charged. Power supply stops immediately after disconnecting the cable, there is no delay. And there is no way to turn off charging during operation.

Also for three batteries, but not triangular, but flat. Instead of a three-color indicator, there are four blue LEDs. But there are already two USB ports, 1A and 2.1A. When in use, the current charge level is displayed every 5 seconds. When charging, the charge level is also visible.

Everything is held on by screws and is inconvenient to disassemble. And it’s also difficult to assemble, the springs try to push the plug out:


It also copes with 1A consumption (it also supports 2.1 A, but I haven’t found anything that consumes that much):

And it turns off in the same way if you connect a power-hungry device when the charge level is low:
 and then immediately disconnects

The result is a good charger for 3*18650, maybe one of the best. Full metal body. The button is recessed so that it is not pressed accidentally. All batteries are placed in parallel, thereby increasing operating efficiency. Can produce more current, therefore, has two USB port, one of which is 2.1 A. The indicators work both when in use and when charging from the mains.
Of the minuses, it also cannot be turned off with a button, the button is only for turning it on. It turns off itself after 10 seconds of inactivity. I have already mentioned the impossibility of quickly changing batteries and not very convenient assembly with screws.

Also for 1 battery, like ML-102. Has a button, 5 indicators, supports a “special” mode for iPhone. Includes adapters for various phones and a flashlight. There are no specifications for the current output.

Alas, I couldn’t take it apart, so we won’t see the insides. The plastic is molded very tightly.
Under the same conditions, charging was only able to produce 0.66A in normal mode and 0.87 in special mode (for the iPhone):

The special mode turns on only for a couple of minutes, so don’t be fooled by high values

Interestingly, it can also work with a very discharged battery (possibly causing a drop in voltage):

This is observed only in a “special” mode, but for emergency cases it will do!
To sum it up: it was assembled conscientiously, it has been working for two years. The standard cable was of poor quality, so I soldered a new one. Charging is leisurely, but more efficient - it will work until the end, limiting the output current. The only one we review that can be turned off with a button during operation!
The downside is that there is only one USB connector. Charging from the network occurs through it. So without a special cable (USB - USB), you won’t be able to charge it yourself.
What conclusion can be drawn from the options considered? There are no universal things. To each his own. It’s more convenient for me to throw a 1*18650 power bank and several batteries into my backpack. Some people find Ruinovo more convenient - tighten it with screws and forget about it until you have to change the batteries. In general, I told you all the possible problems when choosing a portable charger - don’t be mistaken.
But I missed one point. Batteries! Shouldn't we take them out of laptops? You need high-quality ones so that such a charge will last for a long time. And the Chinese are trying to slip in a cheap one under the guise of a normal battery:

First of all, remember - there are no 18650 batteries with a capacity greater than 3400 mAh. And even those are achieved only in non-standard operating modes (which are not available in standard power banks). Standard capacity is 2200 mAh, for higher quality ones - 2600 mAh
Still, not worth taking Chinese brands(UltraFire, TrustFire, FandyFire... ***Fire) - there is no way to understand where the original is and where the fake is, you can run into batteries with a capacity of 1000 mAh and even 250 mAh instead of the indicated 2600. (see photo above)
If you still want to save money, pay attention to the captions about the actual battery capacity on the website:
 If real capacity less than 2200 mAh - better not take it. It's not worth it.
Interested in other things? Write in the comments! Perhaps I will choose your topic for review next time.
Hi all. Today we’ll talk about a fairly well-known device. The twenty-first century is the century of information technology. Portable devices that constantly lack power. Especially smartphones based on the Android operating system are very power hungry. The browser alone uses about 80% of the smartphone's battery capacity. And, as you know, the Internet is used very often now. It’s even better to say - constantly! Check the weather, the dollar exchange rate, respond to messages on social networks, check your kidney, order pizza for work, order a taxi, book a hotel room - this is far from full list the purpose of a smartphone as an intermediary between the user and the Internet. In such cases, you can’t go far from the outlet. And if there is no access to an outlet...
In general, where there is a problem, a solution to the problem is born, and in this case it was proposed to assemble a portable charger, also known as external battery, also known as powerbank.
A kind of portable charger for replenishing the battery of your smartphone.
What's happened Power Bank?
Translated into Russian, Power Bank is an energy bank. That is, an array of batteries assembled in one housing. There are several spellings of this word: Powerbank and Power Bank, as well as external battery for smartphone/tablet, mobile battery And autonomous Charger .
To put it simply, a Power Bank is a socket in your pocket.
What is a Power Bank for?
Frame external charger has a universal output (USB) and an input (most often microUSB). This means that the Power Bank can power everything that is connected via USB, from smartphones, tablets, navigators and players, to set-top boxes and walkie-talkies.
On the market today there is a huge selection of Power Banks from different companies, capacities, designs, sizes, and reliability. How to choose what you need?
How to choose a Power Bank?
Just like before buying anything, first ask yourself: “ Why do I need a Power Bank?».
If you are going on a long trip and there is no power outlet for several days, then you should take a closer look at capacious batteries from 15,000mAh to 20,000mAh, such as . In addition to capacity, PINENG has a huge number of advantages, which you can read more about.
Or perhaps you’ve been wandering around the city all day, showing presentations from your tablet, you have a million calls and don’t have any time to sit in a cafe recharging your gadget. Then elegant or . You know, these two Power Banks are not a shame to put next to the iPhone since they both have the same stylish design.
But it’s not only power that you should pay attention to. Also, an important difference external batteries is the number of USB outputs. Agree, there is a difference - either you charge one smartphone, or you charge both a smartphone and a tablet. Moreover, each of the gadgets is imbued with the energy of the strength that is recommended for it. All PINENGs presented in our store have this opportunity.
It’s also worth paying attention to the presence of a LED flashlight; this nice bonus can be very useful to you. This is not just a flashlight, but a flashlight powerful batteries, which means it will shine for a long time.
If you have any questions -! We will be glad!
And even if you don’t understand anything about milliamps and so on, you can simply tell us about your tasks for Power Bank, and we will help you with your choice!
Select a power bank or USB tester in the catalog
A. A smartphone is a device that has become an indispensable communication device for all people. They are used to access the Internet and often for a long time. But smartphones have one drawback - time. battery life. In the best case, the battery will work without recharging for one day, and if you use it actively, then for several hours. This article and accompanying video show you how to make a powerful homemade Powerbank that can even charge your smartphone or tablet or a combination of both simultaneously.
You can buy the baby monitor, which is described at the beginning of the video, and all the components of the power bank in this Chinese store. Information on how to receive cashback (refund) in the amount of 7% of the price of all purchases is on our website. Download the schematic, board and other project files.
In order to improve the performance of mobile phone batteries, portable chargers were ordered, which are popularly called power banks. But in its single form, such a device is not even half capable of charging a phone battery. And even three such devices do not provide a way out of the situation. Buying a powerful power bank is quite expensive. A normal powerbank, say, with a capacity of 10,000 milliamps costs 25-30 dollars. Considering this and the long waiting time for the parcel, it is easier to make your own option.
Description of the power bank circuit
The powerbank circuit consists of three main parts. This is a lithium battery charge controller with an auto-shutoff function when fully charged; battery compartment with parallel connections lithium-ion batteries standard 18650; 5-10 amp power switch from the computer power supply; a boost converter in order to increase the voltage from the battery to the desired values of 5 volts, which are needed to charge a phone or tablet; USB connector to which the device to be charged is connected.
In addition to its simplicity and low cost, the presented circuit has high output current values, which can reach up to 4 amperes and depends on the rating of components such as a field-effect transistor, a Schottky diode at the output and inductance. Chinese analogues are capable of providing an output current of no more than 2.1 amperes. This is enough to charge a couple of smartphones at the same time, and our power bank can handle 4-5 smartphones.
Let's look at the individual components of the structure. The power source is 5 parallel-connected 18650 batteries from a laptop. The capacity of each battery is 2600 milliamps per hour. The housing used is from an adapter or inverter, but another suitable housing can be used. We will use a charging board purchased as a charge controller. The charging current is about 1 ampere. You can also take a ready-made inverter that will increase the voltage from the battery to the required 5 volts. It's very cheap. Maximum output current up to 2 amperes.
Circuit assembly
At the first stage, we fix the batteries and fasten them together using a glue gun. Next, you need to connect the controller to the battery to check how the charging process occurs. You also need to find out the battery charge time and understand whether auto-shutdown works when fully charged. Everything on the board is labeled in detail.
You can charge from any USB port. The indicator should show that charging is in progress. After 5 hours, the second indicator lights up, which means the charging process is complete. If a metal case is used, the batteries should be additionally insulated using wide tape.
One of the main components of the circuit is a step-up dc-dc converter, an inverter - voltage converter. It is designed to raise the voltage from the batteries to 5 Volts needed to charge the phone. The voltage of one battery is 3.7 volts. Here they are connected in parallel, so an inverter is needed.
The system is built on a 555 timer - a field-effect transistor and stabilization of the output voltage, which is set using a zener diode vd2. You may have to pick up a zener diode. Any low-power zener diode will do. Resistors of 0.25 or even 0.125 watts. Inductor L1 can be removed from the computer power supply. The diameter of the wire is at least 0.8, it is best to make 1 millimeter. The number of turns is 10-15.
The circuit contains a frequency-setting unit that sets the operating frequency of the timer. The latter is connected as a generator rectangular pulses. With this selection of components, the operating frequency of the timer is about 48-50 kHz. Gate limiting resistor R3 for a 4.7 Ohm field effect transistor. Resistance can be from 1 to 10 ohms. You can replace this resistor with a jumper. Field-effect transistor any average power with a current of 7 amperes. Field crops from motherboards. Small reverse conduction transistor vt1. A kt315 or other low-power reverse conduction transistor will do. Rectifier diode - it is advisable to use a Schottky diode with a minimum voltage drop across the junction. Two containers serve as a power filter.
This inverter is pulsed, it provides high efficiency, high output voltage stabilization, and does not heat up during operation. Therefore, there is no need to install power components on the heat sink. If there are difficulties with Schottky diodes, then you can use the diodes that are in computer power supplies. Dual to-220 diodes are found in them.
The photo below shows the inverter in assembled condition.

Can be done printed circuit board. There is a link in the description.
Testing a 5 volt inverter
We check the inverter for functionality. The smartphone is charging, as you can see, the charging process is in progress. Output voltage is kept at 5.3 volts, which fully complies with the standards. The inverter does not heat up.
Final assembly into the body
We need to cut out the side walls from a piece of plastic. The charge controller has two LED indicators that show the charge percentage. They need to be replaced with brighter ones and displayed on the front panel. There are two holes cut out in the side wall for micro USB connectors, which means you can charge two devices at the same time. There are also holes for LEDs. A hole for the controller, that is, for charging the built-in batteries. A small hole will also be made for the power switch.

All connectors, LEDs and switch are fixed with a glue gun. All that remains is to pack everything into the case.

A USB tester is connected to the output of the device. It can be seen that the output voltage remains firmly at 5 volts. Let's connect Cell phones and let's try to charge them from a homemade Power bank. Two smartphones will be charged at once. The charging current jumps to 1.2 Amperes, the voltage is also normal. The charging process is progressing successfully. The inverter works flawlessly. It turned out compact and, most importantly, stable. The circuit is easy to assemble; familiar components are used.
Hello again, brain friends! Some time ago, my laptop battery failed and had to be replaced, but I didn’t want to throw away the used battery. My braincuriosity pushed me to study it, and what came out of my experiments, read on!

Having studied the Internet on the topic of the “second life” of batteries, I became familiar with the theory and began to practice - I carefully disassembled the laptop battery and took out the batteries, four of which were working. And that's what I made from them homemade this brain guides— an external battery, I think it’s better than just throwing everything in the trash.
Laptop batteries are designed in such a way that if one of the batteries fails, the protection system turns off all the remaining ones, that is, there is a lot left in the used battery good batteries 18650, which can be sent for “reuse”, or simply made into a small external battery for recharging gadgets.
Attention!!! This brainstorming It is for informational purposes only if you are a beginner, that is, you do not have experience working with electrical components, do not have knowledge about the operation of lithium-ion batteries, etc. And if you still decide to repeat the steps of the manual, then remember that you take full responsibility for this, since the process of disassembling the battery is quite dangerous! Be careful and careful.
Step 1: Components and Tools
- old laptop battery - you can borrow it from friends or a hardware repair shop
- case for an external battery - purchased online
- screwdriver
- wire cutters
- round pliers
- dremel


Step 2: Dismantling the old battery


Let's take it in our hands brain screwdriver and along the seam of the battery case we open the case itself. The process is not complicated, since the case is assembled using double-sided tape or ultrasonic welding, the main thing is not to damage the batteries.
If the case does not open, then you can use a Dremel, it is only important not to damage the integrity of the batteries with the disc, so it is better to make cuts at the corners of the case, and not in the middle of the sides.
IMPORTANT!!! When handling lithium-ion batteries in any way that could damage them, it is helpful, even wise, to have a fireproof container and a bucket of sand on hand. And if the integrity of the battery is damaged and it heats up or smokes, immediately throw it into a container and cover it with sand. Sand, by the way, is the only one reliable way extinguish a lithium fire, water or fire extinguishers cannot handle it!
Step 3: Battery Pack


After the battery case is opened, we take out the battery pack; they are usually glued to the case with double-sided tape.
IMPORTANT!!! When handling the battery pack, again, be careful and do not bend the jumpers connecting the batteries, otherwise a short circuit may occur, resulting in an explosion or even a fire!!!
Step 4: Separate the charging board


From the battery pack using brain cutter We separate the charge board and the wires going to the batteries.
The board itself may be useful for further crafts.
IMPORTANT!!! When biting off wires and jumpers, avoid short circuits!!!
Step 5: Separating the Batteries


My laptop battery consisted of 6 18650 lithium-ion batteries with a capacity of 2200 mAh. The batteries are connected in pairs in parallel, and 3 pairs of blocks are connected in series to obtain required voltage and capacity.
So, we carefully separate the batteries from each other, first we divide them into paired blocks, and then we separate the pairs of batteries.
Step 6: Removing Remaining Jumpers


Using round-nose pliers, remove the remaining contact jumpers from the battery poles. But if you want to assemble your own battery pack, then the jumpers can be left, this will make subsequent soldering easier brain contacts. Try not to scatter the removed jumpers, but then dispose of them safely.
Having separated the remnants of the jumpers with a dremel, we clean the battery poles from any remaining solder.
IMPORTANT!!! Be careful when removing the jumpers, as they are very sharp and can easily cut you. Unfortunately, I injured my finger on them.
Step 7: Finding Good Batteries


We arm ourselves with a multimeter and start testing the batteries:
- First, we measure the voltage of the battery, if it is less than 2.5V, then throw it away
- Next, we put the battery to charge and if it gets very hot during charging, then throw it away
- measure the voltage after charging, it should be around 4.1-4.2V, wait 30 minutes and measure the voltage on the battery again, and if it drops below 4V, then throw away the battery, if it is normal, then write down the voltage value
- we leave the batteries in a cool and dry place for 3 days, after this period we measure the voltage on them, and if it drops by more than 0.1V from the recorded value, then throw away the battery
All batteries have passed brain test considered suitable! I put all my good batteries in a plastic case for safe storage.
Step 8: Assembling the External Battery


It’s a stretch to call it an assembly :) but still, in an external battery case purchased online, such as USB Power Bank 18650 Case, insert the battery “mined” from an old battery. At the same time, we observe polarity!!! Otherwise, how can I burn the external battery case?
The positive terminal of the battery should face the charging board, sometimes the correct polarity is indicated on the bottom braincase.
So, we insert the battery correctly, close the case cover and use the USB cable supplied with the case to charge the external battery. We attach the keychain cord and homemade ready to use!
Step 9: Testing


After charging is completed, we conduct another test crafts. My tester showed a value of 5.06V, which is good for charging smartphones, tablets and other gadgets.
Rechargeable homemade assembled and tested, thank you for brain attention!
I somehow got 4 18650 batteries from an old laptop battery. My Imax B6 showed a total capacity of about 6000mA, a decision was made. replace my single-jar power bank with something more capacious.
The batteries are installed in parallel, which is not entirely correct, but since they are from the same series and were operated together, this can be neglected. The batteries fit very tightly, the contact plate was even slightly bent. 
The lid fits very tightly; when I tried to open it, I broke a couple of plastic cards, so the power bank will not fall apart during use. 
At the end there are two USB ports (1 and 2 amperes), micro USB for charging and a white LED that acts as a flashlight. 
The Chinese saved a lot on the board; there are elements that are not soldered. 
As I wrote above, the power bank has 2 sockets of different power. Having checked the voltage and currents under load, I did not get the best results:
Current in USB 2A 
Current in USB 1A 
The photos are not mixed up, both ports output a little more than 1A.
In this case, the voltage drops to 4.35-4.5V 
Open circuit voltage 
The power bank has a battery capacity indicator, made in the form of 4 blue LEDs located above the power button, it doesn’t look very nice, but you can see the battery status. 
The first press of the power button turns on the power bank, the second - the LED flashlight turns on, the third - the flashlight goes out.
In the process of fully charging my smartphone (10% -> 100%), the power bank indicator from 4 began to show three divisions, so even taking into account the non-linearity, it will be enough for 3 charges away from the outlet. During operation, the case heats up slightly, the smartphone was charged in 1 hour 20 minutes, with a battery capacity of 1700 mA.
Conclusion:
It’s quite a good device if you have a faulty laptop battery with sufficient cell capacity.
Pros:
Can install from 1 to 4 18650 batteries.
Two ports for charging 2 devices simultaneously.
Flashlight (there is no such thing as too much).
Minuses:
Inscription 2A is not true.
The LED display is too bright and looks sloppy.
The batteries are connected in parallel, so their capacity should be the same.
There can be all sorts of situations in life - an empty smartphone battery and the absence of a power socket for recharging nearby is a common occurrence. That is why it was decided to make our own powerful Power Bank from an old laptop battery with USB power. Of course, you can buy Chinese, but their 10,000 and 20,000 mA are a big exaggeration! This article will show you how to assemble a device consisting of a charging module lithium battery, USB boost converter, and LED status indicator Battery Power Bank.
Where to get lithium batteries
It is better not to buy the batteries themselves (they are expensive and there are many weak ones) but to use them from an old laptop. Inside this one in the photo are 3 packs of two parallel lithium 18650 type 2200 mAh assemblies, which are connected in series.

In our design, we will use all 3 packages in parallel, having first checked whether they hold a charge well for a sufficiently long time.

IN as a last resort, if some banks are already very weak, put one double package - then the power bank will become lighter and smaller, although weaker.
Power Bank modules
The next important part of the USB Powerbank is the charging board. For this purpose, a cheap one was chosen. Additionally, it turns off the load if the lithium battery voltage drops below ~3.7 Volts, thereby protecting battery from deep discharge.

Now we take a circuit that increases the voltage from the batteries to 5 volts (to power USB output). This is any boost converter to USB.

How to connect it together - . Naturally circuit diagram will have a small toggle switch to turn on the Power Bank. The toggle switch is needed because the boost converter is always powered by the battery (and draws a small current), even if no device is connected to the USB.

Housing for homemade Power Bank
It is better to take a non-metallic case - a suitable plastic box, cable duct, and so on. For this project, we used a non-standard and environmentally friendly material - wood, or more precisely fiberboard. Two covers and walls around the perimeter, all connected with screws.