What do you need to make a column. How to make a column with your own hands - surge protectors
Read also
Hello dear readers of my blog, this time the article will not be entirely in the subject of the site, but still quite useful. Now I will tell you how you can make your own ...
Hello dear readers of my blog, this time the article will not be entirely in the subject of the site, but still quite useful. Now I will tell you about how you can make speakers for your phone with your own hands, or just portable speakers. There are times when you need to organize music, say, in nature, naturally you will not find sockets for 220v, of course, if you have not brought a diesel generator with you. Personally, I needed to make such a modification of the columns in order to take them with me to the horizontal bars. I used to order online portable acoustics, in general, I liked it, but it already seems that it does not play enough. My purchased speaker was the divoom i-tour 20, which I talked about.
In general, the device is good, the volume is very strong, despite its small size. But now let's move on to creating something more powerful.
What you need for work:
And so here is a photo of what I used, now we will look at each element of the photo in detail.
1. Screwdriver. I think you will find such an instrument in your home, because I cannot imagine life when there is no instrument at home. Therefore, with the search for this item, you simply should not have problems.
2. Battery. Well, here you can already use any, the main condition is the voltage in it 12v. This is where the question should arise, since I have been looking for one for a long time, I even had thoughts of buying a car. But everything is much simpler. This is the source battery. uninterruptible power supply. They are used for computers in case the current in the outlet is gone. You can find it in computer stores. But I was too lazy, I ordered through an online store, where everything is for computers. My battery is 12v, its capacity is 9Ah. If money allows, you can take with a larger capacity.
3. wires. As you can see, I have a double one, so look for the same one, or take two single ones. But I would like to note that I have a thin wire in my wire, it is better to take a thicker one, since this one may not withstand it.
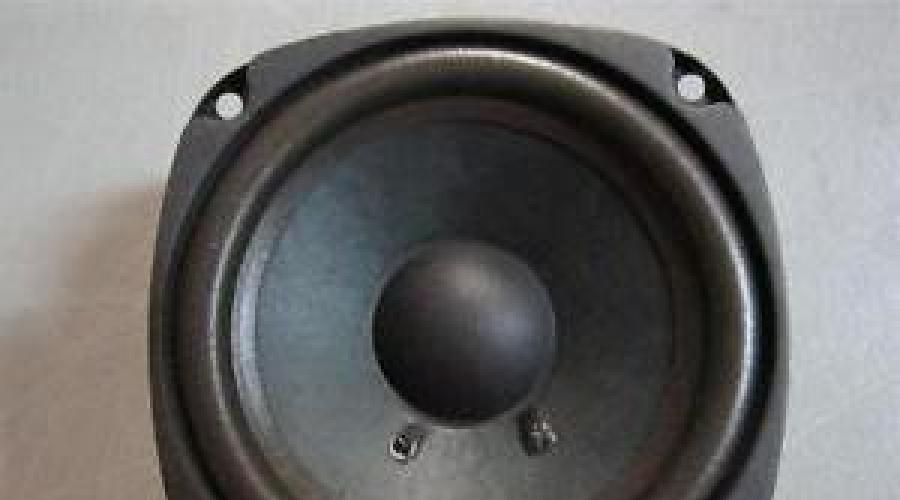
4. speakers. The most common computer speakers that can be found in any computer store. I have had them lying around in a box for many years, so I decided to find a use for them. Well, the main thing here is to take not very powerful ones, since the electricity in the battery is not rubber, so take the speakers that your battery will pull. Personally, after opening, 3 W are written on the speakers, that is, the total power is 6 W. In principle, this is enough.
5. wire cutters. In the process of alteration, it will be necessary to cut the wires a little, so wire cutters are needed, not to gnaw iron with your teeth. Such a tool may not be as common as a screwdriver, but still. If it is very tight, then you can cut it off with a knife, the wires are thin there.
Well, in addition to this, you will need a little care so that you do not accidentally cut the wrong wires. In general, now you can proceed to the work itself.
Create speakers for the phone:
If you have prepared everything you need, then let's make speakers for the phone. For starters, we only need a column with a switch, since it is in it that the transformer is located. And we don’t need the second one at all, so if the connector is disconnected, remove it. And put the main speaker on the table.
If you have a front part covered by some kind of panel, then it is better to remove it, because under it there may be screws hidden that hold the column closed. But do not break off if it does not go. You may have another case where all the screws are on the back side.
After you find all the fasteners, unscrew the screws and open the column, but only carefully, in my case it did not open too much, the wires inside may be short. In this picture, I slightly opened, the next one will show how much maximum it opened.
As you can see, it did not open very wide, so it was difficult to photograph the inside of the column. But you can see how in the center there is a whole bunch of wires. We are only interested in the number 1.
1. Transformer. It converts the current from 220v to 12v, that's exactly what we need to connect after it, it will just be what we need. In my case, blue wires came from it, and all the rest in the case were black.
So the column opened wider when I cut the wires from the transformer, in this picture I marked it with the letter T. I recommend cutting the wires in the middle, all of a sudden you ever decide to remake the column back, then at least you can twist the wires, I personally did it. The wires coming from the transformer are best insulated with electrical tape. And let them stick out from the board for now.
Next, we prepare the wires with which we will connect the battery. It is necessary to cut off the insulation and then connect it first to the speaker, and then to the battery, just be careful not to close the terminals with your fingers, because then there will be a loud mat for the whole house. Well, in principle, that's all, but do not close, check first for performance. By the way, it is not necessary to observe the polarity, even if you do the opposite, the speaker will play just inside the case and the sound will be a little quieter. And if you guess, it will be generally gorgeous.
And now we carefully turn it on and voila, the column has earned. Next, isolate the joints inside the case and you can twist and assemble.
By the way, the photo does not show what works, so I turned off the flash, only the quality became bad, I am writing an article at night with no lighting.
Done, you can clamp the wire with a lid with a speaker, it should not break, well, or twist this edge a little looser. Now your task will be to constantly charge the battery. If you take everything with the same parameters as mine, then 10 hours of work should be enough.
By the way, my wires that I pulled to the battery were in a varnish winding, I could not clean it with a knife, so I just set fire to the wire. Well, good luck everyone, I hope it helped.
Updated (10/05/2013 at 19:45).
Still, I decided to continue the article a little, photography at home is certainly good, but there is always a risk that you can be deceived. This is not my goal, so I decided to post another photo where the speakers work, but this time on the street. The idea to take a photo came quite spontaneously. As usual, I was going to go to train, went outside, came to the horizontal bars near the house, worked out, went to the uneven bars and decided to turn on the music. And just in between approaches, this idea came to me. Therefore, here is another photo confirmation that everything is described correctly in the article and what I advise really works.
As you can see, there is not even a leaflet with copyright, as in the previous photos. That's the only thing, I want to apologize, I took pictures on the phone, but it was already dark outside, so the quality leaves much to be desired. Now the article is finished.
What will be the sound quality in the car, directly depends on the location of the speakers. In addition, the resonance of the hulls also matters in this matter.
Therefore, the body of the speaker used in this case must be made of a material that has sufficient resonance. As a result of this, the most suitable option would be to create columns with your own hands.
You can learn how to make acoustic speakers yourself from our article. The information will help you learn not only how to make speakers yourself, but also how to assemble a real speaker system.
Conditioning a Column
First of all, you need to find out what size the column will be. To do this, you should determine the location of its location.
Most often, the column is installed in the trunk, since there is enough space for it to have enough space. In addition, a kind of resonance is also created in the luggage compartment, so the music sounds a little different here.
You can also install speakers near the rear window, but here they will have to have more compact dimensions, since massive columns may not fit here.
Note. However, this again depends on the position of the speaker: standing or lying down.
Dimension measurement
To find out the size of the box for the column, you should:
- Decide on its location.
- Determine how much space can be allocated to establish.
- Measure the size of the allotted area.
Note: 30 cm long is enough for a speaker in the luggage compartment. But the speakers installed behind the rear seat should not have more than 15 cm.
Material selection
To create a column, the following materials are quite suitable:
- Chipboard. By the way, finding this material can be much easier than the rest, as it is often found on sale. In addition, its price is quite affordable.
Advantage this material is that it has a fairly large return, so the sound of the speakers will not be distorted. Also, this material is the lightest, so the design will not have too much weight. - Hard rubber (ebonite). The products are pretty good, but the sound will be a little muffled. Yes, and finding rectangular pieces of ebonite for sale is not so easy.
In addition, the product may have an unpleasant odor. The most important advantage: ebonite is difficult to ignite, therefore, when short circuit the column body will not burn.
- Wood. Any wood will do.
In this case, it is better to give preference to oak or pine, since with their help you can create a good resonance. Also, the advantage of the material is its attractive appearance.
Note: such a product can even be painted, so it will turn out very beautiful.
Corpus creation
You can complete the body in any convenient way.
The most suitable option is the following:
- Using a hacksaw, cut out the details from the material.
- Select the parts to which the speakers will be attached. In their central part, round holes should be made.
Note: The diameter of the hole must match the diameter of the bottom of the speaker.
- It is also necessary to cut out small rings that will be attached to the bottom of the holes made (so that the speaker is securely fixed). The shape of these rings should resemble a plate without a bottom.
- Glue the rings to the details.
- Around the rings in the details, make more holes in the shape of a triangle with rounded corners.
Note: this is necessary so that the sound penetrates into the case, and does not just go out.
- Small partitions should also be made for the inside of the case (their length should correspond to the length of the case itself). With their help, the phase inverter will be held.
- Make small ports through which the terminals will be fixed.
Column Assembly
To collect all the details in one piece, you should:
- Connect the body parts with glue or self-tapping screws: rectangular parts on the sides, lower part, as well as the part with the hole at the top.
- Fill the inside of the column with synthetic fluff.
- Install the speaker in its intended location.
Note: The speaker wiring can be removed through any opening that is conveniently created.
- Paint the frame with varnish. Thus, it will have a finished appearance.
Note: It is not necessary to use varnish for painting. Black paint may come in handy for this. And some parts can even be done in a different color.
Creating a speaker system
The acoustic system does not always indicate the presence of speakers.
You can work on creating an acoustic system in a car like this:
- Make podiums out of foam. For this:
- Make a template out of cardboard. Attach it to the place where the podium should be.
- Using the template, cut out the base for the podium. For this purpose, ordinary plywood and fittings can come in handy.
- The base consists of two rings. In this case, the diameter of the first ring must correspond to the diameter of the protective mesh. But the diameter of the second - the diameter of the column.
- Rings must be connected to each other with self-tapping screws.
- Cut six pieces to create a slope. Glue all the details together.
- Pour mounting foam into the frame and leave it until it dries.
- You get a more interesting option if you use small pieces of various tree species instead of plywood. In this case, dry pieces of wood that do not have cracks should be selected. From above, everything should be carefully varnished to make the design more reliable. For greater efficiency, everything can be fixed with two rails.
- Mount the speakers in the sockets and install the podiums.
Thus, you can create acoustic speakers (see) right at home and with your own hands. The price of such pleasure will not be high, since it will only be necessary to spend money on the purchase of material.
And in general, you can use any old speakers. The main thing is that they work and be in good condition.
Of course, before you start this process, it is worth reviewing various photos and videos with this topic. The instructions are also helpful.
Do-it-yourself speakers are within the power of someone who knows how to handle a soldering iron, and also understands electrical diagrams. To work, you will need a small number of parts that can be borrowed, for example, from car radios. You will also need material for the manufacture of speaker cabinets. Usually, wood is used for these purposes, but you can even use a plastic case from worn-out acoustics. Before you sit down with a soldering iron and etching a printed circuit board, you should choose a design, a microcircuit, and the capabilities of an acoustic system.
What do you need from acoustics?
It's nice when the sound played from personal computer, sounds in the entire audible range (from 20 Hertz to 20 kHz). To emphasize certain frequencies, you need to use special filters. Most of the cheap speakers that can be found on sale reproduce sounds in the range from 50-100 Hertz and up to 15 kHz. From this, the sound seems incomplete, ugly. Therefore, DIY loudspeakers must have higher performance to meet your needs.
Immediately decide which frequencies you plan to emphasize, whether your amplifier will have the ability to manually adjust. But if you decide to take the easy route, it will be enough to filter out low and high so that devices that reproduce this spectrum work in parallel with the main speakers. You've probably heard words like "tweeters" (small speakers that filter out high frequencies) and "subwoofer" (a large wooden box that houses a speaker to reproduce bass). These are the ones you have to make yourself.
What do you need for a subwoofer?
Without a quality box, it will not work. Surround sound is created by air moving inside the box. Moreover, the air drives the speaker cone. So, you need to make a closed box with one air outlet. Since you are making speakers for your computer with your own hands, there is no need to use huge speakers that are used for car audio. The ideal option is car acoustics used as standard, which is installed in the front. Small diameter speakers, rubberized diffusers, soft and elastic. This is exactly what is required for a subwoofer.

Of course, it will not create strong air pressure, but for a small room it will be enough to emphasize low frequencies. You will also need a bass amplifier, there are a lot of these on the radio markets. If possible, you can remove it from an old car tape recorder. The output power must be at least 20 watts, and the power supply of the microcircuit is preferably unipolar. But the most important thing is the filter low frequencies(LPF), because how to make a speaker with a subwoofer without this node will not work. Do not clutter up the design with complex low-pass filters on microcircuits and operational amplifiers. A passive filter assembled from resistances and capacitors is enough. Depending on their parameters, frequencies are cut off.
How to make a subwoofer box
For the manufacture of the box you need to use durable wood. Chipboard or fiberboard is ideal, its thickness should be no more than 5 mm, so that the design is as light as possible. If there are old Soviet TVs in wooden boxes, then you can make a good box out of them. Cut out all the structural elements with a jigsaw. Do-it-yourself acoustic speakers must be durable, so do not spare glue and self-tapping screws for fasteners. The front part, on which the speaker is installed, is attached last.
To stiffen the box, use triangular-shaped wooden slats. Try to glue all small cracks and gaps. After all, the air in the subwoofer will move, and you need it not to come out of the slots, as the sound is spoiled because of this. In the back of the box, you need to drill a hole for the wire, a connector for connecting to the amplifier is mounted on the outside. It is much more convenient if the self-made sound speakers are compact and without external blocks.
How to make a power supply
As mentioned above, you should not take a chip with a bipolar supply for the design. The reason is the complexity of the power supply, it is not easy to get the current necessary for operation. Therefore, it is best to make designs that can be connected to a unipolar voltage of 12-24 V. And subsequently repairing the speakers with your own hands will be much easier, unless, of course, any breakdown occurs. The power of the transformer should be slightly greater than the power of consumers - all amplifier circuits.

The best option is to make one power supply for all devices. For the effective location of all acoustic units, it is worth placing both the power supply, and the low-pass filter with an amplifier for the subwoofer, and the ULF for the main speakers and tweeters in one case. This will allow ergonomic use of the equipment, and the number of wires becomes minimal. On the back wall of the subwoofer, you need to install connectors for connecting the main speakers and tweeters. But keep in mind that the subwoofer is a source of vibration, so soldering must be done with high quality, and fastening to the case should be done using rubber washers.
DIY speakers: amplifier and power supply
The amplifier and power supply can also be embedded into the subwoofer case to save space, and connectors for connecting "tulips" can be installed on the outside. The hole is filled with sealant, after which the front side is installed. It is also mounted first with a sealant, and then attracted with self-tapping screws. After the box dries, it must be covered with a suitable material.

Can be used as a power supply a simple circuit: transformer, rectifier bridge and 2-3 electrolytic capacitors. Such speakers for a computer, assembled with their own hands, will work great, the sound will be clear and pleasant. If there is a slight buzz, then increase the capacity of the electrolytes. In the absence of elements with a large capacity, several pieces can be connected in parallel, then the total will be equal to the sum of all capacitors.
How to make basic speakers with your own hands
For the manufacture of the case, you can use both wood and plastic. It is better to give preference to the first, since when it is used in acoustics, the sound quality improves. If you are too lazy to cut wood, then you can ennoble the speakers from old radio or use them without modification. The amplifier and power supply will be assembled in the subwoofer box, so all that remains is to connect the speakers to the desired connectors. Therefore, if you have two speakers from the music center, you can safely use them.

If you decide to do everything in at its best, then, by analogy with the subwoofer box, you also make two cases for the main speakers. If desired, they can also be pasted over with attractive material. Pasting with thin felt, for example, improves the sound quality of the speaker system. In these speakers, it is most reasonable to install two speakers each - for medium and high frequencies. This will save wires for connection, and provide a more attractive appearance of the entire system.
Production of a printed circuit board for amplifiers and rectifiers
Perhaps no less laborious process, which will take a lot of time. If the scheme you have chosen is simple enough, then you can apply a pattern to the foil material using a permanent marker. Just pre-treat the foil with electrolyte to car batteries or hydrochloric acid. This will degrease the surface and improve the etching process. If the PCB pattern is complex, then it is better to use laser ironing technology and software for drawing tracks. Here's how to make a column with your own hands, namely a printed circuit board for it.
In the program, you outline the location of the elements, draw paths, and then print the resulting image on laser printer with maximum black saturation. Paper is better to use glossy. Then lay the drawing face down on the surface of the textolite foil, fasten the paper and wrap it in a clean rag. The heated iron now needs to be driven over the rags so that the pattern is printed as accurately as possible. This procedure is carried out within 10-15 minutes. After its completion, moisten the paper in water, all excess will go away, and only toner will remain on the foil. If necessary, you need to draw the missing elements with a permanent marker.
Board etching
After the transfer of the picture is completed, you will need a solution of ferric chloride. Most radio amateurs use it, since the etching process with it takes little time. If you use a solution of copper sulfate and salt, then etching can take a day or two, depending on the concentration of substances. It also happens that a solution of ferric chloride corrodes copper poorly, so to increase the etching rate, you need to heat it. Just try not to miss the moment when the tracks are freed from excess metal, otherwise the part of the foil that is under the toner will be destroyed.

In principle, you can make music speakers with your own hands without etching printed circuit boards. There is a hinged installation, which is much easier to do. But after all, a beautiful board with the correct installation looks much nicer than the wires and conclusions of the elements assembled in a heap. And the possibility of interference in the case of surface mounting is much higher. After etching the board, it must be thoroughly washed and dried. And only after removing the toner layer with a solvent or alcohol, you can proceed to install the elements.
Mounting elements on a printed circuit board
Now you just have to outline the location of all the elements on the surface of the board. First, make marks in those places where you want to make holes with a drill with a diameter of 1-1.2 mm. The lesson is not easy, because with strong pressure, you can simply break the drill. To improve printed wiring, it is necessary to tin (cover with a layer of tin) all the tracks of the board. To do this, you need to treat them all with a solution of rosin, after which, with a heated soldering iron with tin, go through each one so that the solder reliably adheres to the copper surface. Excessive heating is not needed, as there is a risk that the foil will begin to peel off the textolite.

Before installing the elements, their terminals must also be tinned. Only in this case, do-it-yourself computer speakers will have the highest possible reliability. In the presence of vibration, the soldering can collapse very quickly, the contact will disappear, and the amplifier will stop working or will work, but with a wheezing, unstable.
Conclusion
As you can understand from all that has been said, you can make high-quality acoustics from any material that is at hand. Pay only attention to its condition, do not use rotten wood for a subwoofer or speakers. The elemental base of bass amplifiers is very small - one microcircuit is enough, which provides an output power of 10-20 watts in two channels. Simple music speakers, designed with your own hands, will serve you for many years, and the sound quality will allow you to enjoy both music and films with special effects.
Do you often have to disconnect and connect your headphones to your computer due to circumstances beyond your control? This is not very good, because Connecting headphones frequently over time can lead to poor contact in the audio jack, resulting in noise in the sound or even turning it off. Therefore, I recommend that you turn on your headphones and speakers at the same time so as not to wear out your equipment prematurely. Headphones and speakers played at the same time can play at the same time and below you will learn how to organize it.
Simultaneous audio playback on 2 pairs of wired headphones, or wired and wireless
This method works for paired wired headphones as well as wired and wireless ones. Similarly, using this method, you can connect headphones and speakers, the sound will be played at the same time. I tested this method on a computer with a built-in Realtek sound card, on computers with other sound chips, this method may not work.
Step 1 - playback devices
Find the speaker icon in the lower right corner of the screen, click on it right click mouse, in the window that appears, select the "Playback devices" menu.
Step 2 - Writers
Now open the Recording Devices tab. You see a list of all devices connected to the computer that can record sound. Click on the empty space inside the window with the right mouse button, in the appeared context menu select "Show Disabled Devices".
Step 3 - Stereo Mixer
Now in the list of devices you have a hidden device called "Stereo Mixer". It will be in a disabled state, right-click on it and select "Enable".
Step 4 — listening setup
Right-click on the "Stereo Mixer" device and select "Properties". A window with several tabs will open, we are interested in the “Listen” tab. Enter it. Check the box "Listen to this device”, and below in the drop-down menu, select the second headphones or speakers in which you want to hear the sound. If you want to send audio to both wired and wireless headphones, select from the dropdown menu bluetooth headphones. After that click "OK".
That's it, now you should hear sound in two devices at the same time. The method is universal, it works on most computers, but not on all. In the same way, you can set up simultaneous sound playback on speakers and headphones.
Simultaneous playback on speakers and headphones on computers with a Realtek sound card
This method requires that your computer has sound card Realtek and latest official drivers To her.
Step 1 - Control Panel
Go to the control panel of your Windows computer. Click "start", find the menu "control panel" and click on it. If you have Windows 10, you need to click on "start", then start typing the word "panel" in Russian on the keyboard, your search will turn on, and in the first search results you will see the "control panel" menu. Click on it.
Once you get to the control panel, find the menu "Realtek HD Manager" or simply "Realtek HD". Run it.
Step 2 — Setting Up Realtek
In the right upper corner Realtek settings, you will see the Advanced Device Settings menu. Click on it.
Step 3 - additional settings Realtek
Set the settings as you see them in the screenshot above.
Step 4 - Connector Options
See where the mouse cursor is in the screenshot? Click on this yellow folder, you will have a window for setting the parameters of the connector. Set it up the same way as you see it in the screenshot, otherwise simultaneous sound playback in headphones and speakers will not work.
That's all, now if you connect the headphones to the output on, and the speaker to the rear panel (or vice versa), then the sound will go to both the speakers and the headphones at the same time. You no longer need to plug and unplug your headphones every time you need them.
Weak sound can be even on a new laptop. This is due to the fact that modern models, despite their high performance, do not have strong speakers. First of all, this applies to budget laptops. Even more often, users are faced with low quality audio tracks in individual applications, audio or video files.
How to improve the sound in each of these cases?Quiet sound on the computer: reasons
We will cover both obvious problems that can be solved within a few seconds, and serious difficulties that prevent the usual use of the PC.
Inoperative jacks/headphones/speakers
If the computer is far from new, and various sound devices have been inserted into its connectors for more than a year, then we can consider the deterioration of contact, and with it the sound, as a natural phenomenon. However, when trying to make the headphones louder, check the volume control. Connect your device to another PC to check if your headphones or speakers are faulty.
Tip 1: Unplug the cable, then plug it back in. Reconnection will reveal problems with the jack or plug.
- If the speakers break down, you should think about buying their portable counterparts. Mini models are highly mobile. You can use them as an addition to your tablet or smartphone. But keep in mind that the minimum value of lung power portable devices should start at 3 watts. Higher values will be required for those who are going to listen to music in places with extraneous noise. The number of speakers indicates whether you will hear stereo or mono sound.
- If the headphones are working, you can make the sound louder by correcting the system settings. Through the "Start" menu, go to the "Control Panel". In the window that appears, select "Sound". Then, in the list that opens, find your headphones. In the next context menu, select " Additional features". Here you will need to find a list of effects, and then check the item “Volume equalization” in it. These simple steps in some cases, they help no worse than a headphone amplifier.
Tip 2. If you do not want to understand the settings of various software products, then get low-impedance headphones. The last property is the key to higher volume.
Driver Issues
Lion's share software problems with a PC is somehow connected with the drivers. Specialists distinguish 4 groups of problems:
- developer errors (this kind of problem is solved by updating);
- OS version driver mismatch;
- incorrect driver settings;
- driver conflicts (“the opposing side” is often different multimedia devices).
The first thing to do is to make sure your audio driver settings are correct. As an example, we use the notorious Realtek. Refer to the "Control Panel", you need the "Hardware and Sound" department, where the mentioned software. Then check each tab. No line should be lowered or muted. Don't miss filters and surround sound.
- If the sound has become quieter due to the drivers, then try updating them. Special utilities will help you with this.
The named utility will scan the OS and issue a list of direct links to new driver modifications.
- OS capabilities also allow you to test and update the driver. Use the following step by step guide.
- Use the Control Panel.
- Open the "System and Security" tab.
- Open the "Sound, game and video devices" section.
- Please refer to the sound card driver.
fig.3. Update audio driver (Realtek)
In the device manager, next to the drivers, there should be no additional characters, especially exclamation marks. The presence of such symbols indicates driver errors. You will not be able to increase the volume, because in such situations, as a rule, at all.
Problems in the settings
I mean OS settings. Before you try to change anything, play the audio file. This will make it easier to control the volume of the sound, because you will hear the changes immediately.
Then go to the "Control Panel", in the item "Hardware and Sound". To add sound to your computer, you will need the options: "control audio devices' and 'Volume setting'. IN last tab the user can adjust the sound in different applications. In the first tab, you will need to determine the device through which the PC plays sound. Select the item you want, such as speakers, and open the device properties.
The following tabs will help increase the sound on your computer- levels (to increase the sound, raise the sliders to the maximum level);
- special (uncheck "Limited output");
- improvement (check the "Loudness" checkbox and uncheck the remaining items).
How to improve the sound on your computer: using utility software
Special utilities are an interesting alternative to additional acoustics. They should be used if you do not like the sound when watching a movie or listening to an audio file. Similar shortcomings are typical for audio and video content downloaded from torrents.
But before turning to such tools, make sure that it is impossible to adjust the sound using the standard features of Windows. After all, the utility will increase the sound only if there are no serious problems with the hardware or peripheral devices. And be sure to try opening the file in another player. Among software video devices, experts often distinguish VLC.
Tip 3. As soon as VLC starts playing, move the corresponding player slider. Note that its maximum volume is 200, which is much more than in many similar devices.
The following programs will help to amplify the sound on the computer:
sound booster
This program capable of increasing the volume by 1.5 timesIt swings both browsers and Skype. In this case, the sound quality will not suffer. The utility does not load the processor and RAM. After installation, it takes no more than 10 MB. The named volume amplifier is fully integrated into the OS. Due to this, the change in sound reproduction is carried out by using the Windows slider. Among other amenities, Sound Booster is distinguished by the presence of a set of hot keys. Combinations can be created independently.
WATCH VIDEO
Hear
This amplifier will not only help to make the sound on your computer louder, but also improve the quality of playback of movies, music and any other sounds.Consider a list of the main functions of this software product.
- 3D sound. This is surround sound. The sound will be available to the user from all sides.
- Equalizer. The multi-band equalizer gives the user absolute control over frequencies.
- Channel management. The named component of the program allows you to organize a concert with the effect of "live" performance. Not every sound amplifier for a computer gives such an effect.
- Speaker correction. This mechanism is responsible for the resonance of the speakers.
- Atmosphere. This effect is a set of reverbs that simulate the sound of a telephone booth, a well, etc.)
- fidelity. Manager to restore the frequency and intensity that were lost during the recording.
Audio Amplifier
The named utility is designed to process files with problematic sound.A few clicks will quickly change the level and tone of a video or audio file. The conversion process takes a matter of seconds. This tool not only responsible for amplifying the sound, but also helps to equalize the volume of the selected list of files. This eliminates the need to adjust the sound in the speakers. The named program for increasing the volume on a laptop will make it easier to prepare for events that require a constant volume level.
SRS Audio Sandbox
The specified sound amplification program turns the speakers into a real audio systemThe list of functions includes improving the sound quality of the built-in speakers, the formation of 3D-sound and highlighting the voice during movie viewing. You will feel the difference in sound already at the first start. It is worth mentioning that this utility provides for individual sound settings for games and movies, taking into account the characteristics of the genre (action movie or melodrama, RTS or action).