3 what device manager is for. Device Manager: open and work in a new way
Read also
VIA HD Audio Deck is a program that allows you to control sound parameters on computers that have a motherboard with an integrated VIA sound card. Before us one-stop center, from which you can change the settings of connected recording and playback devices. In addition, the program has a separate section with port settings. But let's talk about everything in order.
Installation and features
VIA HD Audio Deck is distributed along with a standard package of audio drivers provided by the manufacturer. But if necessary, it can be installed separately. However, without the presence of drivers, it will not be possible to launch the program. We also draw your attention to the fact that before the first launch, you must first restart Windows.
The main window of the VIA HD Audio Deck is a kind of menu that helps you quickly navigate to sections with volume sliders, equalizer, speaker configuration, surround sound options and general information. technical information about the sound card. On the side is the previously mentioned panel for controlling analog outputs. That is, if necessary, VIA HD Audio Deck allows you to turn off the power to individual ports and thereby limit the operation of the devices to which they are connected. For convenience, port icons visually correspond to their “physical” location in system unit and even “divided” into front and rear panels.
Additional tools
Among additional tools, which are part of the VIA HD Audio Deck, it is worth highlighting the stereo mixer and “amplifier” for the microphone. Also note that some parameters can be adjusted not only from the main panel, but also from context menu tray icons.
Key Features
- managing sound parameters of VIA audio cards integrated into the motherboard;
- the presence of an equalizer and stereo mixer;
- enabling and disabling analog outputs;
- quick setup volume levels of playback and recording devices;
- installation complete with a standard set of drivers from the manufacturer;
- Compatible with Windows 7, 8 and Windows 10.
In OS Windows family control over the properties of the computer hardware is carried out using a system utility such as device manager. In other words, directly between the user and the hardware. With its help, the following options are available:
- View the equipment installed on your computer.
- Timely identification of incorrectly operating equipment and elimination of device conflicts.
- Editing configuration parameters for a single device.
- View information about installed device drivers, as well as the ability to download directly from the Internet or computer.
- Rollback software devices up to the previous version.
- Enable, disable, and remove devices through appropriate interactions with their drivers.
Opportunities that it opens up this program, can be used by both a beginner (find out the model of a particular device, update drivers) and an advanced user (advanced troubleshooting and conflicts in the operation of equipment).
- Go to the Start menu.
- Open the “Control Panel”.
- Item "System".
- In the “Hardware” tab you will see the “Device Manager” button.
Dispatcher Windows devices 7 has the following location:
- Click “Start” again.
- If there is a “Computer” item in the menu, right-click on it and in the menu that appears, find what you were looking for.
- Otherwise, go to the “Control Panel”.
- On the right top corner In the “View” menu, check the box next to “Large (small) icons”.
- In the generated list you can find the dispatcher.

Also in any OS Windows manager devices can also be opened using the command line. To do this, go to “Start” and find “Run” there.

It will appear with a line in which enter the line “devmgmt.msc” and press the enter key. That's all.
It is worth paying attention to the fact that your account You must have administrator rights to make any changes to device settings. However, any user can access Device Manager.
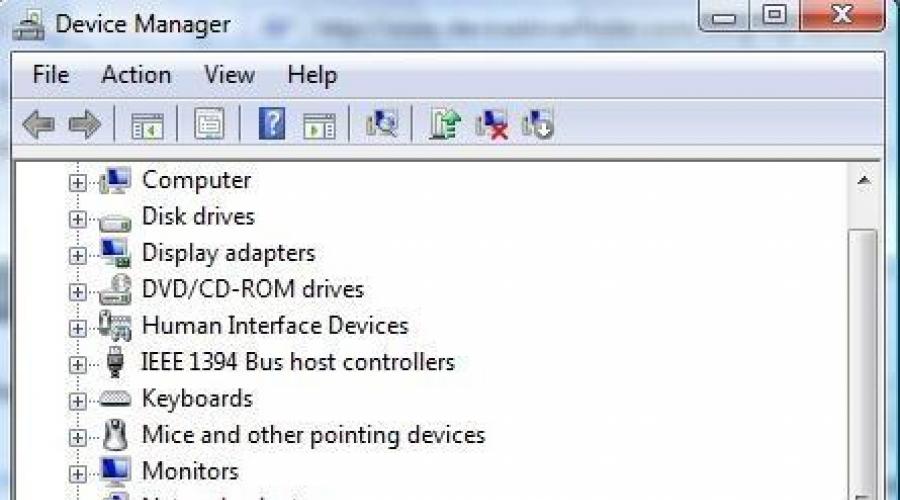
And now a few words about Initially, you will see a list of devices on your computer. By clicking on the plus sign to the left of the name of a device or device class, or by double-clicking directly on the words, you can see a list installed drivers. To update the configuration, select the appropriate action from the right-click menu. If in the list you see an icon in the form of a yellow question mark in XP, or a small white circle with inside on the main icon next to the name in Windows 7, this means that the driver is not installed for the device, that is, the computer cannot use it in its work. You can fix this by updating the configuration, or searching for the required software manually on the Internet if you know the device model.
19.10.2016
Device Manager - built-in Windows utility, contains a set of functions for controlling the operation of the computer and an easy-to-understand interface. Responsible for correct work video cards, network adapter, processor, monitor, printer, etc. connected to the computer. Information about the hardware composition is stored in this program. Here we edit the properties of each connected equipment, update and reinstall drivers.
Unlike other built-in Windows programs The task manager has undergone fewer changes. There have been no visual changes since the release of Windows 98.
The device manager is responsible for the operation and management of equipment connected to the computer. Here we check how the device works, whether the driver is installed correctly, reinstall it, etc. The first step when checking the functionality of the mouse, flash drive and web camera is to open the device manager. Here you can immediately see whether the device is working correctly or not. The corresponding labels and description of the driver will let you know about this. To get started, launch the device manager. This is described in detail below, but if you know how to do this, scroll down the page. Although even an advanced user will still find something interesting. As they say, “the new is the well-forgotten old.”
Devices in the device manager are organized into sections, and to open the section with video adapters, click on it with the mouse. In general, the device manager contains information about the central processor, video card, sound card, network adapter, hard drive, etc. Runs only with administrator rights.
How to open Device Manager
OS developers are constantly improving, simplifying and adding new features to Windows. Look below 8 various instructions launch the Task Manager and select the one you like. I describe from simple to more complex.

- Using the Run window.
 Call up the Run window using the Win + R hotkeys and enter the command devmgmt.msc and press Enter.
 - Via the command line.
 Launch the command line and enter the name of the utility - devmgmt.msc and press Enter.
- For Windows XP.

Working with Device Manager
Installing and updating drivers
You need to install drivers from the disks that came with the computer when you purchased it. If there are no disks, open the case and look at the model motherboard. Download drivers from the official website of the equipment manufacturer.
After installing the necessary drivers, the hardware will be detected in Device Manager.
By clicking right click mouse over the required equipment, open the menu where the program controls the device. Here we update the drivers. U Microsoft base its own drivers. However, it is better to use drivers from the device manufacturer's website.

Driver rollback
You may encounter a problem that after updating the driver, the device will not work correctly, produce errors and not execute the necessary commands. For such cases, Device Manager provides a function to roll back the updated driver. Right-click on the malfunctioning device and select Roll Back. The utility will restore previous version drivers before updating.
Uninstalling the driver
If the device does not work correctly, remove the device driver and then reinstall it. Right-click on the device we need and click Delete. The device driver will be removed, just remember that after this action you need to install new driver which is already prepared.

Before removing the driver, the system will display a message that you need to confirm. We give an affirmative answer and remove the driver. Just remember that after this operation the device will be completely removed from the system and its use will be impossible.
device Manager system utility Windows, a simple but very important part operating system. Here we configure the equipment, install or remove the driver, even without using third-party software. Therefore, we use this Windows component attentively. Let's pay attention to details and take action. Only in this case will setting up the system be successful and fruitful.