Setting up a tp link tl mr3420 router: step-by-step instructions. Setting up a tp link tl mr3420 router: step-by-step instructions Settings for changing the factory password
Read also
In order to get to the router’s web interface, you need to open your Internet browser and type 192. 168.1.1 in the address bar, Username - admin , Password – admin(provided that the router has factory settings and its IP has not changed).
Changing the factory password
To ensure that no one but you can enter the router settings, you need to change the password to enter the settings.
To do this, select from the menu on the left System Tools(System Tools) – Password(Password) and enter the settings:
Previous username:: old username, enter admin
Previous password: old password, enter admin
New username: enter a new username, you can leave admin
New Password: enter a new password
Confirm the password: confirm the new password
Setting up an Internet connection
Let's go to Net(Network) - Internet access(Internet Access). Here you choose how (by what technology) you will connect to the Internet:
Setting up 3G/4G Connections
1. To set up the Internet via a USB modem (3G/4G), go to Net(Network) - 3G.
Region: Russia
Mobile Internet service provider: Choose your communications provider
Connection mode: Connect automatically
Authentication Type: Auto
2. If your telecom operator is not among those offered, go to Additionally(Advanced Settings). Put a dot on " Specify manually Dial number, APN, username and password". Here we enter data from your telecom operator. After entering the settings, click Save(Save).
3. To set up an Internet connection via a WAN port, go to Net(Network) - WAN. Here in the column Type WAN connections (WAN Connection Type) select the connection type that is used by your provider.
Setting up a PPPoE connection
1.
In field WAN connection type (WAN Connection Type): select PPPoE/Russia PPPoE
2. Username
3.
Password ( Confirm the password(Confirm Password)
4.
Secondary connection(Secondary Connection): Disabled
5.
WAN connection mode(WAN Connection Mode): Connect automatically(Connect Automatically)
6.
Save(Save). The Internet is configured.
Setting up an L2TP connection
1.
WAN connection type L2TP/Russia L2TP
2. Username(User Name): your login according to the contract
3.
Password ( Password): your password according to the agreement. In some firmware it asks a little lower Confirm the password(Confirm Password)
4.
We put a point on Dynamic IP(Dynamic IP)
5.
IP Address/Server Name
6.
MTU size (in bytes)
7.
Connection mode(WAN connection mode) - Connect automatically(Connect Automatically)
8.
After entering the above settings, click Save(Save). The Internet is configured.
Configuring PPtP (VPN) while automatically obtaining a local IP address (DHCP)
1.
WAN connection type(WAN Connection Type): select PPTP/Russia PPTP
2. Username(User Name): your login according to the contract
3.
Password ( Password): your password according to the agreement. In some firmware it asks a little lower Confirm the password(Confirm Password)
4.
We put a point on Dynamic IP(Dynamic IP)
5.
IP Address/Server Name(Server IP Address/Name) - server address or name (specified in the contract)
6.
MTU size (in bytes)(MTU size) - change the value to 1450 or less
7.
Connection mode(WAN connection mode) - Connect automatically(Connect Automatically)
8.
After entering the above settings, click Save(Save).
Setting up PPtP (VPN) with a static local IP address
1.
WAN connection type(WAN Connection Type): select PPTP/Russia PPTP
2. Username(User Name): your login according to the contract
3.
Password ( Password): your password according to the agreement. In some firmware it asks a little lower Confirm the password(Confirm Password)
4.
Choose Static IP(Static IP address).
5.
In the fields IP Address/Server Name(Server IP Address/Name), IP address(IP Address), Subnet mask(Subnet Mask) Main gate(Gateway) enter the data from the contract. In field DNS you can enter DNS your provider's address.
6.
Connection mode(WAN connection mode) - Connect automatically(Connect Automatically)
7.
After entering the above settings, click Save(Save).
NAT when automatically obtaining an IP address (DHCP)
1. In the WAN connection type field ( WAN Connection Type): select Dynamic IP(Dynamic IP)
Setting up Wi-Fi on the router
Setting up a Wi-Fi connection. In the side menu, go to Wireless (Wireless mode). In the window that opens, enter the following settings:
1. SSID1 the name of your wireless network.
2. Region(Region): You can choose Russia, or you can choose nothing. It's not critical.
Setting up Wi-Fi encryption. In the side menu go to Wireless Security(Wireless Protection):
1.
At the very bottom, select the encryption type WPA-PSK/WPA2-PSK
2.
PSK Password(PSK password): enter the password for Wi-Fi network. The password must not be less than 8 characters
3.
Click the button below Save(Save). After saving the settings, you will be prompted to reboot the router; ignore this requirement (red text below).
Protocol- Select the required protocol
Status- Enable
Click Save.
Source: rudevice.ru
Thanks to high speed(300 Mbit/s) data transfer TP Link TL MR3420 allows you to successfully watch movies high resolution via WiFi connection in local network. The router is compatible with USB modems. The TL MR3420 router can provide general access To mobile internet using Wi-Fi network.
The material presented below is instructions for setting up a router from TP LINK, using which each TL MR3420 owner will be able to create wireless point access to mobile Internet.
Description of the TP Link TL MR3420 device
Despite the budget price, TP Link TL MR3420 has significant functionality and signal power. It is equipped with standard five ports, as well as USB, through which you can connect a 4G/3G modem or flash drive.
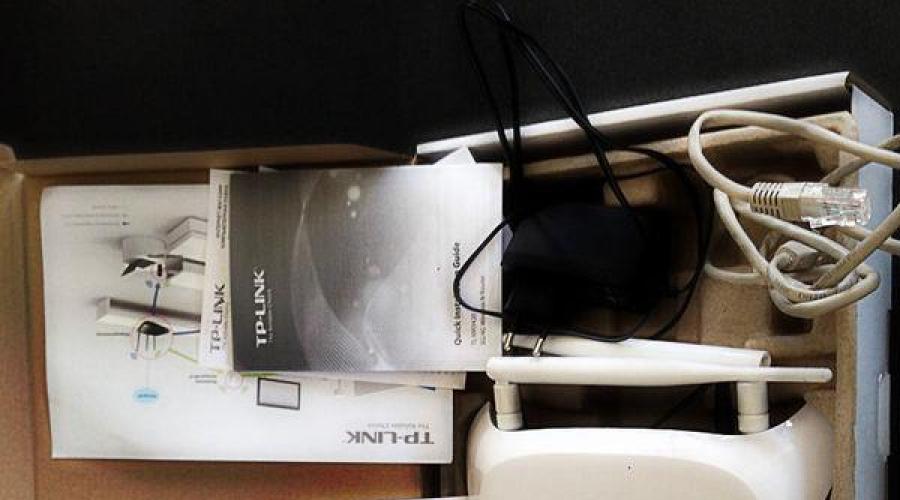
In addition to the router itself, in the box the user will find: a patch cord, a CD with software, two antennas and a power supply.
 On the back of the device there are 5 regular ports (1 - Internet and 4 - LAN), a power connector, and a factory reset key.
 There is a USB connector on the side.
Settings
The following sequence of actions must be performed:

 After completing the procedure, you need to immediately begin setting up your Wi-Fi connection. To do this you need to take the following steps:

Settings for changing the factory password
For the safety of the user and his information data, it is recommended to change the access code to the router settings, since the default “admin” is no longer a secret to anyone.
To adjust the login password for the TL MR3420 settings, you will need to do the following:

Functional check
Now the TP Link TL MR3420 router is connected and configured. Next, to analyze the operation of the wireless network on a computer or laptop (the main thing is that you have a working wireless adapter), perform the following sequential steps:
- Log in to the “Network Management Center”;
- Then in the window that appears, click on the created network and connect. You will need to remember and enter a complex access code recently invented by the user;
- After that close open menus and open the browser;
- If all points of the above manual are correctly and carefully followed, the user will be able to carry out the long-awaited Internet surfing.
Conclusion
In accordance with numerous positive reviews from users of the TP Link TL MR3420 brand device in question, the main conclusion can be drawn about the excellent functioning of the device. Mainly, negative reviews include complaints about the glossy finish of the device, i.e., in the opinion of experts, the router has almost no functional flaws, except for the outer cover.
It should be noted that it has a big advantage over similar models in terms of the relatively low cost of the router, which rarely exceeds $40.
Typically, such devices equipped with a USB port have a price significantly higher than the indicated cost. The router copes well with local computer networks in small offices and at home.
TP Link TL-MR3420 is one of the most worthy representatives of budget class routers that support settings for Internet-based networks from Rostelecom. Among the huge range of routers, choosing the most suitable model for home or office use is very difficult. If you plan to create a small working network and connect additional equipment, for example, the TL-MR3420 router from TP Link will be the best option, which will not only allow you to organize the uninterrupted operation of all devices, but will also help reduce costs.
Setting up the TP Link TL-MR3420 router from Rostelecom
The TP Link TL-MR3420 router is very popular for setting up services provided by Rostelecom. To start working with the equipment, we will need to connect the power supply, Internet cable (WAN) and Ethernet cord to the corresponding connectors located on the back of the router. Then we have to go to the connection network cable to the computer, which will be used for further configuration. The compact body of the TL-MR3420 model contains three devices:
- 3G modem (USB-Ethernet output);
- Wi-Fi access point;
- LAN router.
This allows you to make a router from TP Link a universal equipment that does not take up much space in your home or office.
Selecting a location for installation and connecting the device
Before you start connecting the TP Link TL-MR3420 yourself or use the services of a specialist from Rostelecom, you need to choose the optimal location for installing the equipment. There are recommendations to consider:
- availability of free space (at least 30 cm above the router);
- absence of a nearby heat source (it is advisable to avoid places where direct sunlight may fall);
- opportunity quick access to the connectors.
A suitable option is often to place the router on one of the walls, where there is sufficient air access for ventilation of the equipment.

Setting up the TP Link TL-MR3420 web interface for Rostelecom
The router is configured using the interface on the web page. It will not take a significant amount of time, thanks to the intuitive layout of the options. To enter the basic parameters, go to the WAN network subsection and select the connection that corresponds tariff plan. To organize a PPPoE connection, enter the password and login data into the appropriate fields. This information is issued to the subscriber at the time the contract is concluded. After filling in the data for connecting Rostelecom, we confirm and save the changes.
Acquainted with price offers You can use Rostelecom for roaming abroad.
When setting up the TP Link TL-MR3420 router with a connection to services from Rostelecom, you must adhere to the following sequence:
- open an Internet browser;
- enter the device’s IP address in the address bar (192.168.0.1);
- go through the authorization procedure by entering your login and password information (by default this is admin/admin);
- specify the connection details of the provider.

You can also choose Extra options devices that are used by the subscriber, for example, television.
Attention! If Internet access from Rostelecom is provided using ADSL technology, then you will need to configure the connection on the modem, and only then connect the Ethernet cable from it to the router connector. In this case, it will be unnecessary to enter your Internet login information on the router itself.
Wi-Fi network settings
The TP Link TL-MR3420 router works not only as a wired router. With its help, you can easily organize Internet distribution for the entire household or office network, connecting wireless equipment and multiple devices with Ethernet connectors. 
To configure the TP Link TL-MR3420 router Wi-Fi settings, you need to activate the appropriate communication module, with the help of which the Internet will be distributed from Rostelecom. To do this, in the web interface, go to the section called “Wireless Mode”. Here we arbitrarily set the name Wi-Fi points, and also select network protection parameters. After confirming and saving the options, the wireless connection will be completely ready for use.
High performance TP Link TL-MR3420 for both budget device and support for high-speed data transfer standards up to 300 Mbit/s allow its owners to comfortably use the Internet connection. With its help, you can create a wireless secure network and use the router for internal data exchange. The equipment makes it possible to quickly and easily organize a home network with support for IP television and telephony from Rostelecom.
1. Connect the Ethernet cable included in your apartment to the port Internet Your router.
2. Make the necessary settings on your computer's network card. To do this, left-click on the button Start, select item Control Panel, then point Network connections.
In the window that opens, right-click on the icon network card and in context menu select item Properties.
Left click once Internet Protocol TCP/IP and click on the button Properties.
Make settings similar to those shown in the figure:

3. Connect an Ethernet cable between the computer’s network card and one of the router’s ports, for example port No. 1, as shown in the figure.

4. Open a browser window and enter in the address bar http://192.168.0.1 and press Enter. In the authorization window that appears, in the field Username select admin,
in field Password dial admin, and press Entrance.

5. After pressing the button Entrance The settings page will open. First, we need to indicate the type of network access: check WAN only.

Attention!! For the IPTV+Internet connection to work correctly, the router must be configured using the PPTP protocol.
Then you need to configure this same WAN port: Select it below (on the left) and fill in the fields as shown in the figure. Namely:
WAN Connection Type- PPTP/Russia PPTP
User Name- pw***
Password - ********
Choose Static IP
Server IP AddressName-pptp.freedom
IP Address - 10.*.*.*
Subnetmask - 255.255.255.*
Gateway - 10.*.*.*
DNS - 195.98.64.65
Choose Connect Automatically
Press the button Save.

6. Next, we’ll configure routing for the operation of local resources, including torrents: Select the tab Advanced Routing in the menu on the left and Static Routing List. Next, fill in as shown in the picture, using your data from the registration card, namely the gateway address (column Gateway on the router).
Add the first route:
Click Add New, and fill in the data - Destination Network(like on a picture), Subnet Mask(like on a picture), Default Gateway(Your gateway address from the registration card), Status leave Enable. The remaining routes are similar.


7. Now let's set it up wireless network:
In the router menu, select the tab Wireless and in it Wireless Settings. Fill in the data:
Wireless Network Name- The name of your wireless network (for convenience, you can set a name for the network in the same way as the login from the subscriber’s registration card)
Region- Russia
Channel- Auto
Mode- 11bgn mixed
Channel Width- Auto
Max tx rate- 300Mbps
Button Save save the data you just entered.

Password for WiFi networks can be set on the tab Wireless Security in point WPA-PSK/WPA2-PSK - PSK Password: here we enter the password for the wireless network (for convenience, you can set the network password in the same way as the password for Internet access from the subscriber’s registration card)

To do this, left-click once on the network card icon in the lower right corner of the screen (next to the clock). In the window that appears, click the button To plug and enter Wireless access key, which you asked in the previous paragraph.
class="eliadunit">
Among the many budget routers, the TL-MR3420 TP-LINK stands out for its use of a dual-antenna circuit and the ability to connect a GSM or CDMA modem as a backup Internet channel. Among other features, management is worth mentioning throughput, protection against external attacks, network diagnostics, as well as support for the secure function Wi-Fi connections Protected Setup, which TP-LINK calls QSS.
In this article we will configure the router for its intended purpose, that is, distributing the Internet via LAN and Wi-Fi via a 3G connection.
Connection 3g router to computer and its settings
1. Make the necessary settings on your computer’s network card.
For Windows XP: Start - Control Panel - Network Connections - Local Area Connection - Properties - Internet Protocol (TCP/IP)- Properties - Get IP automatically And Obtain DNS server address automatically.

For Windows 7: Start - type View network connections-Local Area Connection - Properties - Internet Protocol version 4 (TCP/IPv4) and Properties - Obtain IP automatically and Obtain DNS server address automatically.


2. Connect an Ethernet cable between the computer’s network card and one of the router’s ports A(for example, to port No. 1 in the figure).

check that you received the IP address automatically from the router:
For tl-mr3420, 3220
For tl-mr3020
Make sure the mode switch on the device itself is in the 3g position
3. Open a browser window and in the address bar enter:
For tl-mr3420, 3220 - 192.168.1.1
login and password to log in admin/admin
For tl-mt3020 - 192.168.0.254
Also admin/admin
, and click Login.
After clicking the Login button, the settings page will open. Once logged in, change your password, " System" And " Admin Password".
PS... Now you can Russify the web interface, for this you will need winSCP. To access, use the router address (192.168.1.1), login (root) and password that you specified to access the router.
Unpack the russian archive and copy it to the router using winSCP
Setting up a 3G modem
1. First, we need to specify the type of network access.
Go to the tab Network - Internet Access
Select mode 3g only(3g preferred is also possible).
Save- Save
2. Insert the 3g modem into the usb connector of the router.
Go to the Status tab, make sure that the modem is successfully recognized by the router:
3. If the modem is detected, then go to the tab Network - 3G
In Region (Location) select Russia(Russian Federation)
In field Mobile ISP select your provider.
Save.
My modem (huaway e367) for beeline started up with the following settings:
4. To check connection status go to the menu "Status"
If the connection is successful, you should see something like this in Status:
Setting up a wireless router network
1. Open the browser and write in the address bar http://192.168.1.1/
2. To access WEB interface devices will ask you for a default login and password admin/admin
3. Go to the section QSS(QSS function) and turn it off by pressingDisable(Disable)
4. Go to the WEB interface of the device and go to the menu " Wireless"(Wireless mode) and select the submenu there" Wireless settings" (Wireless Settings)
Wireless Network Name(Network name) - The name of your network
Channel(channel) - it’s better to manually select the freest one
Region(Region) - Russia
After settings - save - Save(Save)
5. Go to the submenu " Wireless Security" (Wireless Security)
Select WPA-PSK/WPA2-PSK
In field PSK Passwordenter the password for your wireless network (at least 8 characters, English letters/numbers)
Save - Save.
After this, reboot your router through the "System tools" -> "Reboot" section
If you have a connection problem after this mobile devices, then do the following
- Disable the QSS function in the QSS tab
- Change the values of two parameters RTS Threshold And Fragmentation Threshold in the bookmarkWireless > Wireless Advanced(Wireless mode - Additional settings wireless mode)
RTS Threshold - 2305
Fragmentation Threshold - 2304
We will configure your Wi-Fi card on your computer to access the network
To do this, left-click once on the network card icon in the lower right corner of the screen (next to the clock). In the window that appears, click the Connect button and enter the Wireless Network Access Key that you specified in the previous paragraph.