How to customize mobile notifications completely for yourself. How to customize mobile notifications completely for yourself Customize notifications using special applications
Read also
- Very handy tool. With their help, you can connect to a VPN, take notes, and open the Settings interface with just one click. But did you know that the set of buttons can be customized?
While the tech community is still divided on one thing, everyone agrees on one thing: Notification Center and Buttons quick action Microsoft did a great job in it.
Here's how to customize them for yourself.
Open "Options"
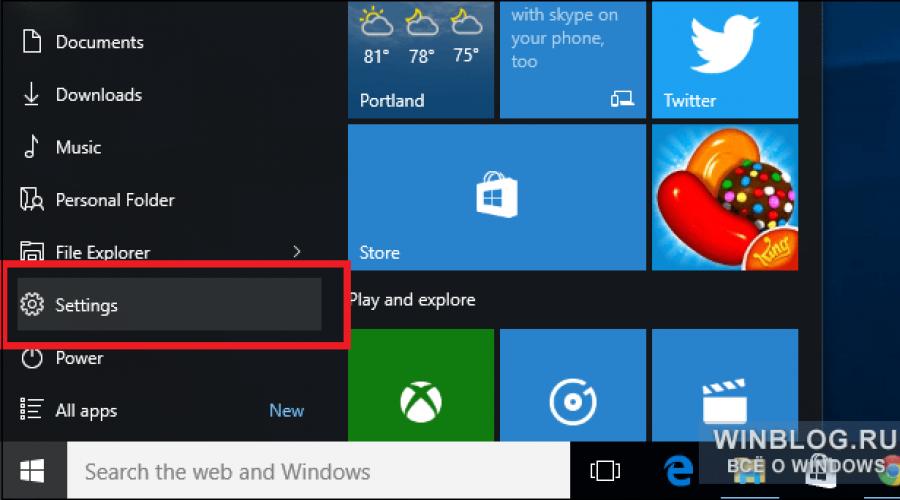
To get to the button settings, open the Settings interface through the Start menu or through the Action Center itself - the All settings button is there by default.


In the Settings interface, open the System section.

There, select Notifications and Actions. Here you can configure the four main quick action buttons.

Setting up quick action buttons
The buttons in the Settings window are arranged in the same order as in the Action Center.

That is, the first button out of four, no matter what action you assign to it, will be the first one in the Notification Center panel.

Click the button in the Options window. A menu will appear with a list of actions that can be assigned to this button, including access to specific options (for example, the Location section), the ability to enable tablet mode, or connect to Bluetooth devices nearby.

You can also add a button to quickly put your computer into “Do Not Disturb” mode (Quiet mode) or a “Note” button to create a note in the first four places.
If Windows 10 is installed on a laptop, will be available additional options, such as adjusting the screen brightness, turning on Airplane Mode, or viewing the charge level.

If you click the Expand link in Action Center, all the buttons will be shown, not just the four main ones.
| Materials |
What is the area for? Windows notifications 7 and what is it anyway? The notification area (aka Tray) is small block with icons in the lower right corner of the desktop, next to the clock. Maybe someone doesn’t pay attention to it, but someone, on the contrary, customizes it for themselves for convenience, information and speed. Rarely used icons can be turned off completely or hidden, accessing them when necessary using a special button. In this article I will analyze everything that may be useful to you when working with it, but for dessert - What to do if the language bar disappears in Windows 7
To configure the notification area, go to the panel Windows management 7, Browse by Large icons and select Notification area icons.
Or you can right-click on empty space taskbar and select Properties. A window will appear in which you need to click on the button Tune in the tab Task bar in area Notification area.
or even simpler - click on the triangle next to the language bar and select Tune

This will open a list of icons that have ever appeared in the Windows notification area.

For each icon you can specify a parameter - " Behavior". There are 3 values available here:
- Show icon and notification- the icon will always be displayed in the notification area; all messages that the program that created this icon shows using it (usually pop-up messages) will be displayed;
- Show notifications only- the icon will be hidden. By clicking the button in the form of a small white triangle in the notification area, you can see all the hidden icons. Messages will be displayed.
- Hide icon and notifications- the icon will be hidden (accessible through the button with a triangle), messages will not be displayed.
In addition, you can disable unnecessary icons, they will not be displayed at all, even in hidden ones. For this you need in the window icon and notification settings click link Enable or disable system icons. In the window that opens, set the parameter Behavior in a state Off for unnecessary icons.

Also in the far right corner of this area there is a strip that appears when you hover the mouse cursor over this place. Its purpose is to minimize all windows. This is for those who find it easier to perform actions with the mouse rather than using a key combination. Win+D.
Removing the notification area through the registry.
This method is little known and needed, but still, for general awareness, I will describe it. After these manipulations, only the time and language bar will remain in the notification area.
1. Press the key combination Win+R to open the utility Execute
2. Enter the regedit command
3. Follow the branch HKEY_CURRENT_USER\Software\Microsoft\Windows\CurrentVersion\Policies\Explorer
4. Create a new 32-bit DWORD key (right-click in the window on the right and select New -> DWORD Value (32 bits)) with the name NoTrayItemsDisplay and set its value to 1.
5. Exit the system registry and reboot the computer.
When you get tired of the empty tray, you can return it by setting the NoTrayItemsDisplay attribute to 0.
Disable component notifications
I couldn’t do this in the Home Basic edition, but I did it on a computer with Ultimate.
Maybe someone gets bored and doesn’t need any messages from this area to pop up. There are 2 ways to disable it.
1) Using the Editor group policy
Go to Start -> Control Panel, enter part of the query in the search bar, for example: “group”

and in the results found, open “Change Group Policy”.
- Start, enter gpedit.msc in the search field and left-click on the result found.
In the console tree of the Local Group Policy Editor, open “User Configuration / Administrative Templates / Start Menu and Taskbar”.
In the details pane, you need to find the policy “Disable pop-up notifications for component announcements”, as shown in the following screenshot:

To open policy settings, just:
- Double-click with the left mouse button on the selected policy;
- From context menu policies, select the “Change” option;
To prevent notifications from being displayed, select the “Enable” option.
2) Using the Registry
In order to disable notifications from notification area components using the registry, you can use the following tweak:
"TaskbarNoNotification"=dword:00000001
How to use it? Open notepad, paste this code there and save it with any name and in any place convenient for you, the main thing is that the extension is .reg
Changing the delay time dialog boxes notifications
With this setting, you can set the amount of time notifications remain on the screen before being dismissed. This can be done either using a graphical interface or using the registry.
1. Graphical interface
1) Start -> Control Panel and there we look for “Center special features».
2) Select the option “Use a computer without a screen” or “Facilitate concentration”:

3) Find “How long should Windows notification dialogs remain open?” and select from the drop-down list the time you need.
2. System registry
To change the delay time of notification dialogs using system registry, you can use the following tweak:
Windows Registry Editor Version 5.00
"MessageDuration"=dword:00000005
Where 00000005 is the time in seconds. In this case it is worth 5.
Clearing outdated icons from the icon and notification selection dialog
After installing/launching programs that are located in the notification area, this list growing all the time. Using the following tweak, you can leave the current dialog to display only those icons that are currently located in the notification area.
Windows Registry Editor Version 5.00
"PastIconsStream"=-
"IconStreams"=-
To apply the changes, you must restart the explorer.exe process or log out.
Attention! Think carefully about using this tweak, because... After it, it may turn out that the notifications you need will disappear from the list.
And finally, I will answer such a common question - What to do if the language bar disappears?.
Yes, this happens too. And people immediately panic and start looking on the Internet for the answer to this question.
This happens (I’m talking about the missing panel) because some programs “get impudent” and change their settings as they please, especially for all sorts of third-party toolbars. ICQ 7 may cause problems with the language bar. Well, if you cleaned the registry with some utility.
Well, the actual solution to this problem:
1) Right-click on any free space on the control panel, select Panels and check if there is a checkmark opposite Language bar

2) Start - Control Panel - Regional and Language Options - tab Languages and keyboard- button Change keyboard

Go to the tab Language bar and do it like I do. Well, or whatever is more convenient for you, but with these settings everything is displayed well and satisfies me.

3) A slightly modified previous method, but it can also help:
we need the General tab here

The idea is that you need to change the default language from the drop-down menu to English(Apply - Ok), and then select again Russian(Apply - OK). If you only have Russian there, then click Add and add English.
Well, if all this didn’t help, then it means there’s something in the file ctfmon.exe responsible specifically for language bar. The ctfmon.exe application, in turn, is closely related to the service Task Scheduler. The startup type of the task scheduler must be Automatically. Let's check this:
Start -> Control Panel -> Administrative Tools -> in the left window select Services and applications-> in them Services -> look in the right list Task Scheduler and make sure that the Startup type field is Automatic

And finally, the toughest method for those for whom nothing has helped is a registry tweak.
Windows Registry Editor Version 5.00
"ctfmon.exe"="C:\\Windows\\System32\\ctfmon.exe"
We save all this in notepad with the extension reg, launch, reboot.
Windows 10's notification system is still a work in progress - redesigned app notifications that appear on your lock screen, desktop, and action center. In the anniversary Windows update 10, Microsoft has added even more notifications (currently Windows time can connect your phone through the Cortana app and send Android notifications to your desktop) and Extra options notifications, including the ability to prioritize certain apps over others.
The Notification/Action Center is already quite functional, but it's still quite confusing. Here's how to deal with notifications on Windows 10, prevent them from appearing on the lock screen, or turn them off altogether.
Please respect my privacy.
Notifications automatically appear on the Windows 10 lock screen, so you can stay on topic without having to unlock your device. But you may not want to see all (or some) notifications appearing on your lock screen, in which case you can disable this feature.To remove all notifications from the lock screen, open the Settings menu and select System > Notifications & Actions > Notifications and turn off the toggle under Show notifications on lock screen.
To hide notifications from specific application From the lock screen, open the Settings menu and select "System > Notifications & actions > Receive notifications from these senders" and tap the app you want to configure. In the app's notification menu, turn on the switch under "Keep lock screen notifications private."

Set your priorities.
Notifications can pop up everywhere (on your lock screen, on your desktop, on your phone...), but they actually live in the notification center. Not all app notifications are important, so Windows 10 lets you prioritize apps for the Action Center.To prioritize notifications from an app, open the Settings menu and select System > Notifications & Actions > Receive notifications from these senders and tap the app you want to configure. At the bottom of the window there will be a priority switch, select the priority level you want: highest (displayed at the top of the notification center), high (displayed above normal notifications in the notification center), or normal (displayed at the bottom of the notification center). Programs are installed by default in "normal" priority.

From this menu, you can also choose how many app notifications you want to be visible in the notification center at any given time. The default value is 3, but you can also set it to 1, 5, 10, or 20 from the drop-down menu under "Number of notifications visible in Action Center."
Switching sounds.
If you don't mind notifications but don't mind sounds, or you want to set a different notification sound, you need to go to Control Panel. You can mute the sound for individual apps in the Settings menu (Settings > System > Notifications & Actions > Receive notifications from these senders > [ App ] > Sound when you receive a notification), but not for all notifications at once.Click right click mouse on the Start button and open Control Panel. Click Sound to open the Sound menu and select the Sounds tab.

In the Program Events window, scroll down until you see Notification (in the Windows tree). Click on this item to select it, and then open the drop-down menu under Sounds. You can either choose a different notification sound, or you can go to the top of the menu and select the "None" option to turn off notification sounds completely.

Turn off all notifications.
If you don't need notifications at all, no problem - it's easy to make them virtually invisible in Windows 10.To turn off all notifications from all apps, open Settings and select System > Notifications & Actions > Notifications and turn off the toggle under Receive notifications from apps and other senders.

If you just want to turn off some notifications, go to the "Receive notifications from these senders" section and turn off individual apps.
To hide the Action Center icon on the taskbar, right-click on the taskbar and select Settings. Under "Notification Area", click on "Turn system icons on or off". Turn off the Action Center toggle to remove its icon from the taskbar.
In this series of articles we thoroughly analyze iOS settings 9 . Settings in iOS are added, modified and even deleted with every new version systems. The article is relevant for both, but you need to take into account that the higher the system number, the more opportunities it offers.
Today in the second part of the article I will analyze the second block of settings. It includes three items: notifications, control center and do not disturb.
Notifications
This section is intended for setting up notifications in iOS.
Notifications– these are text and/or sound notifications to the user about the application. These notifications are sent manually by application developers, or they are triggered by certain events within the application. For example, the developer can notify you about the release of new levels in an update, or the program reminds you of a certain date in your calendar, etc.
The arrow in the screenshot shows the call to the notification center.
The options include a choice of sort order:
- Recent– notifications will be sorted from newest to oldest.
- Manually– the user himself sets the priority of notifications in the notification center. Those higher on the list will be higher.

Option Group by program is responsible for grouping notifications in the Notification Center.
If the option is disabled, then in the notification center they will be divided by day.

And if enabled, notifications will be divided by program.

Well, all that remains is to sort it out Notification style in settings. Here is a list of programs in which the user can customize notifications to their liking.
The screenshot below shows the options you can select for the application. Please note that some programs may not have certain options - this means that this is intended by the developer.

Allow notifications– main option. Feel free to disable it if you do not want to see notifications from the application in any form. There are applications that annoy you with annoying notifications - then I run here. Plus, when you first start it, as a rule, the program asks for permission to notify. If this permission is not given, then this item in the settings will be immediately disabled.
In Notification Center– whether to display notifications from the application in the notification center.
Sounds– disable if you do not need sound notification. I disable this option for applications that overuse sounds, because they often sound at the most inopportune moments.
Badge sticker– whether or not to display the number of notifications on the icon.

On a locked screen– whether or not to display notifications (including in the notification center) when the iPad is locked. If the option is disabled, notifications from the application will only arrive during active operations with the tablet.
Alert style on unlocked device (none, banners or alerts):


You should know that four standard applications There are separate notification settings. In particular, the Photos and Messages applications have an option Show thumbnails. If it is enabled, a miniature photo is displayed in notifications (if it was in the message).

The calendar can be configured separately different types events in the program (see screenshot below).

Notifications for mail are configured separately for each mailbox in system. Very comfortably.

Command centre
Control room (or control center) is a panel that can be called up by swiping up at the bottom of the screen. This panel contains useful options for quick access to them. Unfortunately, the control center cannot be flexibly configured to suit your needs - you must put up with the functionality that it has.
- enable/disable airplane mode, Wi-Fi, Bluetooth, do not disturb mode and screen orientation lock
- basic music control (stop/pause, next track)
- screen brightness control
- launching the Clock and Photos applications
- control AirDrop And AirPlay(not available for everyone iPhone models, iPad)

There are only two switches available in the Control Center settings:
On a locked screen– whether or not to allow the control point to be available on the device’s locked screen. With this option enabled, anyone without authorization will be able to turn on music, turn on airplane mode, take a photo, and more. I recommend turning off this option if you do not want unauthorized (albeit limited) access to the device.
Access in programs– whether or not to allow the control point to be accessible while applications are running. Sometimes it is important to disable this option in games where swipes are actively used (for example, Fruit Ninja), so as not to accidentally call the panel.
The control center has not changed since iOS 7. It is discussed in more detail in a separate review.. Unfortunately, Apple has not yet added an obvious on/off switch for 3G/LTE to the panel.
Do not disturb
Do not disturb(or “Do not disturb mode”) – is designed to switch the device to silent calls, reminders and notifications.

If the mode is turned on, then in the right top corner A crescent moon icon appears on the screen.

Manually– if you turn on this switch, the device goes into “Do Not Disturb” mode and to disable it, you must manually turn off this function. An alternative to this button is the switch in the control center.
