The flash drive is write protected, how to remove the protection. Simple ways to remove write protection from a flash drive
Nowadays, more and more people prefer to use a flash drive to store information. But what if you want to write a document to it, but instead a message appears: “You do not have access to the target folder” or “You do not have permission to save files.” Let's start figuring out how to remove protection from a flash drive. (How to put a password on a flash drive)
Move the switch
First, check to see if there is a small mechanical switch on the flash drive. If it is present, check that it is not in the “Lock” position - in this case, the flash drive is write protected. We put the switch in the open position and everything should work.
If there is no such switch on the flash drive, we move on to more radical methods.
Using the command line
Using this method will allow you to remove protection from the flash drive and save information on it, and even work with command line not difficult.
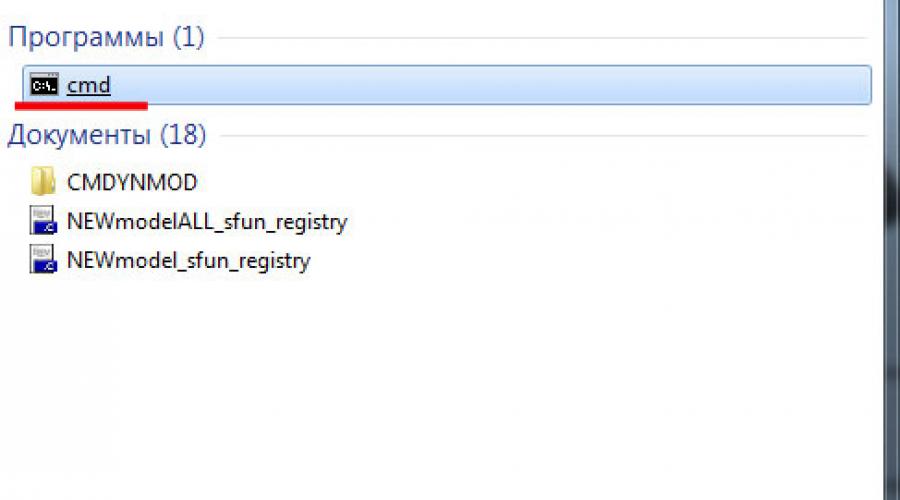
In the Start menu, enter “cmd” in the search field and open the command line at the top.

Now, in place of the cursor, enter the Diskpart command and press “Enter”.


Now you need to check which disk number corresponds to the flash drive. You can check the memory capacity of the flash drive. For me this is Disc 2. Remember the number “2” and move on.

In the command line, enter Select Disk 2, you put the number that you defined above, and press “Enter”.


To exit Diskpart, write exit – “Enter”. Close the command line window.

Now you need to restart your computer, and then try to write something to the USB flash drive.
Using formatting
This method will easily restore the functionality of your flash drive, but you should use it only if you don’t mind losing the information stored on it. We will not perform formatting using tools operating system, and using the utility hard disk low level format tool.
The program will do "deep formatting"- that is, on physical level Each memory cell will be re-magnetized and “0” will be assigned to them. Zeros are also assigned to those cells that are responsible for protection.
Download a program to remove protection from a flash drive and install it on your computer (download hard disk low lewel format tool), connect the flash drive that we will format to the computer. We run the program as administrator. In the next window, select the device that needs to be formatted. Click “Continue”.


Then you can format the flash drive using the operating system. As a result, all data is erased, and you can copy files to a flash drive, change them, and rename them.
I also advise you to read the article:. It describes four more ways to solve this issue.
Use one of the methods to remove protection from a flash drive and start using it 100%.
Rate this article: (2
ratings, average: 5,00
out of 5)
Webmaster. Higher education with a degree in Information Security. Author of most articles and computer literacy lessons
- Launch this very command line, but, very important, do it as an administrator. To do this, go to the “Start” menu, open “All Programs”, then the “Accessories” folder and right-click on the “Command Prompt” item. In the drop-down menu, just click on “Run as administrator”. In Windows 8.1 and 10 there is no need to do this; there you just need to simultaneously press the “Win” and “X” buttons on the keyboard.
- Now you need to launch the DiskPart shell by simply typing the word “diskpart” into the command line and pressing Enter on your keyboard. The shell will be launched and ready to use.
- Then you need to see which disks are available for use (including flash drives) and remember the number of the one that is write-protected. To do this, enter the command “list disk” and press Enter again. The list we need will appear on the screen. You can find out your drive by its size. In our case, this is “Disk 1”.
- Next, you need to select a flash drive to work with. In our case, the command will look like “select disk 1” (since in the previous step we determined that our storage medium was identified in the system as Disk 1).
- Actually, now all that remains is to enter the command to remove write protection. It looks like this: “attributes disk clear readonly”. Do this and wait a little while the system removes the protection.
- To exit, you need to enter the “exit” command.
- Open a registry editor program. The most convenient way to do this is by opening the program launch window. To use this, press the “Win” and “R” buttons on your keyboard. When it opens, enter the word “regedit” in one single field and press Enter or the “OK” button in the same window.
- Next, in the left panel, sequentially go to the following folders: “HKEY_LOCAL_MACHINE”, after “SYSTEM”, then “CurrentControlSet” and finally “Control”.
- Right-click on the “Control” folder. In the menu that appears, click on “Create” and then “Section”. This will cause a window to create a new partition in this folder to appear.
- A new untitled folder will appear in the Control folder. Enter "StorageDevicePolicies" as its name. This is what will happen new section, which will automatically open in the panel on the right.
- Now in the newly created one, open the function menu (right mouse button), select “Create”, then click on “DWORD parameter (32 bit)” (for 32-bit OS) and “QWORD parameter (64 bit)” (for those , who have a 64-bit OS).
- Will be created new parameter, in the name of which you should enter “WriteProtect”. Open it. In the window that appears for changing the parameter, enter 0 in the “Value” field. Click the “OK” button at the bottom of this window.
- Close Registry Editor and try using the drive that was previously not working.
- Launch the same program execution window that we already opened in the previous method. Write "gpedit.msc" and click "OK" in open window. The editor we actually need will launch.
- Next, open the “Computer Configuration” folder in the left panel. Then open the "Administrative Templates" and "System" sections.
- In the panel on the right you should find a parameter that concerns recording prohibition. Open it.
- In the open window, check the box next to “Disable”. Click on the “OK” button and close all windows.
- Avoid mechanical influences.
- Protect from dust and water.
- After finishing work, use the mode safe removal devices.
- Check for viruses.
- It is not recommended to use a flash drive in devices with different OSes, or at least not to write or format them in such devices.
- “list disk” – a list of all disks connected to the system will be displayed. You need to choose the right one. You can determine which one corresponds to the flash drive if you go by the size of the disk.
- “select disk X” – selection the desired disk, where “X” is the disk number from the list displayed by the previous command.
- “detail disk” – output detailed information on the selected disk. Make sure you select the required drive.
- “attributes disk clear readonly” – resetting the “read only” attribute.
- “clean” – deletes all partitions on the disk.
- “create partition primary” – creating a partition.
- “format fs=fat32” – formatting a partition with the creation file system FAT32 (if you use the fs=ntfs command, formatting will be performed creating a file NTFS systems);
- exit – exit the program.
- JetFlash Recovery Tool – for Transcend drives.
- Apacer Repair – for Apacer drives.
- Apacer 8 Repair Utility is a set of utilities for drives not only from Apacer, but also from a number of others.
- UFD Recover Tool – for flash drives Silicon Power.
- USB Flash Drive Online Recovery– for AData drives.
- Kingston Format Utility – respectively, for Kingston flash drives.
- AlcorMP is a utility that can work with Transcend JetFlash drives and others that use the AlcorMP controller.
- Phison Format & Restore – formats (low-level and high-level) flash drives with a Phison controller.
- HP USB Disk Storage Format Tool is a universal utility for formatting flash drives.
Nowadays, a lot of users ask how to remove protection from a flash drive.
This need arises at the moment when a person wants to write something to his removable storage device or delete some information from it, but cannot do this due to an error. It says that “The disk is write protected,” so nothing can be done with it.
But there are several ways to solve this problem, and some of them are incredibly simple.
1. Pay attention to the switch
Many drives have a standard switch, which, in fact, is responsible for installing protection.
If this switch is set to the “On” position, the user will only be able to view the contents of the flash drive, but not edit it. He will not be able to copy anything to his computer or write anything new to the drive.
Therefore, carefully inspect your flash drive for this very switch. If you find it, change position and try using the media again.

If after this USB flash drive did not work as expected, you will have to resort to a more complex method of solving the problem.
2. Remove protection via the command line
As you know, Windows has a command line that allows you to very easily and quickly perform various manipulations with the system using text commands. A protected flash drive may also cease to be so if you enter some commands correctly.
In general, you need to do the following:


It is worth saying that this method is quite strong and helps in most cases. But if all else fails, use the Registry Editor.
3. Remove protection through the registry editor
This method is also considered quite effective and efficient.
It involves the following actions:


If this method does not help, you can use the Group Policy Editor.
4. Remove protection through the Group Policy Editor
This method involves the following actions:


It is quite possible that this method will not help either. Then all that remains is to format the flash drive. Then absolutely all its parameters will be removed, including write protection. How to do this is clearly shown in the video below.
If you have any problems or questions regarding all the steps described above, write about it in the comments.
Open menu "Start".
If the drive is detected by the computer, right-click on it.

From the context menu, select "Format".


After formatting is complete, try copying something to it.
If formatting also does not work - a message will appear that the flash drive is write-protected and formatting is impossible, run it using the command line.
How to format a flash drive via the command line
Launch Command Prompt. This must be done with administrator rights. В - this is Windows PowerShell (administrator), you can find this item in the context menu "Start"(to open it you need to click on the button "Start" right mouse button - RMB). In and 8, you can create a new task as an administrator.
In the command line console we write -
Diskpart - the action must be confirmed with the Enter key.
Then we write -
List disk - confirm again with Enter.
Select disk - and the disk number that corresponds to the device (in our example, this is disk 6 - a 16 GB USB flash drive that is write-protected) - confirm.
On at this stage We have determined which number is assigned to our disk (flash drive).
Writing a command
Attributes disk clear readonly This action will clear the disk attributes.
Perform this action if the media does not contain important information.
Clean - confirm. This step is necessary to delete all information on the device, including service information.
Select partition 1 - confirm.
The next step is to write the command -
Active - press Enter to activate the newly created new partition.
Then we enter -
Then we write
Assign to assign a new drive letter to the flash drive.
To exit the command line, write Exit.

After all these manipulations, try creating a new file on the media.
At first glance, all these actions with the command line seem somewhat complicated, but in fact there is nothing wrong.
Follow the step-by-step instructions in the instructions and quickly restore the flash drive when regular formatting does not produce results.
In the command line terminal, the mouse context menu does not work, but the hotkeys do.
It is not necessary to manually enter the spells from the instructions - they can be copied using a combination Ctrl F-Recovery SD- to recover user data on microSD cards. Flash Memory Toolkit- for restoring and testing drives, the ability Reserve copy, complete information cleaning. In most cases, the functionality of a USB flash drive or other flash drive can be restored and even saved or restored, lost data. In rare cases where the media has been damaged mechanically, repairs will be required. service center, but then the cost of recovery will be prohibitive, it’s easier to buy a new flash drive.Conclusion
It is very frustrating when habitual manipulations performed many times suddenly, at one unfortunate moment, fail. It would seem that writing files to a flash drive is a routine operation that is already performed “automatically”. And so, when I try once again to transfer several files to this portable media, a message pops up that this flash drive is write-protected and the operation cannot be performed.
Is this a death sentence, or can the problem be dealt with? Let's figure it out.
Reasons for blocking a flash drive
There can be many versions of why it is impossible to write to the media - from mechanical damage to the flash drive to a stupid joke from someone you know. What led to the blocking in this case is not important. It is much more important to use the portable media correctly. Common recommendations include:
It is much more interesting and useful to find out a way to get rid of the error and write to a flash drive.
How to remove write protection
Let's start everything simple. Having made sure that the flash drive is intact in appearance, nothing is broken and it has not been dipped into liquid, we will gradually find out why it turned out that this disk is write-protected.
Hardware lock
Inspect the storage media carefully. SD memory cards (microsd through an adapter) and some flash drive models have a mechanical switch that blocks the ability to write and format. Check what position it is set to; if it is in “Lock” mode, then all you have to do is move it and remove the write protection.
It is useful to connect the flash drive to a different USB port, or try recording on another computer. This will eliminate the possibility that this computer having problems with USB.
If the flash drive does not open on any computer, then most likely the drive is damaged and will have to be replaced.
Checking the file system type
Please note what kind of file you are trying to write to. As a rule, new flash drives are initially formatted in the FAT32 file system. If the file being written is 4 GB or more in size, you will first have to change the file system to NTFS. Only then will it be possible to record files of any size. 
Virus check
Before you continue trying to unlock your flash drive, it is extremely useful to check it for viruses. The reason may be hidden in some kind of blocking malware ability to write information to disk. 
Use the installed antivirus program, or download the test utility from the website of the developer of such software.
Using the Registry
You can enable disk writing by entering (or checking) the value of the parameter in the registry. To call it, you need to click the “Start” button, enter “regedit” in the search bar, then right click mouse click on the found utility and select the menu item that launches it as an administrator. 
"HKEY_LOCAL_MACHINE\SYSTEM\CurrentControlSet\Services\USBSTOR"
and find the “Start” parameter. 
The value “3” of this parameter means that the entry is allowed, but if a different value is set, then most likely the cause of the error has been found.
Unblocking an entry in the Local Group Policy Editor
It is possible that the ability of some users to write to removable media is blocked on the computer. To remove the ban, you need to make changes to the local group policy. You should click the “Start” button, enter “gpedit.msc” in the search bar, right-click and run the snap-in as administrator.
“Computer Configuration->Administrative Templates->System->Access to Removable Storage Devices.” 
Parameter value " Removable drives: Disable recording" should be "Not set" or "Disabled". Otherwise, entry to external media prohibited.
You need to reboot the system and then try again to write to the flash drive.
Removing recording protection using Diskpart
If there is still no result, then you can use the command line and the Diskpart program included in the OS. You need to click the “Start” button, enter “Diskpart” in the search bar, and on the line that appears with the name of the program, right-click to run it as an administrator. In the window that appears, enter the following commands.
 If no recording was made because the “read-only” attribute was set, then steps 5-7 can be skipped. Otherwise, it is advisable to format the flash drive, first saving all important data.
Using third party utilities
It is possible that the flash drive is not formatted, giving one or another error. In this case, to solve problems it is advisable to use proprietary utilities, produced by many flash drive manufacturers. Some of them can be listed:
All utilities must be run as administrator.
You can clarify the type of controller used in the flash drive by using, for example, the “Flash Drive Information Extractor” utility. 
Conclusion
If none of the recommendations help solve the problem, then the drive will probably need to be replaced. You can use specialized utilities designed to work with a specific type of controller. There is a possibility that the flash drive can be revived. The question is how much you can trust this drive after a serious failure.