How to remove the latest windows 10 updates. Remove Windows updates
Read also
Any person who heard the word “updates” for the first time will say that these are certain measures aimed at improving the product. Their task is to fix bugs and shortcomings in any program, not necessarily in Windows 7. For example, a year after the release of the application, the company decided to improve the interface and released a package of updates that the user must download and install, after which he will see these changes.
Updates in Windows 7 are usually aimed at fixing security issues, compatibility operating system with drivers and software. This also includes software compatibility issues that require the installation of the Microsoft . net framework and so on.
Unfortunately, you can’t do without problems with updates - after a while they become irrelevant, as new ones appear that replace them. In this regard, there is a "dump" in the section with installed updates, and on the hard drive I want to have more free space.
There is only one solution: remove all Windows 7 updates and reinstall only the ones you need. But what if you have a thousand of them? Windows 7 does not have a feature that allows you to uninstall all updates at once, so third-party software is indispensable here.
Problems that may arise during de-update
It is recommended to create a system restore point, since the methods discussed in this article can lead to unpleasant consequences, for example, certain programs may fail to work, the OS may start to “slow down”, as a result of which the system may crash, etc. The only way fix it: roll back Windows 7 to the point where the updates were installed.
Not all updates will be removed, but only those that do not require user action. The remaining updates will have to be uninstalled manually.
First, consider a simpler method that will take just a few minutes of your time, while the second is a longer one that requires certain software. All these processes will not interact with the update center in any way. Just in case, temporarily disable the search for updates to successfully complete operations.
Removing Windows 7 updates through a batch file
Do you know the method of uninstalling updates through command line? So, this method simplifies it: now you will not write the command “wusa.exe / uninstall / update number” every time - all possible updates will be automatically removed from your computer.
Let's create a file with the extension .bat (batch file). To do this, write the following code in notepad:
@echo off
color 0A
mode con: cols=40 lines=12
setlocal enabledelayedexpansion
Set templist=%TEMP%\listTMP.txt
set list=%USERPROFILE%\Desktop\uninstall_updates.cmd
echo.
echo.
echo Please wait
echo.
echo.
if exist %templist% del %templist%
if exist %list% del %list%
wmic qfe get hotfixid>>%templist%
call:1 "KB" "KB:"
echo DONE
timeout /t 3 /nobreak > nul
exit /b
:1
for /f "tokens=1* delims=]" %%a in ("find /v /n "" ^<"%templist%"") do (
if not "%%b"=="" (set line=%%b) else (set line=not)
set newline=!line:%~1=%~2!
set newline=!newline:not=!
echo wusa.exe /uninstall /!newline!/quiet /norestart>>%list%
::set templist=%list%
goto:eof
Then save by ending the file name with .bat and selecting "All Files". After launching it, uninstall_updates.exe will appear on the desktop. To start the procedure for uninstalling updates, run it and wait for the process to complete (the command line window will automatically close).

In my case, when the program finished its work, only 90 modifications out of 233 remained. We can safely say that its task has been partially completed. Restart your computer to reconfigure Windows.

Uninstalling updates with Revo Uninstaller
To complete the update removal process, we need the Revo Uninstaller program. You can buy it on the developer's site for $39 or download it somewhere, it's up to you.


After launching Revo Uninstaller, we see a list of programs available for removal, but there are no updates here. To fix this, in the top menu, click on the "Tools" tab and select the section with options (Alt + O). In the navigation panel on the left, click on the “All programs” item and check the necessary settings: show system updates, show system components, click “OK” and you can notice significant changes in the list of programs - applications will appear, the name of which will contain the update number.
Select them and click Remove. Of course, this method requires certain actions from the user, but you don’t have to manually click on each component in the Windows 7 Update Center.
All users of modern computerized devices (be it a computer, phone or any other gadget) have at least once encountered a situation where a program or even an operating system asks for an update. In the case of Windows patches(that is, updates) appear, almost every day.
On the one side This is good- because day by day technology is getting better and in order for the computer to keep pace with the times, it is required at least sometimes to update the programs installed on it and the operating system as a whole.
What does the Windows update give
As you know, nothing is perfect in the world. The same can be said about the work of modern operating systems, including Windows. After the official release of the OS, it takes a lot of time for the system to work equally effectively on all computers.
From time to time, developers receive various complaints from users about the poor performance of the OS. To fix problems, the creators of Windows have to release patches in the form of files stored on official servers. Just these files are downloaded by the system, so that later use them to solve certain problems in the work.
Thus, timely download Windows updates- it's kind of, system performance guarantee from developers.
Why uninstall updates
Unfortunately loaded. updates are not always good for the computer. This is due to the fact that they sometimes do not fit under specific car user. After all, today in the high-tech market competes with each other a large number of manufacturers motherboards, video cards, processors and other computer components. These components are built in different factories using at least slightly different source materials, which often results in problems with Windows running on a particular computer.
It is in such cases that updates do not lead to improvement, but rather, deterioration OS performance. This usually happens after installing the so-called optional patches. These updates, as a rule, are not important for the system as a whole, but only for some programs. Experienced users most often do not even download patches marked " Optional”or even decide to disable updates, thereby protecting themselves and the computer from unnecessary problems.
Be that as it may, in order to return the system to working condition after the next patch, a rollback is required, namely - removing such updates.
This can be done in different ways. Let's consider the simplest ones.
Removing patches through the Control Panel
The easiest way to remove patches manually in Windows 7 is to use the system tool. To get started, you need to go to Windows Update" through Control Panel. The latter is in the menu Start».
Here you should find the section " Windows Update' and go to it.

To view the list of currently installed patches, click on the link "", which is located in the left corner of the bottom of the window.

In the list presented, you will see several patches at once (or maybe in your case there will be only one) that have already been installed on the computer.

You only need highlight patch, which you want to delete, right-click on its name and select the appropriate item from the drop-down list (you can also just double-click on the name). Pay attention first to installation date the patch you are trying to remove. If you roughly remember the day after which your computer started acting up, then select a patch from the list, installed at that moment. Immediately after this action, the computer should restart.

If you need to completely remove immediately several patches, but unfortunately you can't do it all at once. This means that it is impossible to allocate a certain number of patches, so you have to delete each one in turn.
Using the command line
If for some reason you are unable to remove a particular patch through the Control Panel, or you want to simplify the process uninstalling multiple updates, you can use command line- she is also able to perform this task.
To get started, run it by pressing Win on the keyboard + R and typing cmd in the window that appears

In the window that opens, you need to write the wusa.exe /uninstall /kb command:<номер>and press " Input” (by “number” is meant the number of a particular patch). It can be found in the section "", which was mentioned above.

You can find out full information about the capabilities of the wusa.exe program by running the wusa /?

After entering the command and pressing the Enter button, a window with help information will appear:

If you know for sure (for example, you saw it on some forum) which of the important or optional updates caused problems with your computer, then write exactly its number.
Automatic removal of multiple updates
If your goal is to remove a large number of updates, it is easier to perform such a procedure by creating a file with the extension bat. To do this, open a text editor and create a file containing the following lines of code: wusa /uninstall /quiet /norestart /kb:1234567
Here's what it looks like in an example (file created updatedel.bat):

Keys quite And norestart are needed in order to prevent the appearance of the uninstall confirmation window for each update and automatic reboot.

How to disable updates
If you don't want your Windows to be updated, you can disable this feature in settings. For this:
- Go back to Update Center;
- Go to the section " Settings", which is on the left side of the window;
- To disable updates, select from the list " Do not check for updates”, and then press OK .
Related videos
Name Removing required updates does not fully reveal the meaning of what is described in the article, since it is not entirely clear what exactly is meant by the term "mandatory". The material could be titled as Removing non-removable updates, but then it's not entirely clear why they suddenly became unremovable: by the will of the developer or due to errors with the component store. There is another option to designate as removing updates that are not intended to be removed, but this is somehow redundant, or something.
More recently, I discovered one curious feature of some updates: they are not removed by standard means of the operating system. In practice, a situation arose in which I could not remove the "broken" update from the system. As we delved deeper into the subject of the question, it turned out that there are different types of updates in Windows, and that the particular case of the inability to remove some of them is not at all the result of any local error, but rather reflects a feature. Apparently, this is explained by the architectural nuances of the update mechanism. In practice, it is difficult to create such a system of updates interconnections, in which each update will be completely autonomous, that is, independently of the others, and, accordingly, can be removed without any consequences. But even more importantly, some updates for the system are really critical, because they are integrated into it quite deeply. For example, the update mechanism itself (service stack) is provided by a set of modules (installer, libraries, etc.) that are necessary for installing subsequent updates and on which the performance of the mechanism as a whole depends. Accordingly, all servicing stack updates that introduce algorithmic changes cannot simply be uninstalled, as some features of those algorithms that have already installed subsequent service packs would then become unavailable. Removing such updates is fraught with serious consequences for the system, such as the destruction of the component store, and as a result, potential problems with the performance of the operating system itself. In fact, everything is so scary, since there are only about a dozen such mandatory (non-removable) updates, for example, in the Windows 7 system :) But it’s still worth knowing about this nuance, as well as having an understanding of how to produce remove required updates.
Problem
From a technician's point of view, installing and uninstalling system updates is a trivial task. In our age of the global Internet, updates to the system are installed constantly, often completely unnoticed by the user. Updates are security fixes for various components, modules containing additional functionality for existing applications, as well as new software. However, along with the tasks of installing updates, the tasks of removing system updates often also arise. The reasons for this can be quite diverse, ranging from the need to simply reinstall any of the updates to achieve correct performance and ending with the need to fix dependency problems and the integrity of the component store.
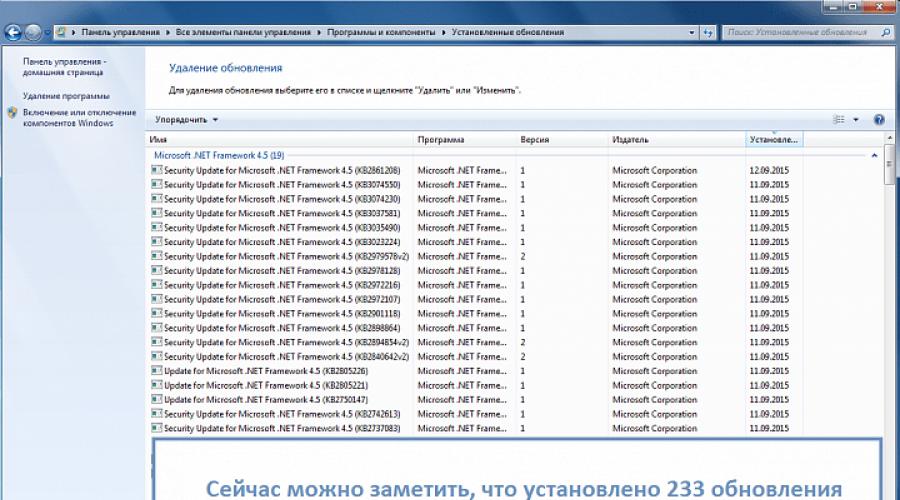
The system provides several ways to remove updates from the system, for example, through the Windows Update, applet Installed updates. In this case, the user simply selects by clicking the left mouse button (marks) the update of interest to him and by clicking the right mouse button opens the Delete menu, or selects the item of the same name from the top panel:
everything is trivial here. But with mandatory updates, everything is somewhat more complicated, since with similar actions we do not see the usual controls:

when trying to uninstall this component from the command line using the wusa utility:
wusa /uninstall /kb:2522422
an error is thrown: The Microsoft Windows Update is a required component for this computer, so uninstallation is not possible.

In this case, the specialist has a reasonable question: why are you doing this to me? :) The fact that the system considers some updates mandatory and does not allow them to be deleted does not at all guarantee that these updates cannot be damaged and cause various kinds of problems. Therefore, in some cases, it becomes necessary to remove it. Is it possible to remove such non-removable updates from the system?
Solution
The changes described in this section may break the component store!! You perform the actions in this section at your own peril and risk!!
Therefore, act very carefully, preferably by making a full backup of the system or by creating a restore point. The main thing is to understand why you are doing all this. If you need to fix the consequences of a crooked update, then uninstall the required update, and then install it again. In a successful scenario, after uninstalling / reinstalling a non-removable update, you will be able to correct the consequences of a crooked update, however, in the worst case scenario, you will bring the system to a non-working state, since the update may turn out to be key. The result could be component store corruption with the error STATUS_SXS_COMPONENT_STORE_CORRUPT .
At what level is the non-removability of such mandatory updates ensured? At the level of parameters in configuration .mum files.
Mum file (Microsoft Update Manifest / Microsoft Update Manifest) is a Windows update configuration file in XML format that contains package parameters: name, identifier, installation language, dependencies, action flags, and others. It is used as an identifier (symbolic name) of the maintenance service (stack) in order to perform enable/disable/remove operations on the package using various service utilities (for example, the Package Manager (pkgmgr)). The manifest file contains the name of the serviced update in its name and is located in the %WinDir%\servicing\Packages directory;
Msu file (Microsoft System Update/Microsoft Service Pack) - a stand-alone Microsoft Update package that contains metadata (describing each update package contained in the .msu file), one or more .cab files (each .cab- file contains individual update modules), .xml file (which describes the update package and is used by the Windows Update Standalone Installer wusa.exe to perform the update installation process), properties file (the file contains property strings that the wusa.exe utility uses.
The .mum file has a parameter named permanence that takes two values: removable and permanent . Service packs that are not desirable to be removed from the system are declared by Microsoft developers as "permanent" (permanent), while all other (normal) service packs are marked as "removable" (removable). Therefore, the process of changing the update type from non-removable to removable is reduced to changing this parameter in the corresponding .mum file.
General algorithm of actions
At the request of readers, the algorithm of actions is given for the widest possible audience of users, so I tried to describe the process at an accessible level.
- After a typical system update is installed, the corresponding .mum files are placed inside the %Windir%\servicing\Packages\ directory. Therefore, open in C:\Windows\servicing\ , put the cursor on the Packages subdirectory.
- Often there is a problem with access to objects in the %Windir%\servicing\Packages\ directory, since full access permissions are set only for the TrustedInstaller system account. Therefore, to make changes to access rights, we click on the Packages directory with the right mouse button, select the Properties item and then go to the Security tab. In the window that opens, immediately after the "Groups and Users" section, click the Change button, then click Add, in the window that opens, write in the input field All, click Check names, select from the found one, click OK, then set full rights for the newly added group. Close the window, in the main window Security, at the very bottom, click the Advanced button, in the newly opened window, in the "Permissions" tab, select the newly created group (Everyone), click the Change permissions button, then at the very bottom of the new window, check the box "Replace all child object permissions on permissions inherited from this object", click OK everywhere, closing all windows.
- We go into the Packages directory, look in it for the .mum file (s) related to the update being removed. Usually they have a name containing the full name of the package being searched for:

- Open the found file for editing:
- We are looking for a string containing the word permanence , replacing the parameter value with permanence="removable" . In the example above, this is line number 4 . Next, close the file and save the changes made.
- We perform similar actions for all .mum files associated with the required non-removable update package, since two or more .mum files may be associated with some updates.
- After finishing the editing process, close all windows related to updates. In some cases, the changes take effect instantly, that is, the update will become available for removal immediately after opening and reindexing in the section

Windows 10 updates do not always bring stability, new functionality and security to their users. It is not uncommon for cases when, after their application, serious failures in the system were observed. If this happens, there is nothing left for us to do but remove the Windows 10 update.
In this article-instructions, we will just talk about how to remove such patches, and we will do this in several ways at once. It will also consider what to do in order to further prohibit the installation of certain types of files and eliminate the error associated with them. To work with the system, you must have administrator rights. In addition, there is a manual on our website.
The easiest way to delete such data is through the standard system settings or the control panel. Follow our step by step instructions.
Using Windows 10 Settings
- First, open the system configuration menu. This can be done both through Start, and through the notification curtain or Windows 10 search. We will use the simplest option - hot keys. Press Win + I at the same time and you will immediately be taken to the settings panel. Here we go to the section that we circled in the screenshot with a red frame.


- Next, click on the "Update History" entry.


- Click on the inscription indicated in the picture.


- Here are collected all the patches that were applied to our system. They can be sorted by name, date, manufacturer, or title. If you select an entry, a link to the WEB help about it will appear below, and to remove a specific update, right-click on the object and select "Delete". It can also be done using the button located a little higher.


- Now you need to confirm the operation being performed. To do this, click on the button indicated in the screenshot.


- The process of uninstalling the update has begun. Depending on the type of update, its size and other parameters, this may take a different time.


After the reboot, the update will be removed from your computer and, if it caused system crashes, the problem will be solved.
Note: If your computer has suffered a serious crash and Windows has stopped starting, you can try booting into safe mode and delete files from there. How this is done we described in.
Using the control panel
In order to go to the list of updates, you can use the control panel. To do this, we do the following:
- We launch the control panel, for example, through the Windows search. To do this, click on the magnifying glass icon, which can be found in the lower left half of the taskbar, and enter the query in the search field. Next, click on the result - we marked it with the number "3".

- Select the "Programs" item.

- Click on "View installed updates".


As a result, the menu that we have already seen above will open, and in exactly the same way as last time, we will be able to remove unnecessary Windows 10 patches.
Delete via command line
You can also remove low-quality updates in the system using the command line. We need to take these steps:
- We launch the command line - in Windows it is called cmd. We enter these three letters in the search field, which will open after clicking on the magnifying glass icon, and right-click on the result indicated in the screenshot. We need to select the "Run as administrator" option.


- To see a list of all the fixes that have been applied to the system, write a statement like: wmic qfe list brief /format:table and press Enter.


- You can remove any update with a command like: wusa / uninstall / kb: xxx, where xxx is the number of our patch (you do not need to enter the letters KB).


- Windows will ask for confirmation to remove the update - we agree and click "OK".

- After that, the Adobe Flash Player security patch will be completely removed from our computer.


If we add the /quiet prefix to the patch removal command that we used in step 3, the system will execute it without prompting. If a reboot is required, it will also occur without prompting.
Blocking the installation of the selected update
Shortly after Microsoft introduced Windows 10, the developers created a program called Show or Hide Updates. The application is needed in order to disable the installation of certain updates, and separately security patches or drivers. Let's see how to use the utility.
- When the app is downloaded, find it on your PC (default is the Downloads folder) and launch it.

- When the program starts, click the button labeled "Next".


- The diagnostics of our PC has begun, we are waiting for its completion.


- We select the item we need. The first section hides the selected updates, the second, on the contrary, shows them.


- From the list, select those updates that you want to hide, and when completed, click the button with the text "Next".

- Hiding the latest updates has started, this will take some time. We are waiting for the completion of the process.

This starts the process of hiding file updates. No more patches will be installed for the selected parameter. Click the "Close" button.

If you need to undo the action and resume updating Windows, run the program again and use the Show hidden updates option. Just like in the first case, select the patch you want to update, after that everything will start working.
Warning: You must have administrator privileges to uninstall downloaded updates.
Removing the update icon
Another point worth mentioning is the annoying notification icon that constantly informs you about the need for a system update. Moreover, when we disable these fixes, it makes no sense at all. Unless to display useless messages.
In order to disable an unnecessary icon, we will use the Windows 10 control panel, or rather, the notification center in it. By following our step-by-step instructions, you can easily achieve a positive result.
- We launch the control panel by finding it through the search (we examined how this is done a little higher), and select the "Programs" section.


- We go to the section that we marked with a red frame.

To disable reminders, find and uninstall update KB3035583. Ignore operating system warnings. When the removal process is completed, you can close the window. But in order for the changes to take effect, you will have to restart your computer.
Instead of total
We considered the question: how to disable automatic updating of Windows 10. Before removing it, carefully study what they are for: deleting everything in a row, you can compromise the security of the system. We hope what you wrote helped you. If you still have any questions, do not hesitate to ask us in the comments, and we will definitely help you solve the problem.
Any update, especially if it affects system files, is a potential threat to system stability. Despite the fact that updates are tested both by Microsoft itself and by administrators themselves, situations when installing an update leads to a complete inoperability of the system happen from time to time. What to do in this case? We will talk about this in this article.
The main problem, which is also an undeniable advantage, of Windows systems is their diversity. The number of possible combinations of hardware and software running on it is almost impossible to calculate, therefore, no matter how carefully you test updates, there can always be a combination of hardware and software that is incompatible with a given update. Most often, problems are associated with third-party drivers or low-level software running at the kernel level.
Separate conversation - unlicensed systems. Most often, activation is bypassed by patching and replacing the kernel. This in itself is unsafe and fraught with potential problems, and with updates that affect the kernel, you risk getting a system crash, which has already happened more than once. Various amateur assemblies available on the Internet are also subject to this drawback, many assemblers immediately include a patched kernel in the system or force the activator to run immediately after installation, without checking the presence and validity of the system key.
That's what happened last Tuesday of patches. Another security update KB3045999 for Windows 7 on reboot resulted in a "blue screen of death" (BSOD).
Users burst out with regular reproaches to Microsoft, releasing "buggy" updates, but it soon became clear that only systems with a patched kernel were affected by the error. Nevertheless, the problem also affected quite law-abiding users who were too lazy to compile and, in order not to download gigabytes of updates, simply downloaded a suitable assembly from the network.
We will not discuss the moral and legal aspects of using unlicensed software, let everyone decide this issue on their own, but rather consider ways to restore the system.
Installation disc or Windows PE
This is the most affordable, although not the easiest way. Any disk from a compatible system will do, the only condition is to respect the bit depth. You should also remember about backward compatibility, i.e. To restore Windows 7, you can use disks not only from Windows 7 and Server 2008 R2, but also from Windows 8 / Server 2012. In some cases, you can try using a disk from an earlier system, but not all features may be available, for example, it will not work to implement the instructions below with a disk from Windows Vista / Server 2008.
If you are using Windows PE, then it must also be created based on the current version of the OS or later, the bit depth must also match.
Boot from the installation disk and on the screen prompting you to install the OS, select the item System Restore.
 The utility will detect the installed OS and offer to switch to automatic system recovery, there are few options here, so click Further.
 But it’s completely optional to wait for the wizard to finish, especially since he won’t be able to help us, so on the next screen we press Cancel.
 Then do not rush and in the window that appears, select the link Show advanced system recovery options.
 Now you have the opportunity to exit to the command line, which you should use.
 If you booted from Windows PE, then you will be taken to the command line immediately.
After that, you should specify what letter the system disk received. With standard markup, this will be the letter D, the letter C will be received by the service section. To check, run:
 After making sure that this is indeed a system drive, you can proceed to the next steps. Before that, it would be nice to clarify the name of the problematic update, as a rule, this is easy to do using the Internet. Then get a list of all installed packages with the following command:
DISM /Image:D:\ /Get-Packages
In the output, we find the number of the required update and copy the package name, if it is unknown, then remove all packages with the date of the last update.
 To copy the name of a package on the command line, select it and press the key Enter, just right-click to paste.
To remove a package, run the command:
DISM /Image:D:\ /Remove-Package /PackageName:Package_for_KB3045999~31bf3856ad364e35~amd64~~6.1.1.1
where as an option PackageName provide the package name obtained in the previous step.
 Microsoft Diagnostics and Recovery Toolset
Diagnostic and Recovery Toolkit ( Microsoft Diagnostics and Recovery Toolset (MSDaRT) is a tool based on Sysinternals' ERD Commander and available through Software Assurance (SA), but is easy to find online. To work with Windows 7, you will need MSDaRT at least version 6.5, version 8.0 is current
We boot from the MSDaRT disk, remember that bit depth is a mandatory requirement, and on the first screen, after choosing a language (in our case, version 8.0 is used), select Diagnostics:
 Then Microsoft Diagnostics and Recovery Toolset:
 After that, a window will open in front of you with a choice of available tools, we are interested in Hotfix Uninstall or Removing fixes.
 Working with the wizard is not difficult, select one or more updates and remove them:

As you can see, working with MSDaRT is much more convenient than with the command line, but it requires you to prepare for possible emergency situations in advance.
In both cases, after removing the problematic update, you should reboot and carefully analyze the reasons for the failure. We hope that this material will help you quickly restore the system to working capacity after an unsuccessful update.