What happens if you change the processor. How to change the processor on your computer to a more powerful one
Read also
Replacing the central processor on a computer may be necessary if the main processor breaks down and/or becomes obsolete. In this matter, it is important to choose the right replacement, and also make sure that it matches all (or many) of the characteristics of your motherboard.
If the motherboard and the selected processor are fully compatible, then you can proceed with the replacement. For those users who have little idea of what a computer looks like from the inside, it is better to entrust this work to a specialist.
At this stage, you need to purchase everything you need, as well as prepare the computer components for manipulating them.
For further work you will need:
- New processor.
- Crosshead screwdriver. You need to pay special attention to this point. Be sure to ensure that the screwdriver fits the fasteners on your computer. Otherwise, there is a risk of damaging the bolt heads, thereby making it impossible to open the system housing at home.
- Thermal paste. It is advisable not to skimp on this point and choose the highest quality pasta.
- Tools for cleaning your computer internally – not hard brushes, dry wipes.
Before starting work with motherboard and turn off the processor system unit from food. If you have a laptop, then you also need to remove the battery. Thoroughly clean the inside of the case from dust. Otherwise, you may introduce dust particles into the socket when changing the processor. Any particle of dust that gets into the socket can cause serious problems in the operation of the new CPU, including its inoperability.
Stage 1: removing old components
At this stage, you will have to get rid of the old cooling system and processor. Before working with the “internals” of a PC, it is recommended to place the computer in horizontal position so as not to knock down the fasteners of certain elements.
Follow these instructions:

Stage 2: Installing a New Processor
At this stage, you need to correctly install another processor. If you selected the processor based on the parameters of your motherboard, then serious problems should not arise.
Everyone, even the most conservative owner of a personal computer, sooner or later wonders how to update their computer. Purchased only two or three years ago, it is already hopelessly outdated, especially in light of the existence of inexpensive modern alternatives. Not everyone decides to change everything at once, especially since simply replacing the processor often provides an opportunity to “breathe a second life.” With due care, you can do this yourself.
Replacing the processor begins with reading the instructions for the mainboard used). There are now two main manufacturers of central processors - Intel and AMD. Their products are incompatible with each other either electrically or in terms of the configuration of the pins. In addition, even from the same manufacturer, different generations of processors can differ radically.
Replacing a processor requires understanding the meaning of the word “socket”. Physically, the central one is a microcircuit. There are two ways to connect it to the motherboard:
Classic, when many thin copper pins are soldered to one side of the CPU. The microcircuit is inserted with these pins into a special connector (socket) on the motherboard. AMD follows this method;
Intel has taken a completely different approach. The pins are soldered into the connector itself, and the CPU chip only has copper pads.
Based on this feature, you can immediately identify the manufacturer, but much more features are more important installations, which we will discuss below.
Let's summarize: anyone who has decided to increase the speed of their computer and is studying information on the topic “replacing a processor” should look at the instructions for the motherboard in the “CPU” section and find out the list of supported processors. All you have to do is go to the store and purchase the desired processor from the list.
The choice should be based on the frequency and number of cores. Moreover, the latter gives a more significant increase in productivity in modern applications.
Replacing the processor in a laptop and computer is similar. The difference is that the entire internal cooling system of the laptop needs to be removed.
Let's consider the order of replacement in personal computer. Here new processor purchased. First you need to extract motherboard from the body. With enough experience, you can replace the CPU directly in the system unit, but beginners should not do this.
We disconnect all the wires from the system unit, lift it onto the table towards the light, lay it on its side and remove the case cover. Now we take out the expansion cards. Task: release the motherboard and remove it from the case. Let's remember where everything was!
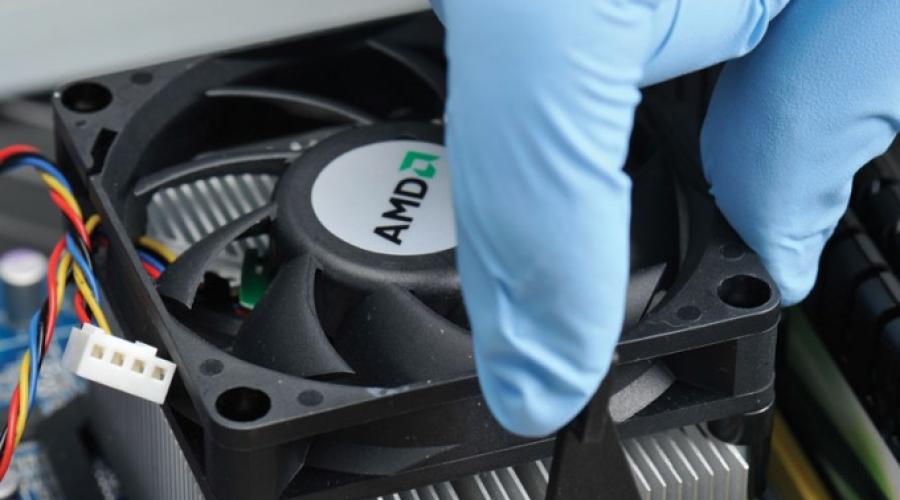
The cooling system with the processor underneath remains on the motherboard (they do not interfere). We dismantle the cooling. If it is standard, then no screwdrivers are required. Typically you need to twist the plastic clip(s) and remove the entire assembly. All retaining locks are always visible, so we do everything carefully. Do not move the radiator to the sides (especially for the LGA socket), but only pull it up. The processor is held in the socket by a pressure lever. Unlock it and, holding the two sides of the CPU with your fingers, take it out. Do not touch the contacts and do not place them on metal!
We take the new processor and place it in the socket. You need to be very careful when working with LGA and not put any effort. There is a key mark on the CPU case that indicates the orientation in the socket. Also, many CPU models have a special shape that does not allow them to be inserted into the socket incorrectly. The instructions for the processor always indicate the installation method (the socket key must match the key on the CPU). We check that the processor is placed without distortions and fix it by turning the clamping lever. If there is no thermal paste on the bottom side of the radiator, then apply it to the processor cover. If it is available (all modern models are like this), all that remains is to place the cooling system. Assembly is performed in the reverse order of disassembly.
Hello. Today we’ll look at a situation where you want to replace your processor on a laptop. We will take a full look at the reasons and what is needed for this. (We recommend reading the note about cleaning your laptops from dust and debris)
- Content
- Introduction
- Reasons for replacing the processor
- Which laptops can do this?
- Conclusion
In short: download CPU-Z from the Internet, run it, see detailed information about the process. If in the Package line you see PGA at the end, then the processor is socket and suitable for easy replacement. If there is a BGA, then it is solderable, which means it can only be replaced by soldering.
Replacing the processor in laptops. Compatibility. Nuances.
Is it worth changing the processor in a laptop?
First we must clearly decide the feasibility of such a replacement. To do this, let’s look at the main reasons to see if they are significant:
- When replacing, you will be able to get 200-400 megahertz clock frequency
That is, for example, there was a central processing unit (CPU) with a frequency of 1.5 GHz, but it will become 1.7 or 1.9 GHz. The fact is that in fact the increase in system performance in this situation will be only a few percent.

Ask yourself, will you notice it? In most cases, this increase in megahertz will only be noticeable by technical specialists and people who work in depth with computers. So think again, is this replacement worth the money?
- Replacing from 2 to 4 cores
If the laptop is used only for light tasks - office programs, watching videos, surfing the Internet - you won’t notice the increase at all. To really experience it, you need to work with video coding or editing, and play powerful games. Then perhaps you will see an increase, and only if the condition of a balanced system is met.

This means that not only the processor is responsible for the power of the laptop, but also RAM and video card. For games, the video card generally comes first; it is the one that processes graphics in games. But more on that below.
- Will the speed of games increase after replacing the CPU?
This is also a quite obvious question. The fact is that not only the CPU is responsible for games, but also the RAM and video card. Even more important than anything is the video card - it processes graphics in games (and sometimes in video processing) and the more powerful it is, the better the games will work.
Laptop upgrade - changing the processor, RAM, HDD to SSD
Therefore, first of all, it is important to find out what kind of video card you have; if it is built-in, then no processor will help make the laptop more powerful. Also, if it is too weak, even though it is not built-in, then again replacing the CPU will not help.

If you have thought about your idea well and decided to continue solving the issue of replacing the processor in your laptop, then read on.
Introduction to CPU Replacement
Replacing a processor in a laptop is much more difficult than replacing a computer. Laptops generally have constant technical equipment for most users. If they change anything, it is:
- RAM - you can add more or replace it with a new and working one
- Hard drive - can be replaced with a copy with a larger capacity or speed, or simply with a working one if the old one is broken
- The processor is quite rare, since it is often already soldered into the motherboard; it can only be replaced by re-soldering. Of course, it’s not always so difficult, which we’ll look at in this article.
- Video chip - even less often it can be replaced and also, usually only by re-soldering
- We will not consider parts like disk drive, wi-fi module, since they do not affect the speed and performance of work, only the functionality
If we take a computer, or rather its system unit, then we can replace any part with a better one. Be that as it may, you can replace the processor in a beech tree, although it is more difficult. To do this, let's start looking into this issue.

Reasons for replacing the processor in a laptop
- The laptop has a powerful video card and I would like to install a more powerful processor
- Unstable CPU operation
- Maybe for some other reasons
Let's start with the fact that not all processors can be replaced. In beeches they can be soldered into the board from the factory. In this case, you will have to take the laptop to a workshop, they will do the resoldering work. But it can be expensive, so resoldering is only advisable for medium or powerful expensive beech trees.
Also, the processor may not be soldered. Which means that it can be easily replaced even at home, but only if you have disassembled laptops, since you will have to disassemble it completely, take into account all the little things when replacing it, and put everything back together. Often this cannot be done at home. But at least it won't be very expensive to have it done at a repair shop.
In order to find out whether the processor is soldered in or not, you can use special program, which shows the complete technical information by CPU. It's called CPU-Z. It is completely free and can be easily downloaded from the official website. By the way, its size is also very small, about 2 megabytes.
You download it from the Internet, run it, and see detailed information about the CPU. If in the Package line you see PGA at the end, then the processor is socket and suitable for easy replacement. If there is a BGA, then it means it is soldered, which means it can only be replaced by soldering.
In any case, it is important to fully study the technical information on your laptop. Plus, look up this question on the Internet by searching for a laptop model and replacing its processor.
It is also worth considering that with the advent of a new processor, its heat generation may increase (it is more powerful, which means it emits more heat during operation), so you need to make sure whether it can be cooled installed system cooling, because it was designed for the previous, weaker one.
Conclusion
In the end, it is worth noting that the process of replacing a processor in a laptop is quite complex and painstaking. Even if you decide that a replacement is advisable, finding a suitable copy will not be easy. Laptop CPUs themselves are rarely sold; finding the right one for you will not be easy.
In any case, if you do not have the necessary knowledge, it will be difficult to solve this issue on your own. The most important thing is to calculate the material side of the matter; maybe it will be cheaper and easier to sell this beech, albeit at a reduced price. But in return, when you buy a new one, you will receive:
- The more powerful model you need for your needs
- The new copy will work better, at least due to its novelty (well, it is clear that it will also be more powerful, including due to the novelty of the device, its performance will not increase much)
- Save a lot of time without searching for the right processor to replace, as well as searching for a reliable repair center to carry out this operation
It's a pity that our electronic friends are aging too quickly. Now the time has come when yesterday’s still nimble laptop began to “crawl like a turtle” and could barely run the programs and games you needed. If the cost of a new one doesn’t fit into your budget, and you can’t stand the brakes anymore, it’s time to think about an upgrade.
Let's start with the most important part of a computer - the central processor. Today we will talk about how to replace the processor on a laptop of any brand - Asus, Acer, Dell, HP, Samsung, Lenovo, MSI, etc., with a more productive one.
Is it possible?
Since you are thinking about replacing the CPU, you, of course, want to install something newer and more powerful. Unfortunately, this is not always possible. However, we’ll talk about compatibility a little later; first you need to find out whether your laptop is even amenable to such an upgrade. More precisely, whether its processor is removable.How to find out:
- Using Device Manager, determine your processor model.
- Open the model specification on the manufacturer’s website and determine the type of its case (socket).
This example shows a removable AMD processor, which can easily be replaced with another (not surprising, since it is desktop).
And here’s another one – a mobile non-removable one:
It, of course, can also be replaced, but only in service centers on special equipment. Such CPUs are replaced only in case of malfunction.
What in these designations indicates that the processor is removable/non-removable? Letters in the name of the housing type. Mention in any combination of the abbreviation " BGA» ( b all g rid a rray) indicates that the chip is not removable. Its contacts are an array of balls with which it is soldered to the board.
In the name of removable cases Intel processors Usually there is a combination " P.G.A.» ( p in g rid a rray). Their contacts are an array of “pins” or legs that are inserted into the connector (socket).
For AMD products, everything is ambiguous. It is not possible to determine whether the CPU is removable just by looking at the name of the case. Thus, the housings of mobile processors FT3, FP4 are non-removable, and S1, FS1, AM2 are removable. You can find information about them on the Internet.
In addition to “Uncle Google”, programs can find out the socket type of your “pebble”. Below are screenshots of the utilities HWiNFO 32/64 , CPU-Z And Aida64.
They will also bring final clarity to the issue of “upgradability” of a laptop if the processor is produced in cases different types, such as, Intel Core i3-2310M.
What parameters are used to determine compatibility?
Having made sure that the processor can be dismantled without a soldering station, let’s turn our attention to the parameters by which compatible models are selected. There are three of them:- Type of shell(socket). Naturally, it should be the same for both the old and the new model.
- Kernel codename. It must also match, otherwise the platform chipset will not be able to interact with the processor. Interchangeability of CPUs with different codenames within the same microarchitecture (for example, Sandy Bridge and Ivy Bridge) is sometimes possible, but is the exception rather than the rule. If you want to conduct such an experiment, ask about the experiences of other users.
- Thermal power (TDP). The new CPU should have the same or lower value as the old one. It is not possible to go higher, since the cooling system will not be able to provide the necessary heat removal. The laptop will still slow down, only now due to overheating. And, very likely, it will quickly fail.
The CPU manufacturer’s website or the utilities I mentioned above will also help you find out these parameters.
Finding a compatible model
Let's take an example to see what we can change the above Intel Core i3-2310M provided that we got a modification in a removable case. Let's find out its characteristics according to the specifications on the Intel website:- Socket – PPGA988.
- Codename: Sandy Bridge.
- TDP (Intel calls this parameter “design power”) – 35 W.
It turns out that a Sandy Bridge CPU in the PPGA988 package (other names G2 or rPGA988B) with a TDP of up to 35 W inclusive is suitable as a replacement.
Let's turn to pivot table mobile processors on the site notebook-center.ru and select models with suitable parameters:
- Intel Core i5-2540M
- Intel Core i7-2620M
- Intel Core i5-2520M
- Intel Core i5-2450M, etc.
All of them can replace our Core i3-2310M.
The table does not list socket types. To find out, just open the model’s page by clicking on its name.
By the way, using the same table you can evaluate the feasibility of the replacement by looking at the benchmark results, which are given in the last five columns. Or visit the website cpuboss.com, where are given detailed comparisons different CPUs.
How to remove the old processor from a laptop and install a new one
And so, you have purchased the appropriate model and are ready to begin installation. Before you take a screwdriver, the computer latest version: Without this, the platform may not recognize the new processor. Also prepare instructions for disassembling your laptop, a tube of thermal paste and a napkin.Disassembly instructions can often be found on the Internet by searching " HPPavilion disassembly», « AsusA52jservicemanual», « AcerAspireOne disassembly", etc. Of course, you should indicate your model. English-language queries usually produce more useful results.
When choosing thermal paste, focus on its thermal conductivity: the higher it is, the better. It is not advisable to use pastes with thermal conductivity less than 3 W/(m deg).
The popularly loved KPT-8 is not suitable for laptops! Its thermal conductivity is only 0.6-1 W/(m deg).
What follows is done at your own risk. If the computer is under warranty, you will lose it
- Disconnect all power sources from the laptop.
- According to the instructions, remove the housing parts that cover the cooling system. On some laptops, this is enough to remove the lid of one compartment, on others - the entire bottom, on others - the bottom and keyboard, and others require almost complete disassembly.
- Remove the cooling system - first the fan, then the radiator. Please note: there are numbers near the screws that secure the latter to the board. It is in this order (1-2-3-4) that they must be screwed in to ensure uniform pressure on the crystal and not damage it. Unscrewing, accordingly, is done in the reverse order (4-3-2-1). If there are no numbers, start unscrewing the screws from any edge and move from one to the other diagonally or in a zigzag.
- When the cooling system screws are of different lengths and thicknesses, remember their locations. If you get it wrong, the consequences can be very dire. A screw screwed into a hole that is not the right width may fall out over time and cause a short circuit. To avoid mistakes, do this: draw a diagram of the location of the screws on a piece of paper and, as you unscrew them, stick them into those places on the diagram where they are located in reality.
- After unscrewing all the screws and disconnecting the fan, grab the radiator in the area of the heat sink (the metal pad that is adjacent to the chip) and lift it vertically up. Try not to put in too much effort. If you feel resistance (this can be caused by too viscous or dried thermal paste), carefully move the heatsink horizontally.
- Remnants of thermal paste and sometimes thermal pads stick to the bottom surface of the heat sink (that purple “garbage” in the photo below). The paste is used to cover the processor, and the gaskets provide heat dissipation to neighboring components - bridges, video chip, and very hot elements of power circuits. The remaining paste must be removed (this is why you prepared the napkin); the pads can be reused if they have retained their elasticity.
You cannot replace thermal pads with thermal paste!
You may know that thermal pads conduct heat somewhat worse than paste. So why not replace the first with the second? Unfortunately, this is not how it works. Gaskets save the situation in cases where the surfaces of the crystals do not come into contact with the heat sink. Laptops are too cramped to provide each chip with an individual heat sink, so manufacturers often install one radiator with a common heat sink. But the chips, as you guessed, have different heights. The paste is applied to the highest one (processor), and the rest are protected with thermal pads.
- So, you have removed the radiator and reached your goal. Now you need to remove the processor. On one side of its fastening there is a screw with a transverse notch. Place a flathead screwdriver in it and turn until the microlift pushes the processor up. After that, pry it up and pull it out.
- and place it in the nest. Pay attention to the key - a small triangle on one of the corners of the processor, near which one or two contacts are missing. It must match the same label on the socket. However, you will not be able to insert the CPU incorrectly unless you apply significant force. The “stone” should fit into the socket without the slightest difficulty. To fix it in the connector, turn the screw in the opposite direction.
- Reinstall the cooling system radiator. After that, screw and connect the fan and finish the rest of the laptop assembly.
Be sure to return all protective pads if you removed them during dismantling!
Only after making sure that you have no “extra” parts left and everything is in its place, connect the power source and press the Power button. If the replacement was successful, the laptop will “come to life” and an image will appear on the screen. However, there should be no other result, otherwise you have made a mistake somewhere. If the computer doesn't turn on at all or starts to make noise but the screen remains black, make sure you have the correct replacement and try again. I'm sure everything will work out for you.
First of all, you need to understand that replacing the processor is possible only if the motherboard has this capability (if it has a socket). A socket is a kind of connector that completely replicates the design of the contact legs of the processor itself.
A radiator with a cooler (cooling fan) is added to the “charged” socket. A huge catalog of processors is presented in online stores today.
Any person who decides to replace a processor should understand that incorrect assembly can lead to processor failure. We are talking about significant overheating.
To prevent this from happening, a radiator (aluminum or copper) is used. Using special thermal paste, a high degree of heat transfer is achieved. The removed heat is dissipated using a cooler.
If you removed the motherboard from the computer before integrating the processor, do not forget to use a special mat that will protect printed circuit board from static electricity.

AMD processors are not inferior to Intel in their characteristics. In addition, they initially come with thermal paste already applied. On the one hand, there is savings for the buyer, on the other hand, it will be more difficult to install the processor without touching the delicate layer.
To install you will need the following instrumental set:
- a set of small screwdrivers;
- tweezers;
- magnifying glass (loupe);
- good lighting.
Because the processor is square, be especially careful to ensure it is installed correctly. To do this, a key (triangle or semicircle) is depicted on it.
In order to monitor the operating temperature of the processor (since exceeding it is the main reason for equipment failure), it is recommended to install special software.
You can easily find it on the Internet free programs(not pirated, but freeware). With its help, you will immediately receive an alarm in the event of a significant excess operating temperature processor.
Detailed instructions that will help you replace the processor yourself: