Virtual Windows 10. VirtualBox Virtual Machine
A program that allows you to install operating systems in isolated mode. You can also install the current one on a virtual machine to get acquainted with it or experiment. Often, users thus decide to check the compatibility of the "dozens" with programs in order to upgrade their main operating system in the future.
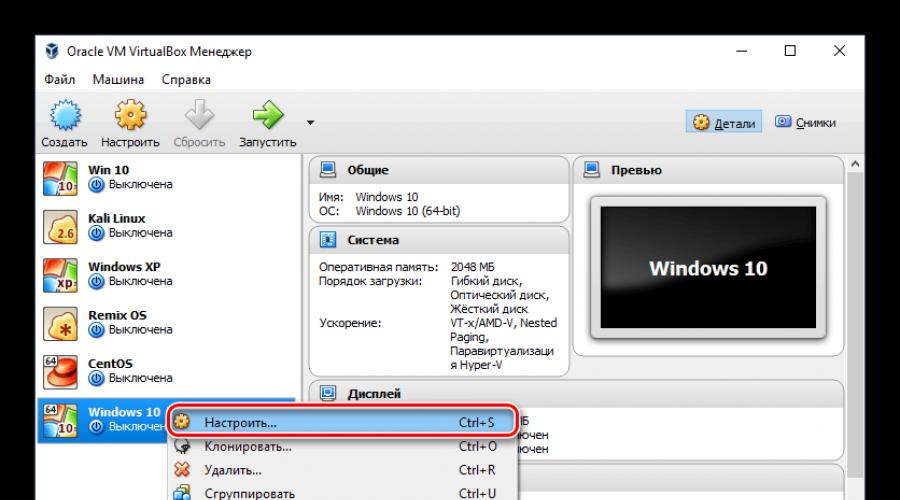
Each OS in VirtualBox is installed on a separate machine. In fact, this is a virtual computer that the system takes for a regular device where you can install it.
To create a virtual machine, follow these steps:
After this step, a virtual machine will be created, and you can proceed to its configuration.
Configuring virtual machine settings
The new virtual machine, although it will allow you to install Windows 10, but, most likely, the system will noticeably slow down. Therefore, we recommend that you change some parameters in advance in order to increase performance.

Other settings you can do yourself now or at any time when the virtual machine is turned off.
Installing Windows 10 on VirtualBox
- Start the virtual machine.
- Click on the icon with the folder and through Explorer select the location where the image with the ISO extension is saved. After selecting, press the button "Continue".
- You will be taken to Windows Boot Manager, which will prompt you to select the bit depth of the installed system. Select 64-bit if you created a 64-bit virtual machine, and vice versa.
- The installation files will be downloaded.
- A Windows 10 logo window will appear, please wait.
- The Windows installer will start, and at the first stage it will prompt you to select languages. Russian is set by default, you can change it if necessary.
- Click on the button "Install" to confirm your actions.
- Accept the terms of the license agreement by checking the box.
- In the installation type, select "Custom: Windows installation only".
- The section where the OS will be installed will be displayed. If you are not going to partition the virtual HDD into partitions, then just click "Further".
- The installation will begin in silent mode and the virtual machine will reboot several times.
- The system will ask you to set some parameters. In the window you can read what exactly Windows 10 offers to configure.

All this can be changed after installing the OS. Select button "Setting" if you plan to personalize now, or click on "Use default settings" to move on to the next step.
- After a short wait, a welcome window will appear.
- The installer will start receiving critical updates.
- Stage "Selecting a connection method" adjust as you wish.
- Create an account by entering a username and password. Setting a password is optional.
- Your account will begin to be created.


The desktop will load and the installation will be considered complete.

Now you can customize Windows and use it as you wish. All actions performed inside this system will not affect your main OS in any way.
Let's talk about the easiest way to install Windows 10 on a VirtualBox virtual machine.
To install Win10 on VirtualBox you will need:
- Win10 ISO Image ();
- installed latest version of the program virtual box.
So, if the Win10 image is downloaded and VirtualBox is installed, let's get started.
Installing Windows 10 on VirtualBox consists of two steps.
- Create and configure a virtual machine
- System installation
Create and install a virtual machine
- Start VirtualBox by double-clicking the left mouse button on the program shortcut.
- In the virtual machine window, click the button Create.
- In field Name in the window that opens, enter any name for the virtual machine, for example, 10 , Win10, Windows 10 or any other foul language you like.
- From drop-down Version list select Windows 10(x32 or x64 - depending on what you want to install). Keep in mind that in VirtualBox you can install at least x32 if you have a 64-bit host system, or vice versa. If there are not enough resources, put x32 - it definitely eats less.
- When the system is selected, click button Next.
- Using a slider, input field, or arrows allocate the amount of RAM that this virtual machine can use. Highlight no more than half the volume that you physically have, otherwise the computer will hang and slow down. Allocate memory and click Next.
- In the next window, do not change anything, but simply click Create.
- Then just press the button Next.
- In the next window again click Next, thus creating a dynamic hard disk, the size of which will change automatically.
- In the next window, using the slider or the arrow box specify the maximum size of the virtual hard disk. The minimum for x64 is 20 gigabytes, for x32 - 16. Set the size and click Create.
- The virtual machine has been created, let's move on to setting it up. Right-click on the machine icon (located on the left side of the VirtualBox window), and in the context menu that opens select Customize.
- In the settings window that opens, go to the tab carriers and click the icon Add an optical drive.
- In the VirtualBox window that appears click the Select image button. Explorer will open, in it find and select ISO file system image.
- In the settings window click OK and it will close.
- Again right click mouse on the virtual machine icon and in the context menu click button Run.
Installing Windows 10
- The virtual machine is running. In order to expand it to full screen, press the keyboard shortcuts Ctrl (right) + F, and then Enter to close the pop-up window.
- The virtual machine is booting up. Since her hard drive is empty, it starts booting from the virtual drive.
- In the window for installing languages and times, do not touch anything unnecessarily and click Next.
- In the next window click Install.
- In the license agreement window check the box I accept the license terms, click next.
- In the installation type selection window click second - selective- Windows installation only, for advanced users.
- Since the system is installed on a virtual machine, you can do nothing in the disk management window and just click Further.
- Now the installation itself has begun, which, depending on the hardware, will take from several minutes to several tens of minutes. Ten minutes, I would say. You can smoke for a while, no action is required from you.
- In the Settings window, which will help you get started sooner, you can also leave nothing and just click Use default settings. If you are interested in these settings - unsubscribe in the comments, I will shoot a video tutorial.
- The next window will ask for a Microsoft account. If you don't need an account, click the Create a new account link, wait a while for the next window to appear, scroll it all the way down and click the Orthodox link Sign in without a Microsoft account.
- Now, in the Your Account window, enter your username. Set a password if you like, and then, whether you like it or not, click the Done button.
- Windows says hello to you, which means the installation was successful.
Well, a video option, where without it.
VirtualBox is a specialized software that creates an unlimited number of virtual computers in the memory of a personal computer. Each created virtual computer can have arbitrary virtual devices, its own operating systems, and so on. From our Internet portal you can download a virtual machine for Windows 10 and run another operating system using the software, despite the fact that the computer is already equipped with which OS.
In most cases, a virtual machine is installed and used to test work, to test certain applications and even entire operating systems. Novice users can test the convenience of a system before installing it on their computer. In some companies, virtual machines allow you to check storage media and clean out all viruses from them, and then start using them on a PC.

You can install using a virtual machine, or you can develop professional software and test it using the presented application.

In other words, VirtualBox is a fallback that can be used for a wide variety of purposes and tasks! Each of you can handle the installation and use of the application.
Features of VirtualBox for Windows 10
Before you download VirtualBox for Windows 10, check out a small list of the main features of this application:
- Ability to virtualize audio devices;
- Maximum performance;
- Support various network interactions;
- Ability to set up shared access to folders, to exchange documents.

Please note that Virtual Box will take at least an hour to figure out its functionality. Although this is not a simple utility, it is very effective and works better than all the analogues that we have ever tested.
We will add components Hyper-V in Windows 10, consider the option of creating a virtual machine using Hyper-V, and also consider its parameters.
Adding Hyper-V components.
We launch "Run" in any of two ways:
- Right click on the menu "Start" and choose "Run".(Fig.1)
- Pressing a keyboard shortcut Win+"R".
Enter appwiz.cpl(Fig.2)
 Fig.2 - Enter appwiz.cpl
 A window will open "Programs and Features". Left click "Turn Windows features on or off".(Fig.3)
 Fig.3 - Programs and components.
 A window will open "Windows Components". Select everything in the section Hyper-V.(Fig.4)
We press "OK".
 Fig.4 - Selecting Hyper-V components.
 We are waiting for the installation of components - Applying Changes, and press "Restart now".(Fig.5)
 Fig.5 - Applying components, rebooting the system.
 On this Adding Components finished. Getting Started with Hyper-V
Launch Hyper-V.
On the menu "Start" -> "Windows Administration Tools" a label appeared "Hyper-V Manager". We start it. (Fig. 6)
 Fig.6 - Launch Hyper-V Manager.
 Before us is the starting window "Hyper-V Manager".(Fig.7)
 Fig.7 - Start window of Hyper-V Manager.
We select our computer on the left, I have this - DESKTOP-9PLBR7Q, a menu will appear on the right "Actions", Click on the item "Virtual Switch Manager".(Fig.8)
 Fig.8 - Go to the Virtual Switch Manager.
 IN "Virtual Switch Manager" click "Create Virtual Switch".(Fig.9)
 Fig.9 - Create a virtual switch.
 Enter Name, I have this - hypernet and note, I have this - Hyper-V network.(Fig.10)
Also choose Connection type. I chose to connect to External network through my network card - "Realtek PCIe GBE Family Controller". I also checked the checkbox "Allow the managing operating system to share this network adapter".
We press "Apply".
 Fig.10 - Properties of the virtual switch.
 Pops up a warning "Pending changes may break network connectivity".(Fig.11) I assume that this article will be read by beginners, which means they are unlikely to repeat after me step by step using the involved server of their enterprise 😀 . Therefore, it's okay that we can lose the network connection for a while. We press "Yes" and we are waiting "Apply Changes".
 Fig.11 - Warning about a possible network connection failure.
 Now going into "Network Connections" -> "Configure adapter settings". We can see our newly created vEthernet (Hypernet), also adjacent to it is not connected vEthernet (Default Switch) - " Standard Network" automatically provides virtual machines with access to the computer's network using network address translation ( NAT). NAT we are not interested at the moment. And we will not touch this switch. (Fig. 12)
 Fig.12 - Network connections -> Configure adapter settings.
 This completes the network setup. Let's move on to the most important thing, for which the virtualization system was created Hyper-V- WITH creating a virtual machine.
Create a virtual machine.
Right click on our computer -> "Create" -> "Virtual Machine". (Fig.13)
 Fig.13 - Creating a Hyper-V virtual machine.
 The "Virtual Machine Creation Wizard" will open.(Fig.14)
- Click the button "Ready" to create a virtual machine with default settings.
- Click the button "Further" to create a virtual machine with specific configuration options.
 Fig.14 - Virtual machine creation wizard.
 Specify the Name of the virtual machine and its location. (Fig. 15)
I decided to test with Ubuntu Server 18.04.
This is how I have it:
- Name: ubuntuserver 18.04.
- Location: E:\hyper-v ubuntu server 18.04\.
 Fig.15 - Specify the Name of the virtual machine and its location.
 Select the generation of the virtual machine. (Fig. 16)
In most cases, you should choose the second generation, but if you install something 32-bit something worth choosing - Generation -1.
I personally have Ubuntu Server 18.04 64-bit with the support UEFI, hence I choose - Generation 2.
 Fig.16 - Select the generation of the virtual machine.
 We allocate the amount of RAM. (Fig. 17)
My operating system is enough 1Gb RAM=> I leave the default inscribed 1024 Mb. Let's go "Further".
 Fig.17 - Allocate the amount of RAM.
 We choose which switch our network interface will be connected to. (Fig. 18)
Choose our "Hypernet", let's go "Further".
 Fig.18 - Network settings.
 Create a virtual hard disk. (Fig. 19)
Specify Name,Location and maximum Size virtual file HDD.
I have so:
- Name: ubuntu server 18.04.vhdx.
- Location: E:\hyper-v ubuntu server 1804\.
- Size: 10 GB.
 Fig.19 - Create a virtual hard disk.
 Choose ISO image from which we will install the operating system. (Fig. 20)
Choose an item "Install operating system from boot image file"-> Press "Review"-> Choose iso image. -> Click "Further".
 Fig.20 - Selecting an OS image.
 Completing the virtual machine creation wizard. (Fig. 21)
We press "Ready".
 Fig.21 - Completing the virtual machine creation wizard.
 Now in Hyper-V Manager we see the newly created virtual machine - ubuntu server 1804. (Fig.22)
Right click on it -> "To plug".
 Figure 22 - Hyper-V Manager, New Virtual Machine.
 A window will appear (Fig.23)
If you want to install the system Windows then when you click on the button "Start" your installation should run without any errors.
But in order to start Ubuntu Server 18.04 I had to "File" - > "Options"->"Safety" disable "Safe Boot".(Fig.24)
 Fig.23 - Connecting to a virtual machine.
  Fig.24 - Disable Secure Boot.
 Turn on the virtual machine. (Fig. 25)
 Fig.25 - Turn on the virtual machine.
 Everything is fine, the virtual machine started up. We are met by the installer Ubuntu Server 18.04.(Fig.26)
 Fig.26 - Running virtual machine. Ubuntu Server 18.04 installer.
 Changing virtual machine settings.
Let's make a small overview of the parameters of the virtual machine so that you can see the main functions before deciding to use the virtualization system Hyper-V.
"File" - > "Options".(Fig.27) Fig.27 - Go to "File" -> "Parameters"Equipment.
"Firmware"- you can change the boot priority of devices in the virtual machine. (Fig. 28)
 Fig.28 - Selecting the boot priority.
 "Safety"- Can "Enable/Disable Secure Boot", "Enable/Disable encryption support".(Fig.29)
Fig.29 - Security settings of the virtual machine."Memory"- you can edit the amount of allocated RAM, Enable/Disable function dynamic memory.(Fig.30)
 Fig.30 - Parameters of RAM.
 "CPU"- you can edit the number of virtual processors according to the number of processors on the physical computer.(Fig.31)
It is also possible to distribute the load in "Resource management".

"SCSI controller" can add HDD,DVD drive or Shared Drive.(Fig.32)
 Fig.32 - Parameters of the SCSI controller.
 You can also change connected media settings, for example here we can change the inserted into the virtual DVD drive ISO image.(Fig.33)
 Fig.33 - Media parameters.
 "Network adapter" you can change the configuration network adapter: Choose Virtual switch, prescribe VLAN ID, customize Bandwidth.(Fig.34)
 Fig.34 - Network parameters.
 Control.
"Name"- you can easily change the virtual machine to one more convenient for your use. (Fig. 35)
 Fig.35 - Name change.
 "Integration Services"- Select the services you want to make available to the virtual machine. .(Fig.36)
 Fig.36 - Integration services.
 "Checkpoints"- Here you can configure Checkpoints( snapshot, restore points), turn on the automatic mode for creating them and assign a storage location. (Fig. 37)
 Fig.37 - Control points.
 "Smart Padding File Location"- You can specify the path to the swap file. (Fig.38)
smart padding- a function that makes it possible, if there is not enough memory to boot a virtual machine, to use the paging file on the host.
 Fig.38 - Location of the Smart Padding file.
 "Automatic actions at startup"- You can select the operation that you want to perform with this virtual machine when you start the physical computer.(Fig.39)
In the top three in the software market for virtualization of operating systems - VMware, VirtualBox and Hyper-V - the last hypervisor occupies a special place. This special place is due to the fact that Hyper-V is a standard component of Windows server systems and some versions of Windows for desktop PCs. Yielding to VMware Workstation and VirtualBox in functionality, cross-platform and partly in ease of use, Hyper-V, however, is not without its advantages. And the main one is the higher performance of the guest OS.
Below we will talk about activating Hyper-V on a Windows 10 system and creating a virtual machine using this hypervisor.
1. Hyper-V - a regular hypervisor from Microsoft
The standard Hyper-V component was inherited by Windows 10 from versions of Windows 8 and 8.1, and the hypervisor migrated to them from Windows Server. Both Windows 8.1 and Windows 10 optionally include Hyper-V in the Pro and Enterprise editions. The hypervisor can only work on 64-bit systems.
For a long time, Hyper-V did not support any other guest OS other than Windows. However, relatively recently, Microsoft has taken care of supporting Linux guest OS by the hypervisor. And today, with the help of Hyper-V, you can test some Linux distributions, in particular, the popular Ubuntu.
2. Requirements for running Hyper-V
The minimum amount of RAM on a physical computer to run Hyper-V is 4 GB.
The computer processor must support SLAT technology (Intel EPT or AMD RVI). Almost all modern processors meet this requirement.
Another requirement for the processor, also provided by many modern models, is support for hardware virtualization technology and, accordingly, its active state in the BIOS. In the motherboard BIOS for Intel processors, this technology (depending on the version) may be called differently - Intel-VT, Intel Virtualization Technology, Intel VT-x, Vanderpool, or Virtualization Extensions. AMD's hardware virtualization technology is called AMD-V or SVM (Secure Virtual Machines). For example, in AMI BIOS version 17.9, the AMD processor hardware virtualization feature can be found along the path Cell Menu - CPU Feature - SVM Support.

AMD processors usually have hardware virtualization enabled by default. Whether a particular processor model supports hardware virtualization, this point can be found on the websites of Intel and AMD.
3. Activate and run Hyper-V
Hyper-V included with Windows 10 Pro and Enterprise is optional. Initially, the regular hypervisor is disabled. It is enabled in the "Programs and Features" section of the control panel. The fastest way to get there is an internal search.

Run "Turn system components on or off".

In the small window that appears, tick all the sub-items of the Hyper-V item. Click "OK".

The system will apply the changes for a couple of seconds and ask you to reboot. After the reboot, we are looking for a shortcut to launch the Hyper-V Manager. The Hyper-V Manager shortcut can be immediately pinned to the Windows 10 Start screen by finding it in the Start Menu Administrative Tools.

The Hyper-V Manager shortcut can also be accessed using an in-system search.

Launch Hyper-V Manager.
4. Setting up network access
In Hyper-V Manager, the network is configured in a separate step, and first you need to create a virtual switch - a setting that provides access to the network. We click on the name of the physical computer, and in the right part of the window, select "Virtual Switch Manager ...".

The wizard for creating a virtual switch will start, where the first step is to select the type of network. There are three of them:
- External - This type uses the network card or Wi-Fi adapter of the physical computer and connects the virtual machine to the same network as the physical computer. Accordingly, this is a type of network that provides access to the virtual machine to the Internet;
- Internal - This type provides a network between the physical computer and Hyper-V virtual machines, but does not allow them to access the Internet;
- Private - this type allows you to create a network between Hyper-V virtual machines, but this network will not have a physical computer, nor will it have access to the Internet.
In our case, the access of the virtual machine to the Internet is necessary, therefore we will choose the first type - an external network. Click "Create Virtual Switch".

In the properties window of the virtual switch, give it a name, it can be any name, for example, "Network card 1". Optionally, you can add a note to the virtual switch. If a physical computer has both a network card and a Wi-Fi adapter on board, the specific device through which the virtual machine will connect to the network can be selected from the drop-down list in the "Connection type" column. After the settings are done, click "Apply" at the bottom of the window.

5. Create a virtual machine
Now you can proceed directly to creating a virtual machine. On the left side of the Hyper-V window, the selection should still be on the name of the physical computer. In the upper right corner, click "Create", then - respectively, "Virtual Machine".

In the welcome window of the launched wizard, click "Next".

Give the virtual machine a name; you can also change its location on the disk of a physical computer by specifying the desired disk partition and folder using the browse button. Click "Next".

One relatively new feature of Hyper-V is virtual machine generation selection. In our case, generation 2 is selected.

What does it mean? Generation 1 are virtual machines that support 32-bit and 64-bit Windows systems. Generation 1 is compatible with previous versions of Hyper-V.
Generation 2 - new format virtual machines with UEFI-based firmware. These virtual machines support a number of new features and can provide a small performance boost. Only 64-bit versions of Windows 8.1 and 10, as well as server versions of Windows Server 2012, Server 2012 R2 and Server 2016, are installed as guest OS on generation 2 virtual machines.
The UEFI platform imposes another requirement for using generation 2 virtual machines - UEFI bootable media. This point must be clarified by downloading the ISO image with the Windows distribution from third-party sources on the Internet. But it's better to download Windows distributions from official Microsoft sources. So, the Media Creation Tool utility, which downloads Windows 8.1 and distribution kits from the Microsoft website, creates a bootable ISO image that supports the UEFI environment at the output.
In the case of installing Windows 10 as a guest OS, this is the recommended method for obtaining an ISO image of the system. Windows 10 provides a lazy-type installation process. In our case, Windows 8.1 will be installed as a guest OS, and its official distribution, obtained using the Media Creation Tool, requires a product key to be entered during the installation process. The TechNet Trial Software Center site can help you support UEFI and take advantage of the free Windows 8.1 test. On this site you can download the English edition of 64-bit Windows 8.1 Enterprise and test the system for free for 3 months. The problem with the lack of support for the Russian language after installing the system can be solved separately by installing a language pack and setting Russian as the main language of the system.

We return to the virtual machine creation wizard. In the memory allocation window, we leave the preset parameters if the physical computer has no more than 4 GB of RAM. If it is more than 4 GB, you can increase the amount allocated when the virtual machine starts. For guest Windows XP, the RAM indicator can, on the contrary, be reduced to 512 MB. Click "Next".

In the network settings window, select the previously created virtual switch from the drop-down list. Click "Next".

In the virtual hard disk connection window, specify a name for the virtual machine, specify the location on the disk of the physical computer, and specify the size. These are the options for creating a new hard drive. The second item of this step of the wizard is used when the computer already has a virtual hard disk, in particular, with a guest OS installed. If you select a generation 2 virtual machine, the virtual hard disk file must be in VHDX (not VHD) format, and the guest OS must support the UEFI boot environment. Click "Next".

If you selected the option to create a new virtual hard disk in the previous step of the wizard, the next step is to specify the path to the Windows distribution. Generation 2 virtual machines are no longer able to boot from a physical CD/DVD drive. Only the network and the ISO image can be download sources for the guest OS distribution. In our case, this is an ISO image. Click "Next".

The final stage of the wizard - click "Finish".

6. Connecting a virtual machine
Having created the virtual machine, let's return to the Hyper-V Manager window. Now it needs to be connected. To do this, there is the "Connect" command, among other commands of the context menu called on the virtual machine. The Connect command is also present on the right side of the Hyper-V Manager window. To connect, you can also double-click the left mouse button on the preview window of the selected virtual machine.

In the connection window that opens, click the green start button.


The normal Windows 8.1 installation process will follow, just as you would on a physical computer.

As soon as the installation files start copying, you can close the virtual machine connection window and do other things.

Closing the connection window will free up some physical computer resources for other tasks, while the virtual machine will continue to run in the background. Its performance will be displayed in Hyper-V Manager.

You can connect to a virtual machine as you need to perform actions in it.
Everything - Windows 8.1 is installed. You can turn off, suspend, save a virtual machine, or reset its state using both commands in the Hyper-V Manager and buttons on the top panel of the connection window.

7. Boot Priority
In order not to waste time on the boot window from the CD / DVD when starting the virtual machine in the future, you need to open the parameters window in its off state and remove the path to the ISO file with the distribution. This is done in the DVD drive tab of the virtual machine's hardware settings.

An alternative option is to raise the hard drive in boot priority above the DVD drive (but not above the "bootmgfw.efi" file). This is done in the "Firmware" tab of the hardware settings.

In both cases, the changes made are saved with the "Apply" button at the bottom.
8. Bypass Hyper-V Connection Window Limitations
The Hyper-V hypervisor focuses on virtual machine performance, not functionality. Unlike their competitors - VMware and VirtualBox - Hyper-V virtual machines do not work with connected flash drives, do not play sound, and interact with a physical computer only by pasting text copied into the main OS inside the guest OS. That's the price of Hyper-V virtual machine performance. But this is if you work with the usual Hyper-V connection window.
Full integration of a physical computer and a virtual machine can be obtained using the standard remote desktop connection utility.

This utility allows you to flexibly configure connection settings, in particular, make available not only USB drives connected to a physical computer, but also individual hard disk partitions inside the virtual machine.

Connecting to a virtual machine in this way will provide audio playback and two-way file transfer in the guest OS.
Have a great day!