Installation of virtual PC. How to create a virtual computer in Virtual PC
Read also
A virtual computer or "Virtual Machine" is installed on real computer using various emulation tools. In this tutorial we will look at creating a virtual computer using software product Microsoft Virtual PC 2007.
Before we start creating a virtual machine, we need to install it. How to do this is described in the article.
Let's start creating a virtual computer in Virtual PC.
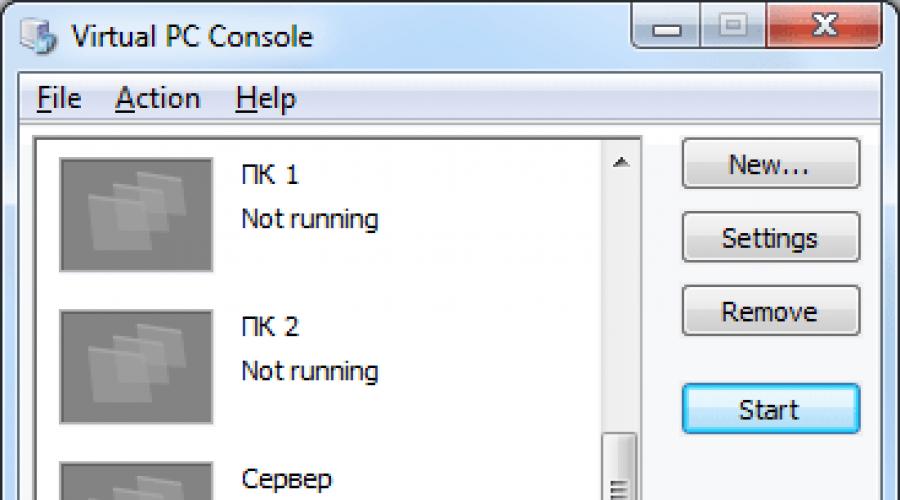
Step 1. Launch Virtual PC 2007 by double-clicking on the icon. A window will appear Virtual PC Console. The Computer Control Center consists of three areas. In the center is a list of used virtual computers. On the right are frequently used commands:
- New... (Wizard for creating a new virtual computer).
- Settings (Settings of the selected virtual computer).
- Remove (Deletes the selected computer).
- Start (Start a virtual computer).
So, in order to create a new virtual computer click on the button New...

Step 2. In the New Virtual Machine Wizard window, click Next.

Step 3. In the new window, select the option Create a Virtual machine(Create a virtual machine). Click to continue Next.

Step 4. Enter the name of the new computer in the field Name and location. Then click Next.

Step 5. In the selection window operating system In chapter Operating system Click on the drop-down list and select the operating system that you will install on this virtual computer. Having selected the OS, click Next.

Step 6. Next you need to configure the volume random access memory. You can use the recommended amount of memory by setting the switch to Using the recommended RAM or change the memory size by setting the switch to Adjusting the RAM. I advise you to use the installation wizard’s recommendations and click Next.

Step 7. Next in the virtual virtual creation window hard drive In chapter Do you want to use set the switch to mode A new virtual hard disk.
(An existing virtual hard disk- this is connecting an existing hard drive with the installed system).
Click to continue Next.

Step 8. In the window settings virtual disk you can specify its future location by pressing the button Browse, and set hard drive size in field Virtual hard disk size. Leave the default settings and click Next.

Step 9. All. Creating a virtual computer in Virtual PC completed successfully. Press to exit Finish.

Now we start setting up the created virtual computer in Virtual PC 2007. To launch the created virtual computer, click on it once right click mouse and then click Start. The computer will start, but nothing will appear, since there is no operating system installed on it.

In order for our computer to start working on it we need .
To do this, in the running window, in the top menu, click CD and select Capture ISO Image...

In the window that appears, specify the path to ISO operating system image. Double click iso image. After this, reboot the virtual computer by clicking on the cross and selecting Turn Off.

After the next start of the virtual computer, the operating system will automatically load into the virtual CD drive.
After which the standard installation of the operating system will begin. You can see how to install the Windows operating system in the section.
Until the add-ons are installed, the mouse cursor will remain stuck on the virtual computer screen.
After the operating system installation is complete, you will need to install add-ons for the virtual computer.
In the window that appears autostart click Run Setup.exe.
The add-on installation procedure is standard. In the first and subsequent windows, click Next. When installation is complete, click Finish. After this, reboot the virtual computer by clicking in the window that appears Yes.
In today's article I will tell you about virtual machines: why they exist, how to use them and I will show all this with an example. I think it’s no secret to anyone that with the release Windows Vista it was spicy compatibility problem. Those programs that have no problems worked in Windows XP- refused to work in Windows Vista. Time is running, Vista is no longer relevant, it was replaced by “seven”, however program compatibility issues have not disappeared anywhere. The compatibility mode that you specify in the file properties sometimes helps, but for the most part it is useless - that’s why virtual machines appeared, so that emulate work the operating system we need. If you have a specific program that refuses to work in Windows Seven, but no problem works on Windows XP, then you shouldn’t write it off. The program is fine, but I have an old scanner, Mustek 1200UB Plus, which does not want to work in 64-bit Windows Seven. He's quite working, he's just very old, and the manufacturer not going to update drivers for equipment.
However, this is not the only application of virtualization technologies. Imagine that you have a suspicious file, what can you do with it? Take a chance and run on computer, which you actively use and on which you have a bunch of important programs and documents?, but you can run it on isolated from all programs and data operating system that runs in your window! Which option would you prefer? I think the conclusion is obvious.
In my article about virtual machines I used Microsoft Windows Virtual PC. You can download this program on the official Microsoft website (If you have licensed Windows) or find it on , I downloaded it on nnm-club.ru, just enter in the search Microsoft Windows Virtual PC. There is also VMware - its functionality is much higher, but we don’t need it.
Let's get started!
The program requires processor support for virtualization technology, if your processor supports it, make sure that virtualization technology is enabled. Installs the Package (x86 for 32-bit OS, and x64 for 64-bit OS respectively). After installation you will need to restart your computer...
You can also download it here:
32-bit (x86): Windows6.1-KB958559-x86.msu
64-bit (x64): Windows6.1-KB958559-x64.msu
After reboot you need create a virtual machine, or a virtual computer, which is actually the same thing. To do this we launch Virtual PC and choose "Create a virtual machine", give it a name and indicate where it will store its files.

Choose the optimal amount of RAM for the virtual machine (depending on your amount of RAM), but for XP 512 megabytes is enough.

With a dynamic disk everything is clear, select the default option, in this case your disk in the virtual computer will have a volume equal to the volume of the partition that you specified earlier.

So our virtual computer is launched, it is as empty as the new one, therefore we need install operating system, For example Windows XP.

There are several installation options: if you have installation disk , then you can install from it, or specify the path to disk image. I chose the second option. In the DVD drive parameter, the path to the MS Windows XP SP3 image was specified. Click OK and reboot the virtual machine using the button "CTRL+ALT+DEL"

Here's a friend we know Windows XP installation. I won’t focus on it, everything is described in detail

How share disk— it’s up to you, although I think there’s no point in it: just create a section for the entire free volume. Now the installation files are being copied!

Well, here is the installation process - nothing complicated, the same as easy installation, only in the window. By the way, Virtual Machine intercepts mouse and keyboard control to return to your OS click ALT+CTRL+LEFT ARROW

OK it's all over Now: system installed and ready to go.

In contact with
Appearance new version operating system is stressful for most users. Therefore, one of the main tasks of developers is to make the transition as smooth as possible. This doesn’t always work out, but the creators of Windows 7 turned out to be understanding people, and therefore introduced a virtualization package into the system that was new at that time, allowing you to run XP inside the “seven”.
General information
The virtual machine emulates Hardware, creating an isolated environment inside the system into which you can install any OS. This allows you to solve many problems with software compatibility, and also makes it possible to “try” another system without deleting the current one. You will be able to work with physical drives, install games and programs for Windows XP without giving up the “seven”, save files and perform other tasks. Let's see how to install a virtual machine on Windows 7 to take advantage of all its useful features.
Checking for Virtual PC
If you installed Windows 7 Ultimate, Enterprise or Professional versions, then you have the Virtual PC feature by default. You just need to make sure that the processor supports hardware virtualization. This can be done using the utility from Microsoft Hardware-Assisted Virtualization Detection Tool.
Download the utility and run it. Depending on the results of the processor test, the following messages may appear on the screen.

Enabling/disabling virtualization is done in BIOS settings, so before installing Virtual PC manually, make sure the option is enabled.
The option may be called Intel_Virtualization Technology, AMD-V, Virtualization Extensions, etc. Find this feature in the BIOS and change the value from “Disabled” to “Enabled”.  If after this you cannot start the virtual machine, Windows offers to install a special patch. At this stage, it is important to choose the correct system bit size – x32 or x64.
Manual installation
Installing a virtual machine on Windows 7 includes two steps:
- Windows installation Virtual PC;
- Installing a virtual Windows disk XP Mode.
First, let's deal with Virtual PC:

Then you can proceed to installing the Windows XP Mode virtual disk:

First start
After installing XP Mode, the "seven" must further configure it to create a virtual disk. Therefore, after clicking the “Finish” button, the following window will appear on the screen, in which there will be another license agreement, the terms of which you must accept.  Specify the folder where the virtual disk will be located and create the first user.
  Enable security features of the system you are creating. This is not necessary. Click "Start Installation".
  The installation process will start; you just have to wait for it to end.
New virtual machine
The system is prepared, the virtual disk is installed. All that remains is to create a new environment and run Windows XP in it.

The newly created sandbox will appear in the XP Mode main window. Right-click on it and select “Open”. Select the “DVD drive” option and specify the path to the physical drive (if you have a disk with the Windows XP distribution) or a pre-downloaded ISO image. The system installation wizard will launch.

All you have to do is install Windows XP as usual to start using this system in an isolated environment created using the hardware virtualization feature.
After the installation is complete, you can use all the features of the Microsoft OS: install gadgets for Windows XP, install games that do not run on the “seven”, launch outdated programs etc. – to do this, just run XP mode through the emulator. 
Alternative virtual machines
In addition to the built-in hardware virtualization feature, Windows 7 supports third-party programs that help you create an isolated environment and install any operating system into it.
First of all, it is necessary to note such virtualization systems as VMWare Workstation and Oracle VM VirtualBox. Let's look at the example of Virtualbox to see how such programs work.
Oracle VM Virtualbox
Download and install Virtualbox. It is installed in the same way as any other program, so you should not have any problems.
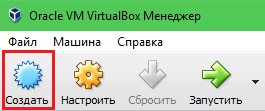
- Launch Oracle VM VirtualBox and click Create. The Create Sandboxed Environment Wizard opens.

- Specify the name of the new machine, system type and bitness, and then click “Next”.

- Set the amount of RAM that will be automatically allocated when the virtual machine starts for its operation.

- Create a new one HDD and click Next.

- Specify the disk type. If you don't know which is better, leave the first item on the list checked.

- Select the storage format - it is recommended to select “Dynamic image”.

- Specify the name and size of the new virtual hard disk, and then complete the wizard by clicking the Create button.

The isolated environment is ready. To start working with it, mark it with the left mouse button and click the “Run” button in the top menu.  A new window will appear on the screen through which you will first install and then interact with Windows 7 or another installed operating system. Specify the path to the physical disk or ISO image with the Windows distribution and click “Continue.”
  We will not consider the Windows 7 installation process in detail here, since it is no different from a regular installation on a physical hard drive. You just need to wait until the system installation is completed.
The virtual machine is launched through the Oracle VM VirtualBox program. You will need to open this utility and select the desired one from the main menu on the left virtual image systems.
As for other utilities, in VMWare Workstation the process of creating a virtual machine almost completely repeats the procedure described above.  In some other programs you may need additional customization, so for beginners they may seem a little complicated.
Conclusion
Creating a virtual machine and installing a system on it is quite simple, but you need to be careful - since April 2014, Windows XP is not supported by Microsoft, therefore, even by emulating the mode of this OS, you make your system vulnerable.
Additionally, XP mode is not supported on machines with installed Windows 8, and there is no way you can fix it. Virtual PC was originally created for smooth transition between systems, so you won’t be able to skip a version.
But you can try installing a system other than Microsoft Windows - for example, Linux.  It’s quite difficult to switch to it right away; besides, you have to give up most of your usual habits. Windows programs. In emulation mode, you will gradually get used to the features of interacting with new system and decide whether you need to switch to it completely.
To have several operating systems with separate workspace and applications at hand, you don’t need to buy a second (third, fourth, etc.) computer. Because it all fits into your single PC. How? Thanks to virtual machines (VMs) - special programs that create (emulate) imaginary (virtual) computers inside the main operating system.
A virtual PC is almost like a real one. It has its own processor, memory, hard drive, network adapter And all the rest. Of course it's not physical devices, but they are made in such a way that operating systems consider them to be exactly that - real.
Several virtual computers can work simultaneously on one physical computer. Exactly how much depends on the hardware resources: the faster the processor, the larger the RAM, the more spacious the storage, the more. A typical home PC with average performance Windows based 10 copes with the simultaneous operation of three to five lightweight operating systems (for example, Windows XP, Android and Lubuntu + the main system). Or two or three relatively heavyweight ones (for example, the main Windows 10 + virtual Windows 7 and Mac OS X). As you already understand, virtual computer emulator applications allow you to install and run a variety of operating systems on them.
General purpose virtual machines (as opposed to specialized ones, such as the Java VM) use:
- To run applications that the main system does not support.
- To protect the system from potential harm from untested programs.
- As an additional barrier against viruses when visiting dubious web resources.
- To create an isolated environment for studying the activities of malware.
- As a testing ground for debugging your own developments.
- To master network construction technologies.
- For double authorization on some gaming portals and much more.
And of course, virtual machines are widely used to distribute server work resources.
Today we will not touch on the industrial use of VMs, but will only consider what can be useful to home users of Windows OS.
Oracle Virtualbox
Let's look at the process of creating a new virtual machine and starting to install Windows 10 on it.
- Click the “Create” button in the top panel.
- In the first window of the VM creation wizard, we will indicate the name of the OS (it will be displayed in the list of guest systems), its type (Windows, Linux, etc.) and version. In our example, this is Windows 10 32 bit (you can install 64 bit, but it will require more resources). To move to the next step, click Next.

- Next, we will indicate the size of the VM RAM. By default, Windows 10 x86 is allocated 1 GB, but you can increase this amount by moving the slider to the right. If your PC does not have a lot of RAM, do not give the VM more than 2-3 GB, otherwise the main system will slow down due to lack of memory.

- Next we create a virtual hard disk. If you are installing the system for the first time, select the “Create new” option.

- Leave the virtual disk type as default.

- A storage format is an area on your computer's physical drive that is allocated to a VM. It can have a constant or dynamically expanding volume within the limits that you define further. To save space, we will choose a dynamic format.

- Next we indicate the name of the volume (virtual disk C) and its size. Default is 32 GB.

- After clicking the “Create” button in the last window, a new virtual machine will appear in the list. Its parameters are shown in the frame on the right.
- To proceed to installing Windows, click the “Run” button in the top panel.

- In the window that opens after this, the “Select boot disk" Click on the folder icon and specify the path to the system distribution. This can be an image in .iso format or physical media (DVD, flash drive). After selecting your distribution, click Continue.

- The further course of installing the OS into a virtual machine is no different from installing it on a physical computer.

Some VM and guest system settings
Clicking on the virtual machine window will capture the mouse cursor (i.e. it will only move within the virtual screen). To return the cursor to the main OS, press the Ctrl+Alt combination.
To access the full range of features of the guest OS, you need to install special add-ons. Go to the "Devices" menu, click "Mount Guest Additions Disk Image" and follow the further instructions.

To connect a folder to the guest system for exchanging files with the main one, click the “Shared Folders” item in the “Devices” menu. Click on the “folder+” icon in the window that opens and use the “path to folder” field to specify it in Explorer (it shows the directories of the main system).
If you want the setting to work permanently, check “Auto-connect” and “Create permanent folder”. a shared folder will be available from the virtual machine explorer as a network one.


To change the poll order boot devices(for example, to boot a virtual machine from DVD), shut down the guest OS, open its settings (in the main Virtualbox window) and go to the first tab of the “System” section. In the "Load Order" list, select the desired media and press the arrow buttons to move it to the top.

VMware Workstation Pro
Some Hyper-V virtual machine options
To take a snapshot of the running guest OS, Open Top Menu its Action window and click Checkpoint. Or press the combination Ctrl+N.
Access to the settings of an individual virtual machine is available from its context menu in the list of the main manager window and is hidden behind the “Options” button.
Other features of the program are also very simple and can be mastered without much difficulty.
In all manuals on computer and network security you can find a warning regarding installation software. The authors of such guides advise careful installation of programs downloaded from the network, because the installation of some of them is fraught with the occurrence of various problems - from virus infection to system failures.
What to do in cases where you need to constantly install various software? You need to install a PC emulator - special program(16.5 MB), which creates another computer in your operating system, but only a virtual one, on which you can install new OSs, and not just one, but as many as you like. Having installed the operating system, you can install necessary software, and if necessary, all this can be deleted literally with one keystroke (to do this, you just need to delete the corresponding file from the disk).
Installing the emulator is not particularly difficult; at the end of the installation you need to indicate the location of the files with the program.
At the last stage, you need to specify the location of the program files.
After installation and the first launch, the program will prompt you to create and configure virtual machines using a wizard.
Among the possible options: creating a new virtual machine with all the settings, using standard settings for the virtual machine, or adding parameters from an existing virtual machine, which is stored on disk as a VMC file.
The next step is to specify the name and location of the virtual machine. By default, the program suggests creating it in the \Documents and Settings\Computer_name\My Documents\My Virtual Machines directory. You have to be very careful here, since this location actually means the location of the virtual machine file. After installing the operating system and the necessary software on a virtual computer, the virtual machine file can reach several gigabytes. Therefore, it is necessary to specify a disk to create a virtual machine that has enough free space.

Be careful when choosing where to place your virtual machine files.
After selecting the location of the virtual machine, you must specify which operating system will be installed on it.
In subsequent steps, you need to set the size of the RAM of the future virtual computer and the location of the virtual hard disk.
Installing the operating system on a virtual computer is only possible from a bootable CD or floppy disk (for the Windows 98 operating system). To install the operating system from a CD, you need to start a new virtual machine and select “CD -> Use Physycal Drive J” (for the first CD drive) or the corresponding item for another CD drive. If you have a bootable operating system CD installed in your CD drive, the OS installation will begin automatically.

Installing the operating system on a virtual computer is only possible from a bootable CD.
To exchange data between a virtual computer and a regular one, you must install a special Virtual PC add-on. To do this, you need to start the virtual machine and select "Action -> Install or Update Virtual Machine Addition".
Installation of the add-on is standard; after rebooting the virtual machine, you can connect another virtual disk to it, which is essentially a folder on the hard drive of the main machine. It is with the help of this folder that data will be exchanged between the main and virtual machines.
To connect a virtual disk, select "Edit -> Settings" and display the Shared Folders section.

After installing the add-ons, you can add folders for data exchange between the virtual and host computers.
After launching the settings for the first time, the section will be empty. Using the Share Folder button, add one of the folders on the main computer’s hard drive to the list of available folders, and in the Drive Lette section, select logical name virtual disk that will correspond to this folder on the virtual computer.
Now, after launching Explorer in a virtual computer, another one will appear in the list of its disks, corresponding to the newly created open folder.

The data exchange folder is presented as another disk.
Work with all installed virtual machines carried out using the Virtual PC console, which appears after launching the application. Here is a list of all installed virtual machines, buttons for adding new ones, deleting existing ones and viewing settings.

The Virtual PC console is used to manage virtual machines.