CryptoPro JCP on Linux. How to Easily and Painlessly Switch to the New Encryption Standard
Read also
We were recently changing a user's password in Linux when we encountered an error: 'Authentication Token Manipulation Error'.
We used the normal passwd command to change the password and it gave us this error and the password was not changed.
Sudo passwd my_user_name Changing password for user my_user_name Changing password for tecmint (current) UNIX password: passwd: Authentication token manipulation error passwd: password unchanged
Fixing auth token manipulation error in Ubuntu
“Authentication Token Manipulation Error’” means that for some reason the password change failed.
There may be several reasons for this. In simple cases, you will see the root cause of the problem in the output itself. For example, if you didn't provide a password, you should see it in an error:
No password supplied passwd: Authentication token manipulation error passwd: password unchanged
Similarly, if the password re-entry does not match, it will also show this information:
Sorry, passwords do not match passwd: Authentication token manipulation error passwd: password unchanged
This is easy because you know what caused the problem and you can take corrective action based on that. But you may not always be lucky, because in some cases you will not see any useful information, only an error.
Let's look at some of these cases and fix this problem.
Method 1
If you are familiar with the Linux directory structure, you know that the /etc/shadow directory stores the password in an encrypted format, along with other information about users and their passwords.
That's why you need to make sure you have permission to read and write to this file. Since you will be changing the password as root, this file must have read and write permissions for root.
If it is not, you must set the correct permission:
sudo chmod 640 /etc/shadow
Method 2
Method 1 will work in most cases. But in our case, we had to remount the root partition with read and write permissions. We have been trying to reset the admin password in Ubuntu.
Mount -rw -o remount /
In some rare cases, your disk may become so full that you won't be able to make any changes to the /etc/shadow file. But if this is the case, then you will run into many other problems.
Did it work for you?
We have shared what worked for us and we can only hope it worked for you too. Made it? Which method worked for you? Mention it in the comments.
linux- this is a multi-user environment and in order for the user to start working in the system, he needs to go through the authentication procedure. PAM (Pluggable Authentication Modules) is a system (mechanism) that takes care of the implementation of authentication procedures. Before the advent PAM, developers of programs that were somehow related to authentication had to adjust their program to the existing authentication mechanisms. Accordingly, if the authentication mechanisms changed, then it was necessary to change the programs that used them. Therefore, a system was developed PAM, which is a “layer” between programs and authentication mechanisms. That is, now the authentication programs (for example, the program login) should only be able to work with the system PAM. The program transmits PAM parameters (for example, login and password) and it (the program) is no longer “interested” in what authentication method is implemented in the system - password or smart card authentication or another method. Further works PAM and returns the program either success or failure.
Let's look at the system PAM more. The main functions, or actions, or tasks that the system performs PAM- divided into four groups that have specific names:
group auth- these are actions related directly to authentication. That is, actions or functions that allow you to determine that you are you. This can be password authentication, smart card authentication, biometric authentication (fingerprint, etc.) and others.
group account- These are actions related to account management. For example, even if you are authenticated in the system, then your account You can put a ban on work at certain times of the day. Or allow logging in in console mode, but prohibit logging in in graphical mode. Etc.
group session- the actions of this group provide the user with the necessary resources for work. The simplest example is permission to mount directories.
group password- actions that implement a change in the user's authentication data. Most often, these are actions to manage user passwords.
All these actions or procedures (functions) are implemented as separate modules, which are located in the catalog /lib/security/. That is, we can say that there are group modules auth, group modules account etc. Accordingly, the system PAM is modular and if you need to implement biometric authentication, then you just need to install a module that can perform this procedure.
Basic configuration file systems PAM is a file /etc/pam.conf. Except file /etc/pam.conf, settings PAM stored in directory files /etc/pam.d/. Inside the directory are text files which contain a sequence of actions (a certain algorithm) for programs that use PAM. For example file /etc/pam.d/login contains the system operation algorithm PAM for the program login, and the file /etc/pam.d/passwd for the program passwd.
Consider first the file format /etc/pam.conf. The file is made up of lines. The file may consist of one line, or it may consist of several lines, forming a chain of successive actions. Each line describes one rule or one step of such a chain (algorithm). The line consists of four fields. The first field is the name of the program to which this step belongs. The second field is the action type ( auth, account, session, password). The third field is the field in which the behavior of the system is set. PAM after the completion of this step at this step of the algorithm (we will dwell on this issue in more detail below). The fourth field is the name of the module file. Also, the line may contain some parameters passed to the module.
The structure of the files in the directory /etc/pam.d/, the same. The only difference is the absence of the first field - the name. Since the name of the program is taken from the name of the file itself. Let's look at an example of such a file. Let's call it testpam.
auth sufficient pam_rootok.so |
Let's look at the first line. Field auth says the first step will be authentication. The third field is the module that will perform the authentication and return the result of the execution. IN this example module pam_rootok.so checks if the account is root ( root). If yes then success (true) will be returned, if not then error or failure (false) will be returned. The second field is the reaction or the impact of the result on the chain as a whole.
The reaction can be of four types: required, requisite, optional, sufficient. On the example of the line auth sufficient pam_rootok.so Let's see what these values mean.
If the second field is set to requisite, then this means that if the module pam_rootok.so ended with an error, then further execution of the file testpam interrupted and the system PAM returns an error to the application. If the module returned a positive result, then the execution of the chain continues.
required look like requisite. If the module pam_rootok.so ended with an error, then PAM will also return an error, but after the rest of the modules are completed, that is, the chain is not interrupted. If the module returned a positive result, then the execution of the chain continues.
sufficient- if the module pam_rootok.so returned success, then the system PAM returns success to the application, and further execution of the chain is aborted. If it fails, then the chain continues.
optional- this parameter does not affect the course of the chain in any way. Specified for those modules that do not perform any check actions. If the file contains only lines with the parameter optional, That PAM will return success to the application.
More details about the system PAM and the purpose of a particular library can be found at http://kernel.org/pub/linux/libs/pam/Linux-PAM-html/Linux-PAM_SAG.html . Now let's do a little practical exercise that will allow you to better understand how the system works. PAM and how to write configuration files.
Go to directory /etc/pam.d/. Copy the file su to your home directory (so you can restore it) and delete the file in su from directory /etc/pam.d/. Try now to run the command su in the terminal to switch to superuser mode. After entering the password, the system will give an authentication error, as there is no configuration file for the program su.
Create a file /etc/pam.d/su and write the following line in it:
Module pam_deny.so always returns an error. What will be the result? Check. And if you replace requisite on required?
Now let's write the following rule in the file:
Module pam_wheel.so returns success if the user account belongs to a group wheel. If you try now to run the command su, then it immediately ends with an error. That is, now the command su can only be executed by users who are members of the group wheel and know the account password root. If you create a group wheel and add your account there, then the command su will work.
Here's another example:
auth requisite pam_wheel.so |
Try to answer who can successfully execute the command su And what will need to be done for this?
This completes the practical exercise (don't forget to put back the original su file).
I want to emphasize again that configuration files in the /etc/pam.d/ directory can only be created for files that use the system PAM. For example, if you create a file /etc/pam.d/ls with string auth requisite pam_deny.so, then the command ls will still be executed because it does not use the system PAM. To check if a command uses the PAM system, you can use the command ldd, which is passed as a parameter full path to the command file. For example:
Keyword compat just “says” that the system will be used as an authentication system PAM.
And further. Be careful when experimenting with PAM. Through ignorance or negligence, you can easily block your system. Therefore, before changing anything, be sure to save the original configuration files so that in case of problems you can quickly restore them.
Two-factor authentication (2FA) is an authentication method that requires several pieces of information to log into an account or device. Besides the combination of username and password, 2FA requires the user to enter Additional information, such as one-time password(OTP, such as a six-digit verification code).
In general, 2FA requires the user to enter different types of information:
- Something the user knows (like a password)
- Something that the user has (for example, a confirmation code generated by a special application - an authenticator).
2FA is a subset of multi-factor authentication (MFA). The MFA method, in addition to what the user knows and has, requires something that it is. These are biometric data: fingerprint or voice recognition, etc.
2FA helps to secure the authentication process for a particular service or device: even if the password has been compromised, the attacker will also need a security code, and this requires access to the user's device that hosts the authenticator app. For this reason, many online services offer the option to enable 2FA for user accounts in order to increase the security of accounts at the authentication level.
In this tutorial, you will learn how to set up 2FA using the Google PAM module for a non-root user on Ubuntu 18.04. Since you are setting up 2FA for a non-root user, in the event of a lockout, you will still be able to access the computer from your root account. The instructions in the manual are general enough that they can be applied to both servers and desktop installations, both local and remote.
Requirements
- Ubuntu 18.04 server or desktop environment. Ubuntu 18.04 server needs to be configured with .
- The authenticator installed on the mobile device (for example, Google Authenticator or Authy). With it, you will scan security QR codes.
Step 1: Installing the Google PAM Module
To set up 2FA on Ubuntu 18.04, you need to install the Google PAM module for Linux. Pluggable Authentication Module (PAM) is the authentication mechanism used by Linux. The Google PAM module will allow your user to authenticate with 2FA using generated Google codes OTP.
First, log in as the sudo user you created during the initial server setup:
ssh [email protected] _server_ip
Update the Ubuntu Package Index to get latest version authenticator:
sudo apt-get update
After updating the repositories, install the latest version of the PAM module:
sudo apt-get install libpam-google-authenticator
This is a very small package without any dependencies, so it will take a few seconds to install. In the next section, we will set up 2FA for the sudo user.
Step 2: Setting up two-factor authentication
Now that you've installed the PAM module, run it to generate a QR code for the logged in user. This will generate the code, but the Ubuntu environment won't need 2FA until you enable it.
Run the google-authenticator command to start and configure the PAM module:
google-authenticator
The command will ask you some configuration questions. She will first ask if you want the tokens to be time limited. Timed auth tokens expire after a certain interval (default is 30 seconds on most systems). Timed tokens are more secure than non-timed tokens, and most 2FA implementations use them. You can choose any option here, but we recommend choosing Yes and using time-limited authentication tokens:
Do you want authentication tokens to be time-based (y/n) y
By answering y to this question, you will see several lines of output in the console:
- QR Code: This is the code that needs to be scanned with the authenticator app. Once you have scanned it, the app will create a new OTP every 30 seconds.
- secret key: this alternative way authentication application settings. If you are using an app that does not support QR scanning, you can enter a secret key to set up an authenticator.
- Verification code: This is the first six-digit code that this particular QR code generates.
- Emergency scratch codes. these are one-time tokens (also called reserve codes), they will allow you to pass 2FA authentication if you lose the authenticator device. Keep these codes in a safe place to avoid account suspension.
After you have configured your authenticator app and saved your backup codes in a safe place, the program will ask if you want to update the configuration file. If you select n, you will need to run the setup program again. Type y to save changes and continue:
Do you want me to update your "~/.google_authenticator" file (y/n) y
Next, the program will ask if you want to prevent the use of authentication codes more than once. By default, you can only use each code once, even if 30 seconds have not passed since it was created. This is the safest choice because it prevents replay attacks from an attacker who somehow managed to get your used verification code. For this reason, it is better to prohibit the use of codes more than once. Answer y to prevent multiple uses of the same token:
Do you want to disallow multiple uses of the same authentication
token? This restricts you to one login about every 30s, but it increases
your chances to notice or even prevent man-in-the-middle attacks (y/n) y
You then need to specify whether you want the auth tokens to be accepted some time after their normal expiration date. The codes are very time sensitive, and therefore they may not work if your devices are not synchronized. This option works around this issue by extending the default verification codes expiration time so that authentication codes are accepted anyway (even if your devices are temporarily out of sync). It is best to make sure that the time on all your devices is synchronized, as the yes answer will slightly reduce the security of the system. Answer n to this question to keep the token from expiration:
By default, tokens are good for 30 seconds and in order to compensate for
possible time-skew between the client and the server, we allow an extra
token before and after the current time. If you experience problems with the poor
time synchronization, you can increase the window from its default
size of 1:30min to about 4min. Do you want to do so (y/n) n
The last question is whether you want to enable a limit on the number of login attempts. This will prevent the user from making more than three failed login attempts within 30 seconds, which will increase system security. Enable this restriction by answering y:
If the computer that you are logging into isn't hardened against brute-force
login attempts, you can enable rate-limiting for the authentication module.
By default, this limits attackers to no more than 3 login attempts every 30s.
Do you want to enable rate-limiting (y/n) y
You have set up and generated 2FA codes using the PAM module. Now you need to enable 2FA in your environment.
Step 3: Activating 2FA in Ubuntu
The Google PAM module now generates 2FA codes for your user, but Ubuntu does not yet know that it needs to use the codes in the authentication process. At this point, you need to update your Ubuntu configuration to enable support for 2FA tokens in addition to basic authentication.
There are two ways here:
- You can require two-factor authentication every time a user logs in and every time a user requests sudo rights.
- You can only require 2FA during login, then only the user's password will be required when asking for sudo rights.
The first option would be ideal for a general environment where it is desirable to secure any action that requires sudo privileges. The second approach is more practical for a local desktop environment where you are the only user on the system.
Note A: If you enable 2FA on a remote machine that you access via SSH, you will need to complete steps two and three of the manual before proceeding. The rest of the steps in this manual apply to all Ubuntu installations, but remote environments need advanced settings so that the SSH service knows about 2FA.
If you are not using SSH to access installing Ubuntu, you can immediately proceed to the rest of the steps in this manual.
2FA prompt on login and sudo elevation
In order for the system to use 2FA during login and subsequent privilege escalation requests, you need to edit the /etc/pam.d/common-auth file by adding a line to the end of the existing file.
The common-auth file applies to all authentication mechanisms in the system, regardless of the environment used. It also applies to authentication requests that occur after a user has logged in, such as during a prompt for sudo rights when installing a new package from a terminal.
Open file:
sudo nano /etc/pam.d/common-auth
Add to the end of the file:
...
# and here are more per-package modules (the "Additional" block)
session required pam_unix.so
This line enables Ubuntu's authentication system to support 2FA when logging in with the Google PAM module. The nullok option allows existing users to log in even if they have not set up 2FA authentication for their account. In other words, users who have set up 2FA will be required to enter an authentication code the next time they log in, while users who have not run the google-authenticator command will be able to log in with their default credentials until they set up 2FA.
Save and close the file.
2FA prompt only when logged in
If you want 2FA to be requested only when logging into a desktop environment, you need to edit the configuration file of the desktop manager you are using. The name of the configuration file is usually the same as the name of the desktop environment. For example, the configuration file for gdm (the default Ubuntu environment since Ubuntu 16.04) is /etc/pam.d/gdm.
In the case of a headless server (which is virtual server), instead you need to edit the /etc/pam.d/common-session file. Open the appropriate file depending on your environment:
sudo nano /etc/pam.d/common-session
Add the highlighted lines to the end of the file:
#
# /etc/pam.d/common-session - session-related modules common to all services
#
...
# # and here are more per-package modules (the "Additional" block)
session required pam_unix.so
session optional pam_systemd.so
# end of pam-auth-update config
auth required pam_google_authenticator.so nullok
Ubuntu will now require 2FA when a user connects to the system via the command line (locally or remotely via SSH), but this will not apply to running commands with sudo.
You have configured Ubuntu to support 2FA. Now it's time to test the configuration and make sure that when you log into your Ubuntu system, you will be prompted for a security code.
Step 4: Testing Two-Factor Authentication
Previously, you set up 2FA to generate codes every 30 seconds. Now try to login to your Ubuntu environment.
First, logout and log back into your Ubuntu environment:
ssh [email protected] _server_ip
If you are using password-based authentication, you will be prompted for the user's password:
Note: If you are using certificate authentication on the remote server, you will not be prompted for a password. The key will be transferred and accepted automatically. You will only need to enter a confirmation code.
Enter the password, after which you will be prompted to enter the 2FA code:
Verification code:
After that you will be logged in:
[email protected] _server_ip: ~#
If 2FA was enabled for login only, you will no longer need to enter 2FA verification codes until your session ends or you manually log out.
If you have enabled 2FA via the common-auth file, you will be prompted to specify it as well on every request for sudo privileges:
[email protected] _server_ip: ~# sudo -s
sudo password for 8host:
Verification code:
[email protected] _server_ip:
You have verified that the 2FA configuration is working properly. If something went wrong and the system did not ask you for verification codes, go back to the third section of the guide and make sure you edited correct file Ubuntu authentication.
5: Preventing 2FA blocking
In case your mobile device is lost or destroyed, it is important to have backup methods in place to restore access to your 2FA-enabled account. When you set up 2FA for the first time, you have several options for regaining access after being blocked:
- save backup your secret configuration codes in a safe place. You can do it manually, but some authentication apps like Authy provide code backup features.
- Save the recovery codes in a safe place outside of a 2FA-enabled environment that can be accessed if needed.
If for some reason you do not have access to the backup options, you can try to restore access to the local environment or remote server with 2FA support in another way.
Step 6: Restoring Access to the Local Environment (Optional)
If you have physical access to the machine, you can boot into recovery mode to disable 2FA. The recovery mode is a target type (similar to a runlevel) in Linux that is used to perform administrative tasks. You will need to edit some settings in GRUB in order to enter recovery mode.
To access GRUB, first restart your computer:
When the GRUB menu appears, make sure the Ubuntu entry is highlighted. This is the default 18.04 install name, but it might be different if you manually changed it after installation.
Then press the e key on your keyboard to edit the GRUB configuration before booting your system.
Go to the end of the file that appears and find the line that starts with linux and ends with $vt_handoff. Go to the end of this line and add systemd.unit=rescue.target. Make sure you leave a space between $vt_handoff and systemd.unit=rescue.target. This will allow the Ubuntu machine to boot into recovery mode.
After making changes, save the file using the keyboard shortcut Ctrl + X. Your machine will reboot and you will be at the command prompt. Press Enter to enter recovery mode.
Once at the command line, open the configuration Google file Authenticator, which is located in the home directory of the blocked user.
nano /home/8host/.google-authenticator
The first line in this file is the user's private key, which is used to set up the authenticator.
Now you have two options:
- You can copy the private key and set up the authenticator.
- If you want to start with a clean slate, you can remove the ~/.google-authenticator file entirely to disable 2FA for that user. After logging in again, you will be able to set up 2FA again and get a new secret key.
In any case, you can restore the system after a 2FA blocking in a local environment using the GRUB bootloader. Next, we will explain how to restore access to a blocked remote environment.
Step 7: Restoring Access to the Deleted Environment (Optional)
If your sudoer account is locked in a remote environment, you can temporarily disable or reconfigure 2FA using the root user.
Login as root user:
ssh [email protected] _server_ip
After logging in, open the file Google settings Authenticator, which is located in the home directory of the blocked user:
sudo nano /home/8host/.google_authenticator
The first line in this file is the user's private key, which you need to set up the authenticator.
Now you have two paths:
- If you want to set up a new or erased device, you can use the secret key to reconfigure the authenticator app.
- If you want to start with a clean slate, you can delete the /home/8host/.google_authenticator file completely to disable 2FA for that user. After logging in as a sudo user, you will be able to set up 2FA again and get a new private key.
With any of these options, you will be able to recover from an accidental 2FA block using the root account.
Conclusion
In this tutorial, you set up 2FA on an Ubuntu 18.04 machine. Two-factor authentication provides an additional layer of account and system security. In addition to the standard credentials, you will also need to enter additional code login confirmation. This makes it impossible for unauthorized access to your account, even if an attacker manages to get your credentials.
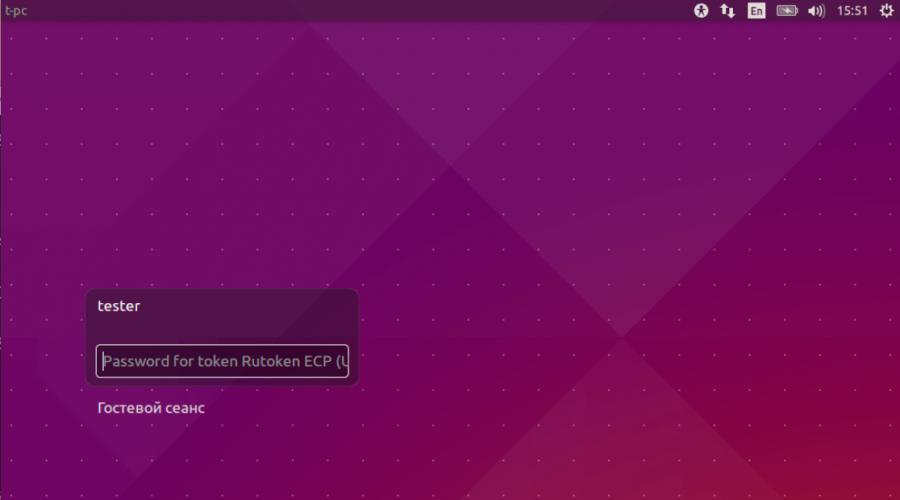
Tags: ,- Connect the USB token to your computer.
- To determine the USB token model name, open Terminal and enter the command:
As a result, the name of the USB token model will be displayed in the Terminal window:
Make sure you are using: Aktiv Rutoken ECP
Introduction
Pluggable Authentication Modules (PAM, Pluggable Authentication Modules) is a set of shared libraries that allow you to integrate various low-level authentication methods into a single high-level API. This allows you to provide unified mechanisms for managing, embedding applications in the authentication process.
The general procedure for setting up PAM is as follows:
- Generate an RSA key pair on the token (verified that it works for a key length of 2048 bits, there were problems with 1024)
- If a certificate is required, then use OpenSSL or other software to generate a certificate and write it to the token
- burn public key or a certificate to the required directory
In the end it looks like this:

Preliminary preparation
The demo is running on Ubuntu 18.04. The described sequence of actions is also relevant for other versions of Ubuntu and systems based on Debian.
To configure the PAM module, you need to install the following packages:
- pcscd
- OpenSC
- OpenSSL
- libpam-p11
- libengine-pkcs11-openssl
sudo apt-get install pcscd opensc openssl libpam-p11 libengine-pkcs11-openssl
Rutoken S users also need to install the driver from our website.
General procedure
setting pam_p11
Before you start working with the token, you should configure the pam_p11 module:
- In the dialog that appears, make sure that pam_p11 is selected. If you want to disable password authentication, you can disable Unix authentication.
Creating keys on a token
Run openssl
We load the pkcs11 support module:
OpenSSL> engine dynamic -pre SO_PATH:/usr/lib/x86_64-linux-gnu/engines-1.1/pkcs11.so -pre ID:pkcs11 -pre LIST_ADD:1 -pre LOAD -pre MODULE_PATH:/usr/lib/x86_64- linux-gnu/opensc-pkcs11.so (dynamic) Dynamic engine loading support : SO_PATH:/usr/lib/x86_64-linux-gnu/engines-1.1/pkcs11.so : ID:pkcs11 : LIST_ADD:1 : LOAD : MODULE_PATH: /usr/lib/x86_64-linux-gnu/opensc-pkcs11.so Loaded: (pkcs11) pkcs11 engine OpenSSL>
If you are not using Ubuntu 18.04, you will need to check the location of pkcs11.so. It can be located, for example, in /usr/lib/openssl/engines/ . If you can't find it, use the find command
Create a self-signed certificate in PEM format:
OpenSSL> req -engine pkcs11 -new -key 0:45 -keyform engine -x509 -out cert.pem -text
Where 0:45 is the slot:id pair (which we specified in step 5). OpenSSL will prompt you to enter a PIN and fill in the information about the certificate. If you get an error, check if other USB tokens or smart card readers are connected to the computer.
Checking the generated certificate. A self-signed certificate file named cert.pem should be created in the current directory.
Note: if you remove the -x509 key when creating a certificate in OpenSSL, then at the output we will get a request for a certificate.Note
At the stage of user selection, information about the connected token may not be updated dynamically. If you've connected the token and don't see the pin input field, you may need to move the focus to the "guest session" and back to your user.
Create file /usr/share/pam-configs/p11 with the following content:
Name: Pam_p11 Default: yes Priority: 800 Auth-Type: Primary Auth: sufficient pam_p11_opensc.so /usr/lib/x86_64-linux-gnu/opensc-pkcs11.so
If you are not running Ubuntu 18.04, you will need to check the location of opensc-pkcs11.so. It can be found, for example, in
/usr/lib/opensc-pkcs11.so. If you can't find it, use the find command
Update PAM configuration:
sudo pam-auth-update
Let's prepare the token.
$ pkcs15-init -E $ pkcs15-init --create-pkcs15 --so-pin "87654321" --so-puk "" $ pkcs15-init --store-pin --label "User PIN" --auth- id 02 --pin "12345678" --puk "" --so-pin "87654321" --finalize
In the pin and so-pin parameters, you can specify the desired user and administrator pin codes.
We create an RSA key pair of length 2048 bits with ID "45" (it is worth remembering the id, you will need it when creating a certificate). Authentication on a token occurs under the user entity.
$ pkcs15-init --generate-key rsa/2048 --auth-id 02 --id 45<вводим PIN пользователя>
Let's check the generated key:
$ pkcs15-tool --list-keys Using reader with a card: Aktiv Rutoken ECP 00 00 Private RSA Key Object Flags: , private, modifiable Usage: , sign Access Flags: , sensitive, alwaysSensitive, neverExtract, local ModLength: 2048 Key ref : 1 (0x1) Native: yes Path: 3f001000100060020001 Auth ID: 02 ID: 45
Creating a certificate and importing it to a token
Since 2020, the use of encryption in accordance with GOST R 34.10-2001 will be banned, which means that all organizations that interact with government agencies are forced to urgently implement the next standard - 2012. If you work in one of them, then do not pass by: in this article we will talk about how to solve the problem using a server on CentOS 7 and the CryptoPro JCP package.
If you are hearing about all this for the first time, then here is a little historical background.
In 1994, the FSB developed a number of standards and measures designed to protect the exchange of documents between organizations and other participants in this process. One of these security measures was the electronic digital signature of documents, and one of the standards - GOST R 34.10-94, which describes the algorithm for generating and verifying electronic digital signature. Adopted and put into effect by the resolution of the State Standard of Russia dated May 23, 1994, number 154, he worked until 2001.
It was replaced by the well-known GOST R 34.10-2001 - an improved standard designed to ensure greater algorithm stability. But time does not stand still, algorithms and methods of cryptoprotection are changing, and after eleven years GOST R 34.10-2001 is changed to GOST R 34.10-2012.
In the new standard, the first version of the requirements for parameters remains the same. Length secret key is of the order of 256 bits, and it is envisaged to use a hash function with a hash code length of 256 or 512 bits. The main difference of the new standard is options with additional parameters and schemes, including hashing according to the GOST R 34.11-2012 Stribog standard.
INFO
Stribog is the god of the ancient Slavs, who patronizes the winds, weather and everything related to airspace. Perhaps and cloud technologies Same. Read more about this cipher in the articles "" and "".
In February 2014, the FSB announced the start of the transition to the use of the new national standard GOST R 34.10-2012 in electronic signature for information that does not contain information constituting a state secret. The document numbered 149/7/1/3-58 dated January 31, 2014 “On the procedure for the transition to the use of new EDS standards and hashing functions” was published, it established the following requirements.
- After December 31, 2013, terminate the certification of electronic signature tools for compliance with the requirements for electronic signature tools approved by Order of the Federal Security Service of Russia dated December 27, 2011 No. 796, if these tools do not provide for the implementation of functions in accordance with GOST R 34.10-2012.
- After December 31, 2018, prohibit the use of GOST R 34.10-2001 to generate an electronic signature.
The Ministry of Communications even created a plan for the transition to the standard (PDF). However, in practice it turned out that everything is not so simple, and the transition had to be postponed until December 31, 2019. The reasons are as follows.
- Many state and municipal authorities are not ready to switch to the new GOST-2012 electronic signature standard due to the lack of support at the software level.
- To issue new certificates, you need hardware that supports new GOST, and the certificate of the Head Certification Authority, generated using GOST-2012. Certification centers received it only in the summer of 2018. Additional time is required to issue certificates to all users.
Now there are two cryptoprotection standards for the operation of EDS, but those who use GOST-2001 urgently need to do something. Winter, as they say, is coming, which means that a series of tests awaits us when implementing GOST-2012 support.
I will tell you how to deploy a FSB-certified cryptographic information protection tool (CryptoPro JCP) on a Linux server running Java JDK. By the way, if you are still using GOST-2001, there is a wonderful one on the CryptoPro website, I advise you to read it, it will not be superfluous.
The entire document flow between the participants of the exchange takes place on the principle of SMEV (system of interdepartmental electronic interaction). An application may be a member of such a system, but it may not be one at all, the principle of document exchange does not change from this. For ease of understanding, I drew a small diagram.

Prices
As always, the question of licensing arises. software solution. CryptoPro JCP is not cheap, and if one workstation costs 1200 rubles, then server licenses are much more expensive - about 30,000 for each core (or two cores Intel processor with Hyper Threading disabled).
Installing and configuring a crypto provider
In the examples I will use virtual machine with CentOS 7, but you are not limited in choice hardware And Linux distribution. All actions and commands will be the same.
First of all, let's create a local user under which the software that uses document signing will run.
$ sudo useradd -d /opt/user -p<Тут указываем пароль>-s /bin/bash user; sudo grep user /etc/passwd
Install the Java JDK correctly. Download the required distribution.
$ wget --header "Cookie: oraclelicense=a" --content-disposition http://download.oracle.com/otn-pub/java/jdk/8u191-b12/2787e4a523244c269598db4e85c51e0c/jdk-8u191-linux-x64.tar .gz -O jdk-8u191-linux-x64.tar.gz
Unpack the archive and check if the Java folder is ready for copying.
$ tar zxvf jdk-8u191-linux-x64.tar.gz; ls-al;
Copy the folder to the section for application software. I usually use /opt .
$ sudo cp -rf jdk1.8.0_191 /opt/
We check that it was copied correctly. If necessary, change the owner of the folder to root.
$ ls -al /opt/jdk1.8.0_191/ $ sudo chown -R root:root /opt/jdk1.8.0_191/; cd /opt/jdk1.8.0_191/; ls-al;
Prescribe environment variables for Java JDK for all users by default.
$ sudo vi /etc/profile.d/oracle.sh
We write the following to the file:
Export JAVA_HOME=/opt/jdk1.8.0_191 export JRE_HOME=/opt/jdk1.8.0_191/jre export PATH=$PATH:/opt/jdk1.8.0_191/bin:/opt/jdk1.8.0_191/jre/bin
If the server has multiple versions of the Java JDK, then alternatives must be registered for new version.
$ sudo alternatives --install /usr/bin/java java /opt/jdk1.8.0_191/bin/java 2 $ sudo alternatives --install /usr/bin/jar jar /opt/jdk1.8.0_191/bin/jar 2 $ sudo alternatives --install /usr/bin/javac javac /opt/jdk1.8.0_191/bin/javac 2 $ sudo alternatives --set jar /opt/jdk1.8.0_181/bin/jar $ sudo alternatives --set jar /opt/jdk1.8.0_191/bin/jar $ sudo alternatives --set javac /opt/jdk1.8.0_191/bin/javac $ sudo alternatives --config java
In the menu, select option 2 (or the one that will lead to the use of a newer Java versions). Do not forget to correct the rights to the JRE systemPrefs.
$ sudo chmod 777 -R /opt/jdk1.8.0_191/jre/.systemPrefs
Checking installed version Java.
$ java-version
java version "1.8.0_191"
Java(TM) SE Runtime Environment (build 1.8.0_191-b12)
Java HotSpot(TM) 64-Bit Server VM (build 25.191-b12, mixed mode)
Copy the folder with the CryptoPro JCP distribution kit to the section for application software.
$ sudo cp -rf jcp-2.0.40035 /opt/
We check that everything is copied correctly.
$ ls -al /opt/jcp-2.0.40035/
Grant permission to run scripts.
$ sudo chmod +x /opt/jcp-2.0.40035/*.sh
We check the owner and rights to the folder, it must be root. Let's go into it.
$ ls -al /opt/jcp-2.0.40035/; cd /opt/jcp-2.0.40035/;
To avoid problems during installation, check the number of cores on the processor and check the license. You can find out the number of cores with the nproc command.
Let's move on to installing the JCP crypto provider. During installation, you will need to answer a number of questions.
Continued available to members only
Option 1. Join the "site" community to read all the materials on the site
Membership in the community during the specified period will give you access to ALL Hacker materials, increase your personal cumulative discount and allow you to accumulate a professional Xakep Score rating!