How to make content in a Word document? Work with the table of contents automatically and manually
Good time to all! Continuing the study of the Word program, we will get acquainted with such a function as creating content, well, or a table of contents, as you like. This is especially important if your document has several sections that must be clearly demarcated.
That's when the presence of content is simply necessary. Often in a document you can see real chapters, subheadings, as in a real book, with page numbers. If you are thinking of a large document, then being able to make a table of contents is a must.
Creating content in different versions of this text editor is practically no different. This is done both manually and automatically. The manual method is somewhat laborious, which is why templates and styles appeared in later versions of the Word. With the help of which you can customize the content quite simply. How to do this in different editors will be described in this article.
We make content in Word 2010 automatically, with page numbers
When creating content in a document, you need to imagine what it will be. The fact is that any content (or table of contents) that you open may look like this: ...
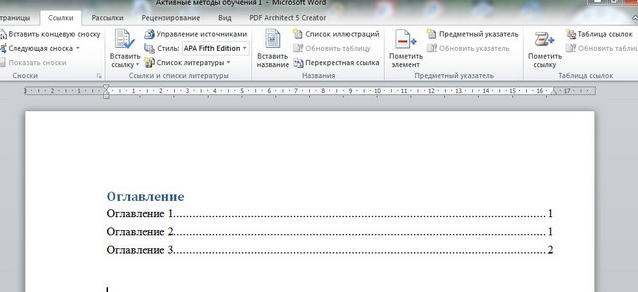
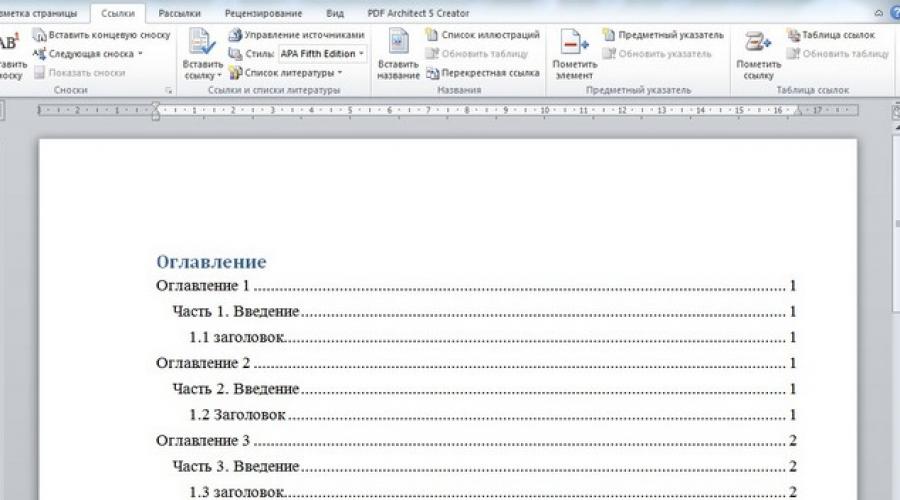
... or like this:

This is called "creating first-level headings" as in the previous figure and second and third as in the next. There may be several levels. It all depends on your text and your creative plan. So, if you only have headings of the first level, that is, there are no subheadings (2, 3, etc. levels), then it’s easier to create headings for your text through the “Styles” menu, immediately while writing the text.
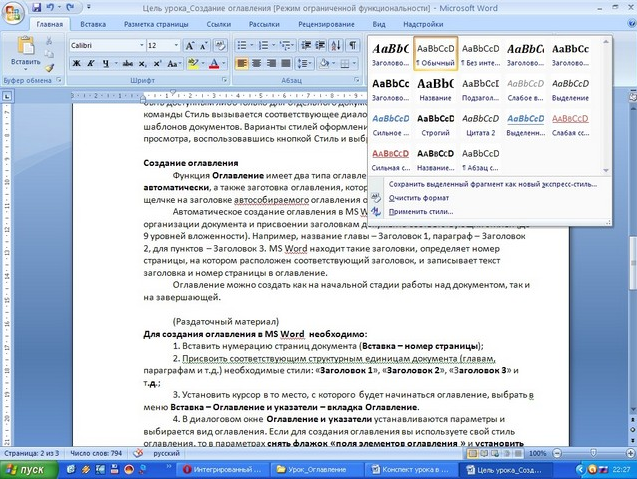
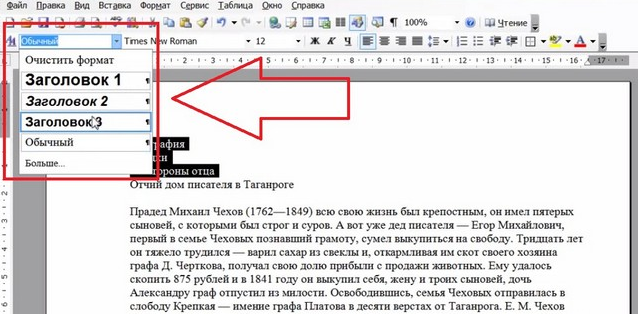
To select them, select the future heading, right-click to call up the menu in which we find the "Styles" item. By clicking on it, we will open a window with a wide variety of options. Or, on the toolbar in the "Home" menu, this set is already present.
All that remains is to select the "Table of Contents" item. If your content will be on several levels, say three: a heading and two subheadings of the second and third levels, then you will have to work a little. This is done already when the text with all the headings is typed and needs to be formatted.
To do this, we single out each level separately. Having selected, for example, one heading, which will be the first level, we find below in the text exactly the same and with the key pressed ctrl select it, and so on.
Holding down a key ctrl you can select individual places of the text. Holding down the Shift key selects the entire desired fragment - from the first word to the last. These key combinations are common and used in all editors, as well as in Windows Explorer.
In this case, the previously selected text fragments will remain selected. If you won't hold ctrl, then only the current fragment will be selected. Having thus selected the necessary headings, go to the "links" menu. There we see the button "add text".
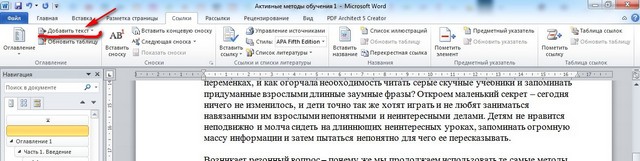
By clicking on it, we will see names such as “Level 1, Level 2, Level 3” in the drop-down menu, etc. For the first heading, select "Level 1". Further, we select in the same way all the other subheadings, not forgetting to combine the corresponding levels. Once you have created the level headings, you can start creating the table of contents itself.
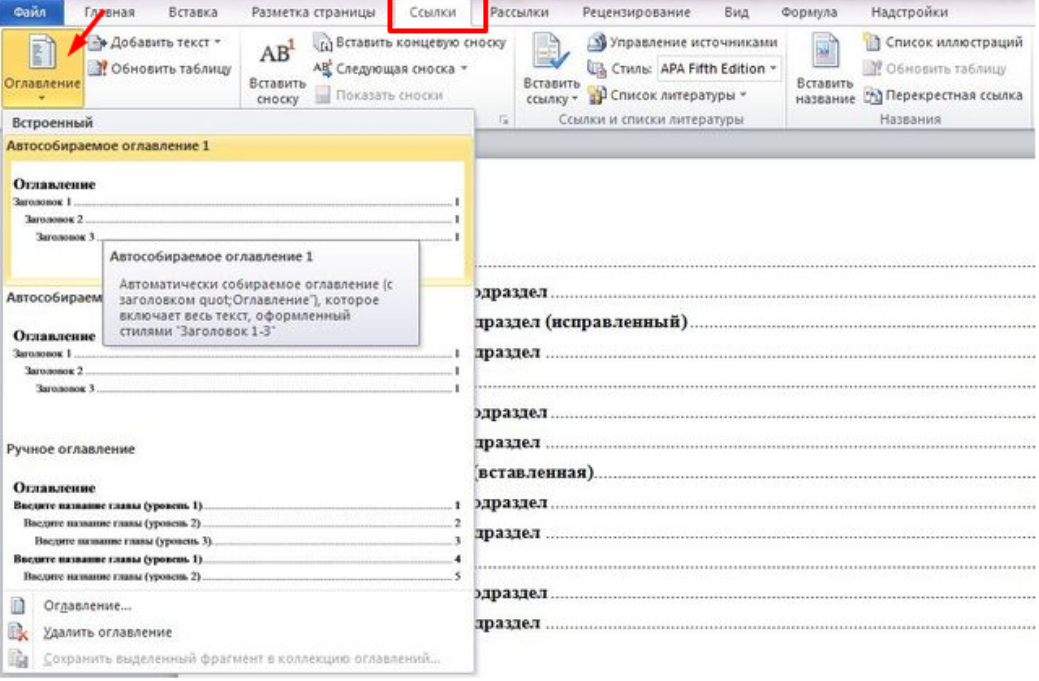
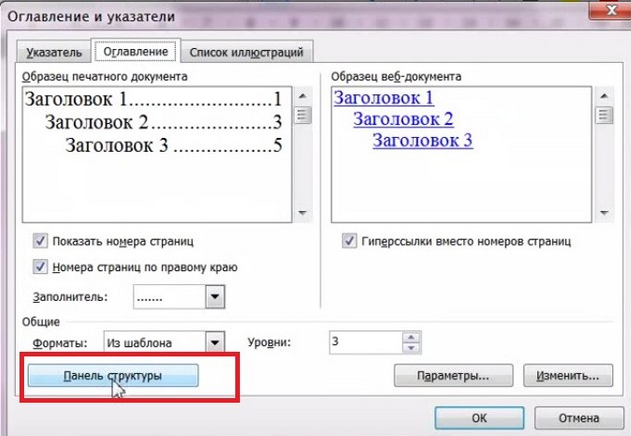
We put the cursor at the very beginning of the page, above the first heading, or at least where you want to place your content. After that, in the "Links" menu, click on "Contents". A menu with title options will open.

These are automatic styles that collect the previously organized table of contents. We select, for example, "auto-assembled table of contents No. 1". The program itself will create content from the text headings you have chosen, placing the pages on which these text lines were located.
In addition, at the very end of the Table of Contents tab in the Links menu, there is also manual content entry. If you select it, then your titles will not be displayed for you, but you will have to enter their titles manually from the keyboard.
Adding content automatically with page numbers to Office Word 2007
When writing text, it is usually assumed that all headings are created in advance. This is the best way to create content. Either you immediately make all the necessary headings and subheadings, or then you “crawl” throughout the document in search of these very headings. It's okay, your document turned out to be five pages maximum.
And if it has a hundred or more pages? It is possible to miss something somewhere. So, the document is created, divided into headings and subheadings. In the "Links" tab, we find the "Contents" button and call up the list of table of contents templates. Do not forget to select the necessary fragments of text before this:
We also select the automatic content mode. As a result, it will appear in the place where you put the cursor. If you click on the table of contents that appears, it will be in the form of a table.
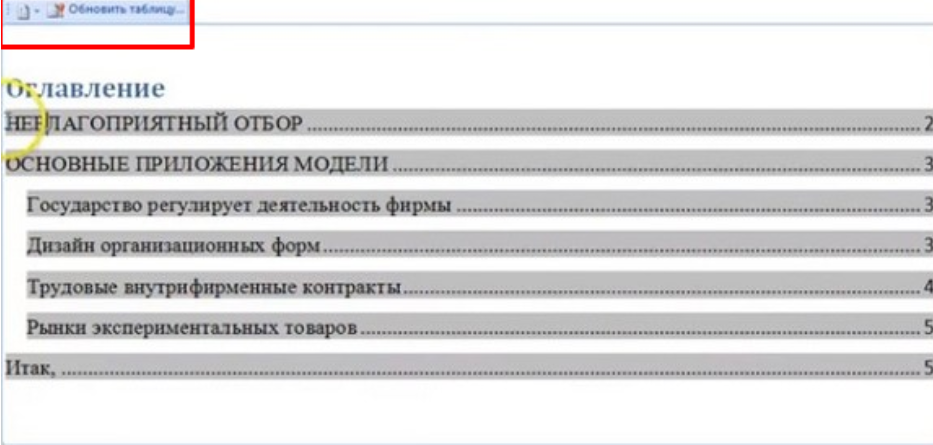
However, if you make any changes to the text, they are not displayed in the content. To make changes in it, you must double-click to activate this table. Now you can edit it. After all changes, the content must be updated.
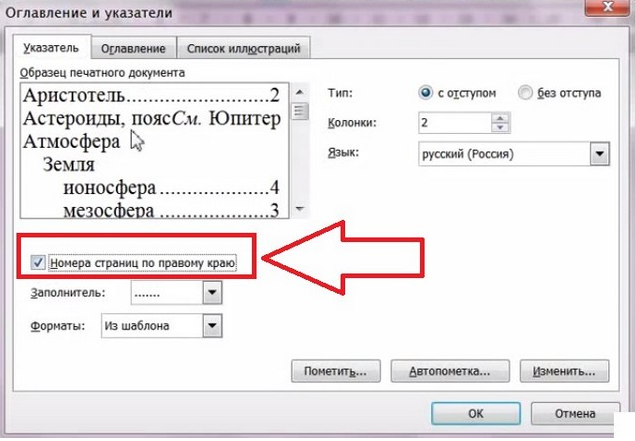
Thus, we create all the headings, subheadings, and so on. Now let's move on to the title itself. In the "Insert" menu, select the "Link" item and in the drop-down list, click on "Tables and Indexes".
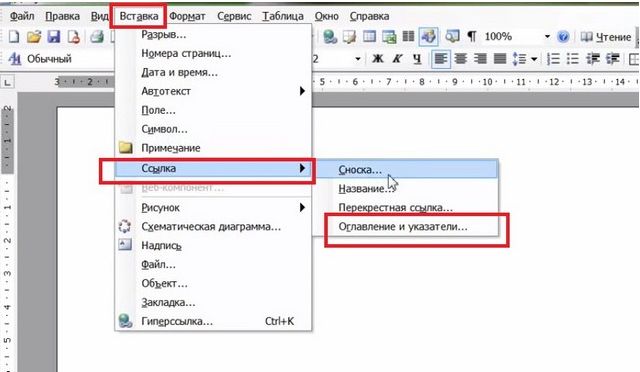
An editing window will open, in which we sequentially carry out the following operations. In the "Page numbers on the right margin" box, check the box.
How to make a table of contents in Word 2007 with dots using the Tab button?
Key " Tab”, or “tabbing” is used for more than just indentation. It can also help you create content. True, all this is done manually and looks somewhat worse than in the cases described above.
In general terms, it looks like this. We select a separate page for the table of contents, on which we write either “Table of Contents” or “Contents”. Next, write the names of all sections, if any, from a new line. Partitions have been discussed before.
We put the cursor after each name and the button " Tab» run to the end of the page, where we put the page number of the beginning of this section. Between the title of the chapter and the page number by repeatedly pressing the dot button, we put these same dots. Next, on a new line, write the next section and repeat everything in the same order.
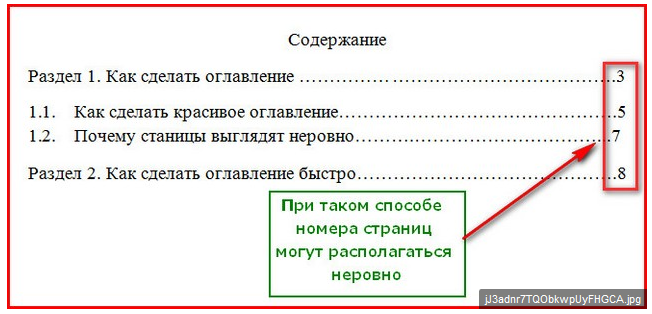
However, the page numbers, as can be seen from the figure, are not evenly spaced. Therefore, since version 2007, there is an automatic collection of the table of contents with an arrangement in the table structure. But you can set the tabs evenly manually. This is done with a line.
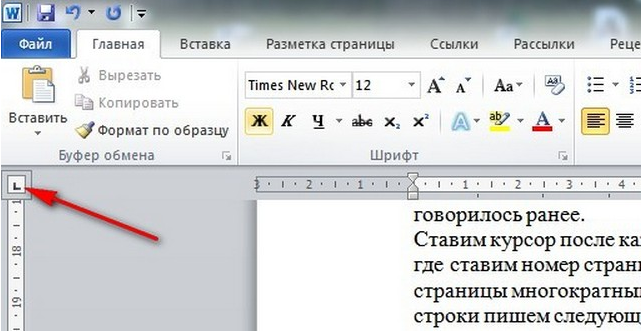
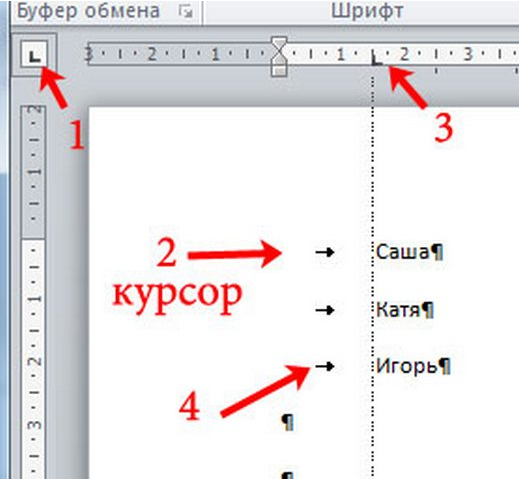
There is an icon in the top left corner that sets the tab value. If you click on it, then it changes the picture and, accordingly, the value.
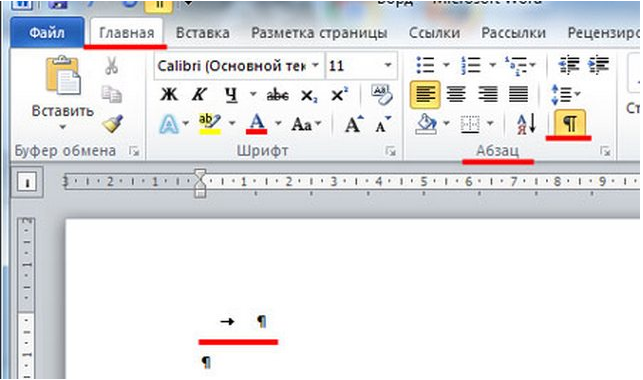
To make it convenient to follow the changes, it is necessary to enable the display of tab characters in the document. To do this, on the toolbar in the "paragraph" tab, we find the icon for displaying hidden characters and click. As a result, formatting marks will become visible in the document.
So, by clicking on the tab icon in the upper left corner of the ruler, we set the required value: either along the left edge, or in the center, or along the right edge, and so on. At the second stage, we put the cursor in the line we are working with, then click on the top line where it is necessary to set a tabulation - a characteristic icon will appear. Now press the "Tab" key, the cursor will move to this place and you can type text.
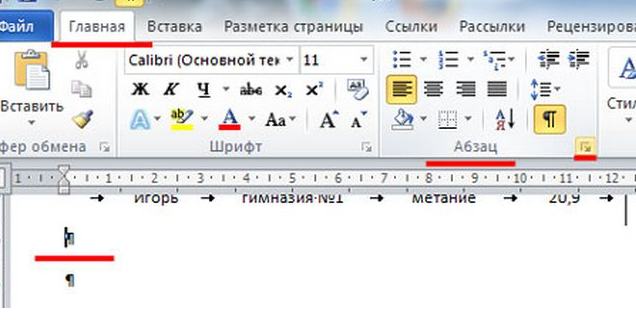
The same can be done by calling the "Tabulation" menu from the "paragraph" tab in the Main Menu.
In the window that appears at the very bottom we find the "tab" button and press it.
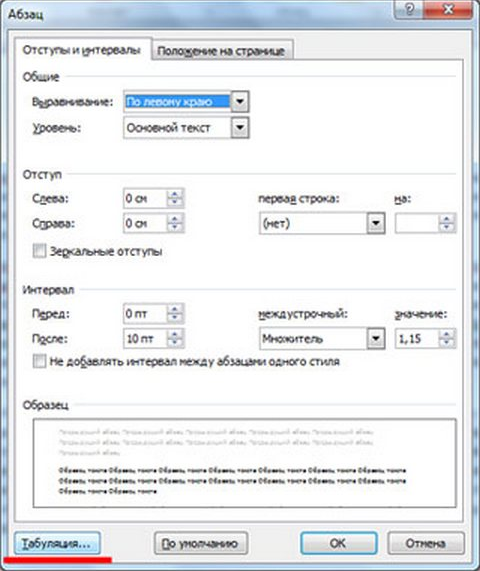
Here we set the parameters that are necessary. This is the tab stop, which is given in centimeters. Select the desired alignment and filler. That is, what the space between the title and the page number will look like - in the form of dots, a continuous line, or nothing at all.
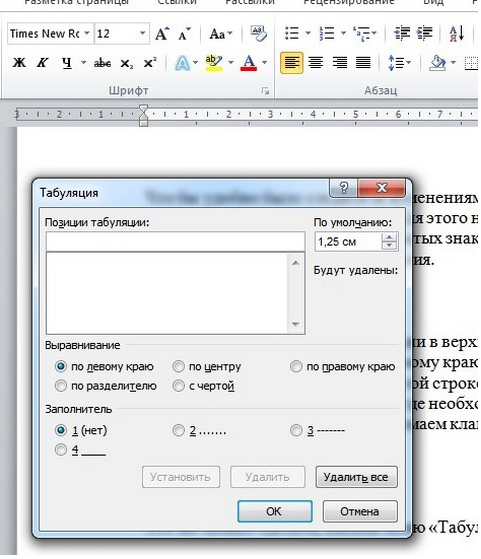
Having set all the values, press the "install" button and then "ok". As a result, we get the same thing but a little faster.