How to delete cells, columns and rows in Excel
Some users, when editing cells in Excel, face characteristic difficulties: due to the fact that they have chosen the wrong option, their table is either reduced, or stretched, or the data (columns and rows) disappear in it.
This article is designed to help you quickly and correctly delete columns and rows, empty, repeating cells in Excel, and change the contents of the selected cell. Consider separately the solutions to each of the above tasks for changing the table.
How to delete a cell?
1. Open the necessary table in Excel. Left click on the element to be deleted.
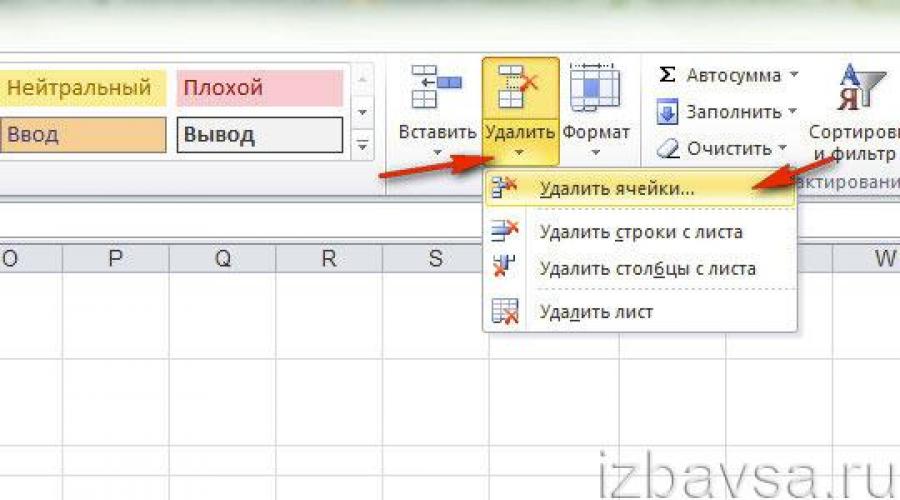
2. On the Home tab, on the right side of the panel, open the Delete drop-down menu and select Delete Cells.
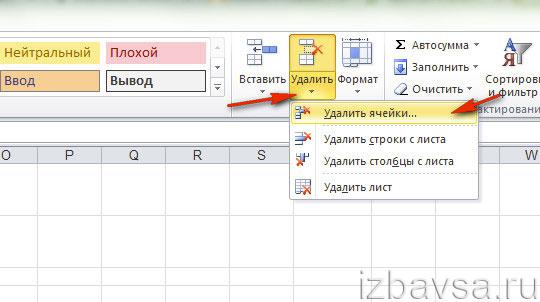
3. In the additional window, select the deletion method (click the radio button next to the required option):
- "Left Shift Cells"- after deletion, all elements on the right side of the line will move to the left;
- "Upward Shift Cells"- lower elements in the column will move up.

4. Click OK.
How to change cell value?
1. Click on the element 2 times with the left button.
2. When the cursor appears, change or delete the parameter in the same way as in Word (Word text editor):
hold down the left button, select the characters and press the "Delete" key to then print other data or insert spaces.

How are rows and columns removed?
1. Click on the column name (special field at the top). All cells in the column are highlighted.
2. Keeping the cursor on the highlighted items, press the right button.

3. In the Excel context menu that appears, click "Delete".

4. Similarly, the line is removed from the project: select it and activate the corresponding command in the menu.
How to remove duplicate cells from a table?
Method #1
1. On the Data tab, click on the Remove Duplicates option.

2. In the settings panel, specify the column in which you want to remove duplicates:
- click "Deselect";
- set a checkmark in the list with a mouse click, where required.
Attention! If you want to remove duplicates in the entire table, respectively, the labels must be set in the list next to each column.

3. Click OK.
4. At the end of the procedure, Excel will report how many duplicate values it has found and removed.

Method #2
1. On the "Data" tab, in the "Filter" block, click the "Advanced" subsection.

2. In the "Advanced filter" window, specify where to save the edited list (in place or in a separate file).
3. Click on the "Only unique records" box. Click OK.
How to remove empty cells?
Method #1
1. Holding down the left button, mark the borders of the table area within which you want to remove empty elements (containing spaces).

2. Press the "F5" key.
3. In the panel that opens, click "Select".

4. Turn on the "Empty cells" option with a mouse click. Click OK.

5. Delete the selected elements through the context menu (right-click on them).
Note. Experienced users use a special formula to remove empty elements. It is written in Excel memory as a script written in Visual Basic. You can learn more about this technology on specialized forums.
Method #2
1. Select the column you want to edit.

2. Open the "Data" section and click "Filter".
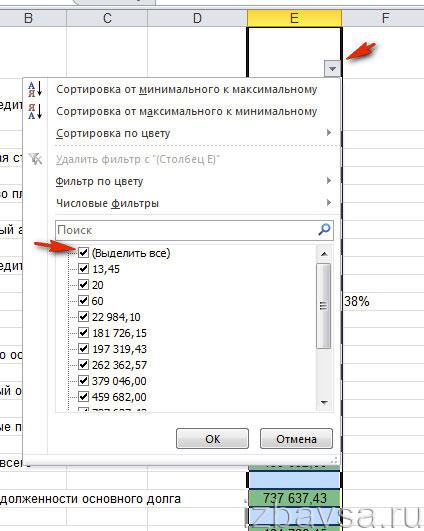
3. Click on the installed filter (“arrow” in the cell).

4. Uncheck the box in the Select All add-on.
5. Click the "Empty" box and then the "OK" button.

6. Only empty cells will be displayed in the column. Right-click on them and click "Delete ...".
Comfortable work in Excel!