If iPhone does not send mail. An email program pre-installed on your mobile device How to set up email services on iPhone - video
Read also
can only be guaranteed if the version of it operating system iOS devices 3 or higher. If the OS version is iOS 2 or lower, then it is not safe to use the email program preinstalled on it. We recommend updating your iOS version.
Configure via IMAP protocol
2. Select Other.
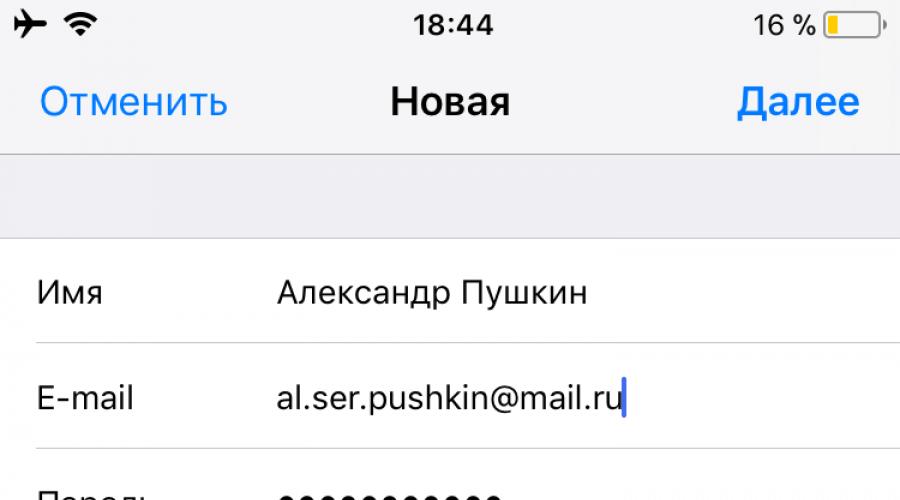
3. Fill in the fields:

6. Go to Settings → Accounts & Passwords and open the account you just connected.

7. Proceed to edit your account.


10. Fill in the fields:

11. Click "Done".
12. Return to the Account menu. entry" and go to the "Advanced" section.

993 .

Configure via POP3 protocol
1. Open standard application Mail on iPhone or iPad.
2. Select Other.
3. Fill in the fields:
4. An error message will appear. Select Continue.

5. Go to the “POP” tab.

6. Change data:

After connecting your mail, you need to set additional settings.
8. Go to Settings → Accounts & Passwords and open the account you just connected.
8. Tap SMTP in the Outgoing Mail Server section.

9. Proceed to edit the primary server.
10. Fill in the fields:
11. Tap Done.
12. Return to the previous screen and go to the “Advanced” section.

13. Check that in the “Inbox Settings” section the “Use SSL” setting is enabled and the server port is specified 995 .

Changing SSL settings
1. Go to Settings → Accounts & Passwords and open the account you connected.
2. Look at what you have in the “Host Name” field in the “Incoming Mail Server” section.

The mail program is configured using the POP3 protocol
2. Proceed to edit the primary server.
3. Fill in the fields:
4. Tap Done.
5. Return to the previous screen and go to the "Advanced" section.
6. Install:
The mail program is configured using the IMAP protocol
1. Tap SMTP in the Outgoing Mail Server section.
9. Proceed to edit the primary server.
10. Install:
11. Click "Done".
If the above settings are already installed in your email program, then no changes need to be made.
In the standard Mail email client, there are three mail checking modes: "Sample", "Push" And "Manually".
Sometimes it happens that due to our own inattention, or because of someone’s playful hands, and sometimes even by ourselves, certain functions stop working for us. If the standard iOS email client Mail has stopped updating automatically and you don’t know what to do, you need to do the following:
1 . On iPhone or iPad, open Settings → Passwords and accounts.
».3 . For necessary mailboxes indicate the schedule " Push», « Sample" or " Manually" A description of each mode can be found below.

Push
The “Push” function will allow you to automatically push messages from the mail server to your iPhone or iPad. It is not available to everyone mail servers(for example, it doesn’t work with Gmail, but with iCloud mail friendly as it should be). Don't forget about the obvious drawback of Push - the function consumes a little more battery. Push is ideal for active users who need to respond to emails quickly.
Sample
By specifying the mode “ Sample", be sure to select the appropriate value:
- Automatically: iPhone or iPad will download emails in the background as long as the device is connected to a charger and Wi-Fi.
- Manually: Data will be downloaded to the device only when you launch the application.
- Hourly, 30 minutes and 15 minutes: Data will be downloaded automatically according to the selected check interval.

It is worth considering that the battery will be used more economically if you sample less frequently.
Manually
Checking email manually is entirely the responsibility of the user. We opened the application, pulled the work area down and waited for new messages to load. If you rarely receive letters or rarely use mail, then this is your option.
For owners of mobile devices on iOS, it is possible to synchronize their device with a Yandex mail account. About,
how to do this will be discussed in this article.
Yandex.Mail, like most email services, requires certain permissions for use in third-party client applications (both desktop and mobile). To provide them, do the following:

Setting up Yandex.Mail on iPhone
There are several options for connecting this mail service, after which you will be able to work with letters on mobile device.
Method 1: System Application
For this procedure, you only need the device itself and account information:

- Incoming mail server: Host name - imap.yandex.ru
- Outgoing mail server: Host name - smtp.yandex.ru


After completing the steps described above, Yandex.Mail on iPhone will be synchronized, configured and ready to work. But sometimes these manipulations are not enough - the mail does not work or gives an error. In this case, you must do the following:
- Open "Settings" devices and go to the item "Accounts and Passwords"(on old iOS versions it is called "Mail, addresses, calendars").
- Select Yandex there, and then the account you are setting up.
- In chapter "Outgoing mail server" select the corresponding custom box SMTP(there should be only one).
- Mailbox yandex.ru We have already been linked, but it is not working yet. To “start” it, in the section "Primary server" click on the item smtp.yandex.com, if she is there.

In cases where there are no mailboxes yet, select "Not configured". In field "Node name" write down the address smtp.yandex.com.
- Save the information you entered and click on again smtp.yandex.com.
- Make sure the item "Use SSL" activated, and in the field "Server port" value is written 465
.

But it happens that mail does not work with this port number. If you have a similar problem, try entering the following value - 587 , everything works well on it.
- Now click “Done” - “Back” and go to the tab "Additionally", located at the very bottom.
- In chapter "Inbox Settings" item must be activated "Use SSL" and the following server port is specified - 993 .


Note: The Username field is marked as optional. This is partly true, but sometimes it is the lack of information specified in it that causes problems with sending/receiving letters. In such cases, you must enter the mailbox name there, but without part“@yandex.ru”, that is, if, for example, our email [email protected], you only need to enter lumpics.


Now Yandex.Mail will definitely work normally. We will consider another option for setting it up on the iPhone.

Method 2: Official app
The postal service provides special program for iPhone users. You can find it on the website. After downloading and installing, run the program and follow the installer's instructions. To add an existing email, you only need to enter its address and password in the application.

This completes the Yandex mail setup. All letters will be displayed in the application itself.
Setting up email on iPhone and iPad is not difficult if your mailbox is registered with iCloud, Google (Gmail), Yahoo!, AOL or Outlook.com. It all comes down to entering user data in just 4 fields; the email client will do the rest itself. But if you need to set up a mailbox in Mail.ru, Yandex, Rambler or Meta.ua, the situation changes somewhat.
Today we will tell you how to set up a standard email client (Mail) on iPhone for email services pre-installed in iOS (iCloud, Gmail, Yahoo!) and non-standard ones like Yandex or Mail.ru.
In order to set up a mailbox in iOS, you need to connect your iPhone to the Internet (a 3G connection is sufficient, but it is better to use high-speed wireless Wi-Fi access). True, this is not necessary, mail can be configured offline, an account will be created, but the username and password will be verified after connecting the device to the Internet.
How to Set Up Gmail on iPhone
Setting up mail on iPhone for email service providers (hereinafter referred to as “mailer”) Gmail, Yahoo!, Outlook, AOL, Exchange does not cause any problems, the Mail email client will automatically detect the settings of the incoming and outgoing mail servers, just fill in just 4 text fields:
- Name— when sending messages, the value of this field will be displayed in the “From” field. Enter your full name so that recipients can easily identify you.
- Email- E-mail address.
- Password— password for the mailbox.
- Description— a label that will be displayed in the “Mail, Addresses, Calendars” menu. If you have several mailboxes, use the email address as the description, this will make it easier to identify the desired entry.

Setting up Yandex mail on iPhone
There are no problems with those “mail providers” (email service providers) for which the standard mail client Mail.app can receive settings automatically, but if it comes to Yandex, Mail.ru or Rambler, you will need to dig deeper.

You can find them using Yandex search, Google or any other search engine, or you can use a special search form on the Apple website.
Finding Yandex Mail settings for iPhone and iPad


After the server settings are found, they need to be entered in the appropriate fields:
- Incoming mail server
- Account type— select the IMAP protocol (how does IMAP differ from POP according to Google)
The values of the “Name”, “E-mail” and “Description” fields are automatically substituted from those that you entered previously - Node name— server host name
- Username— email address (same as in the E-mail field)
- Password- mailbox password
- Account type— select the IMAP protocol (how does IMAP differ from POP according to Google)
- Outgoing mail server
- Node name— server host name
- Username and Password b It is not necessary to enter in the outgoing mail server settings
After you all required fields have been filled out correctly, tap " Further". After checking the data, in the “ IMAP» tap on « Save". The Yandex mail account will be saved and will become available in “Mail, addresses, calendars”.
Additional email settings in iOS

You can set up your email account more flexibly on your iPhone or iPad. On the page " Mail, addresses, calendars -> Account name -> Advanced» can be configured:

As we have already noted, search Mail settings from Apple does not give positive results for some email services, namely: Rambler, Meta.ua, Ukr.net. For your convenience, we will provide the necessary settings.
| Account type: | IMAP |
| Incoming mail server: | |
| Node name: | imap.mail.ru |
| Username: | |
| Password: | email password |
| Outgoing mail server: | |
| Node name: | smtp.mail.ru |
| Username: | email address (full) |
| Password: | email password |
| Account settings (“Mail, addresses, calendars - Account in Mail.ru -> Advanced”): | |
| Use SSL: | included |
| Server port: | 993 |
| Outgoing mail server (“Mail, addresses, calendars -> Account in Mail.ru -> Outgoing mail server (SMTP) -> Primary server (smtp.mail.ru)”) | |
| Use SSL: | included |
| Server port: | 465 |
| Account type: | POP |
| Incoming mail server: | |
| Node name: | pop3.ukr.net |
| Username: | email address (full) |
| Password: | email password |
| Outgoing mail server: | |
| Node name: | smtp.ukr.net |
| Username: | email address (full) |
| Password: | email password |
| Account settings (“Mail, addresses, calendars - Account in Ukr.net -> Advanced”): | |
| Use SSL: | disabled |
| Server port: | 110 |
| Outgoing mail server (“Mail, addresses, calendars -> Account in Ukr.net -> Outgoing mail server (SMTP) -> Primary server (smtp.ukr.net)”) | |
| Use SSL: | disabled |
| Server port: | 465 |
| Account type: | POP |
| Incoming mail server: | |
| Node name: | pop.meta.ua |
| Username: | email address (full) |
| Password: | email password |
| Outgoing mail server: | |
| Node name: | smtp.meta.ua |
| Username: | email address (full) |
| Password: | email password |
| Account settings (“Mail, addresses, calendars - Account in Meta.ua -> Advanced”): | |
| Use SSL: | disabled |
| Server port: | 110 |
| Outgoing mail server (“Mail, addresses, calendars -> Account in Mail.ru -> Outgoing mail server (SMTP) -> Primary server (smtp.meta.ua)”) | |
| Use SSL: | disabled |
| Server port: | 465 |
Unblocking the POP3 protocol in Meta.ua
- Log in to your mailbox in Meta.ua (webmail.meta.ua).
- Click on “Settings” and select the “POP3/SMTP Server Settings” section.
- In order to allow mail programs to work with mail using the POP3 protocol, select the 2nd or 3rd option: “Allow access via the POP3/SMTP protocol” or “Allow access via the POP3/SMTP protocol and allow mail programs to permanently delete messages from my box."
Once you've set up your email accounts, you can work with email directly from your iPhone from anywhere in the world through the standard Mail.app client. All changes will be automatically synchronized with mail servers.
Note: Email accounts are not transferred to third-party email clients for iOS (Gmail from Google, MailBox from Dropbox) and you will need to configure mail in these clients separately.
How to Delete an Email Account on iPhone
In order to delete a mail account, just a few taps are enough:

As you can see, it’s difficult to setting up email on iPhone or iPad there is nothing, although there are some subtleties for email service providers from the post-Soviet space.
Fortunately, you will only need to set up mail on the iPhone once, then or in, so that after data recovery when flashing the device or the device, the mail accounts will be restored.
If you have any difficulties during the setup process, or need settings for a specific “mailer”, write to us in the comments, we will certainly help you.
It is very simple and convenient to read and send letters by e-mail through the built-in application on your iPhone. This way you can always see the important letters that have come to you and easily write a response to them. But this method However, there is a minus: you cannot send photos from it. To use the built-in mail, you do not need to install any applications on your smartphone, but you will have to tinker a little with the settings for normal operation.
Yandex.ru is considered one of the popular email services among Internet users, so in this article I will try to describe in detail this process. For others mail clients the principle is no different.
Setup instructions:
1. Let's go to " Settings" and find there the item " Mail, addresses, calendars».


3. In the next menu, click on the item “ Other" Alas, Apple does not favor Yandex.

4. Select " New account».

5. In the window that opens, you will need to fill in all the fields.

Name– your name, which people will see in messages from you.
Email– yours mailing address, which you created on yandex.ru.
Password– Your real password for the mailbox.
Description – short description our account, enter yandex or yandex.ru
After all fields are filled in, click “Next”. Our mail setup will begin.
6. In the window that opens, click on “ Save».

7. In most cases automatic settings enough for mail to work correctly. Close “Settings” and go to our standard application “ Mail" All our letters should be loaded there immediately and for a more reliable check we send a test letter for reliability. If everything works, then the mail setup was successful.
If mail does not work, then you will need to delve a little further into the settings:
More precisely:
1. Let's go again to " Settings» — « Mail, addresses, calendars"—the mail we created.

2. In it, select SMTP, which is located in the “ Outgoing mail server».

3. If you already have a configured yandex.ru mailbox, then you just need to click on smtp.yandex.com which is located in the “Primary server” section (if you do not have mailboxes, then select “Not configured”, and in the “Node name” field write smtp.yandex.com. Next, save and click on again smtp.yandex.com ).

4. We check that we have activated the “ Use SSL "and the server port is registered 465 . As you can see in the picture, my mail works well with the port 587 .

5. Click on " Ready»-« Back" and go to the tab " Additionally».

6. Make sure you have in the " Inbox settings"item activated" Use SSL "and the server port is registered 993 .

Now our mail is completely ready and ready to go.
I hope you found this article useful.