How to turn on the computer without a power button if it is broken? How to turn on the phone without a power button PC power button.
Read also
Just yesterday the computer was working properly, but today when you press the power button it shows no signs of life. What could be the problem? Can I fix it myself or can I do it without the help of a professional? Let's figure it out.
As practice shows, in most cases the power button of the system unit “Power” stops starting the computer for the following reasons:
- lack of voltage in the 220 V electrical network;
- malfunction of the surge protector or uninterruptible power supply through which the PC receives power;
- damage to the network cable or lack of contact at its connection points;
- malfunction of the power supply unit (PSU);
- lack of contact in the block through which the power supply is connected to the motherboard;
- failure (lack of charge) of the BIOS memory battery;
- sticking or failure of the “Start” button on the system unit;
- The system unit button does not work due to blocking by a static charge.
If The computer does not respond when you press the Power button, the first thing you should start with is checking the reliability of the connection of the system unit to the network.
- Make sure that the power supply button (on the back of the system unit) is in the “ON” position.
- For a while, try connecting your computer to the outlet directly, without a surge protector.
- Check whether the outlet itself works by connecting any other working electrical appliance to it.
- Next, check the power cord for damage (especially if there are toothy animals at home). Make sure that the plug is firmly seated in the socket and that there are no signs of heat at the contact point.
- It would be a good idea to check/replace the CMOS memory battery in which the PC configuration parameters are stored. If the computer is more than 5 years old, then it is recommended to replace the battery even for preventive purposes.
If all of the above measures do not produce results, you will have to open the system unit for a more detailed examination and diagnosis.
- Remove the case cover and check if the LED indicator on the motherboard is lit.
- The indicator lights up, which means that power is supplied to the system unit.
- If there is an LED, but it does not light up, check the contacts in the connectors and make sure there are no broken wires.
The next step is to diagnose the Start buttons.
How to check that the Power button on the system unit is in working order
The task of the system unit's Start button is to turn on the power switch. After this, the power supply carries out self-diagnosis, and if all network parameters are normal, the power supply sends the corresponding signal to the processor, the computer starts booting. All pre-launch activities take a split second.
If the Power button does not close the contacts well, the computer will not start.
To check if the start button works:
- Check the wires going from the button to the motherboard. The connection occurs through a chip that is placed on the contacts of the system board.
- Make sure that the chip fits tightly and is well fixed to the contacts.
To do this, carefully remove and reattach the connector;
- Disconnect the computer from the network, disconnect the wires of the Power button;
- Turn on the power to the system unit again and use a screwdriver to briefly close the PowerSwitch (PowerSW) contacts. If the computer starts, the problem is due to a non-working button.
Unfortunately, in most cases it will not be possible to purchase the “Start” button separately; you will have to replace the entire housing. However, there is an alternative way to fix the problem.
The simplest solution in this case would be to transfer the functions of the Power button to the Reset button, which is used very rarely.
To do this, just swap the two-pin connectors “power sw” and “reset sw”.
How to turn on a computer without a power button?
To turn on the computer without the Power button, do the following:
- Remove the cover of the system unit case;
- Find among the wires going from the front panel of the system unit to the motherboard a pair with the inscription on the Power Switch (PW Switch) connector;
- Disconnect the indicated connector;
- Using a screwdriver, connect the 2 exposed contacts with a screwdriver or the tip of a ballpoint pen. Closing contacts should be fast, literally in one touch.
VIDEO INSTRUCTIONS
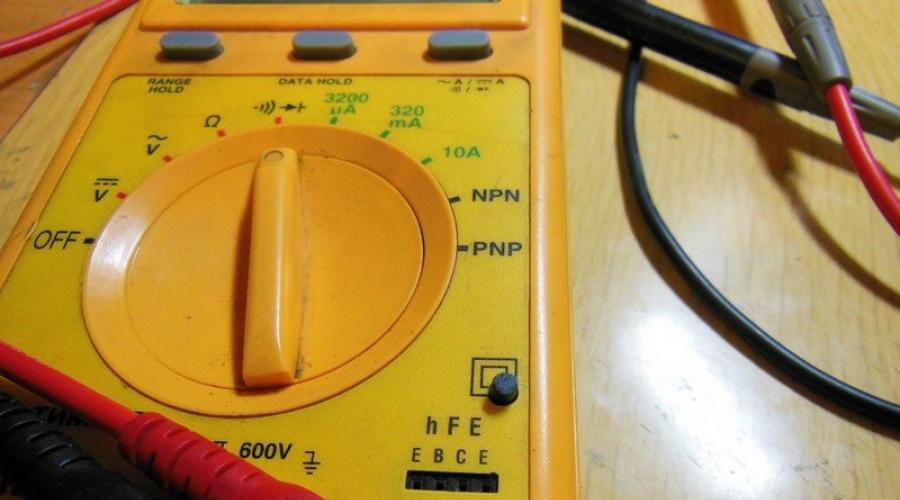
Somehow my tester failed to turn off the device. That is, the switch is in the OFF position, and the “tseshka” is turned on. It doesn’t even make sense to figure it out without a diagram, so I decided to take a different path. In the old days, you could simply put a toggle switch or switch on the power. But now is the digital age and I wanted to make everything more interesting and convenient.
This button is a delayed button. The scheme is simple as hell. The “heart” of the device is the microcontroller Attiny13. The author of the firmware is a respected forum member Boozer. You can install a transistor on the 5th leg of the controller, which will allow you to connect a more powerful load.

The algorithm of the program is as follows. The button must be pressed for a certain time for the on/off operation to occur. The same as on mobile phones. It does not respond to a single or accidental press.

The duration of the press can be changed in the program. This is done in this line if(scan>=100)- time can be adjusted. In this case, 3 seconds. (30ms * 100 passes = 3000ms).

The fuses remain factory. The consumption of this smart device while pressing the button is about 1 mA. The rest of the time the microcontroller sleeps and consumes almost nothing. This property allows it to be used in low-current circuits where every milliamp is important.

There is also a continuation of this topic on the forum. For example, there is a button option for an amplifier. After pressing, one relay is activated, and after a second the second, allowing you to make the necessary delay when turning on.

Video of the button working
If the power button of the laptop does not work, no key combination will be able to “revive” the switched off device - in this case, the device simply does not respond to any presses. You can simply take your laptop to a service center to replace the broken button, or try to fix it yourself. Next, we will tell you how to turn on a laptop without a button, without resorting to complex repairs and replacement of expensive components.
Rule out causes of the problem that are not related to the power button
The fact that the laptop does not turn on when you press the power button may be due to other faults that are completely unrelated to the specified element. Before disassembling your laptop, rule out the following common reasons why it sometimes won't start:
- Most often this happens if the device's battery is not charged enough;
- The power connectors may be faulty;
- The power adapter is intermittent or not functioning at all.
If these reasons are not the source of the problem, there is every reason to believe that it is the device’s power button that has failed.
Replacing the power button
To perform this action, you will either need to dismantle the laptop keyboard or disassemble the device itself. For disassembly instructions, please refer to the specifications for each specific model. Sometimes the "Power" key may even be soldered to the motherboard. In this case, you will have to look for a similar one and resolder the contacts.
In some devices, for dismantling it will be enough to simply remove the panel above the input device by prying it off with a screwdriver.
But in most cases, to get to the power button and its cable, you need to remove the input device. It is usually secured with plastic clips. Removing a keyboard with such a mount is not difficult even for a beginner:

Next, all that remains is to find a board that works in conjunction with the device’s power button, as well as a thin cable connecting it directly to the power button. Having dealt with the situation, disconnect the cable from the supposedly faulty key. You need to make sure that it is working properly, for which you close the contacts at the end, for example, with a screwdriver or an ordinary pen.
If the device responds to contact closure and boots without problems, then the following options are possible:
- You can remove the power button from the socket and insert the end of the cable into the hole formed in the case. You will need it the next time you turn it on - just close the contacts as described above.
- Try to repair the button yourself, as its structure is very primitive. Sometimes exactly the same one can be found on sale.
Another possible option is to close the contacts not on the cable, but on the board itself using the same screwdriver or pen, to do this, remove it from the socket on the system board.
Do not remove the keyboard cable while doing this. If the laptop turns on, replace the input device, carefully secure it with the plastic fasteners, and then, instead of turning off the laptop, put it into sleep mode. After that, it will start when you press any key.
Repairing the cable
Often the reason for the inability to turn on the laptop is not the button, but the cable itself, which has some kind of damage. It can easily be damaged when cleaning the laptop from dust - sometimes a small bend is enough and the cable breaks. This usually occurs where it is inserted into the button or board connector.
In these cases, the remaining length is usually enough to connect the elements, which means the end of the cable can simply be cleaned on one side and used further.
For this you will need:
- scalpel or very sharp knife,
- superglue.

After drying, all that remains is to insert the prepared end of the conductor into the button connector. After the cable is restored, the laptop should start from the button as usual. If this does not happen, you will have to look for these components on sale or use the laptop as described earlier, never turning it off completely.
Few people are interested in modern mobile phones without an Internet connection, but there is a struggle for clients between the leaders of the mobile market. The battlefield is the user interface. Today we will look at the chronology of interface development using the example of the Internet button on iPhones. Let's see how fast and convenient it is. iPhone users interact with this element very often.
If you don’t yet know which button to turn on, or vice versa, turn off, the Internet on the iPhone, then this post will also be useful (before reading, find out your version). Well, or for those who have decided to buy a phone and cannot decide between the iPhone, or iOS and Android models. Before using the network connection button, your phone must have .
The first buttons to turn on the Internet on the iPhone
Starting from the first iPhone model, in order to turn on the Internet without additional tweaks, you had to go to Settings - General - Network - Cellular data. For a very long time. This path to the toggle switch was last used in iOS 6.
Enable cellular data in iOS 7

With the release of the iOS 7 update, the path to the network button has been slightly shortened:
Settings – Cellular – Cellular data.
The same button is used to turn off the Internet on iPhone
Internet enable button in iOS 10

Owners of an iPhone with 3D-touch support (iPhone 6s and higher) and iOS 10 firmware, in addition to the method above, can press the Settings icon, select Cellular data in the context menu that appears, and in the window that opens, click the network connection button. In essence, the path remained the same, only new bonuses appeared.
Internet enable button in iOS 11

A miracle happened in iOS 11 firmware, in
Assembling a computer is not only about connecting large components of the system unit, such as a hard drive, video card, processor or power supply. During assembly, it is necessary to connect the case itself to the “insides” of the computer. Several important elements are displayed on the body. At a minimum, these are power and reset buttons, as well as a hard drive activity indicator. If we are talking about more advanced cases, then some connectors can be placed on the front panel, in particular, USB and inputs for headphones or a microphone. In this article, we will tell you how to connect the front panel of your computer so that all elements on it work correctly.
First, it should be noted that there should be several wires coming from the computer case. In common parlance they are called “pins” from the English word Pin, which means “Pin” or “Pin”. Computer case wires are tiny, and they are connectors into which plugs located on the computer's motherboard are inserted. 
Before you begin directly connecting the front panel of the computer to the motherboard, you need to decide which wire is responsible for which task. To do this, just look at the inscriptions on the connectors. The following symbols can be found on them:

The standard names are listed above. The connector responsible for USB can be labeled - USB 2.0 and USB 3.0. If they are both signed as USB, then it is easy to identify the connector from the faster data transfer protocol - it has more inputs.
Front panel of the computer: connecting the power and display buttons
There is nothing complicated about connecting the front buttons and indicators to the computer motherboard. To do this, you need:

Please note that the connectors and plugs are, in most cases, protected against incorrect connection. That is, it simply won’t be possible to connect them to each other incorrectly without breaking the contacts.
Front panel of the computer: connecting USB and 3.5 mm connectors
When connecting connectors on the front panel of the computer, you must follow the same rules: find the connection location in the instructions and then connect the plug to the connector. Please note that there may not always be space on the motherboard to connect the front USB 3.0 connector. If there is nowhere to turn it on, you will have to leave it unconnected.
It is worth noting that the connectors for connecting audio outputs can be included in a common block with a front display and power buttons, or they can be located separately on the motherboard. USB connectors are always located separately, and their connection location on the motherboard is marked with the designations F_USB, JUSB or USB 3.0. The first two options are typical for the USB 2.0 connector, which is connected via 10 pins, while the 3.0 connector requires 20 pins. 
It is quite difficult to make a mistake in the process of connecting buttons, connectors and indications from the front panel. The main thing when performing this work is accuracy, since the connectors for the front connectors on the motherboard are very thin, and excess force can damage them.